

The cost to paint the interior of a house in Baltimore, MD depends on size, layout, type of surface, and more. Learn what factors can influence your total in this guide.
Use this old-world technique for a sophisticated look


Hiring a pro to limewash a wall can cost between $2 and $6 per square foot of wall space, but a pro can complete the job safely and faster.
Limewashing a wall is labor-intensive and time-consuming, making it a more difficult DIY task for those with physical limitations.
You will need to ensure you have the proper supplies and tools to complete this task, including safety gear, a paintbrush, a roller, limewash, and possibly a ladder.
Incorrect limewash application can lead to cracking or a flaky finish, which you can avoid by hiring an interior painting pro to handle the project.
You may look at the subtle organic textures in a limewashed wall and be surprised to learn how simple they are to create. Whether you're looking for a more interesting interior or an updated exterior, this ancient technique is highly beginner-friendly. The results are intentionally imperfect, making for a forgiving DIY process. Learn how to limewash walls with this handy how-to guide.
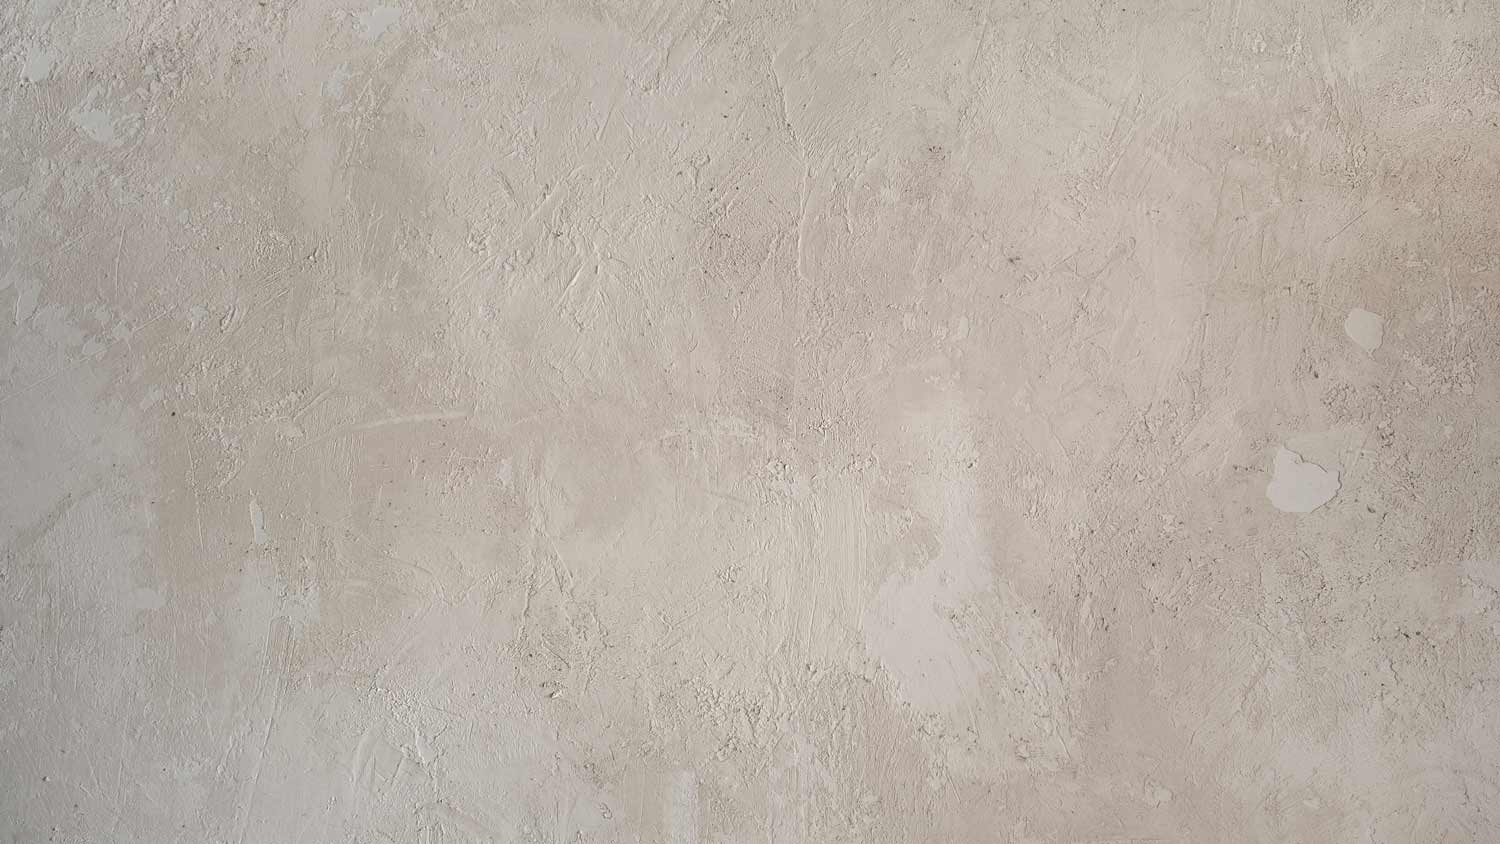
Limewash is a type of paint and painting technique that originated in ancient Rome. Its name comes from limestone, which is crushed, burned, and mixed with water into a lime putty.
When comparing limewash vs. paint, limewash is different because it penetrates the surface it’s painted on to create a chemical bond. The result is a soft, translucent finish with a textured, chalky appearance that lends depth to whatever surfaces it's used on. This is in stark contrast to the opaque, smooth appearance of latex paint.
The cost of limewash paint ranges from $25 to $100 per gallon, similar to other types of house paint. You can save by mixing the paint yourself, which simply involves adding water to a $5 to $15 bag of lime, which you can buy at your local home improvement store (or online).
Limewash offers several advantages over other types of paint:
Breathable surface that won't trap moisture behind it
Naturally bacteria-resistant and hypoallergenic
Absorbs odors and promotes good indoor air quality
Can be applied over brick, plaster, and stone
However, it's worth keeping in mind that limewash creates a very specific textured look for walls in a limited palette of earthy colors. It's also tricky to clean, although its appearance hides dirt and scuffs very well.
Limewash is easy to work with and very forgiving for beginners. The process of limewashing involves at least three coats, the first of which is a primer. You'll need the following materials for the job:
Limewash
Primer
Paint roller (for primer)
Block brush (for limewash)
Paint tray
Painter's tape
Drop cloth
Before you do any painting, protect any other features you don't want to accidentally get paint on. Use painter's tape along the edges of baseboards and ceilings, and lay out a drop cloth, tarp, or large sheet of paper to cover your floors.
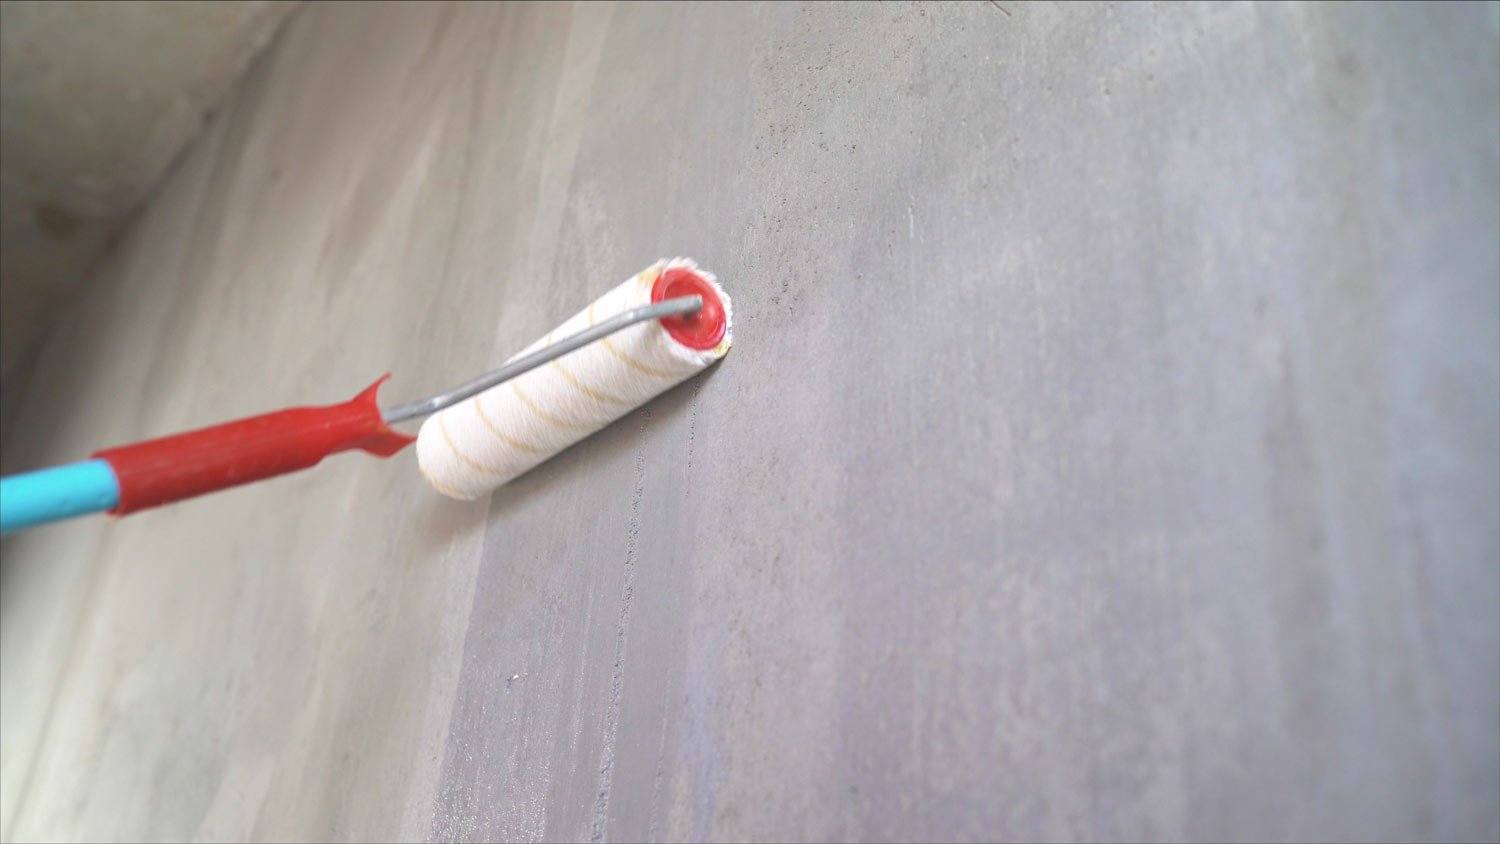
You can apply limewash directly over breathable surfaces such as brick, cement, stucco, or plaster. If your wall was previously painted, apply a limewash-specific or water-based acrylic primer first for best results. If you're painting white walls, have your paint supplier tint the primer a contrasting gray so you can see where you're working and avoid missing any spots.
Primer dries quickly, so blend roller lines as you go and prime each wall completely before moving on to the next. Follow the directions on your can and wait the recommended amount of time for your primer to dry before painting.
Mix your limewash paint thoroughly and stir it often as you work. Load your block brush with paint about a quarter of the way up the bristles. Deposit paint away from the corner, starting on one side of a wall.
Work your way to cutting in edges, carefully smoothing your paint without leaving brush parks on the adjacent wall. Repeat this process whenever you reach a new wall.
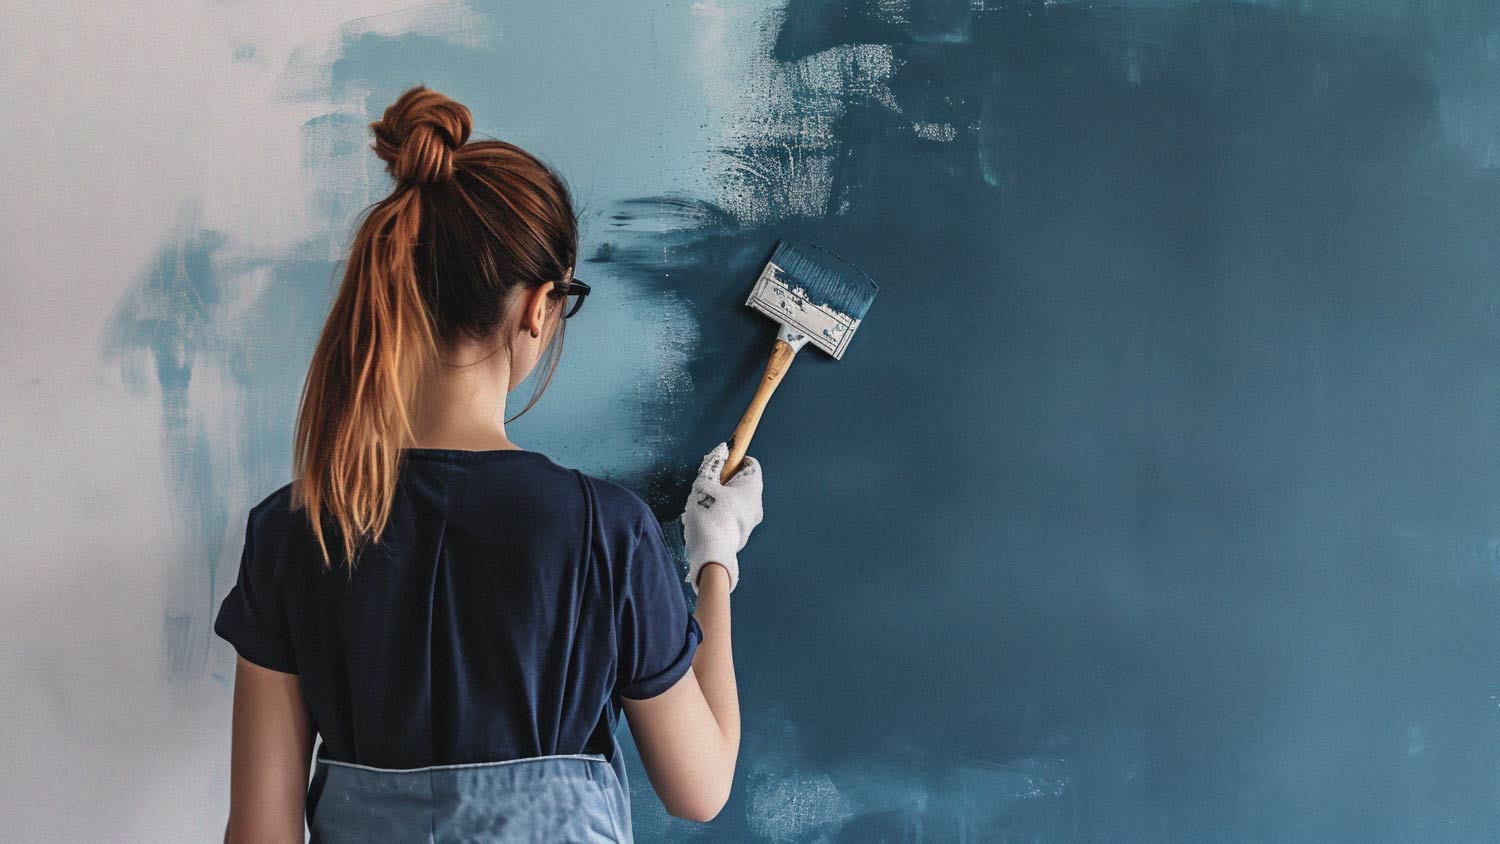
Work across the wall in small sections. Deposit most of your paint in the center of a section, then feather it out to blend it with the edges of the previous section. Use random, medium-sized strokes in all directions, including both straight and curved motions. Apply a thin coat with soft edges until you can't spread your paint any further. Then, reload your brush and repeat.
For a natural look with a cloud-like appearance, blend sections and avoid hard edges. Limewash dries quickly, so work fast and avoid taking too long on any one section.
Wait about two hours for your first coat to dry, then repeat the process from steps three and four to go over your walls a second time. You can apply more if you still aren't happy after two coats.
Be sure to allow each coat to dry fully before assessing. The more coats you add, the more opaque your color will be, with less texture and dimension.
Your finished product should have a fluffy, cloud-like appearance and a range of shades that blend seamlessly.
A successful limewash will leave you with a mottled, shadowy surface that doesn't show much dirt compared to flat paints. If you do need to clean scuffs off of a lime washed wall, wipe it down very gently with a minimal amount of mild soap and warm water. Limewash doesn't cure like latex paint and is very easy to wash off completely, so don’t be harsh.
If you're concerned about keeping your finish intact, especially in high-traffic areas like kitchens or bathrooms, consider applying a clear matte sealer.
Limewashing is very DIY-friendly, and the paint itself will only cost you about $25 to $100 per gallon. The technique lends itself to imperfection, so even beginners can achieve a great result.
However, if you don't have the time or desire to do the job yourself, especially in a large space with lots of rooms, you can hire a professional interior painter near you. The average cost to hire a painter is $2 to $6 per square foot of wall space. However, not every painter provides limewashing services, so you may pay more to find a local pro that works in this niche.
From average costs to expert advice, get all the answers you need to get your job done.
The cost to paint the interior of a house in Baltimore, MD depends on size, layout, type of surface, and more. Learn what factors can influence your total in this guide.
The cost to paint the interior of a house in Los Angeles, CA depends on size, layout, type of surface, and more. Learn what factors can influence your total in this guide.
The cost to paint the interior of a house in Denver, CO depends on size, layout, type of surface, and more. Learn what factors can influence your total in this guide.

Learn how to paint paintable wallpaper to add texture and color while hiding imperfections on your walls with this handy step-by-step guide.

Looking for painted fireplace ideas? Check out these eight top-notch paint colors to help you pick the perfect shade for your fireplace renovation.
Wondering who to hire to strip paint or remove paint? Compare paint stripping contractors and lead abatement pros, and start your project with confidence.