How to Install a Fence Post: A Complete Guide to Setting Fence Posts
A secure and stable fence starts with the posts


Fence posts are the glue that keeps your fence together, helping to ensure it's stable, secure, and straight. Learning how to install a fence post is a fairly straightforward DIY project you can take on with the right tools. This guide covers everything you need to know about fence post installation so you can start your fencing project off on the right foot.
Why Should I Set My Fence Posts Properly?
Before learning how to install a fence post, it's helpful to consider why it's so important. Properly set fence posts are critical for your fence's stability and longevity. If a post isn't secure, your fence is more likely to lean or fall over in places, which can lead to costly repairs and shorten the fence's lifespan. Plus, wonky posts make for a wonky-looking fence, which won't do much for the aesthetic appeal of your home.
How to Prep for Fence Post Installation
Before installing posts, check with your local authorities to see if you need to stick to any height requirements or obtain a permit to build the fence. Then look at the perimeter of your future fence and remove any debris, like rocks and shrubs, that might get in the way of the installation. Finally, grab your tools and supplies and get ready to start digging!
Best Ways to Set a Fence Post
There are several methods you can use to set a fence post. Setting posts in concrete is the most common since it will provide more stability than other methods. However, if you want to avoid messing with concrete, you can also get fairly stable results using soil and gravel.
Installing a Fence Post in Soil and Gravel
If you’d rather not mix concrete, here’s how to set a sturdy post with gravel and soil.
Pick the right posts: Not all fence posts are ideal for installation without concrete. Your best bet is to use metal or pressure-treated wood posts since both materials are durable and resistant to rot and rust.
Mark the perimeter: Before you start digging, mark the areas where you plan to install posts along the fence's perimeter. Use stakes and a string to help make a straight line between post marks. Most residential fences do well with fence post spacing of 6 to 8 feet apart.
Start digging: Once you mark off your post locations, it's time to start digging. Grab a post-hole digger or an auger and dig a hole about one-third of the post length deep and three times the width of your post. In most cases, the hole will be about 24 to 30 inches deep.
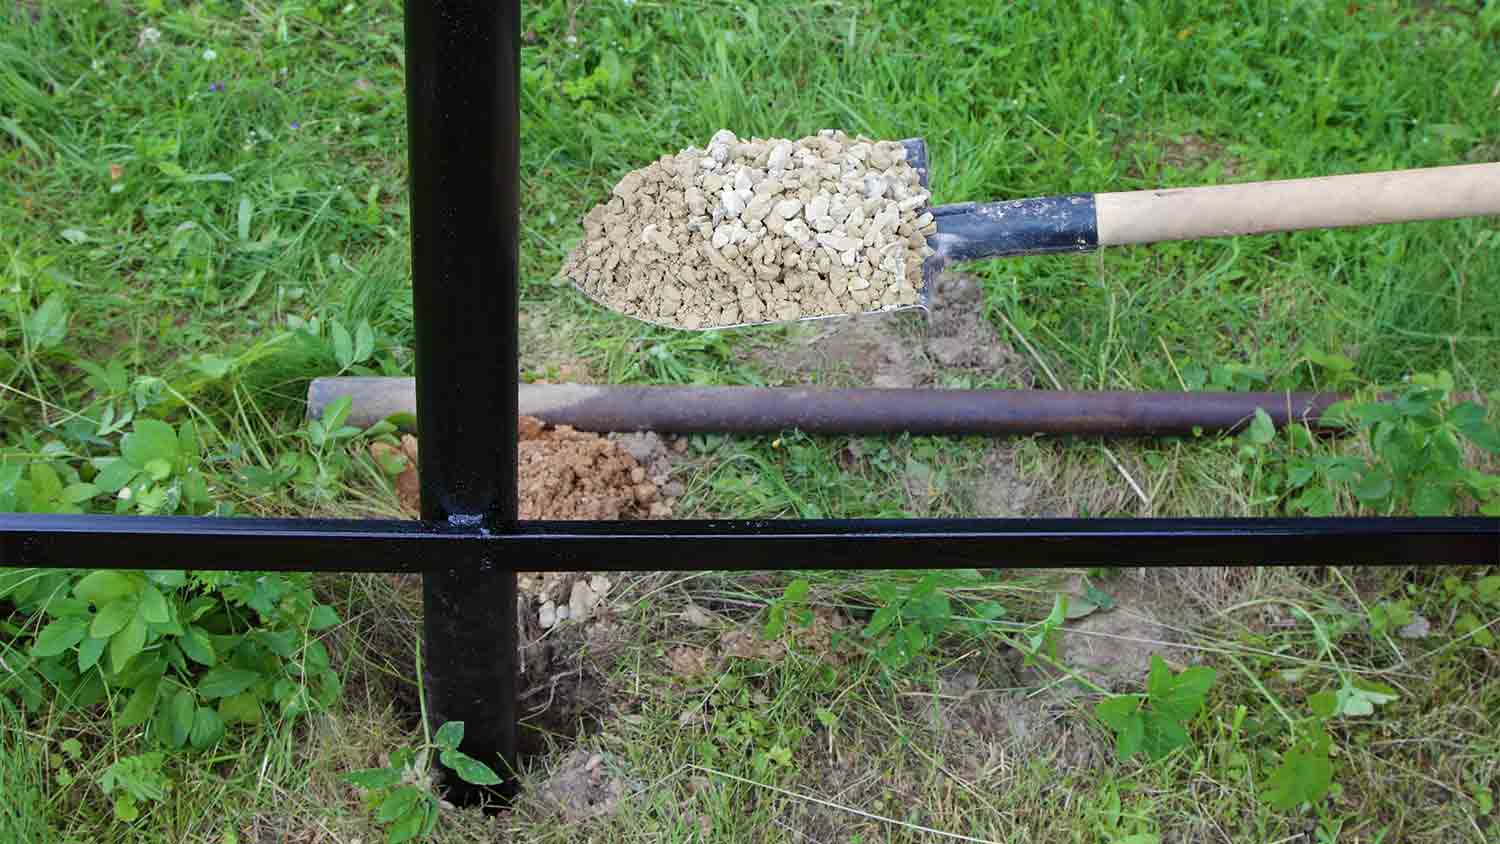
Add gravel: Fill each hole with about 6 inches of gravel. You can technically skip the gravel and use soil, but gravel will provide better drainage, which helps prevent rust and rot.
Insert the posts: Having a friend on hand makes this step easier. Grab your first post and put it in the hole, using a level to ensure it's perfectly straight and plumb. Then fill the hole with your choice of sand, gravel, or both.
Tamp down the soil: Use a piece of wood or a tamper to tamp down the first layer of gravel and soil. Then add another layer of soil and gravel, repeating this step until the hole is full and the soil and gravel are compact.
Create a small gravel mound: Once your hole is full, you can optionally add a small mound of gravel around the post to help drain water away, further preventing rust and rot.
Wait for a day or two: Finally, give the post time to settle for at least a day or two before installing your fence panels. This will help ensure it's stable.
Installing a Fence Post in Concrete
Quick-drying concrete will make this process much faster. It's not as durable as traditional concrete, but it typically works quite well for most residential fences.
Mark off the posts: Mark off each point where you plan to install the fence posts, using stakes and string to help create a straight line from post to post. Space the posts about 6 to 8 feet apart.
Dig the holes: Next, grab a post-hole digger or an augur and dig a hole for each post that's one-third of the post length deep (plus 6 inches) and three times the post's width. Most holes will be around 30 to 36 inches deep.
Add gravel: Add about 6 inches of gravel to each hole to create better water drainage and prevent rust and rot. Use a temper or a piece of wood to tamp it down.
Insert posts and pour dry concrete: Insert each post into each hole. Don't worry too much about it being straight and level—you'll address that in step six. After inserting a post, pour the dry concrete mix into the hole, filling it to about 3 inches below the top of the hole.
Add water: Once you pour the concrete, add approximately one gallon of water per 50-pound bag of concrete. A 50-pound bag makes about 0.375 cubic feet of concrete. So, if your hole is 30 inches deep and 12 inches wide, you'll probably need five 50-pound bags and 5 gallons of water per hole.
Level your posts: Quick-drying concrete usually dries in 20 to 40 minutes, so you'll need to work quickly. As soon as you add water to a hole, use a level to make sure the post is straight and plumb. A helper can make this step much easier. Then use a sharpshooter shovel, stick, or pole to tamp down the wet concrete around the post's base.
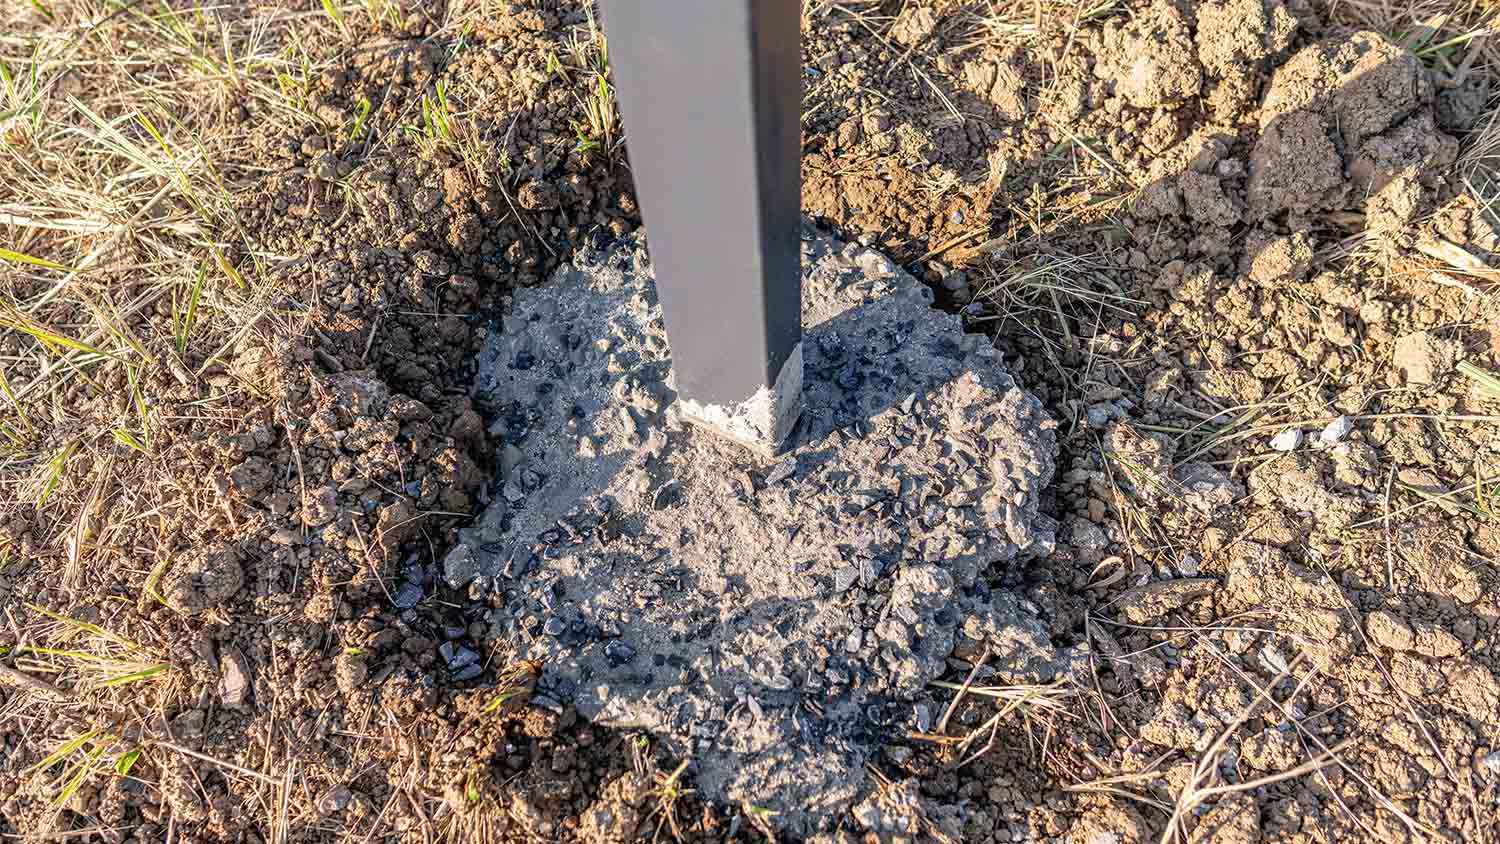
Create a concrete mound: After finishing with the concrete, let it dry for at least one hour. Then mix some more concrete in a bucket, following the manufacturer's instructions, and use it to create small, 1/2-inch-high mounds around each post. This will create better water drainage.
Top off with soil or gravel: Once your mounds are dry, you can optionally add soil or gravel to give your post a more natural appearance.

Tips for Installing a Sturdy Fence Post

There are a few tips to keep in mind to help ensure a smooth fence post installation.
Make sure all of your tools and supplies are at the ready, especially when using quick-dry concrete, since you'll need to work quickly before it dries.
Call 811 to learn the location of your underground utilities so you can avoid them when digging.
Remove all rocks, debris, and shrubs around your new fence line and in the fence holes to make installation easier.
Consider using pressure-treated wood or galvanized steel posts, which are durable and resistant to rot and rust.
Check the weather forecast before starting. Windy or rainy days will make your installation much tougher or impossible.
Double-check the level of each post before setting it since it's critical to a secure installation.
DIY vs. Hiring a Pro to Install or Repair a Fence
The cost to install a wood fence usually ranges from $1,800 to $4,500. Typically, hiring a pro to install a fence costs about $30 per linear foot, while doing it yourself costs around $20 per linear foot, so you can save money by knowing how to build a fence yourself.
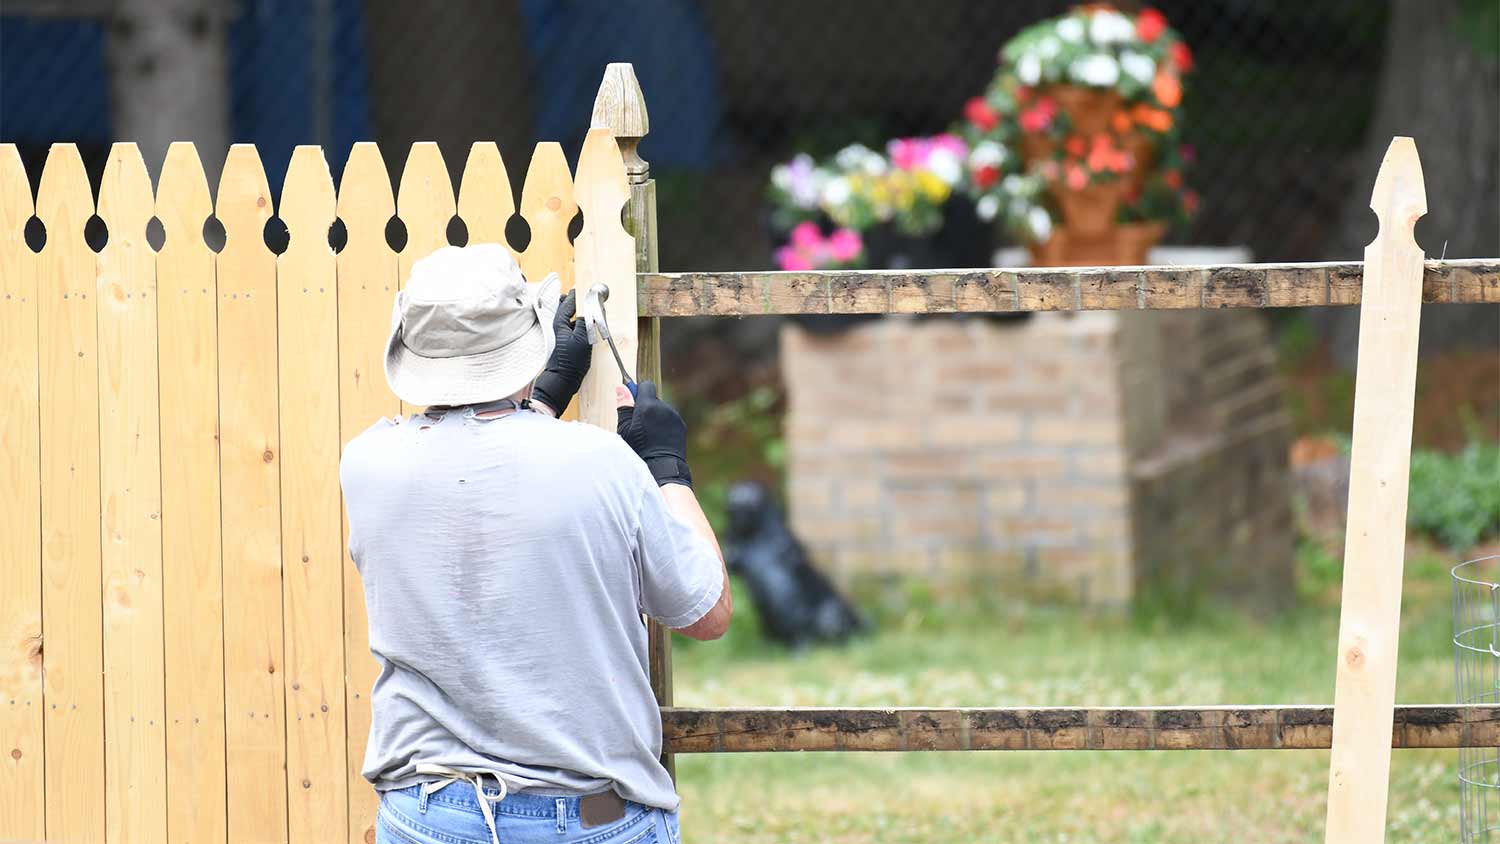
While it's not the easiest project, DIYers can tackle a fence installation provided they have the right tools and supplies. Having a friend on hand is also helpful to assist with post setting. But if you prefer to put your time and effort elsewhere, you can always hire a local fence installer to do it for you.
Frequently Asked Questions
You can use soil and gravel instead of concrete when setting fence posts. However, concrete is more durable and longer lasting, so it's worth considering if you want your fence to withstand the test of time. You should especially consider concrete if you live in a region that experiences severe weather, which can damage your fence.
The number of concrete bags you'll need depends on the width and length of your fence post hole. A 50-pound bag makes about 0.375 cubic feet of concrete. So, if your hole is 30 inches deep and 12 inches wide, you'll probably need around five 50-pound bags for each post.
Your fence post holes should be about three times as wide as the post. So if your post is 4-by-4 inches, you should make your hole at least 12 inches wide. The depth of the hole depends on the height of your post, but it should be as deep as one-third of the post height.
The ideal spacing for four-by-four residential fence posts is usually about 6 to 8 feet between posts. However, if the fence is particularly high or you live in a very windy region, you might want to space them closer together for better stability. A fence pro can help you decide on your post spacing.
You don't need to seal the bottom of your fence posts, but doing so will help fill any concrete gaps caused by hot and cold weather, which can make the concrete expand and contract. Use a silicone or exterior acrylic latex caulk designed for concrete adhesion and apply it to the base of each post.


- How Deep Should a Fence Post Be in the Ground?
- Who Can Fix a Damaged Fence Post?
- Should You Repair or Replace Your Fence?
- How to Fix a Loose Fence Post: 3 Methods That Take Less Than a Day
- How to Remove Fence Posts From Your Yard
- How to Keep Fence Posts From Rotting
- How to Make a Fence Taller for Privacy: 5 Simple Ways
- How to Replace a Fence Post: The Complete DIY Guide
- Learn Who to Hire to Build a Fence on Your Property
- 25 Wood Fence Ideas and Simple Designs to Make Any Space Shine
Get our Angi-powered app


