How to Check Your Well Pump: Troubleshooting and Fixes
All will be well again soon


It’s never a good feeling to have a home appliance or system malfunction, least of all when it concerns your water supply. If you get your water from a well pump, it’s important to troubleshoot even small issues quickly before they become larger problems. While calling a well pump pro is always a good idea, homeowners can check their well pump without pulling it out of the well. Here’s what you need to know.
What to Do When Well Water Isn’t Flowing Properly
When installed properly, a well pump is fairly low maintenance. But harsh weather conditions and power outages can have an effect on the healthiest well systems, and the well pump often gets the brunt of it. After a severe storm, you might experience sputtering water coming from your indoor faucets or cloudy, dirty water. A malfunctioning water pump could be to blame.
Luckily, it is possible to safely inspect and troubleshoot many issues with your water pump without taking it out of the well. If you’re ever hesitant or unsure about what you’re doing, though, call a pro to come take a look (and buy some bottled water to drink in the meantime).

How to Test a Well Pump Without Pulling It Out
If you have a submersible pump or one that’s otherwise difficult to access, you might be worried about the effort involved in testing your well pump. Good news: There are several ways to troubleshoot the various components of a well pump without pulling it out.
Make Sure the Power Is On
Many troubleshooting sessions have started and ended quickly simply because someone didn’t realize the power source had been shut off. Checking the power connection should always be the first step in troubleshooting any home appliance or system, whether it’s a microwave or a well pump. Especially in the aftermath of a storm that created a power outage, fixing your well pump might be as simple as following these steps:
Flick the breaker switch.
If that doesn’t restore power to your well pump, call an electrician.
Continue to troubleshoot if you suspect it’s more than an electrical problem.
Prime the Pump
Some pumps, like submersible pumps used in deep wells, are self-priming. But if you have a jet pump or another type of pump that needs to be primed after a power outage, do the following:
Cut power to the well pump.
Remove the prime plug.
Clear out debris from the well by opening the faucet on the pump.
Attach a hose to the pump. Let the water fill the pump casing and suction line.
Put the prime plug back.
Restore power and let the pump cycle/restart.
Inspect the Pressure Switch
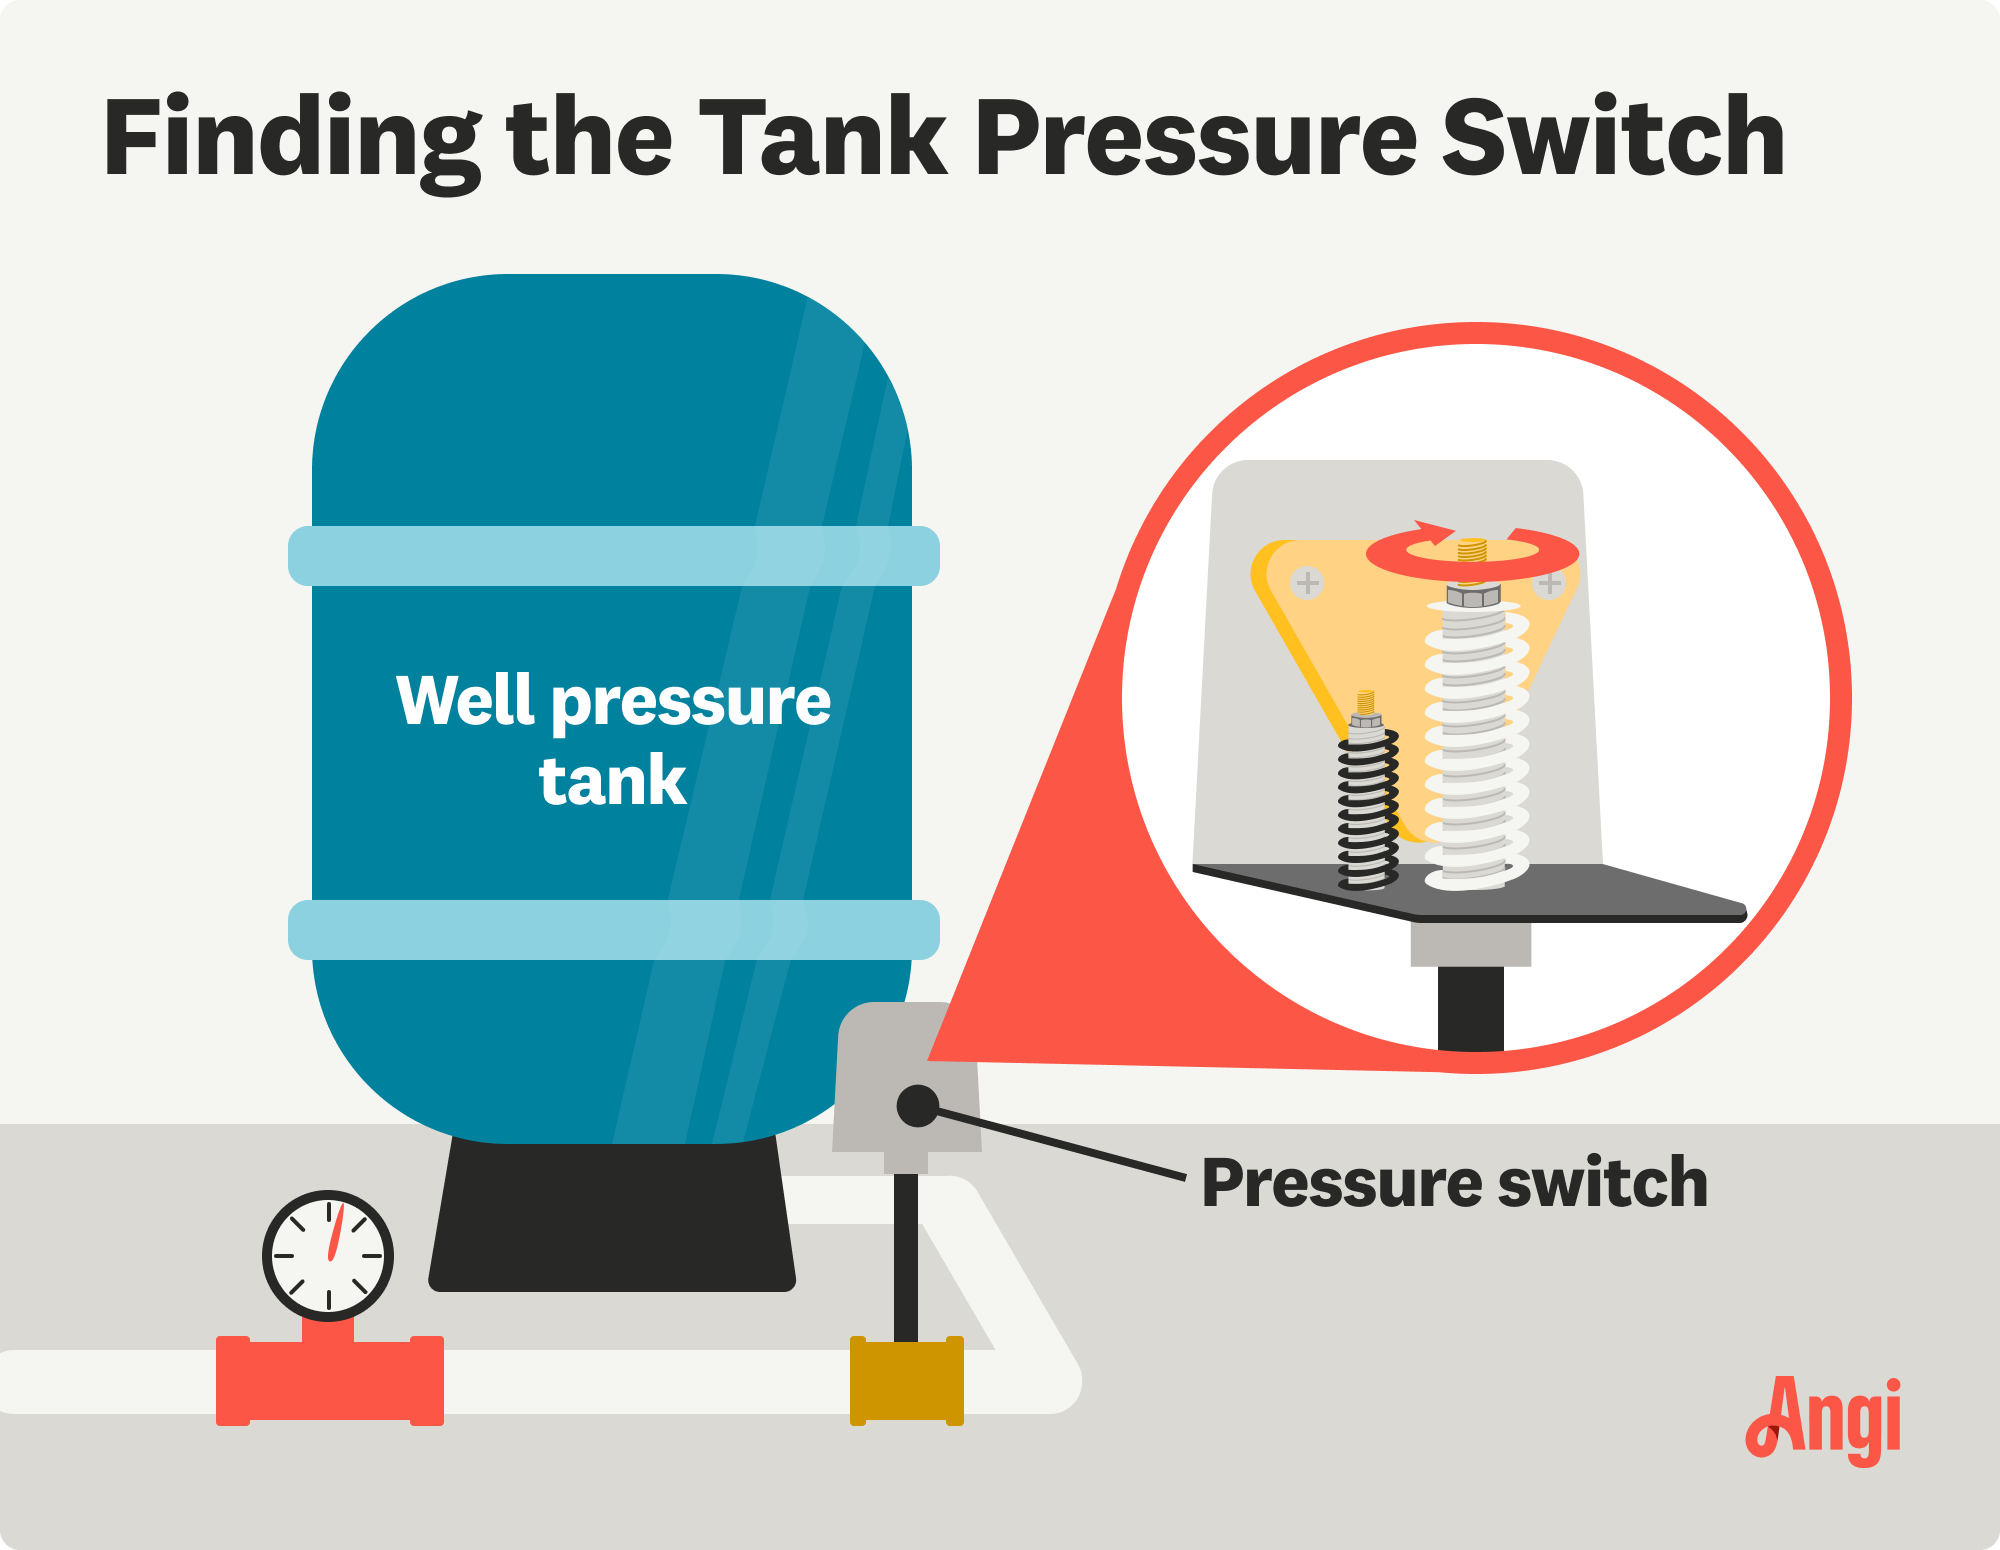
The pressure switch controls the amount of water coming from the well. If you’ve got water sputtering out of your taps or other water flow problems, a faulty pressure switch could be to blame. Here’s how to troubleshoot:
Cut the power to the pump.
Remove the pressure switch cover and inspect the switch for any visible signs of damage.
Listen as the pump cycles. If the cycles are coming too rapidly, this is a pressure issue, not a pump issue.
Adjust the well tank’s pressure if it’s too high or low.
Inspect and listen again as the pump cycles. If it goes back to normal cycling, your job is done.
Get a Reading on the Pressure Tank
If you’re experiencing low or fluctuating water pressure in your home, the issue could be the pressure tank on your well pump. Here’s how to test and adjust it:
Cut the power on your well system.
Drain the pressure tank by turning on some faucets in your house and letting the water flow until the tank is empty.
Inspect the well tank pressure at the air valve. The number should be 2 PSI less than the PSI listed on the pressure switch, which is found inside the switch cover.
If it’s too high or too low, adjust the pressure. For example, if your pressure switch reads 20/40, the tank pressure should be 18.
Restore power and restart the water pump. If water flow resumes as normal, the problem is solved. However, if this continues to happen, you might need to call a well pump pro near you to install a new pressure tank.
Thaw It Out
Submersible pumps in deep wells don’t have an issue with freezing, but jet pumps in shallower wells do. If it’s winter in your region and you’re having issues with water flow, it could be that you’re dealing with a frozen water pump. Here’s what to do:
Let the water run to reduce pressure in the pipes and prevent a pipe burst.
Wait for the pump to thaw.
If this doesn’t work, call a pro. They may have to remove the pump and replace its insulation.
How to Maintain a Well Pump

We’ve discussed how to spring into action when your well pump isn’t working as it should. Now it’s time to learn a bit about how to check a well pump when things are going well to ensure a continuous, smooth operation:
Listen to your pump: It’s important to know how major appliances sound when they are functioning well so that you can troubleshoot when you hear something strange. If your pump is making unusual noises, it’s time for an inspection.
Lubricate a submersible pump: A submersible pump requires little maintenance to do its job, but lubrication can help. Follow the manufacturer’s guidelines when lubricating your pump. Too much of a good thing can damage some components.
Examine the motor: Turn off the power source and check the motor, ensuring all connections are tight and don’t show signs of wear or visible damage.
Inspect for overheating: When water flows into the well, it cools the hardworking pump. However, if there’s not enough water in the well, your pump will overheat. Call a pro if you suspect your well pump is overheating to avoid expensive repair costs.
Check seals and hoses: It’s normal for a well pump to show signs of wear and tear over the years, but you do have to replace seals and hoses at some point. This is not a “wait and see” problem. Damaged hoses and seals require immediate replacement so that you don’t lose access to water.
DIY vs. Hiring a Pro
Sometimes, you just can’t avoid extensive repairs or the need for replacement. Unless you’re well-versed in water pump maintenance and installation, call a water pump pro near you for assistance. They can make suggestions on the type of well pump and system that’s right for your property and household water supply needs and install it properly.
The price of a new well pump can range between $150 and $6,500, depending on the size and complexity of the pump. However, this does not include labor costs or additional work for laying new pipes or running wiring.
Proper installation is key, but ongoing supervision and maintenance is equally important. While a lack of water should be enough motivation to get a well pump fixed quickly, regular inspection of your well system can turn up early warning signs of pump failure. Taking quick action will help you save on costly well pump repairs, although maintaining a safe water supply is the number one concern.
Frequently Asked Questions
Sputtering water and a constant fluctuation of water pressure from your household faucets and fixtures are the main red flags that something bad is brewing with your well pump. The fix could be as simple as restarting the power or priming the pump, especially if the trouble is occurring after a power outage. However, if troubleshooting the power and pressure of your pump does not get things up and running again, it might be time to replace the pump.
A well pump can last 15 years or more, but actual longevity depends on several factors. As with other household appliances and systems, the quality of the pump goes far in how long it will last. Proper installation and ongoing maintenance are also important to ensure all components are working as they should. Act quickly when something seems wrong, and don't make any assumptions about “small problems” when it comes to a well pump.
No. Well pump replacement is not recommended as a DIY project, particularly if you have a deep well and a submersible pump. Plumbing and electricity are best left to the pros, especially when something like your well pump includes both. Even when troubleshooting your pump, it pays to have a partner standing by for your assistance and safety.


- Well Water Stopped Working? Here Are 5 Troubleshooting Causes and Solutions
- How Much Electricity Does a Well Pump Use? What You Need To Know for Your Home
- How To Set Up a Well Pump and Pressure Tank for Your Home
- Common Well Pump Pressure Switch Problems and How To Fix Them
- Common Well Pump Problems and How To Fix Them
- What’s the Average Cost to Run a Well Pump? [2024 Data]
- Sump Pump Constantly Running? What You Need To Know
- 8 Common Problems With Geothermal Heat Pumps
- When and How To Test Your Well Pressure Tank
- How To Increase the Water Pressure From Your Well
Get our Angi-powered app


