
Need to repoint brick in your home to make your home look fresh and new? Use this guide to repointing brick cost to price out your project before starting.
Repair that crumbling mortar, so you won’t have to put another brick in the wall

Brick tuckpointing replaces crumbling mortar between bricks, restoring your wall's water barrier and preventing moisture from seeping into gaps and causing structural damage.
Expect to pay $10 to $20 per square foot for professional mortar repair, with a small 20-square-foot section costing $300 to $500.
You'll need to remove old mortar to about 3/4 inch deep, clean the joints thoroughly, and pack fresh mortar carefully to match your existing joint style.
Hiring a local masonry professional provides reliable guidance on mortar removal depth and joint tooling techniques, keeping your brick repairs structurally sound and visually consistent.
Brick may be one of the strongest building materials on the market, but it’s still susceptible to wear and tear. Changes in temperature coupled with moisture in the brick cause the mortar to crack and crumble over time.
Ignore this damage, and water will soon find its way into those gaps between the bricks, causing even more problems. While you can hire a brick mason near you to return a brick wall or fireplace to its former glory, consider taking on this project yourself. Make these repairs on your own and save money by learning how to tuckpoint brick using the steps below.
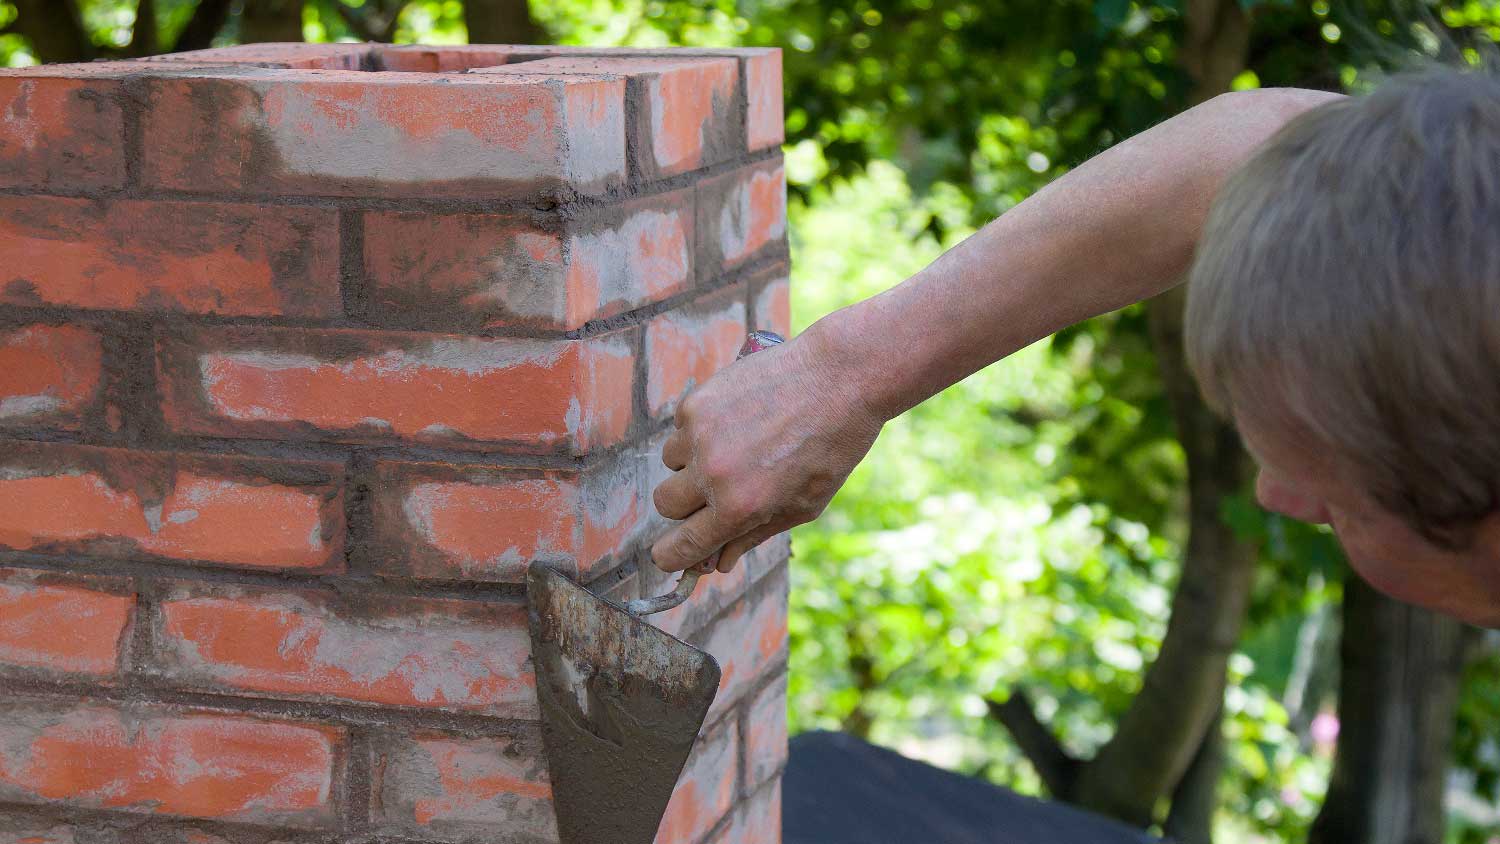
Tuckpointing is the process of removing crumbling mortar from the joints between bricks or stone and replacing it with fresh mortar.
The process accomplishes several things. It improves the aesthetics of the brick and the structural integrity of the chimney or wall. Tuckpointing also reestablishes a water barrier that keeps moisture from seeping into the gaps between the bricks.
Tuckpointing is messy, creating large amounts of dust and chunks of mortar, so you’ll need to prep the area by laying down a ground cloth to catch all of the debris this process will create. This dust is also dangerous to breathe in and can irritate your eyes, so you’ll also want to use a dust mask and goggles.
Before removing any mortar, you need to determine the uniform depth. This tells you how much mortar can be taken out. Measure the width of your brick joints with a straight-edge ruler. Times the width by two, and that’s how deep you need to go before reaching solid mortar. Mark the uniform depth with some painter’s tape.
Before you can start repairing the damaged mortar, you’ll need to remove the loose pieces first. While an angle grinder works best, you can also use a hammer and chisel to remove the mortar.
Whether using a chisel or grinder, remove the mortar carefully to avoid chipping the brick. Position the chisel at the edge of the brick and direct it inwards toward the mortar.
If using a grinder, grind along the edge of the mortar where it meets the brick, being careful not to cut into the brick. A good rule of thumb is to observe the debris coming off the grinder. If the dust you're producing is red, you’re cutting into brick.
Chisel or grind the mortar to a depth of about 3/4 of an inch deep from the surface of the brick to create a solid base on which to spread the new mortar.
Before you can add the new mortar, you’ll first need to clean out all the debris you just finished grinding or chipping away. Sweep the mortar out of the joints using a damp, stiff-bristle brush.
Wash out the joints with water to ensure all the dust is removed. Don’t pour water on the wall, as this will create a mess. Instead, dip a brush in the bucket and apply water to the seams. The water will remove any lingering dust while dampening the bricks, prepping them for the new mortar.

Mix the dry mortar with water, making sure to follow the manufacturer’s instructions carefully. If you’re tinting the mortar to match the color of the existing mortar, add the dye before adding the water.
While you can use a masonry trowel to mix the mortar, a better option is to use a mixer attachment with a power drill. The mixer and drill combo will allow you to achieve a smoother consistency while saving your arm.
Once mixed, the mortar should have the consistency of creamy peanut butter. Add more water or mix to get the right consistency. If you’re worried the mortar is too thin, use the trowel test. Put some mortar on the trowel, then hold it at a 45-degree angle. If the mortar is the right consistency, it will stick to the trowel.
Once the mortar is mixed, work quickly. You’ll have up to an hour to use the mortar, after which it will become too dry to use. You also may need to mix in water periodically during that period to maintain that perfect peanut butter consistency.
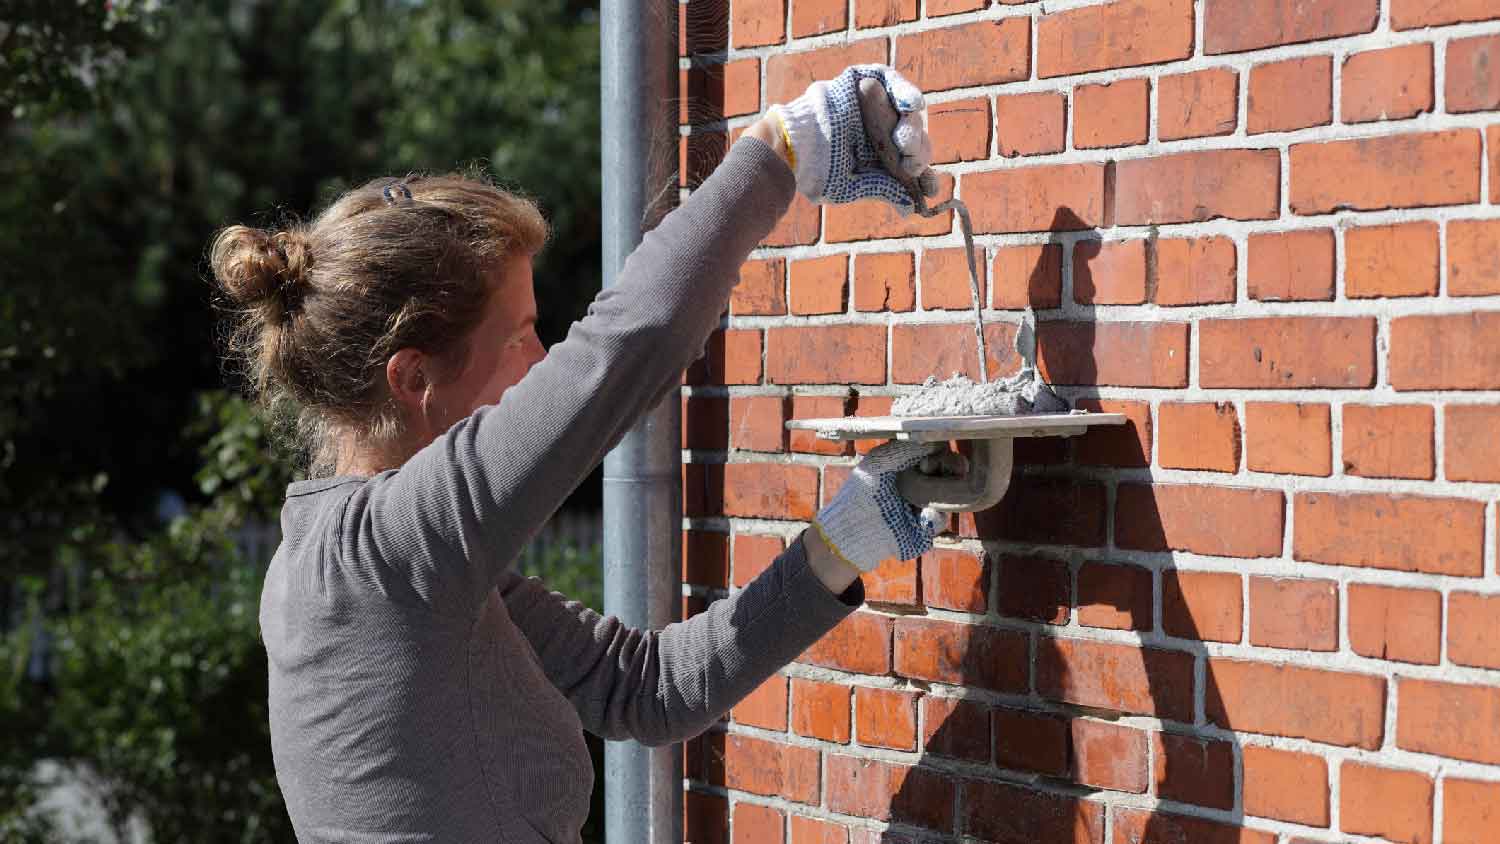
Begin by filling the horizontal cracks. Load a drop of mortar onto a 12-inch by 12-inch square piece of plywood or a mortar hawk. Hold the wood or mortar hawk against one of the joints. Use a tuckpointer to push mortar into the joint until it’s flush with the brick then remove any excess mortar and add it back to wood or mortar hawk.
While you can use a grout or mortar bag to push mortar into the joints, brick masons generally agree that mortar packed in using the above method creates a more durable joint.
Next, load mortar onto the tuckpointer and pack it into the open vertical joints. As with the horizontal joints, make sure to pack it in before scraping off any excess.
After about 30 minutes, the mortar should begin to set. Press on the mortar with a finger. You should be able to make an impression without your finger going too deep. Be wary not to let the mortar get too firm, or it will be more difficult to tool.

Use a pointing trowel to create a finished edge on the mortar joints that matches the shape of the existing mortar joints.
For concave, rounded joints, place the jointer at the top of vertical joints and pull it downward. For horizontal joints, run the jointer across the mortar, stopping halfway across each brick. Move the tool to the other side of the brick and run the jointer back across the joint to finish the edge.
If you want flat joints, use a joint rake. Set the rake depth using existing mortar on the wall, then run it over the new joints to flatten them out.
Wait an additional 30 minutes, then use the stiff bristle brush to remove any loose particles of mortar or mortar left on the brick's face. Don’t wait too long. If the mortar is allowed to set on the brick face, you’ll need to use trisodium phosphate, a powerful acid, to get it off.
Mist the mortar with water periodically for the next several days to slow the curing process. If the area you’re repairing is small enough, hang plastic over it to help retain moisture. While this may be a pain, if the mortar is allowed to dry too quickly, it may pull away from the brick and existing mortar.
The best temperature range for tuckpointing is between 40 and 90 degrees Fahrenheit, which is the range needed for the mortar to set properly. The temperature should be somewhere in this range 24 hours before application and 72 hours after. You should also make sure there is no rain or snow a full day before tuckpointing and at least a few hours after.
You stand to save a significant amount of money by completing a tuckpointing repair on your own. The price range for mortar repair is $10 to $20 per square foot. Repairing a small 20-square-foot section of wall will cost you between $300 and $500.
You’ll only spend about $20 for materials to complete this job yourself. Keep in mind that you will need to spend additional money on masonry tools if you don’t already own them.
1 tree was cut down and 5 others including a large willow tree were trimmed. The Grant Tree Service men were professional and cleaned up afterwards. The cost of the 6 trees were affordable. I am very happy with the results. I would hire them again.
Joseph did a great job with the staircase and trim. Timely and efficient, clear communication about the work, very fair pricing. For the stairs in particular, done very skillfully in an old house (1893) in a tight spiral, and very creative with how to do the handrail. Did a nice job with...
Finished Basements Plus was wonderful from beginning to end! First, they came out quickly for an estimate. I had 4 estimates and theirs was by far the best. (2 of the estimates were more than $20K higher than for the exact same work). Beyond their fair pricing, the work was excellent. They...
 Finished Basements Plus Inc.
I'm a repeat customer of All Star Paving & Sealing and I appreciate the service that all start paving has done for me in the past. I just recently had them out for an estimate and things couldn't have gone better. The staff that they send out to do the estimates are very knowledgeable. The...
 All Star Paving and Sealing
Ace Fireplace Services came to the rescue for my chimney repair. They were quick to pinpoint the issue and worked their magic to fix it. My chimney is now in excellent shape, and I'm a satisfied customer.
 Ace Fireplace Services
Supreme Brick & Chimney did an excellent job restoring the brick and mortar joints on my home. Their team was professional, knowledgeable, and completed the work on time. I highly recommend them and will hire them again in the future! Thanks!
 Supreme brick & chimney
Custom Paint Jobs LLCs custom murals brought life to our childrens rooms. They love it!
Window Depot did an amazing job on my deck. I wasnt sure what I wanted to do, but their composite decking was affordable and will last a long time. I am excited to have family over, and I am no longer embarrassed by my backyard. Jeff and the ground crew were polite, respectful, and caring for...
Storms Mobile Welding was great to work with. They were prompt, professional and did an overall excellent job on the project. I highly recommend.
Beginning with the estimate, Larry and Peyton were super helpful in getting my new condo's interior re-painted. Not only was the job well done, but also done in a super timely manner as promised.
 Five Star Painting of Plain City and Powell
From average costs to expert advice, get all the answers you need to get your job done.
Need to repoint brick in your home to make your home look fresh and new? Use this guide to repointing brick cost to price out your project before starting.
Discover the average chimney tuckpointing cost, key price factors, and expert tips to help you budget and save on your next chimney repair project.

This guide features information on the costs to repair a brick wall, whether or not you need a brick mason to complete spalling, tuckpointing, or a full restoration.
Wondering who to hire to tuckpoint brick? Learn which brick tuckpointing pros to call and how to choose the right fit for your project.

If you’ve started researching how to update old brick or repair crumbling mortar, you may be wondering what tuckpointing is. This guide has you covered.
Learn how to hire a qualified tuckpointing pro for your masonry project. Find the right contractor, ask essential questions, and protect your home.