How to Repair Water-Damaged Drywall
Take action at the earliest signs of water damage to your drywall


Water-damaged drywall can cause several safety hazards, including mold growth, risk of electrical fire, and overall structural weakening of the wall. Plus, drywall with water damage can be an eyesore. Luckily, the repair work is often easy and affordable if the problem isn’t extensive.
Not sure how to repair water-damaged drywall? We’ll walk you through all 5 steps below.
How to Know if Your Drywall Has Water Damage
The sooner you can spot water damage in your home, the easier (and more affordable) it will be to remediate. Here are some telltale signs that your drywall has water damage:
Discoloration: If a spot on your wall has turned a different color, there is likely some water damage happening. It’s easiest to see on white paint; darker-colored walls hide water damage stains better.
Peeling, sagging, or cracking: Your wall is meant to be a flat, clean surface. If you notice the paint is starting to peel, paint bubbling on the wall, or the wall itself is beginning to crack or sag, there is likely water damage happening behind the wall.
Water seepage: Perhaps the most obvious sign of drywall water damage is actual water seeping through the wall. If the water has infiltrated the drywall enough to seep through it, you’ll need to act fast to limit the damage.
Mold growth: Whenever water collects in a damp, dark place, you can bet mold will follow. If you notice mold growing on the surface of your drywall, that indicates the drywall is holding moisture inside it—and it’s the perfect breeding ground for mold and other bacteria. In addition to addressing the water damage, you’ll need to budget for mold remediation costs.
If you notice any of these indicators, you need to act swiftly. While it’s possible to DIY drywall repair (and we’ll show you how to repair water-damaged drywall below), we almost always recommend calling a pro to help you 1.) fix the drywall and 2.) find the source of the water damage and repair that as well. But who do you call for water damage in your ceiling or drywall?
In most cases, you’ll need to hire a water damage restoration contractor near you (these companies can also handle drywall repair after the water cleanup and dehumidification process). Depending on the source of the water damage, you may also need to hire a local roofer or plumber.
Prepping To Repair Water-Damaged Drywall

Before fixing the drywall, you need to find the source of the leak and repair it. If you skip this prep, you’ll only be scratching the surface, negating all the hard work of repairing the water-damaged drywall.
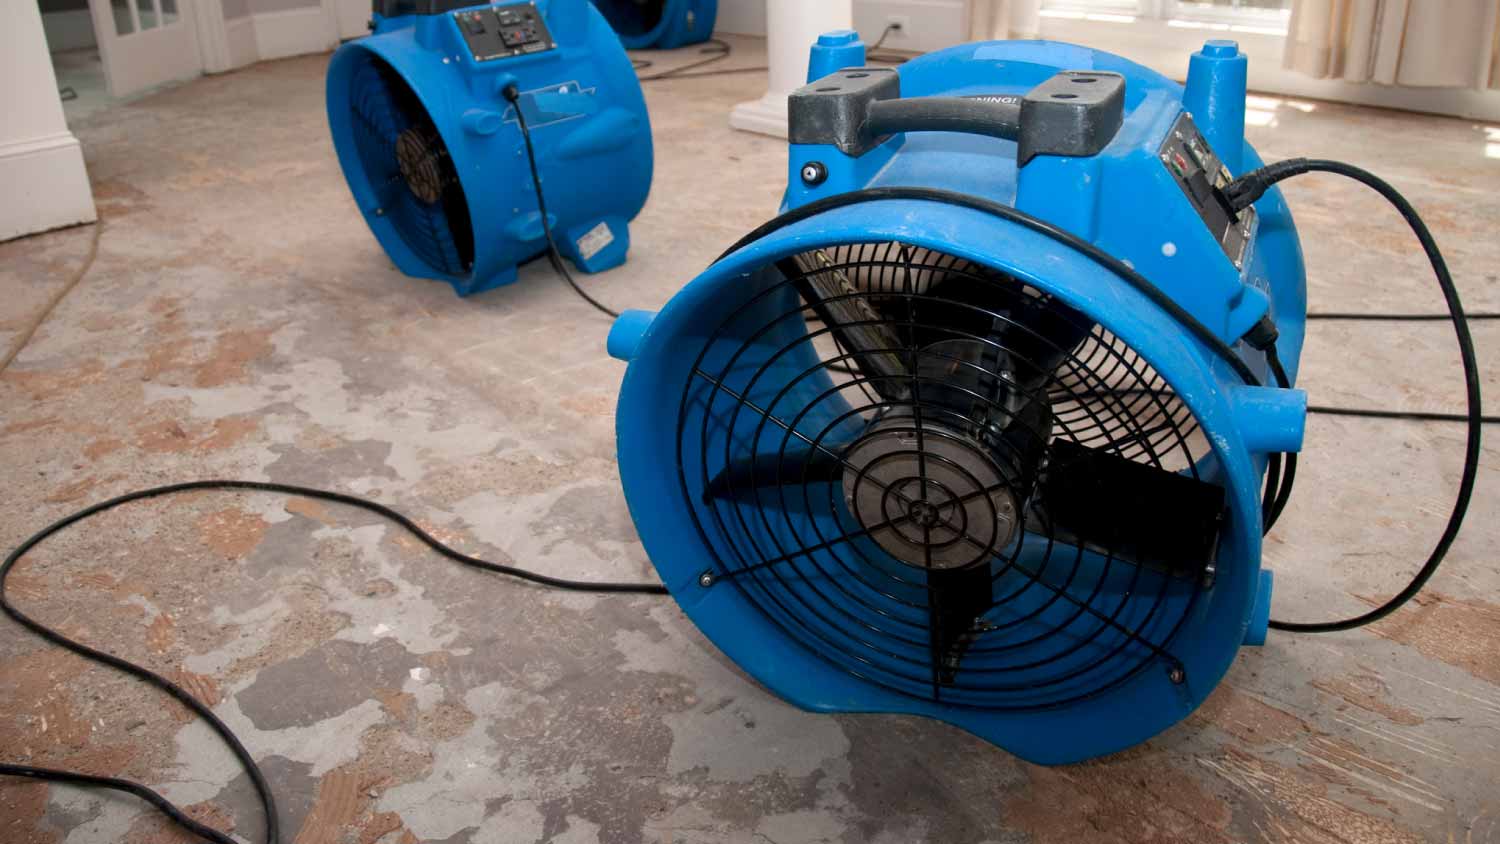
Sometimes, fixing a ceiling leak or water dripping down the wall can be pretty easy and obvious, requiring simply cutting out a small portion of the damaged area to locate and stop the leak in its tracks. Once you’ve done that, run a fan and a dehumidifier for at least 24 hours to dry out the space.
But, if you can’t find the leak or suspect mold or other damage (or aren’t sure how to rule it out on your own), stop this process now and hire a professional water remediation company. They’ll let you know how and if you should proceed.
1. Remove The Damaged Portion of Drywall
First, put down a drop cloth to catch debris, paint drips, and mess. Then, using a keyhole or rectangular saw, cut out the entire portion of damaged drywall. If your wall is sagging pretty heavily, like ⅜ inches or so, you should remove and replace the entire wall rather than just the smaller piece of damaged drywall.
While cutting, you can either try to keep it all in one piece (it’ll come in handy in the next step) or remove it in pieces with the claw end of a hammer.
What To Do If There’s Mold
Black, green, or brown spots on the ceiling or wall indicate that it’s more than just water damage and that mold is likely present. If you notice a small amount of mold (anything less than about 10 sq. ft.) you can safely remove the piece of drywall.
Safety should be your top priority here, though. Wear protective gear like goggles, a mask, and gloves to protect yourself from toxic air. If you think it’s black mold, stop immediately and call for backup.

2. Cut Drywall to Fit Space
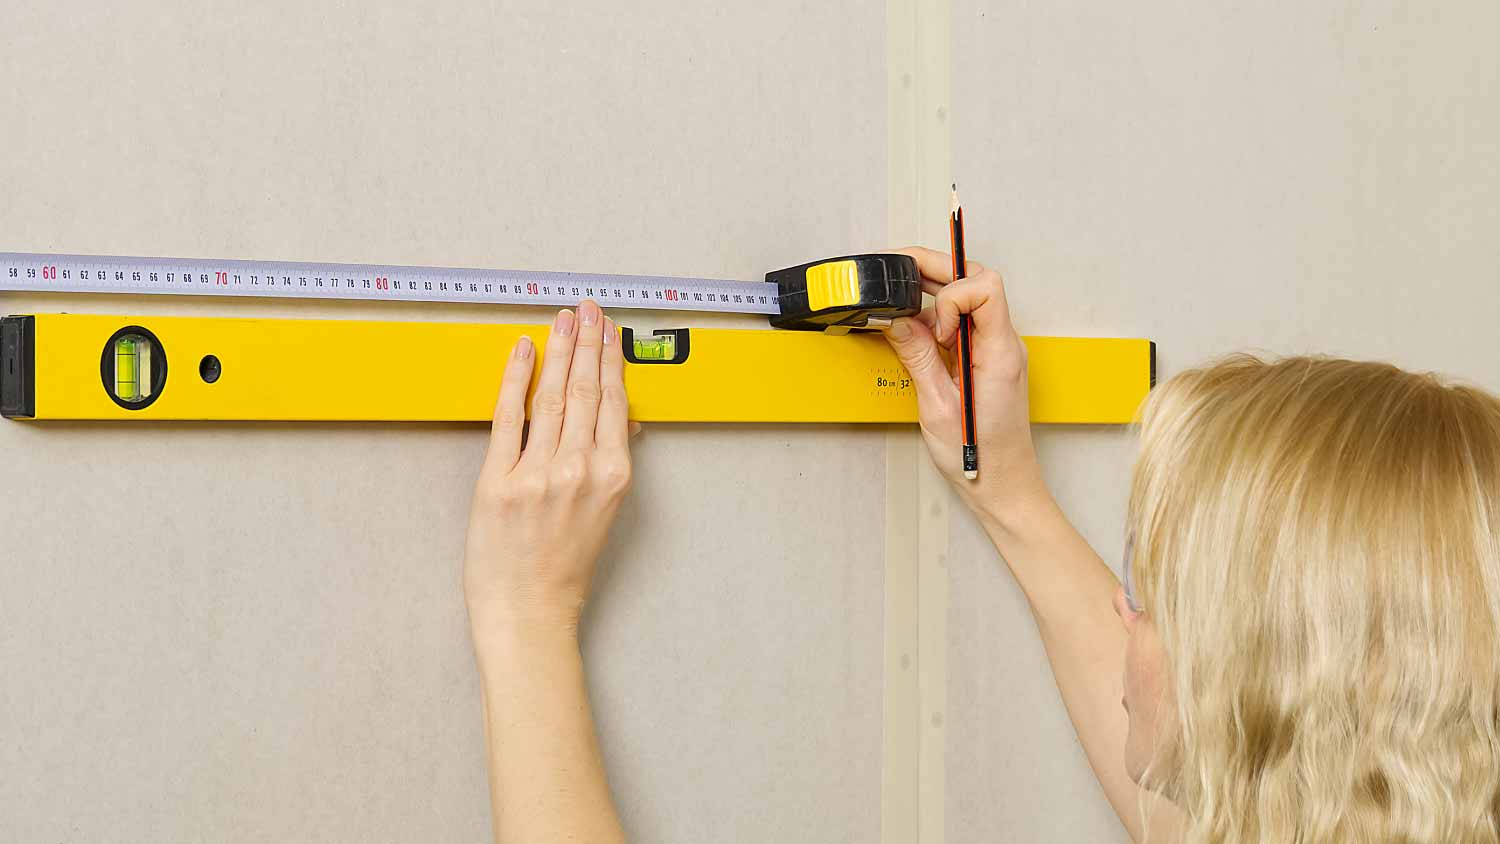
If you successfully saved your damaged drywall in one piece, you’re in luck—this makes the perfect template for cutting a new piece of drywall to fit the opening. If you can’t, simply measure (and remeasure) the opening to make your own template.
To cut, use measuring tape and a pencil to map out the size of the cut you need to make. Then, use a straight edge and a knife to make your cut. Always cut on the inside of your pencil line, as it’s easier to fill open joints with compound or tape than to squeeze in a piece that’s slightly too large.
3. Install Drywall Patch
To prepare the opening for installation, drill drywall clips into the wall surrounding the hole using drywall screws. If you’re repairing a water-damaged ceiling, it may be helpful to have a second set of hands available for installation. Once ready, place the cut piece of drywall in the opening and screw it into place.
If the opening is on a stud, you can skip this step and drill directly into the stud instead.
4. Blend Patch to the Wall
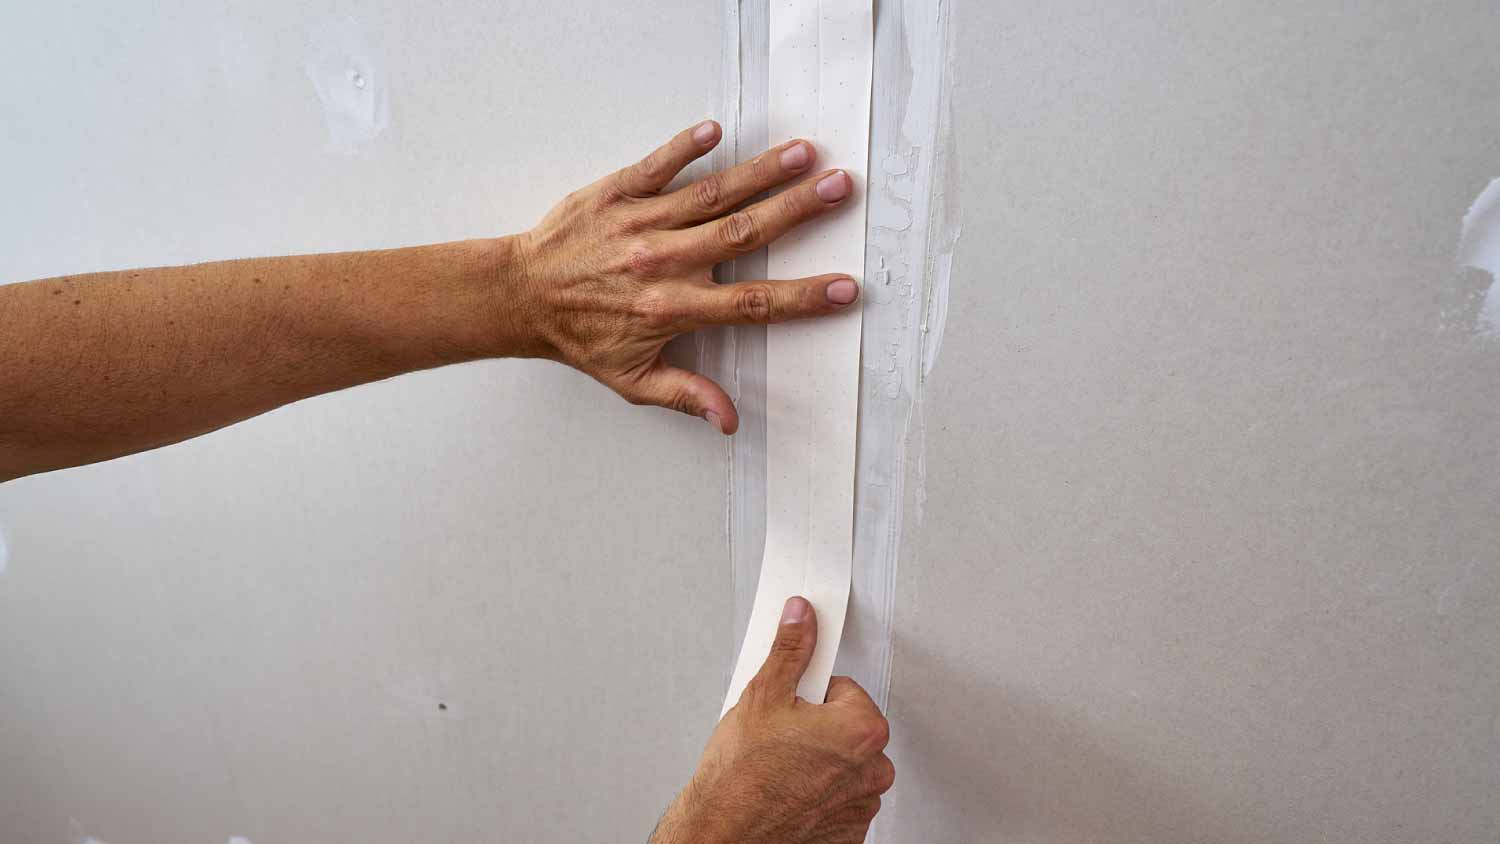
Place drywall tape over the opening's seams. Then, thickly apply joint compound to help blend the tape into the wall.
Once the joint compound is dry, sand the surface to remove any bumps or textures until it matches the texture of the wall. If necessary, use wall texture spray.
5. Paint The Area to Match
Apply a primer to the area using a paintbrush, roller, and tray. You can skip the primer if your paint already has primer in it.
When the primer is dry (or ready, according to the instructions), apply an even coat of paint to the patch. Depending on the quality of the paint and the location in your home, you may have to paint the entire wall to get a seamless final look.
DIY vs. Hiring a Pro
While homeowners may feel confident doing minor drywall repairs themselves (and can skip the call to the local drywall repair contractor), we almost always recommend calling a professional when it comes to water-damaged drywall. With water damage, the repair is much more complicated, because:
There could be mold growth that you need to safely handle (you’ll want a highly-rated mold removal company near you to tackle this job).
You must track down the source of the water damage, which can be tricky if you aren’t an expert.
Once you determine the source of the water damage, you’ve got to fix it. It could be anything from a leaky pipe to a roof leak, meaning you may also need to hire a local plumber or roofer to handle a complex job not suited for DIY repair.
If it’s just a small patch of drywall that’s been damaged and an easy solution for the source of the water damage, you may spend as little as $450 to take care of the problem. However, keep in mind that water damage restoration costs can climb as high as $6,225 for larger, more complex issues.
Questions to Ask a Water Damage Restoration Pro
Have you noticed water damage to your drywall? While it’s important to act fast, we recommend getting quotes from at least three water damage restoration companies and choosing the best one for your budget, timeline, and other needs. Here are a few questions to ask that might help you decide:
Is your company licensed and insured? Are the pros who will be doing the work in my home also licensed and insured? How much experience do the technicians have?
How soon can you begin work, and how long will the project take?
Can you tell me about your process? Does your quote include the inspection, water removal, dehumidification, and cleanup? Is drywall repair also included, or will I need to hire another contractor to repair the portion of the wall that is affected?
Depending on the source of the water damage, do you have contractors whom you recommend, including painters, roofers, and plumbers?
What equipment and cleaning supplies do you use?
Can you provide examples of recent work? Do you have references or customer testimonials?
Frequently Asked Questions
Water-damaged drywall should almost always be replaced. Not only does it look bad, it’s a breeding ground for toxic mold. Even if you think the area is dry and there’s no active leak, the only way to be sure is to cut out the damaged area and see for yourself.
You can paint over water-damaged drywall as long as it’s dry and there’s no active leak. However, painting over the area will not solve deeper problems like mold or water leaks.
If you’re 100% positive that these two issues aren’t a concern, paint over the area with a water—or oil-based primer. This type of paint will ensure that it doesn’t simply seep into the spot.
Any level over 17% moisture should be replaced, as this could be a sign that the drywall is too compromised to be considered safe. A contractor or water restoration provider can come out and use a moisture meter to check the moisture level in your drywall.
If after a visual inspection you’re still unsure about if your drywall is salvageable, a professional reading is the next best option.
According to the EPA, mold grows within 24 to 48 hours if left untreated after a water leak. So unless you notice the leak and stop it right away, you only have a day or so before mold is a real concern. If you don’t notice the leak, it can take about three weeks for the mold spores to become visible. That means you’ve likely had an active mold infection for a few weeks by the time you notice discoloration.


- How to Patch a Hole in Drywall (From Small to Large)
- 8 of the Most Common Drywall Problems and How to Solve Them
- When Should You Hire a Pro for Drywall Repair vs. DIY?
- How to Dispose of Drywall When You’re Done With a DIY
- 11 Must-Know DIY Drywall Repair Tips
- Who Should You Call For Drywall Repairs?
- How to Cut Drywall Before and After Hanging It
- Who Installs Drywall? Get the Right Pro for the Job
- Tools for Drywall: A Complete List for DIYers
- Everything You Need to Know About Drywall Thickness and Size Options
Get our Angi-powered app


