How to Install an Electrical Outlet in 12 Steps
Eliminate extension cords by adding a new power receptacle


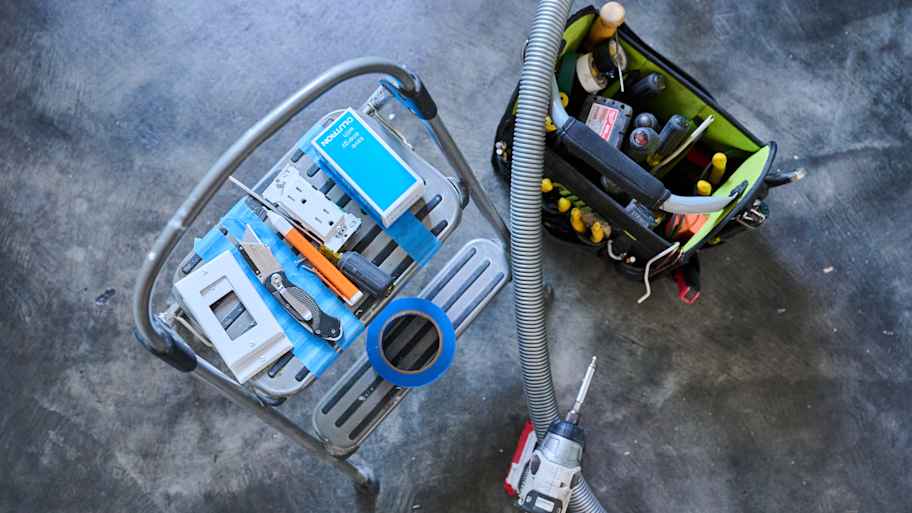
- Pencil
- Drywall saw
- Wire stripper/cutter
- Utility knife
- Tape measure
- Outlet receptacle
- Remodeling (old work) box
- Electrical cable with ground
- Wire connectors (wire nuts)
- Electrical tape (optional)
It’s easy to take convenient electricity for granted. Unless, of course, it’s not convenient enough. Learning how to install an electrical outlet can make a world of difference. Even now, you can probably think of several rooms that could use more outlets in your home.
However, working with electrical wiring can be hazardous to your home and personal safety, so it’s best to hire a professional electrician near you to install new outlets for you. If you have prior electrical experience and feel confident in your ability to complete this task, follow along to learn how to install an electrical outlet safely and put power right where you need it.
Note: Even with prior experience, you still may need permits and a professional electrical inspection to complete this task.

Preparing to Install an Outlet
Working with electricity can be extremely dangerous. If you’re unfamiliar with any of the safety requirements for working with electrical circuits, please consider hiring a local electrician to perform the work for you.
1. Consider Types of Wiring
First, it’s essential to understand the basics of your home’s wiring system. Household outlets come in two forms:
An outlet placed in the middle of a circuit. This type powers other downstream outlets. This outlet must continue the electrical circuit, meaning it has two sets of hot and neutral wires—one set leading into the receptacle and one set guiding the current back out.
An outlet at the end of a circuit. These outlets only have one set of wires since it’s the final outlet and the current can complete on the neutral wire.
Some residential outlets have unique wiring, including splicing or additional connections branching to nearby devices, but that’s a sign you need a certified electrician to install new outlets.
2. Read Electrical Code Requirements
The National Electrical Code (NEC) typically requires the installation of GFCI outlets in damp locations, such as the bathroom or kitchen. For the sake of simplicity, this step-by-step guide focuses on extending an existing 15- or 20-amp standard electrical circuit in a room other than a kitchen or bathroom.
3. Obtain a Permit
In most municipalities, obtaining an electrical building permit is necessary for adding a new outlet. Check with your city’s permit department and acquire the applicable documentation before starting work.
4. Determine Where to Install Outlets
The simplest way to install an electrical outlet is by adding one where there’s already a power source. Investigate your home’s electrical outlets to determine the best places to install new outlets. Here are some tips on figuring out where to install an outlet:
Find an outlet on the opposite side of where you want to install your new outlet.
Avoid using an outlet on a circuit that frequently trips or experiences blown fuses.
Make sure your circuit can handle an additional outlet’s power load.
Ensure you don’t need a GFCI circuit. If you’re using an existing circuit that’s connected to a kitchen, bathroom, basement, or the outdoors, you may need to install a GFCI outlet or avoid adding a new outlet in that wall entirely.
When in doubt, consult a professional electrician before installing your new outlet to confirm it’s a supporting location.
How to Install an Outlet
Follow these steps to install a new outlet, but keep in mind the dangers involved in DIY electrical work.
Find the Appropriate Power Source
For this project, you’ll extend electricity from an existing receptacle to a new outlet. Look for a power source outlet that meets the following criteria.
It’s near the location of the new one.
It’s working and in good condition.
It’s grounded or is a candidate for installing proper grounding.
It’s on a 15- or 20-amp circuit that doesn’t exceed the maximum number of outlets already in use. Eight outlets per 15 amp breaker are the typical maximum, but check with your local permitting office for details.
Turn the Power Off at the Main Panel
 Photo: vladdeep / Adobe Stock
Take extra care during this step to ensure your safety while working with electrical circuits. Start by turning off the breaker switch at the service panel for the existing outlet power source. Use your non-contact voltage tester to test a known live circuit elsewhere in the house to make sure it’s working correctly. Test the power source outlet to confirm the power is completely off on the circuit you’re working on. You should repeat this step until the voltage tester confirms there isn’t a charge.
Trace the Electrical Box in the Desired Location
Next, choose a nearby convenient location for your new outlet. We suggest using a tape measure to determine the height of the existing outlet.
Choose a location for your new receptacle—it can be on either side of the same wall as the existing outlet, depending on whether you’re adding the new one in the same room or an adjacent room. The closer to the existing one, the better. Find the wall stud to ensure that one isn’t directly underneath the drywall at the new location.
Use a pencil to trace the open-face side of the remodel electrical box onto the wall at the new location. Don’t include the four protruding corner tabs in your tracing. Be sure that you purchase a “remodeling” box that you can secure to the drywall, not one that you must mount on a stud.
Cut the Drywall
Once you’ve confirmed the placement of the outlet, it’s time to move on. Use your drywall saw to cut out the rectangle shape traced on the wall. Keep in mind that the box should fit in the hole, and the four tabs will rest on the face of the drywall.
Determine How Much Wire You Need
Determining the amount of wire you need can be tricky, which is why it’s best left to a professional electrician. Err on the side of too much wire if you have any doubts during this step.
Use your stud finder to locate any studs between the two outlet locations.
Use your tape measure to determine the distance between the existing and the new outlets. If there’s a stud between the locations, add the measurement to and from the outlets with the measurement from the bottom of the wall.
You’ll run the wiring through the bottom of the studs in later steps.
Double check the gauge of your wiring by looking at the specifications printed on the wiring covering or the amperage of the circuit. Most home outlet circuits use 15 amps, which need 14-gauge wiring. But some use 20 amps, which need 12-gauge wiring. Don’t mismatch.
Purchase the necessary wiring at your local home improvement or department store. Add an extra foot or two to the total distance to ensure there’s enough wire to work with.
Cut your electrical cable to match the length.
Remove a Knock-Out Hole From the Existing Outlet
 Photo: ungvar / Adobe Stock
Removing a knock-out hole varies depending on the type of outlet box in your wall. Use an appropriate screwdriver to remove the existing outlet cover and receptacle.
Then, remove the wires from the outlet. You may need to unscrew the connector screws or carefully remove the wires from their insertion points. Some outlets have a small slot to insert a tool to depress the wire connector and release the wire.
Once it’s out of the wall, set the outlet aside.
Some adjustments to this step for unique cases:
Use a regular screwdriver to pry open a wire slot if the electrical box has plastic tabs instead of knock-out holes.
For metal, plastic, or fiberglass electrical boxes, use a screwdriver and a hammer to tap one of the knock-out hole covers away from the box.
If you have a metal box, insert a non-metallic push-in cable connector to protect the wire you’ll install soon.
Feed the New Wire Through
Make sure to install the same gauge wire as the existing wire. If you’re not sure what gauge wire to use, choose 14-gauge wire for 15-amp circuits and 12-gauge wire for 20-amp circuits. If studs exist between the two outlets, remove the baseboard with a putty knife or pry bar and cut away the drywall below the top of the trim to access the bottom of the studs. Next, drill a hole through each stud with the drill and a ¾-bit to create a path for the new wire. Once the path is clear, push one end of the electrical cable through the knock-out hole in the old box. Feed the wire into the hole from the old location to the new one. Keep in mind you may need to use fish tape for long runs or through several studs.
Connect New Wires to the Power Source
 Photo: photovs / iStock / Getty Images Plus / Getty Images
This step is a good time to pause, evaluate your comfortability with working with electrical wiring, and stop to call an electrician if necessary. If you have prior experience and feel confident in your ability to proceed, this is your reminder that your existing power source outlet may have more than one black, white, and ground wire.
Cut the new cable with a wire cutter, so you have a few inches of it to work with inside the old box. Strip the sheathing back a few inches with a utility knife and strip the wires back ½ inch with a wire stripper.
Strip the ends of an additional four-inch section (pigtail) of white, black, and ground wires. Safely connect wires using wire connector nuts to twist the existing wires together with the wires from the new cable and the pigtail wires: Black to black, white to white, and ground to ground.
Connect Pigtail Wires to Old Outlet
Use the Philips screwdriver to connect the pigtail wires to the old outlet: Black wire to the black screw, white wires to the silver screws, and ground wire to the green screw.
If you like, you can wrap a strip of electrical tape around the sides of the outlet to cover the connections for additional safety.
Reinstall the Outlet
Once the wiring steps are complete, you can test the strength of the connection by tugging on them gently. If secure, tuck the wires without creating sharp bends in them.
Then, reinstall the outlet and its cover by mounting and screwing it back into the wall. Double-check that the cover is flush against the wall without any gaps.
Wire the New Electrical Outlet
Almost done! Move to the location of the new outlet and cut the new cable, so you have a few inches of it to work with inside the new box.
Strip the sheathing of the new cable back a couple of inches and strip the wires back ½ inch. Connect the wires to the new outlet: Black wire to the black screw, white wires to the silver screws, and ground wire to the green screw.
If you like, you can wrap a strip of electrical tape around the sides of the outlet to cover the connections for additional safety. Same as the other outlet, install the outlet and cover onto the box.
Turn the Power Back On and Test
 Photo: west_photo / Getty Images
Before turning the power back on, call the inspector for an electrical inspection and to have your work approved.
Once the outlet connections are complete and approved, turn the circuit breaker back on. Then, use a receptacle tester for power and correct polarity. If your electrical outlet isn’t working, turn the breaker back off, and consult with an electrician about troubleshooting steps to return it to working order.
Cost to Install an Electrical Outlet
If you hire an electrician, the cost of outlet installation is between $130 and $300, depending on the project’s complexity. One way to offset electrical work costs is to bundle a few small projects together, saving money on labor costs. For example, when hiring an electrician to add a new living room outlet, you can also task them with installing an outdoor outlet.
DIY vs. Hiring a Pro
Adding a standard indoor outlet is possible to complete yourself, but it’s best to hire a professional electrician who has the specialized skills, tools, and knowledge to install it safely. Plus, electricians can advise you on the outlet placement and type and diagnose any problems that arise during the installation.
Frequently Asked Questions
The National Electrical Code (NEC) places a limit of eight outlets on one 15-amp circuit to maintain electrical load values below 80% of the breaker switch’s capacity. To ensure the safety of your home’s electrical system and remain up to code, do not add additional outlets to a 15-amp circuit above the legal limit.
To install an outlet from existing wiring, you’ll need to choose a location where you can already access existing wiring. The easiest way to do this is to install an outlet on the other side of the wall of an existing outlet.
Since the wiring is already in place, all you have to do is connect a new cable to the existing wiring and then connect the correct wires through the wall—to the new electrical outlet. Place your new outlet into the opening in the wall and then connect the correct wires to the appropriate terminal screws.
While you can install outlets in a wide variety of places around your home, you should never install them within 3 horizontal feet and 8 vertical feet of a shower or bathtub. You should also avoid installing them “face-up” on a countertop on a horizontal surface, such as a countertop. If you’re unsure where you can or can’t install an outlet, the best course of action is to hire an electrician for guidance.


- Home Generator Repair
- Lamp Repair
- Electric Repair
- Generator Installation
- TV Antenna Services
- Emergency Electricians
- Commercial Electricians
- Attic Fan Installation
- Attic Fan Repair
- Exhaust Fan Installation
- Electric Inspectors
- Subcontractors
- Electrical Construction
- EV Charger Installer
- Chandelier Installation
- Doorbell Installation
- Bathroom Fan Installation
- Ring Installers
- Electrical Panel Upgrade


