
Discover drip irrigation system cost estimates, key price factors, and ways to save. Get transparent pricing to plan your home irrigation project confidently.
Watch your plants flourish with the perfect watering method

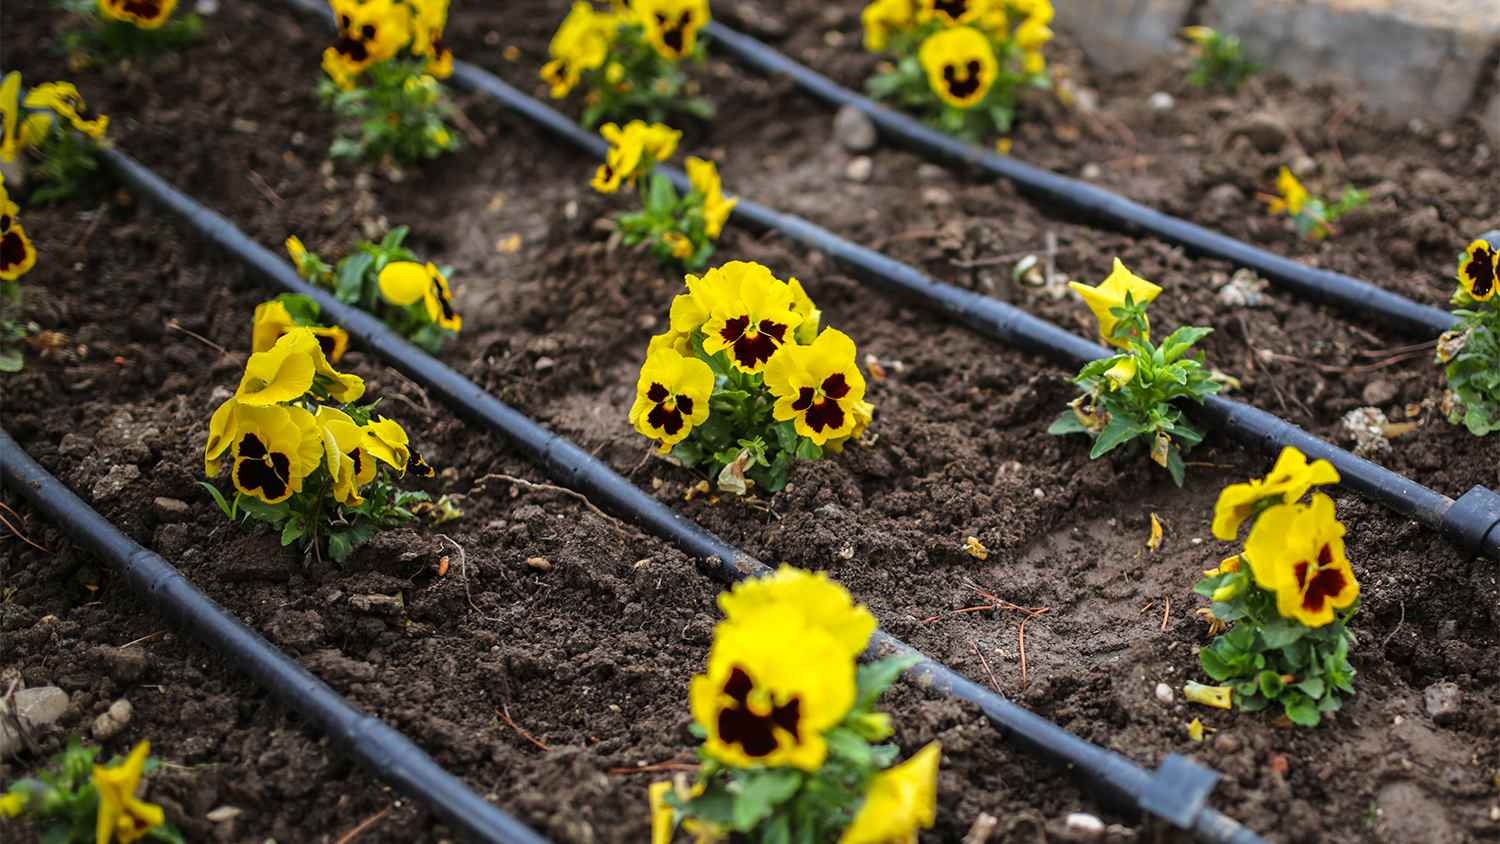
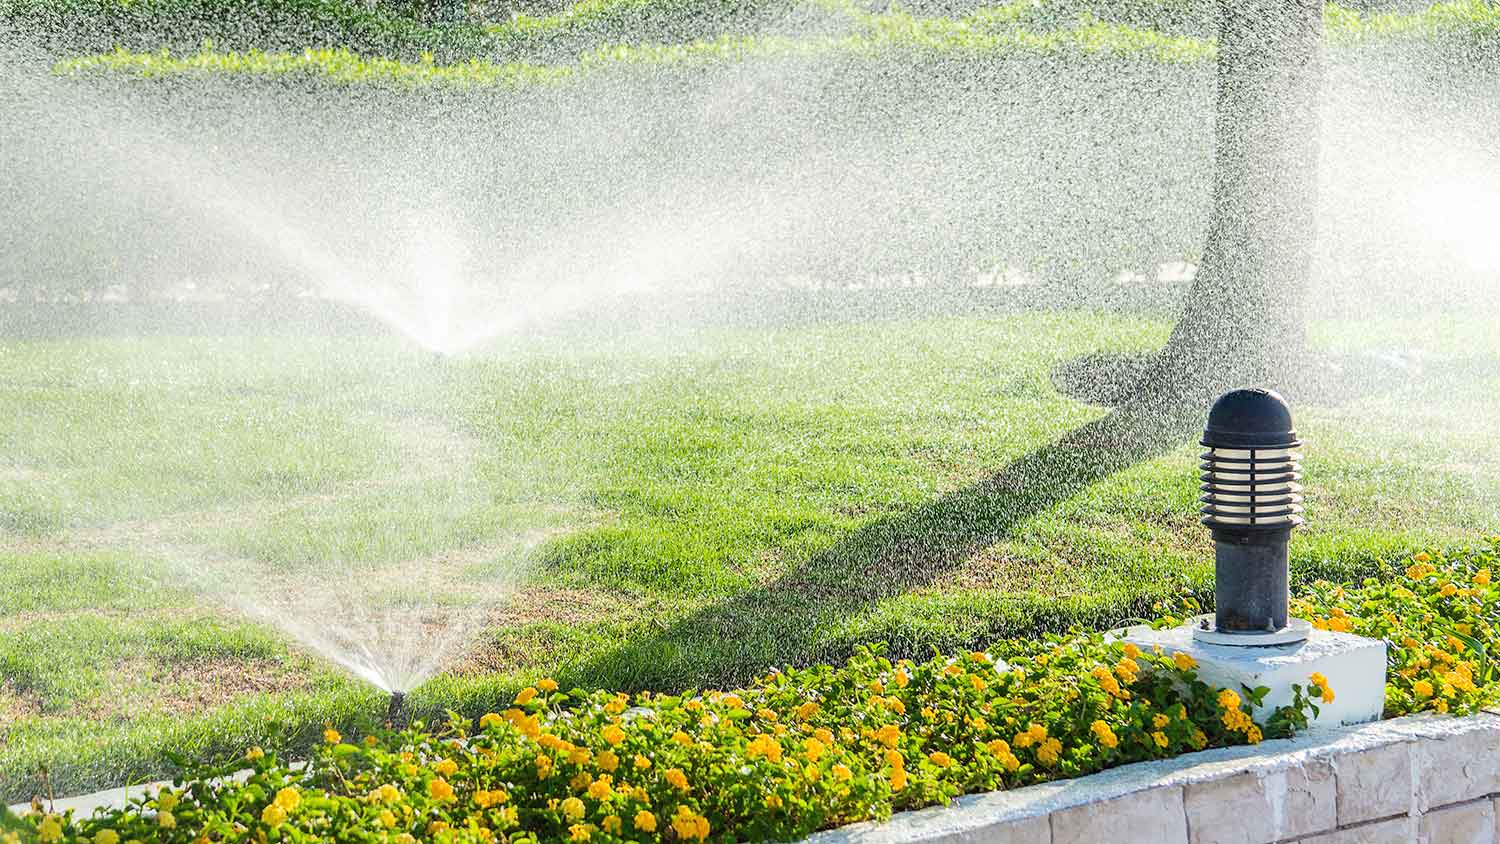
Different types of irrigation systems deliver water to your plants in distinct ways, from drip tape and soaker hoses to emitter systems and micro-sprinklers.
Expect to pay $200 to $850 for professional drip irrigation installation, with costs depending on your lawn size, system type, and complexity.
Your soil type plays a key role in choosing the right drip system, as loose soils need higher flow rates while water-retaining soils work best with low flow.
Hiring a local sprinkler installation professional removes the guesswork from system selection and ensures proper setup for your yard, climate, and budget.
When it comes to keeping your lawn and garden lush and thriving, proper irrigation is key. Choosing the right type of drip irrigation system will deliver water directly to the roots of your plants, minimizing water wastage and ensuring that your garden gets the hydration it needs. Let’s explore the different types of drip irrigation systems, their advantages and disadvantages, and how to choose the right one for your gardening needs.
Drip tape is a type of drip irrigation system that consists of a flexible tube with evenly spaced holes or emitters along its length. These emitters release water directly onto the soil. Drip tape is typically laid out on the ground or buried beneath mulch. Water is supplied to the tube, and it seeps out of the emitters, providing a slow, consistent flow of water to the roots of your plants.
| Pros | Cons |
|---|---|
| Cost-effective | Prone to clogging |
| Customizable | Frequent maintenance |
| Works flat or sloped | Shorter lifespan |
Best For: Row crops, such as vegetables and flowers

A porous tube, a soaker hose allows water to seep out slowly along its entire length. It is made of recycled rubber or polyethylene. It can be placed on the surface of the soil or buried beneath mulch. Water is supplied to the hose and gradually oozes out through the tiny pores, providing a gentle and even distribution of water to the surrounding soil.
| Pros | Cons |
|---|---|
| Easy to install | Prone to clogging |
| Easily movable | Less customizable |
| Uniform watering | No sharp curves |
| Affordable | No irregular layouts |
| Widely available | Quick wear and tear |
Best For: Flower beds, vegetable gardens, and shrubbery.
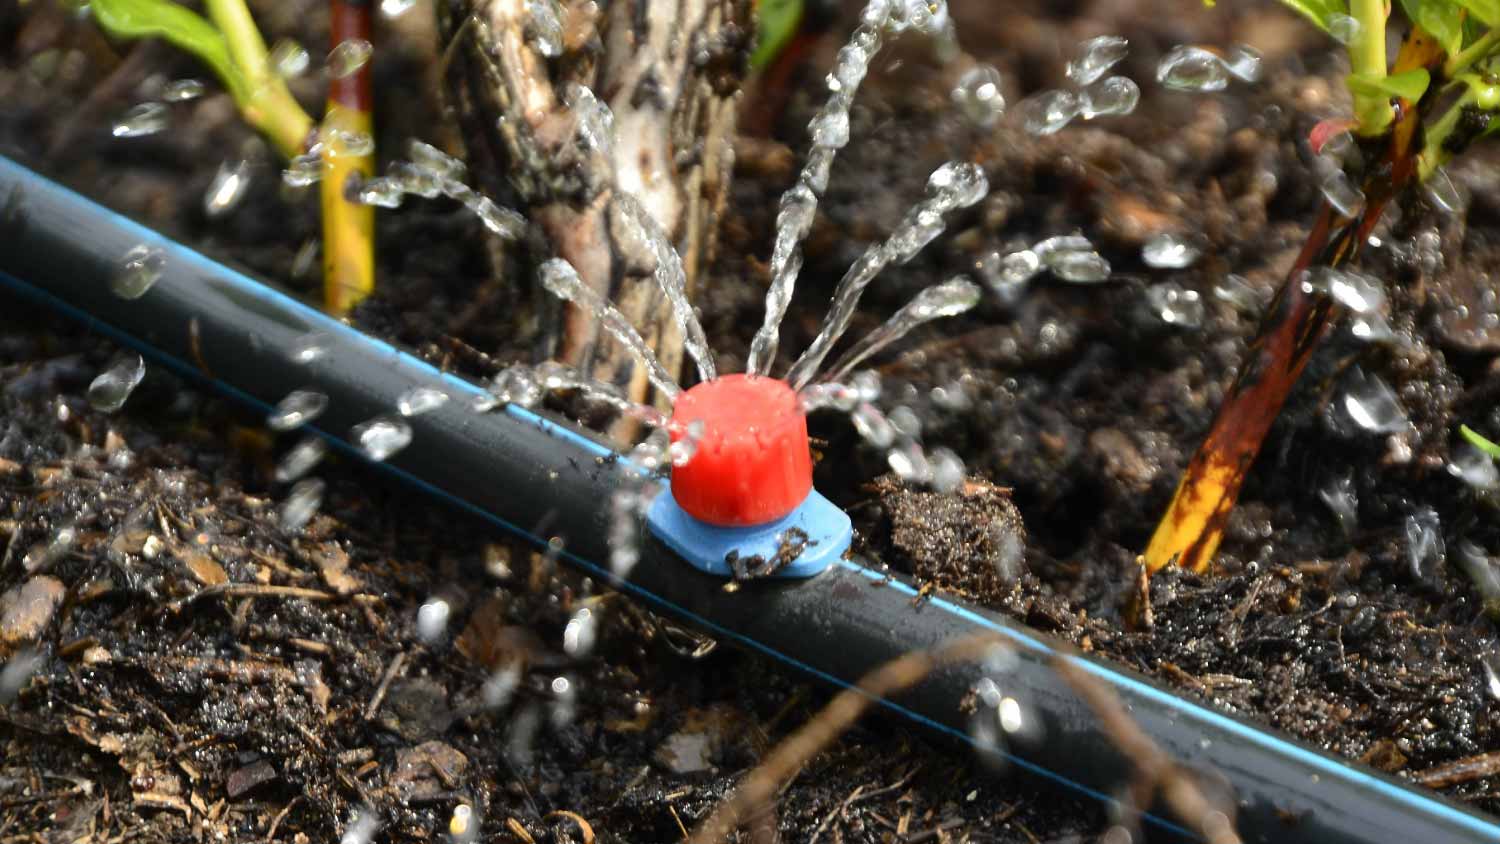
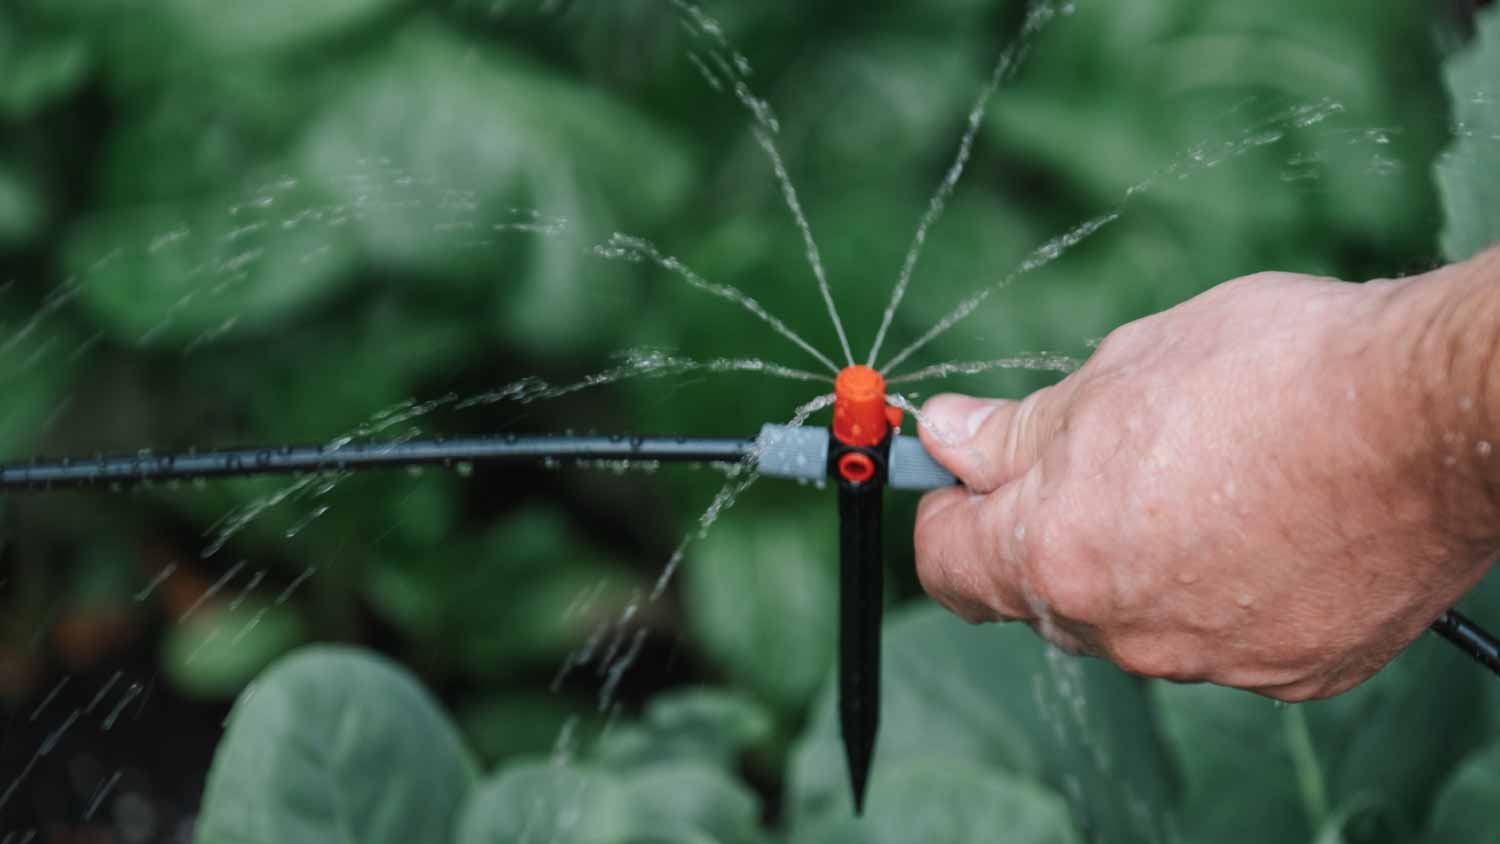
The most common type of drip irrigation are emitter systems, which consist of a network of tubes with individual emitters that deliver water directly to the root zone of plants. Water is supplied through a main tubing system, which is connected to smaller tubes or hoses with emitters. These emitters can be placed near the base of each plant, ensuring precise and targeted watering.
| Pros | Cons |
|---|---|
| Highly efficient | Harder installation |
| Customizable | Regular maintenance |
| Various soil types | Frequent inspection |
| Various layouts | More expensive |
Best For: A wide range of plants, including trees, shrubs, and ground cover.
There are many different types of emitters. They come in various forms to suit different watering needs, and there are a handful of common types:
Inline Drippers: These are built directly into the tubing and release water at a consistent rate.
Pressure Compensating Drippers: Ensure even water distribution regardless of changes in water pressure.
Adjustable Drippers: Allow you to control the flow rate, making them versatile for various plant types.
Bubblers: Release water in a gentle stream, ideal for larger plants like trees and shrubs.
Misters: Emit a fine mist, suitable for delicate plants and seedlings.

Micro-sprinklers are similar to traditional sprinklers but on a smaller scale. They consist of a stake or stand with a sprinkler head that delivers water in a fine spray pattern. Micro-sprinklers are typically placed above the ground and can cover a larger area than individual emitters. They operate similarly to traditional sprinklers but with a lower flow rate.
| Pros | Cons |
|---|---|
| Excellent coverage | Higher water usage |
| Various plant types | Wind interference |
| Various sized areas | Prone to overspray |
| Customizable height | Regular maintenance |
Best For: Lawns, ground cover, and flower beds.
Porous pipes are similar to soaker hoses, but they are made from rubber or fabric materials and “sweat” out water via low flow irrigation. Porous pipes, despite the name, are usually flexible. However, they are also larger than drip tape and tubing, so they need more thoughtful installation.
The larger size makes them more durable and less likely to shift over time. Keep in mind they are designed to sit above ground, making them an ideal choice for rocky soils or containers where in-ground systems won’t work. In residential zones, porous pipes can be used nearly anywhere, including hedges, lawns, and flowerbeds.
| Pros | Cons |
|---|---|
| Durable | May be too low for some plants |
| Very low flow option | More expensive |
| Unique above-ground “sweating” effect | Won’t fit in all locations |
Best for: Long-term gardens where tubing can’t fit underground
Laser-cut tubing is a type of drip tape or soaker hose that’s professional cut for dripping.
This type of tubing is more expensive, but it’s also less likely to develop problems and it’s easier to control how much water certain areas get. You don’t need to use emitters with it, but it may be more prone to clogs if buried in the ground.
We suggest investing in laser-cut tubing whenever possible for a higher-quality system. If you buy a drip tape or soaker hose kit, it’s probably been laser cut already.
| Pros | Cons |
|---|---|
| More reliable | More expensive than reusing tubing |
| Pre-made, uniform irrigation | Can’t customize drip locations as easily |
| Easier installation | Prone to clogging |
Best for: Casual drip irrigation on flower beds where tubing can rest lightly on the ground
A bubbler is a special type of emitter that, well, bubbles. It focuses low-pressure water in a concentrated area, and excels at moving a lot of water to a spot quickly instead of slowly feeding water into the soil.
Bubblers are handy because you can place them at specific points in an emitter system where drip feeds won’t cut it. They’re a common solution for a young tree or thirsty bush that still needs plenty of water, but won’t ruin your low-flow drip setup.
| Pros | Cons |
|---|---|
| Ideal for larger shrubs and trees | Requires a low-pressure emitter system |
| Good for soaking deeper roots | Only targets a small area |
| Used in many different emitter systems |
Best for: Trees, shrubs and bushes
Foggers are similar to micro-sprinklers or misting systems, except they’re installed on walls or ceilings. That placement makes them an option for greenhouses, patios, and anywhere where hanging plants and raised flower beds need extra moisture. It’s a good solution for plants used to a more humid environment, but foggers aren’t always enough moisture for greenhouses.
Foggers need a certain amount of pressure to work, which often makes them incompatible with other drip systems. You’ll need to install it on a separate line or use a separate pump.
| Pros | Cons |
|---|---|
| Excellent for greenhouses and nurseries | May not work with standard drip systems |
| Reaches hanging plants and raised beds | May not supply enough water for some plants |
| Creates humid environment for delicate plants | May require careful setup for best results |
Best for: Greenhouses and nurseries with humidity-loving plants
Punch-in drippers are special drip heads that you can insert into standard tubing. These drippers lock in place and reliably drip out water without issues like clogging or contamination that simple holes experience.
In many ways, punch-in drippers are the opposite of laser-cut tubing, but we still don’t suggest using them on old tubing or hoses. They work best on new tubing designed for drip irrigation. It’s a bit more work to set up punch-in drippers, but with clear DIY benefits for those with custom garden setups.
| Pros | Cons |
|---|---|
| Customized dripper placements | A poor choice for used tubing or hoses |
| Works with standard tubing | Extra setup work |
| Not prone to clogging | |
| DIY-friendly installation |
Best for: Customized garden irrigation where certain spots don’t need water
Now that we've explored the various types of drip irrigation systems, let's discuss the numerous benefits this type of watering system offers:
Water Efficiency: Drip irrigation systems minimize water wastage by delivering water directly to the root zone, reducing evaporation and runoff.
Improved Plant Health: Precise watering promotes healthy root development and prevents overwatering, which can lead to root rot and other issues.
Weed Control: By targeting the root zones of your plants, drip irrigation reduces moisture in between rows, making it less hospitable for weed growth.
Time-Saving: Drip irrigation systems automate the watering process, freeing up your time for other gardening tasks.
Conservation: Drip irrigation aligns with water conservation efforts by using water more efficiently than traditional overhead watering methods.
Versatility: Drip irrigation can be customized to suit various garden layouts and plant types, from vegetables to ornamental flowers.
Reduced Disease Risk: Watering directly at the base of plants helps minimize moisture on leaves, reducing the risk of fungal diseases.
How do you pick the right type of drip irrigation for your property? Fortunately, many drip irrigation kits are designed for specific, common residential uses. However, when customizing a system or choosing a kit, you should consider these factors:
Consider the plants: Drip irrigation can work for a wide variety of plant species, but the type and size of plants still matter. Larger plants with deeper root balls benefit more from larger systems and bubblers. Small flowers fare better with smaller drip tape holes or micro-sprinklers.
Investigate your soil type: Test your soil to determine its needs. Loose soils will drain quickly, which means larger emitters and higher flow to spread out the water is important. Soils that retain water well can make great hosts for drip irrigation, but they do best with very low flow.
Plan based on your current landscaping: If your drip irrigation system needs to take many twists and turns, then thin, flexible tubing may work best. If you only need drip irrigation at specific locations, punch-in drippers may be the best solution. If you’re focusing irrigation on planter boxes, then drip tape or laser-cut tubing could work best.
Consider your budget: Simple drip tape will help you save money, but a full system of emitters is going to be more expensive. Drip irrigation installation cost ranges from $200 to $850, depending on the type of system.
Review water hardness: If your local water is hard and scale tends to build up in pipes, you’ll need to consider the effects on your drip irrigation. Larger emitter and intermittent flushing can help handle this issue.
System longevity: If you only want to set up a drip system for a season, you can go with simpler, less expensive materials. If you want your drip irrigation to last for many years, upgrade to durable hoses and tubing with a high-quality pump and filtration system.
Consult a professional: Irrigation professionals can help inspect your yard and suggest the right kind of drip irrigation for your needs. They can also give you price ranges so you have a better idea for your budget.
Review local laws and water conservation options: Some cities provide rebates and other kinds of encouragement for installing certain types of drip irrigation as a way to save local water use.
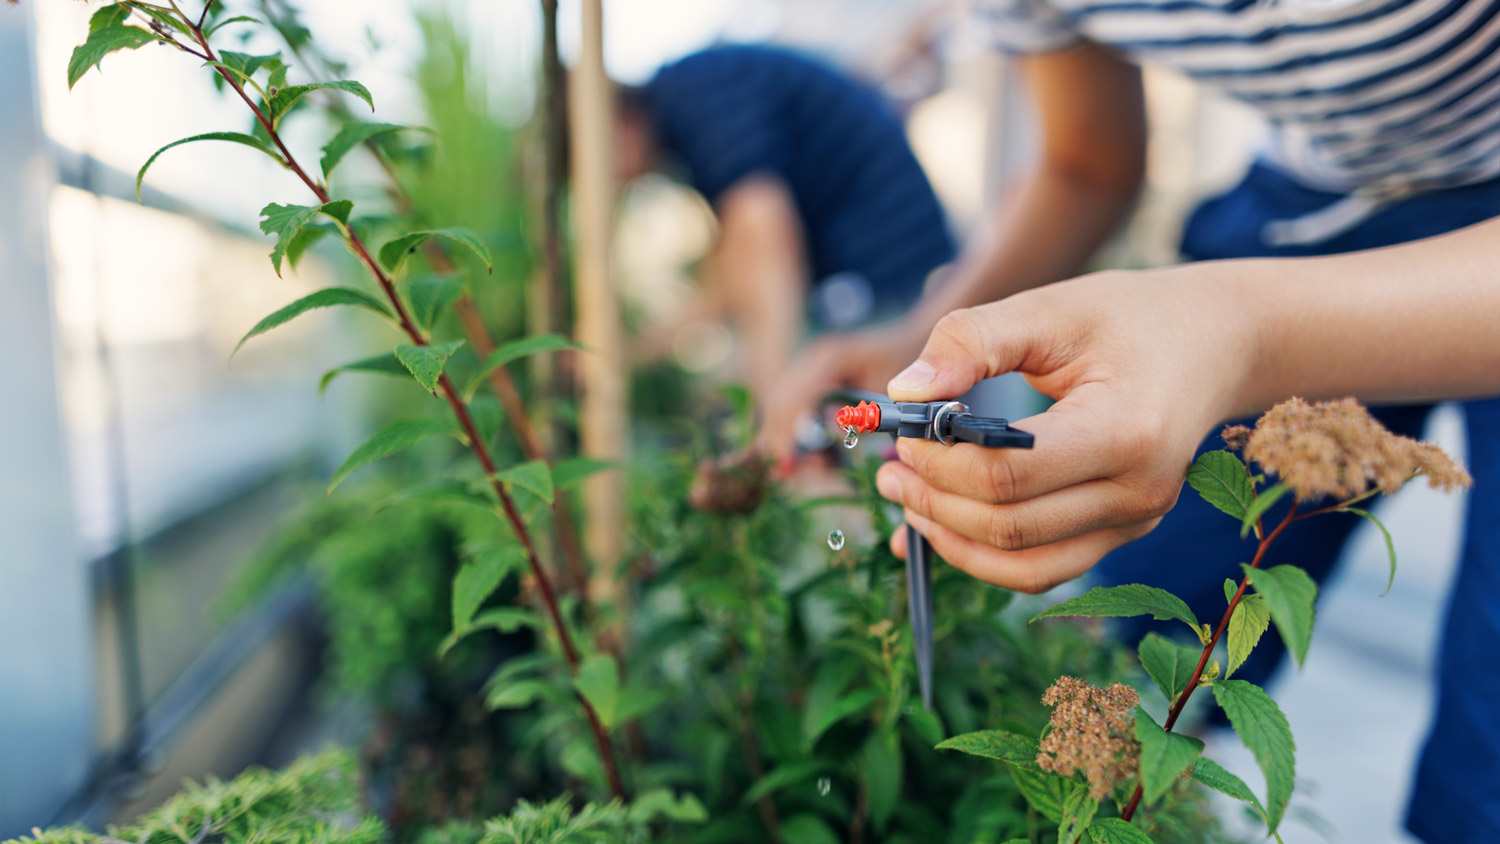
Hiring a local sprinkler service and installation company for your lawn and garden irrigation needs can give you some peace of mind that the job is done efficiently and safely. However, installing a drip irrigation system can also be a DIY project, especially if you’re confident in your home maintenance skills. Here are the basic steps to guide you through the process.
First, you’ll need to determine the layout of your garden and the types of plants you want to water. Measure distances between plants and rows to determine the appropriate tubing lengths. Then you can decide on the type of drip irrigation system that best suits your needs.
Purchase or gather together the necessary components you’ll need for installing a drip irrigation system, including tubing, emitters, connectors, stakes, filters, and a pressure regulator. Ensure you have the right tools, such as scissors, hole punches, and a tubing cutter.
Clear the area you’ll be working in of any obstructions, rocks, or debris that may interfere with the irrigation system’s tubing. Ensure that the ground is level and free of obstacles.
Now it’s time to lay the main tubing along the desired paths, making sure it reaches all the plants you want to water. Connect smaller tubing or hoses with emitters to the main tubing as needed.
Place emitters or sprayers near the base of each plant, following the manufacturer's recommendations for spacing. Use stakes or supports to secure the tubing and keep it in place.
Now you can attach the main tubing to your water source, such as a garden hose or a dedicated irrigation system. It’s a good idea to install a filter and pressure regulator to maintain water quality and pressure.
To ensure your new drip irrigation system is functioning properly, turn on the water supply and check for leaks. Also ensure that water is flowing evenly through the emitters. You can adjust the flow rate as needed to achieve the desired watering pattern.
To keep your drip irrigation system operating efficiently, you should regularly inspect and clean emitters to prevent clogs. Be sure to adjust the system as your plants grow and change. To prevent damage to the system, be sure to winterize your drip irrigation system by draining it before the freezing weather.
Cody did a great job!
Wonderful. I am going to have them remove and replace my driveway in the spring.
 All Star Paving and Sealing
We had a 20+ year old landscape lighting system that needed replacement. Midwest Lightscapes worked with us to design a much improved lighting system, lighting the exterior of the house and the back yard. Installation of the 45 light system took one and one-half days, and went very smoothly....
 Midwest Lightscapes
Did an amazing job transforming my yard. Also installed sod in places, would recommend to everyone.
Always been satisfied with the service work and how they have taken care of my pool.
Bill Gerhardt sold the company to his employees at the end of 2019, apparently without a workable succession plan and without notifying prospective customers of this fact. Most aspects of the maintenance contract have not been fulfilled: no installation of anual plantings per contract, no...
They show up and they did take us on as a client which seems to be a problem with other lawn care providers. We have multiple properties and this one was located close to downtown and no one really wants to mess with it.
I was very happy with the service provided by AK Irrigation. They responded quickly to my email, and the woman I spoke with was polite and professional. I was able to get an appointment that same week. <br /> The technician (Tyler) arrived on time. He was very knowledgeable, and worked...
 AK Irrigation
The worker came out when he was supposed to come. He informed me he would honor the Angie's List deal, but would not do any more work for me since my son in law owns lawn care company as well, even though they do not do the same type of work. He said he did not feel comfortable giving me...
 Bello Giardino LLC
E & L Lawn Care was super. They were very responsive before and after service. They were efficient and were able to complete the job within 1 day. I have had concern about one section of sod - the owner was pro-active and did a visit to evaluate. I have no doubt they will stand behind...
 E&L lawn care
From average costs to expert advice, get all the answers you need to get your job done.
Discover drip irrigation system cost estimates, key price factors, and ways to save. Get transparent pricing to plan your home irrigation project confidently.
A sprinkler system saves time and money, but what are the pros and cons of a drip irrigation system? Here’s what you should consider.
Drip irrigation vs. soaker hose: Which should a gardener choose? Here’s how to tell which of these watering options will work best for your landscaping needs.
Drip irrigation is ideal if you want to conserve water while keeping your plants well-nourished. So, what is a drip irrigation system and how does it work?
Low flow irrigation systems are a great way to make sure you’re keeping your lawn watered while being conscious of how much water you’re using.
Irrigation can help your lawn, flower bed, and veggie gardens thrive. But what is irrigation? Follow this guide to learn how irrigation works.