
The cost to remove texture from walls depends on square footage and the type of texture. Learn all the factors that will impact your budget in this guide.
Swap orange peel or popcorn walls for something smooth and modern

Removing wall texture from painted surfaces requires applying a skim coat of joint compound, while unpainted walls allow you to saturate and scrape the texture away.
Expect to pay $500 to $1,000 per 500 square feet for professional texture removal, with skim-coating costs around $1.10 to $1.30 per square foot.
Testing for asbestos and lead paint protects your health before you start removing texture, especially in homes built before the 1980s when these materials were common.
Hiring a local asbestos testing professional provides peace of mind through proper testing and safe removal guidance when dealing with older textured walls or popcorn ceilings.
You’ve moved into your dream home, but you’re not ecstatic about the faux stucco paint that adorns the walls or popcorn ceilings. Luckily, it’s not hard to achieve a smooth, modern surface if you’re not down with texture. This guide will show you how to remove texture from walls, whether it’s painted on or combed right into the drywall compound.
Before you start this project, you need to do some careful planning. There are two main ways to smooth out the look of your textured walls. You can either scrape off the texture (if your walls aren’t painted) or cover it up (if your walls are painted). These processes are slightly different, so you’ll need to make sure you have the right materials. Here’s how to prep for wall texture removal.
If your home was built before the 1980s, the textured paint on your walls could contain asbestos or lead. Asbestos was particularly common in old popcorn ceilings. Both spray-on asbestos and lead-based paint were banned in 1978. If you’re not entirely sure what kind of paint you’re dealing with, it’s best to hire an asbestos testing company near you and have lead clearance testing.
This project makes a mess, no matter the method. You’re either looking at drips of joint compound or a lot of drywall and paint dust. To protect your room:
Put canvas drop cloths on the floor
Remove baseboards (if using joint compound)
Apply painter’s tape around windows and trim
Cover furniture with tarps or move it out of the room entirely
Tape plastic over vents to prevent dust from moving through your house
Essential safety gear includes goggles, a dust mask, and gloves—emphasis on the dust mask because this project creates a lot of dust.
If you’re dealing with lead paint, you should hire a local lead paint removal expert for safety reasons. But if you insist on doing the job yourself, you still need to take extra precautions. At the bare minimum, wear a HEPA respirator, a hair covering, and disposable coveralls.
Crystalline silica is a toxic dust that's often generated during drywall installation, which can cause respiratory issues if exposed over time. A professional drywall installation company has the right tools to protect your home and ensure safe air quality after your project is completed.

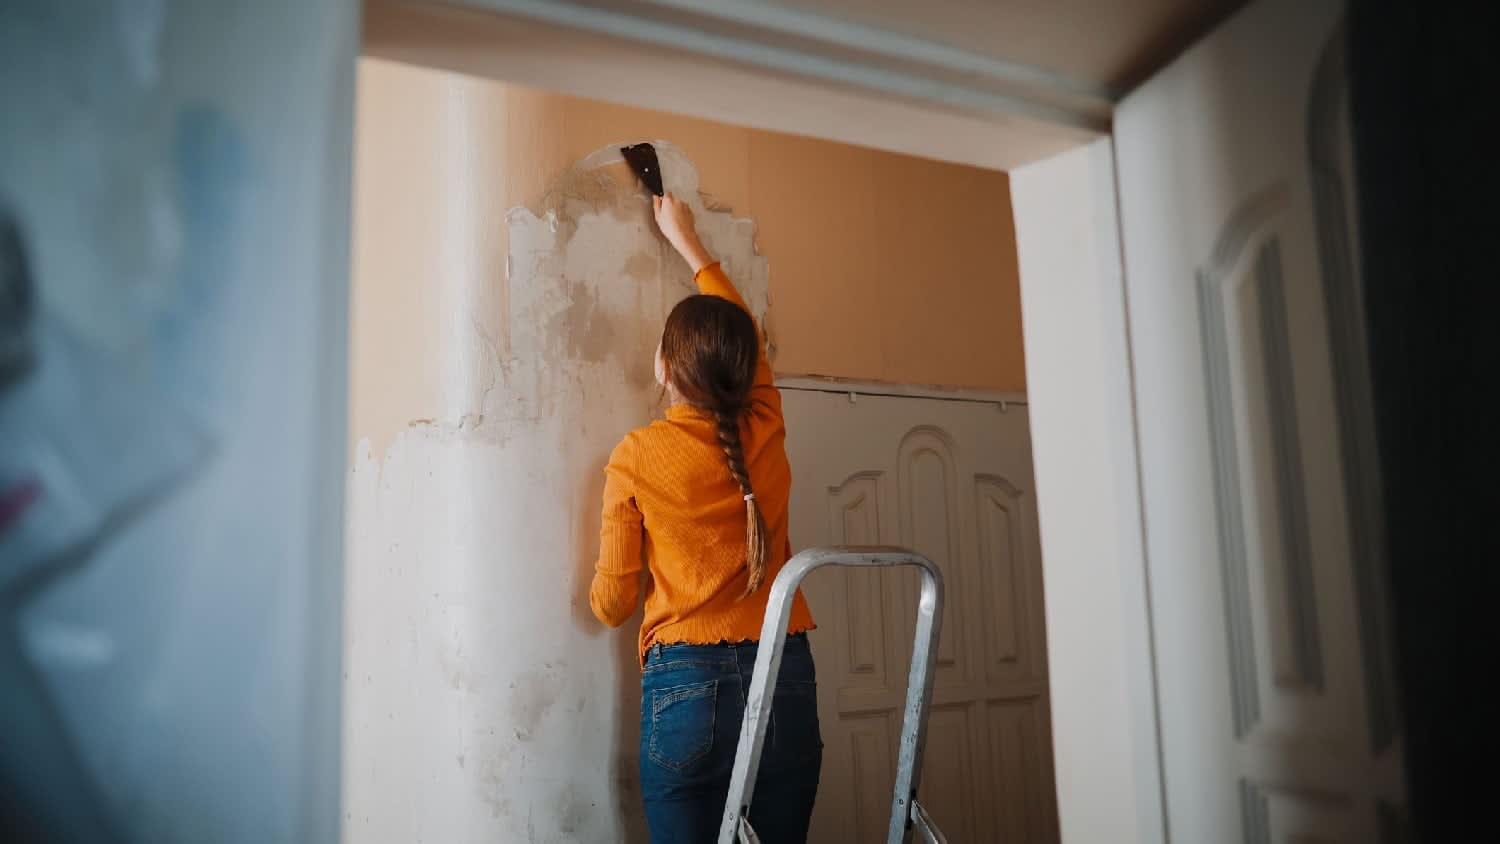
You can try to sand off paint and saturate your wall with water, but the soak-and-scrape method is most effective when used on walls that have never been painted. Follow these steps to scrape the texture right off your walls.
For this project, you’ll need a:
Pump sprayer or spray bottle
Hand sander
Sanding screen
8-inch or 10-inch drywall taping knife
Use a pump sprayer or spray bottle filled with water to evenly saturate the drywall. You may have to spray the wall a couple of times and wait a few minutes for it to soak in. Test the softness with your finger. If the texture feels pliable, move to the next step.
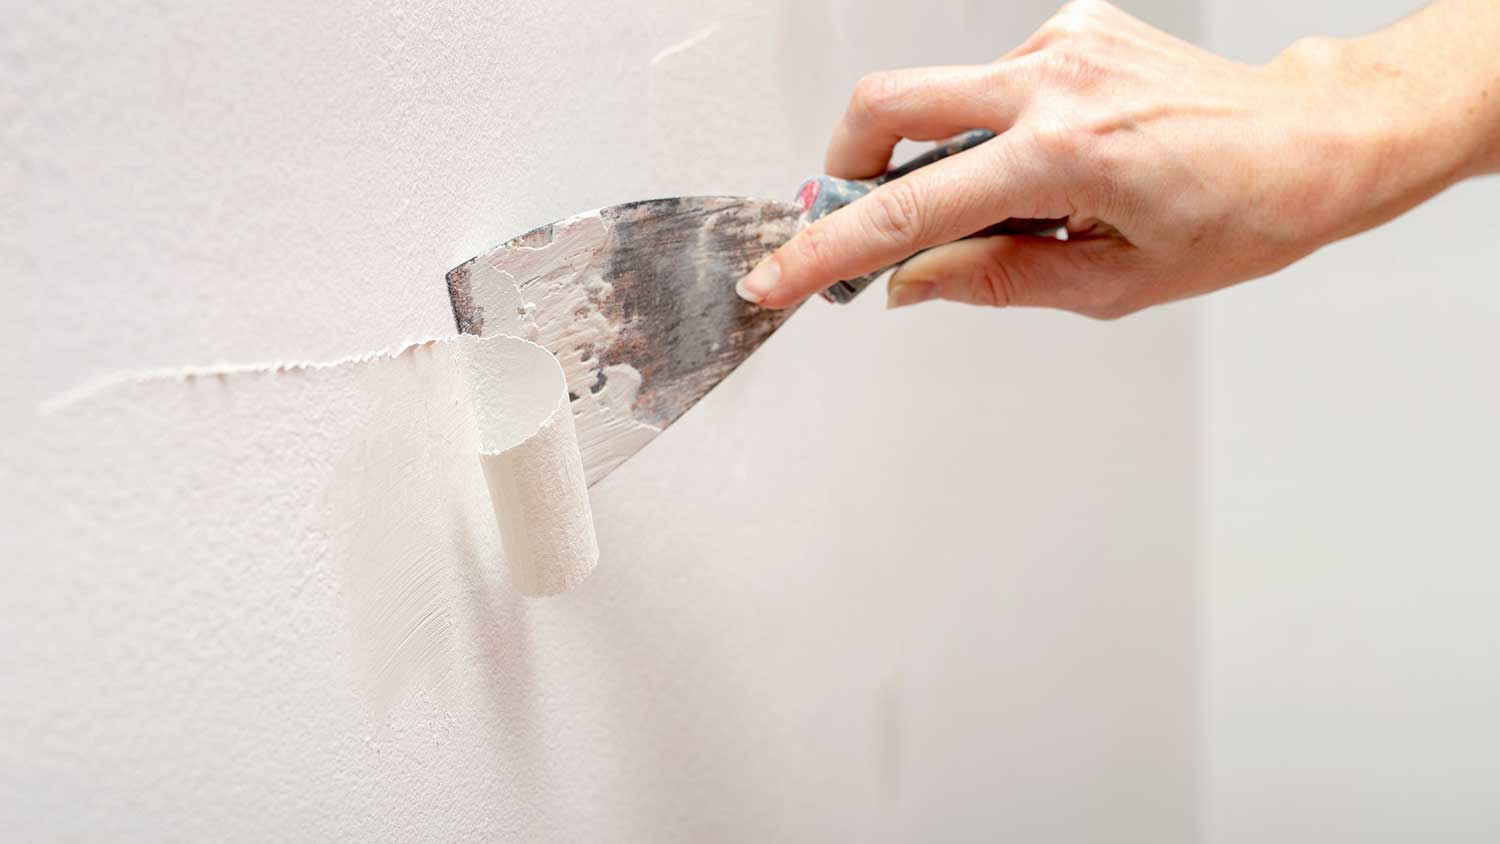
Once water saturates each section of the wall, begin scraping away the textured paint with your drywall taping knife. Make sure you hold the end of the knife at a 30-degree angle against the wall to avoid damaging the underlying drywall. Start with smaller sections of two to four square feet. As you move along, you’ll be able to work faster and with larger sections of wall.
If the knife meets resistance, stop. Spray that area again and wait until the texture softens sufficiently. Continue soaking and scraping until the texture is removed. If there’s a tiny bit of texture left, don’t fret. You can remove it with sanding.
Allow the wall to dry, then gently sand the area to ensure your wall is completely smooth. This should get rid of any texture that you might have missed.
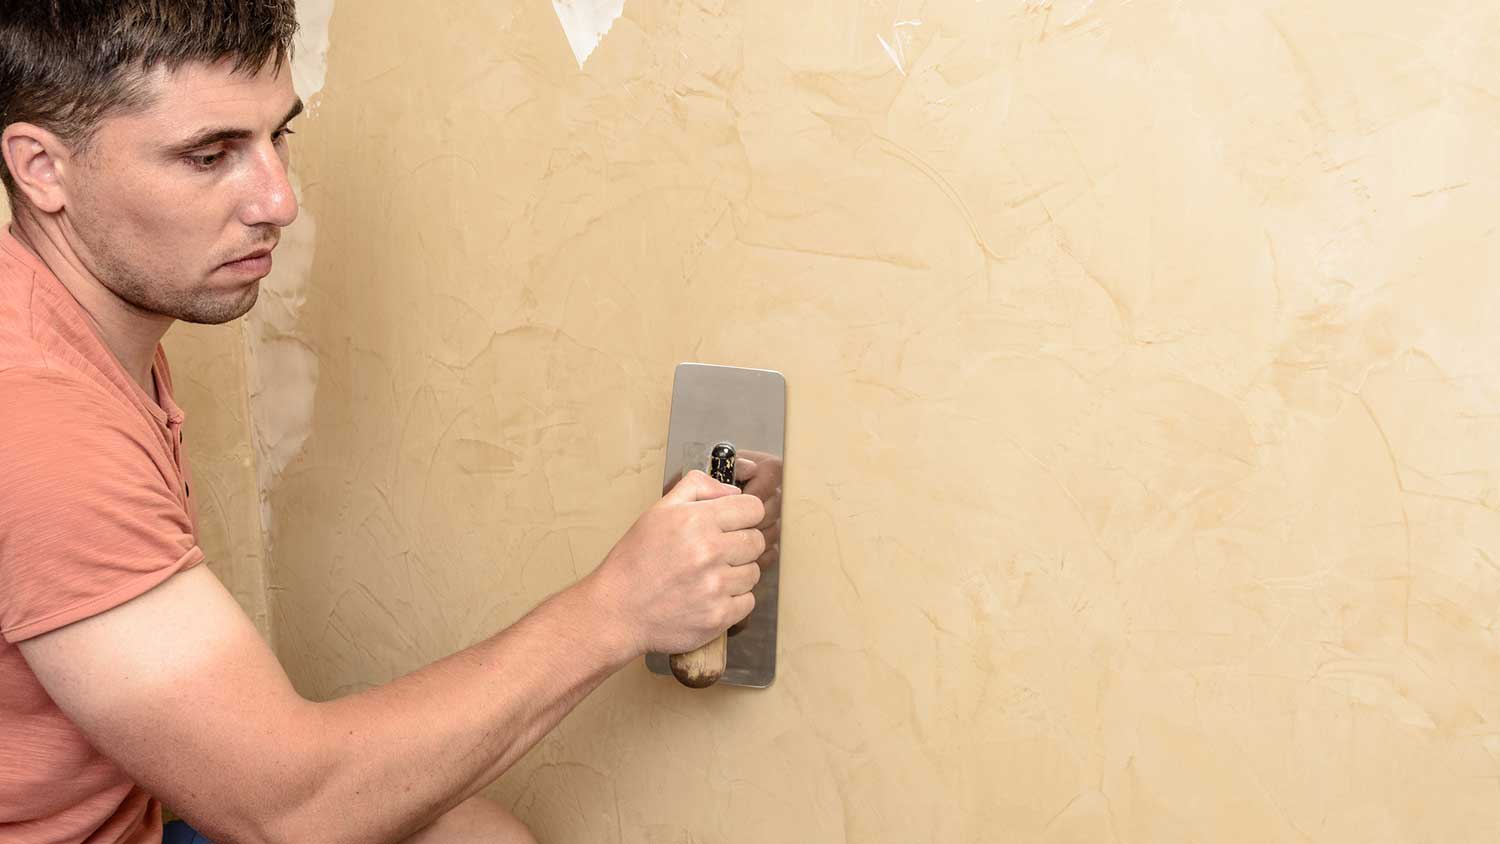
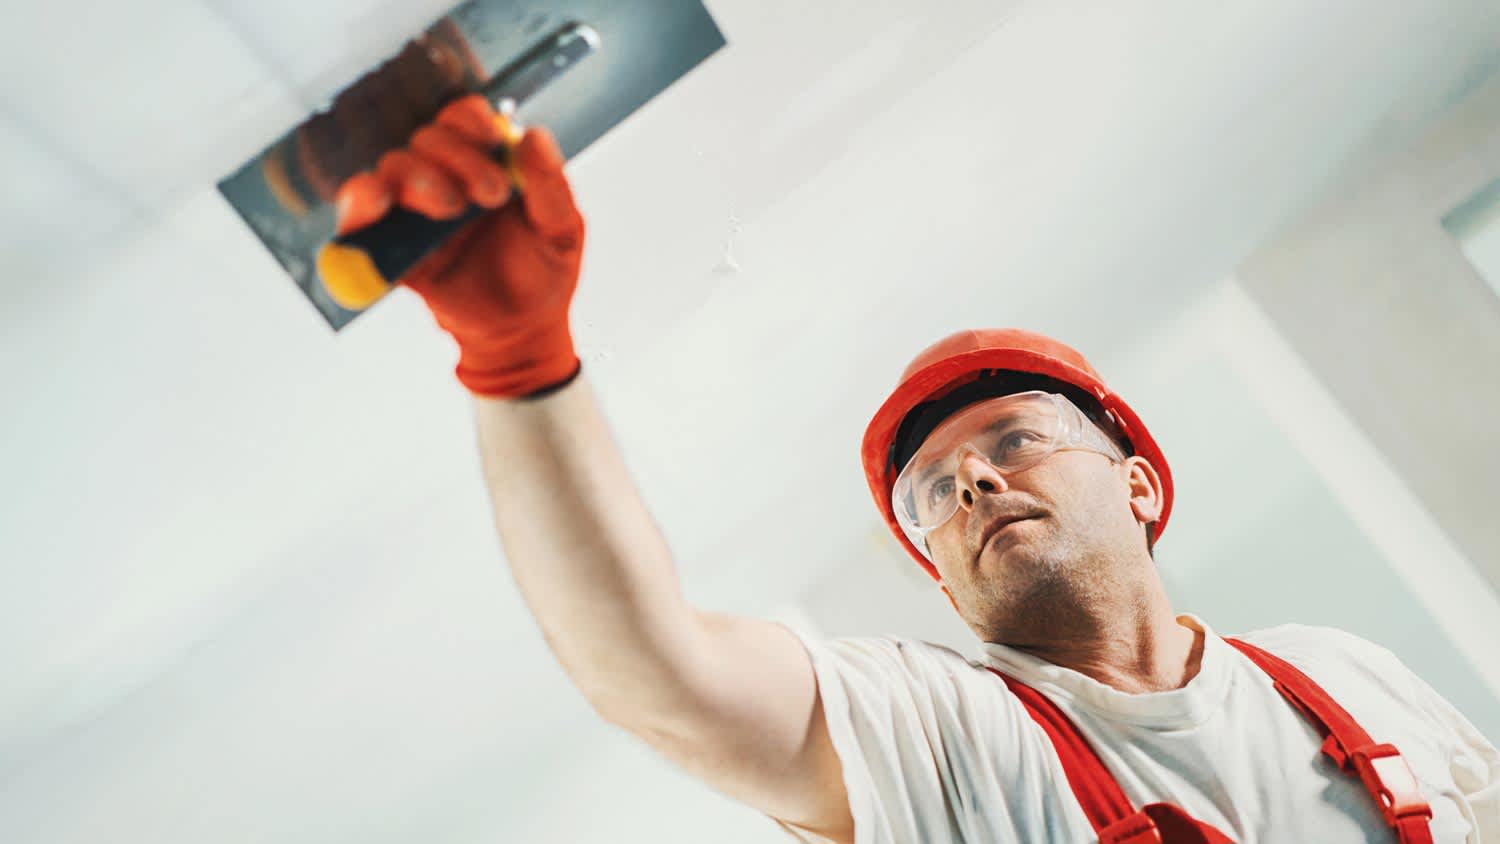
If your textured wall is painted, the best course of action is to smooth it out by covering the texture in joint compound. This is known as a skim coat. Follow these steps to skim coat textured walls.
For this method, you’ll need:
Joint compound (also known as drywall compound)
A drill with paddle bit
Cleaning cloths or paper towels
A thick nap paint roller and pan
A 10-inch drywall taping knife
A drywall mud tray
A hand sander
Joint compound won’t adhere as well to high gloss paint. If your wall is glossy, lightly sand the paint to create some texture for adequate grip. After sanding, clean the wall with some damp rags or paper towels.
In order for this method to work, your joint compound needs to be the consistency of pancake batter. Mix the joint compound using a drill with a paddle bit until you achieve the desired texture.
Pour the joint compound into a paint pan, then roll it on the wall using your thick-nap roller. The thicker the nap, the better it will cover deep textures. Be forewarned: you will make a mess, but that’s what the dropcloth is for.
Take your drywall taping knife and lightly skim the wall to remove the excess compound. The idea is to create a smooth surface over the texture. For less mess, scrape the compound into a drywall mud pan.
It’s difficult to smooth out joint compound once its dry and wet parts start mixing together. Make sure you don’t skim wet joint compound over dried areas, or it will set prematurely. Do small sections (about two feet) at a time.
If your wall has a really deep texture, you might need to add a second skim coat. Let your joint compound completely dry, which takes 24 to 48 hours, before applying the second coat of joint compound.
Use a hand sander to lightly sand the joint compound and smooth out any remaining texture on the surface of the wall.

Want this DIY to go smoothly—literally? It takes some trial and error, but these tips will help.
It might seem like the best option to use a chemical paint remover, but these products may be worse for your walls than resurfacing them. Chemical paint removers can be health hazards if you don’t use them properly. Coming into contact with or inhaling paint strippers can cause headaches, dizziness, and nausea. Serious health risks include cancer, organ damage, and even death.
You may think your walls are smooth, only to find imperfections in different lighting. Shining a light on the walls at different angles will help create shadows on any bumps that you may have missed. Once the walls look good under a harsh, bright light, they’ll look even better in natural or dim lighting.
The trick to removing textured paint on walls is to use the proper grit of sandpaper. If the grit is too fine, you’ll have little luck sanding away the textured coat. Using sandpaper that’s too rough means you could damage the wall and leave uneven spots.
For drywall, use 120- to 150-grit sandpaper.
For rough textures, like stucco or Venetian plaster, use 60- to 80-grit sandpaper.
Even for rough textures, start with the 60- to 80-grit sandpaper, but finish the job with finer sandpaper to avoid damage.
Use 120- to 150-grit sandpaper if you’ve first sprayed and scraped away the wall. The sandpaper will help smooth out the surface before you add a new coat of paint.
Planning a painting project is fairly straightforward. According to Angi data, more than half of homeowners are looking to complete their specialty painting project within two weeks—a quick turnaround time. Removing texture from walls is no different, and a pro should be able to start the project quickly, as long as they’re available and no wall repairs are needed first.
Wall texture removal is a messy job, and skim coating takes a certain amount of trial and error, but handy homeowners can roll up their sleeves and complete this project as long as they have the patience. You’ll save significant money by eliminating labor costs.
The typical homeowner spends $1.10 to $1.30 per square foot on the cost of skim-coating drywall, and the cost of removing a popcorn ceiling is about the same at $1 to $2 per square foot—as long as there isn’t asbestos.
However, there are still some cases where you might want to hire a local drywall contractor. If you have an older home that’s potentially contaminated with asbestos or lead paint, you should hire someone to remove popcorn ceilings and textured walls. This project creates a lot of dust, and there’s the potential for inhalation if you’re not properly protected. Asbestos exposure is linked to serious health complications like lung cancer and mesothelioma, while lead paint can cause kidney and brain damage if inhaled. It’s best to play it safe when it comes to your health.
Removing the texture from walls costs anywhere from $500 to $1,000 per 500 square feet, depending on the current conditions of the walls and what you’re going for. Hiring a local popcorn ceiling removal pro or interior painting company is more expensive than doing it yourself, but it offers a higher success rate. The job isn’t difficult, but it is time-consuming and labor-intensive. Removing pre-existing wall texture involves heavy sanding and multiple passes with a skim coating.
On the flip side, adding texture to your walls costs an average of $750 per 500 square feet of drywall. This is a nifty way to add some unique aesthetics to a room.
Custom Paint Jobs LLC is the go-to choice for all your painting needs. They painted both the interior and exterior of my house flawlessly. Their work speaks for itself!
Beginning with the estimate, Larry and Peyton were super helpful in getting my new condo's interior re-painted. Not only was the job well done, but also done in a super timely manner as promised.
 Five Star Painting of Plain City and Powell
From average costs to expert advice, get all the answers you need to get your job done.
The cost to remove texture from walls depends on square footage and the type of texture. Learn all the factors that will impact your budget in this guide.
Drywall texture can create an attractive finish and add dimension to your home’s walls. This guide breaks down the factors that influence the cost to texture drywall.
Skim coating drywall is a great alternative to replacement, and is often more affordable. Use this guide to estimate the cost to skim coat walls in your home.

If your room is falling flat, learning how to texture walls will help bring dimension to your space. Get to know all the different options and how to do them yourself.
Wondering who to hire for roof coating? Learn which contractor to call, how pros get it done, and what to ask before you book.
The paper is off, but your walls need some love. Learn how to repair your walls after a wallpaper removal project and prep them for paint or new decor.