

Fence repair costs depend on the extent of damage, your fence's material, and how much of the fence you need to fix. Explore all the price factors in this guide.
All the parts play an important role, both big and small


There are 17 essential chain-link fence parts, plus optional accessories like barbed wire.
Installing a chain-link fence costs $2,300 on average.
Whether you should repair or replace a chain-link fence depends on the damage's extent.
Installing a new chain-link fence is DIYable, but a fencing pro can do it in a day.
It might not seem like chain-link fences are all that complex, but about 17 essential pieces keep them functioning as they should. And all it takes is just one part to get damaged and make the whole thing fall apart. Learn about the different parts of a chain-link fence and optional accessories you can add to strengthen the structure even more.
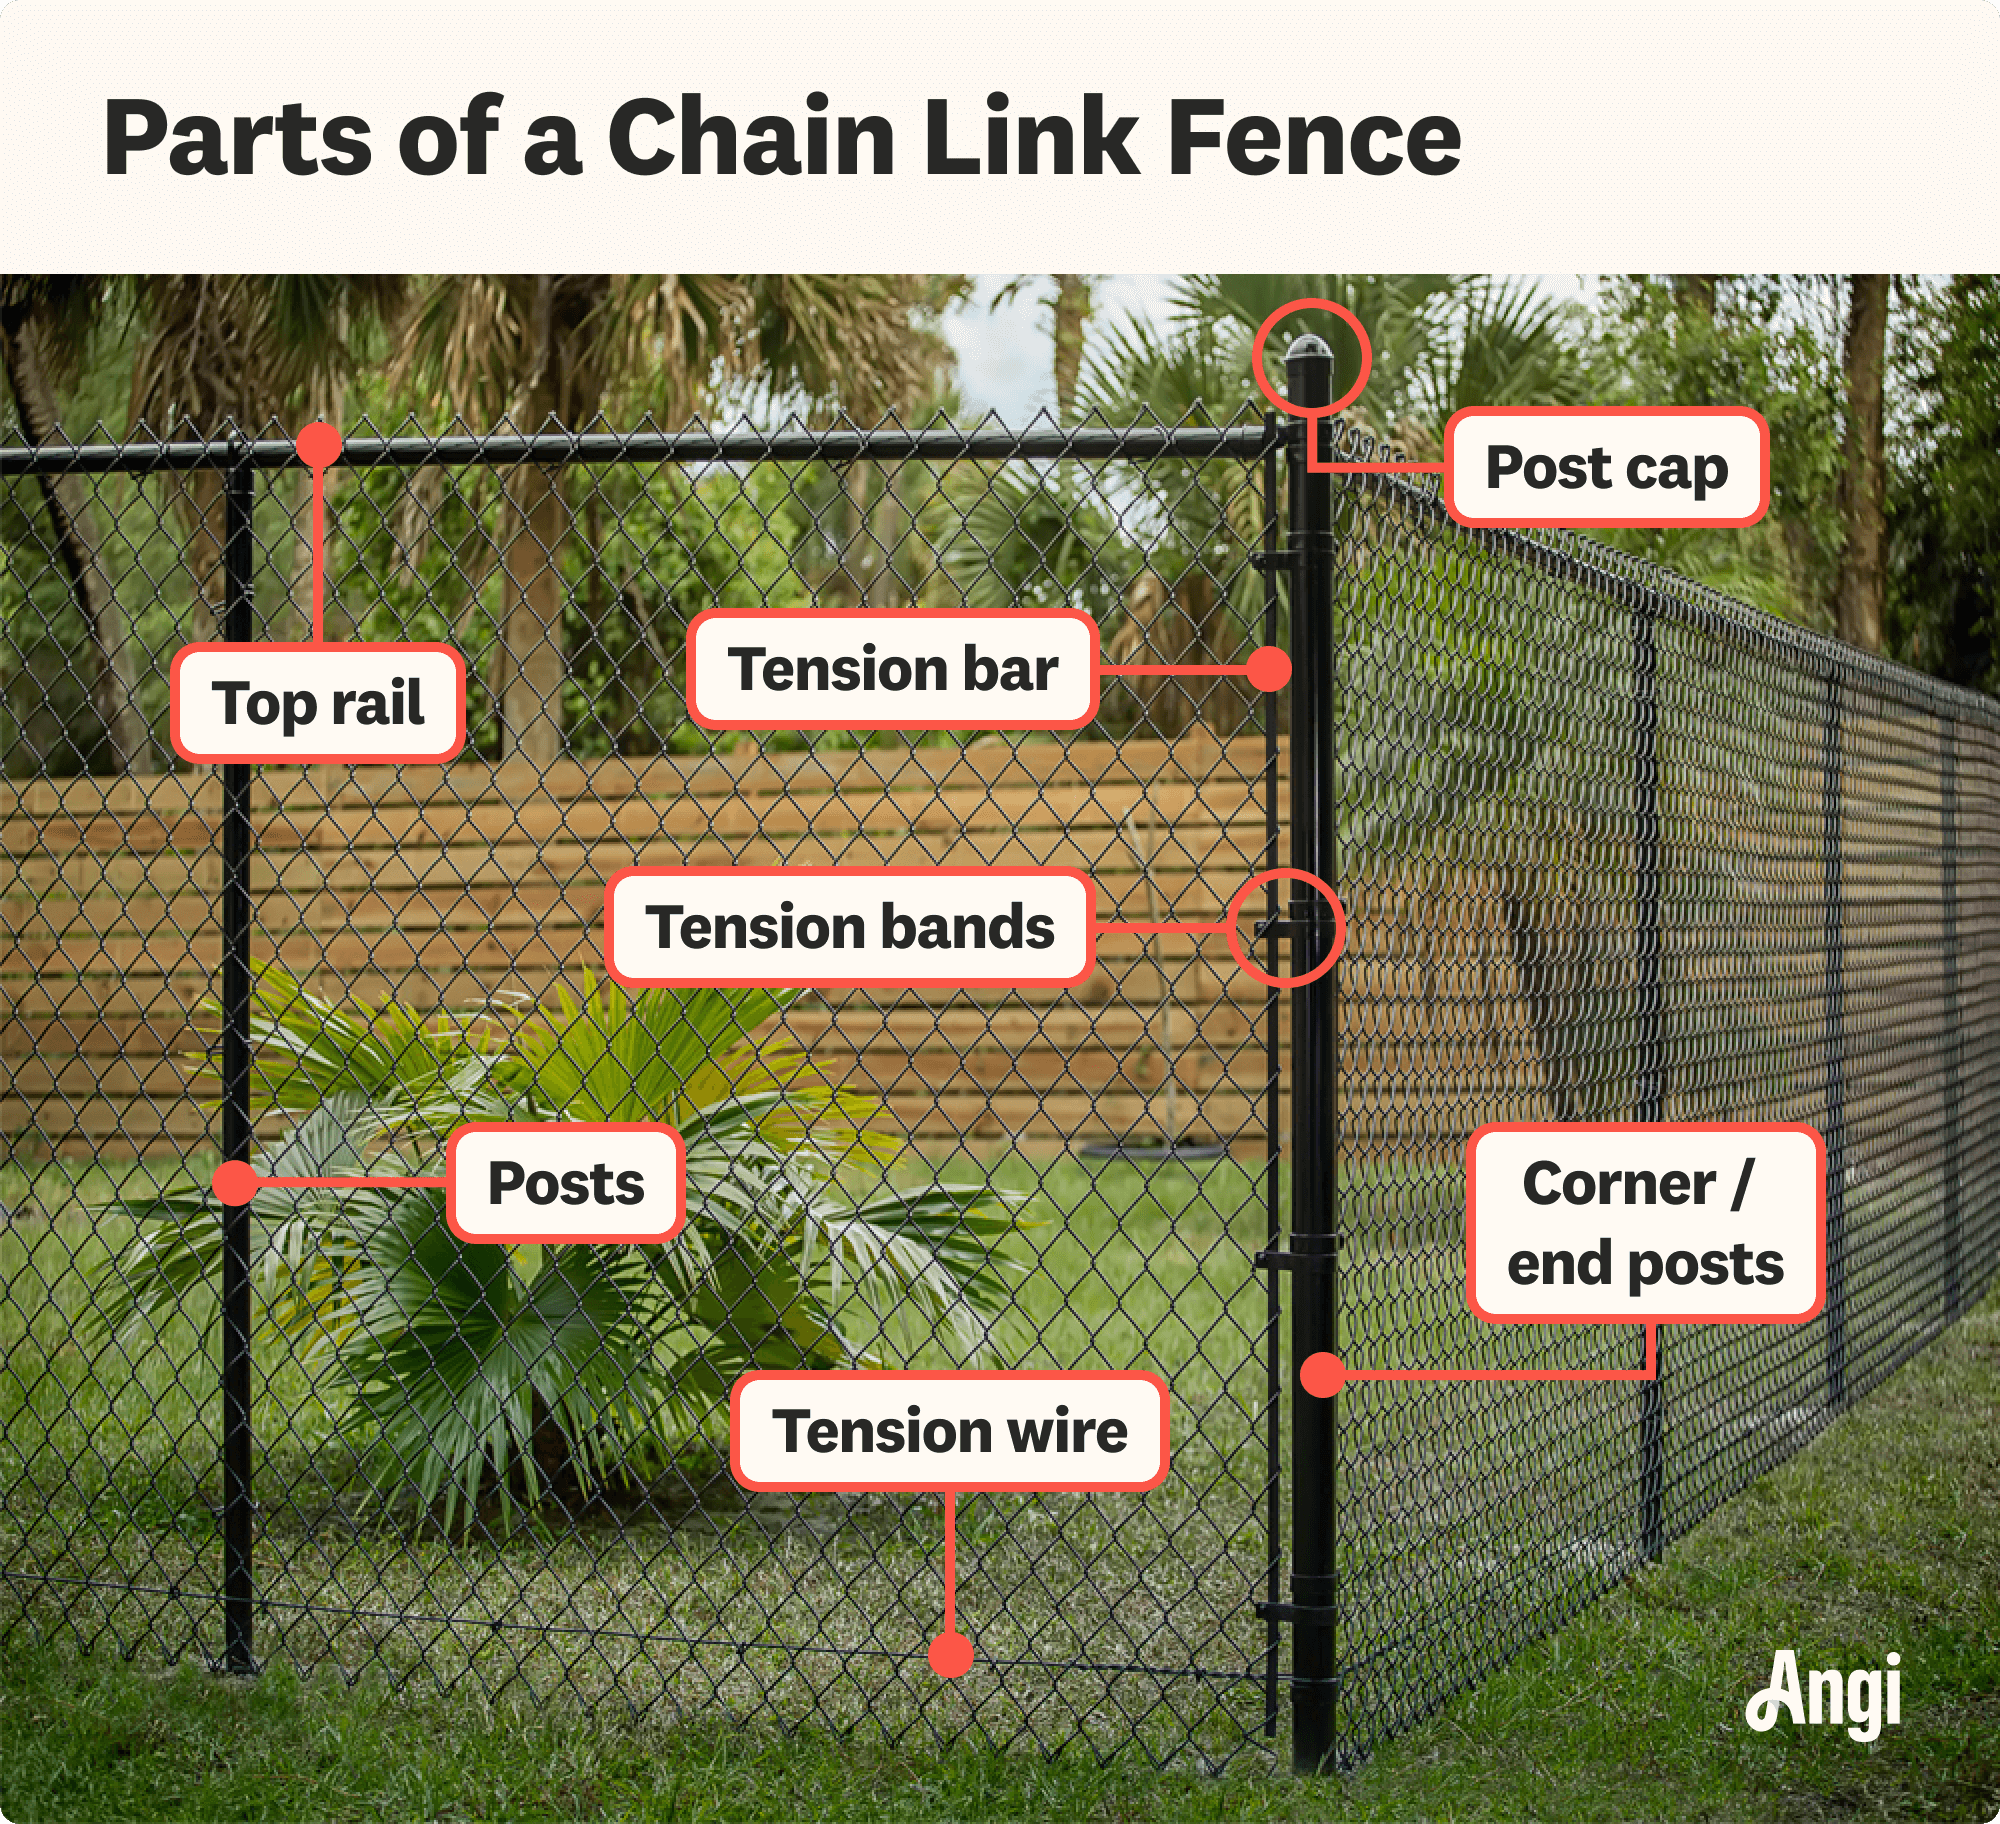
There’s much more to a chain-link fence than the links and fence posts. From the caps on top of posts to the various types of braces used to reinforce the fence itself, these are its mandatory parts.
When you're wondering what a chain-link fence is made of, the mesh lining is likely the first thing to come to mind. Constructed of woven wires with small gapping, this part gives the structure its iconic appearance—and does a great job of keeping out unwanted visitors and keeping in would-be escapees, from pests to beloved pets. Plus, it's a gateway to different types of chain-link fences, including galvanized metal and vinyl-coated options.
If you’re DIYing your fence, you can buy chain-link mesh in large rolls and cut it with metal scissors to fit your exact dimensions. From there, it must be attached to posts and railing with fence ties.
Consisting of thin pre-bent metal wires, these parts link the chain mesh to the railing and fence posts. How many you'll need will depend on the length of your fence. You'll need about one fence tie for every foot of wire mesh, which you can manually secure with wire pliers.
Chain-link mesh tends to curl up at the bottom, and a bottom wire is essential to prevent that from happening. This feature needs to be thicker than the mesh to pull it taut and keep it from budging, and it will run horizontally along the base of your fence and be secured in place with hog ties.
Also called tension wire clips, hog ties secure the chain-link mesh to the bottom wire. Like fence ties, you need to apply hog ties using metal pliers.
Also known as a terminal post or ball cap, these features top the posts throughout a chain-link fence. They prevent them from filling up with rain or snow in inclement weather and ensure they don’t split or crack from cold temps or water damage over time. They come in a number of different shapes and styles, so they can boost the curb appeal of a chain-link fence, too.
Also called terminal posts or end posts, these are the fence posts that you’ll find at the ends and corners of a chain-link fence. They’re responsible for keeping the structure standing from one end to another. They’re larger than line posts and may need to be installed deeper into the ground or a concrete base since they also do more of the heavy lifting.
You’ll find these posts between sections of a chain-link fence. They keep the mesh taught and prevent sagging or instability through a fence’s midsection, and are shorter and not as deeply buried as their counterparts.
Line posts need to be topped like terminal posts to prevent them from filling with water, snow, or debris. While using the same post toppers for both terminal and line posts would be convenient, what you use for the latter must be smaller to accommodate its similarly smaller size.
Top rails are metal pipes that run horizontally along the top of a chain-link fence. They do a lot of important work, from holding the chain-link mesh upright to connecting both line and corner posts to the structure at large.
This cupped-shaped chain-link fence part connects posts to top rails. You’ll need one rail end for every spot where posts and rails meet—that could look like one at the end of a fence where there are no corners, or two to connect two separate posts to a corner. Without them, any extreme pressure applied to the structure may cause it to topple over—say, if there’s a strong gust of wind or your dog won’t stop jumping up the fence.
Also known as a rail end band, this piece goes hand in hand with a rail end. Made of a thin piece of metal large enough to fit through the hole on a rail end, it’s designed to secure the former to adjacent posts, and your rail ends won’t be able to do their job properly without them.
These thin bars run parallel to corner posts to provide them with more stability, and they are held in place with tension bands that resemble brace bands.
This part is responsible for attaching tension rails to gate posts, and it looks and functions similarly to a brace band. Tension bands come in a number of different sizes, and you’ll need to take post diameter into consideration to find the best dimensions.
This plier-shaped part is one of two that allow a chain-link fence gate to open easily. It’s attached to the gate frame and designed to link with a gate post hinge. You’ll need two per single gate and four for setups with double gates.
Gate post hinges are similarly shaped to gate frame hinges but are slightly larger to fit the latter inside. They’ll be attached to gate posts and linked to gate frame hinges with screws.
Fork latches attach to the opening side of a chain-link gate and are secured to the gate frame with a fork collar. They’re designed to lift up and lower down for opening and closing your gate with ease.
A fork collar is attached to a fork latch with screws and is designed to fit over a terminal post. This part attaches the opening and closing mechanism to your gate and the corresponding fence posts.

In addition to the must-haves above, you can include a handful of optional chain-link fence add-ons.
Brace rails: Additional metal bars are placed in line with the top, and tension rails add reinforcement.
Barb arms and barbed wire: Barb arms attach to top rails and enable installation of barbed wire.
Slam-lock latches: Similar to fork latches except that they close automatically when the gate is slammed shut.
Gate wheels: Allow for easier opening and closing, especially on larger gates.
Privacy slats: Blocks out the view of outsiders.
Installing a new chain-link fence costs $1,300 to $3,400 and is roughly $2,300 on average, so it’s worth it to find out if repairs are possible.
Take a closer look at your fence to decide whether repairing it deserves a shot. If individual parts are damaged, from small elements like a broken post cap to larger ones like a dented top rail, swapping them out for new ones is often less expensive than opting for a whole new installation. However, if there’s extensive damage, you may pay more to replace every part than you would to simply update your fence altogether.
To keep your chain-link fence in top shape, follow these maintenance tips:
Clean your fence regularly: You can use a standard garden hose with a high-pressure nozzle to get it done.
Don’t let plants grow on your fence: Plants are stronger than you think, and they can negatively impact your fence’s structural integrity or break through some of the chain links.
Spray on a rust-resistant product annually: Treat your chain-link fence with rust-resistant spray each year (after cleaning the fence, of course) to slow down premature aging.
Get to repairs ASAP: If there’s any kind of damage to your fence, call a local pro to fix it as soon as you can.
Although easier than some projects, installing a chain-link fence requires a fair amount of tools and equipment that may feel overwhelming to a novice DIYer. If you’re not confident in your skills or would rather use your energy elsewhere, consider leaving the job to a chain-link fence installer near you. But before you contact a pro, it’s important to know who to hire to build a chain-link fence.
On the flip side, if your budget is constrained, you can save a lot by doing this on your own. Contractors charge between $25 and $50 per hour of work, which means you could recoup labor fees by going the DIY route. Alternatively, the pros know how to do jobs like this quickly and efficiently, often in just a few hours, so you may only save a couple hundred dollars if you DIY.
Window Depot did an amazing job on my deck. I wasnt sure what I wanted to do, but their composite decking was affordable and will last a long time. I am excited to have family over, and I am no longer embarrassed by my backyard. Jeff and the ground crew were polite, respectful, and caring for...
We used Unique Hardwood Floor LLC three years ago to work on the floors of a 70 year old home that needed a great deal of work. Some floors needed repairs, some were replaced and others just needed to be refinished. It was a complicated job as they needed to blend the old and the new to...
 Unique Hardwood Floor LLC
While Naaman and Mike were very professional and amicable to work with, there were issues in this project that makes giving a higher rating impossible. We had several communications issues that delayed completion. The roofers accessed the property without communicating with me. Just showed up...
 Ohio Roofing Solutions
We hired Andrew and the team from Midwest Lightscapes for a custom lighting design and installation on a Victorian Village home. The house had outdated low-voltage halogen outdoor lights and many of them were not working. Andrew designed and installed a new system including uplighting on the...
 Midwest Lightscapes
Mr. Potter is professional and gave us excellent advice for the fence. He is honest and straight forward. His crew finished the job quickly and did an excellent job. The fence is beautiful and is a major improvement of our backyard.
He did a very good job building the first fence at a very reasonable price. He was a personable guy to deal with and I would highly recommend him to others.
Excellent work; great attention to detail; makes good suggestions but always goes along with what the customer requests; clean and tidy; intelligent; very reasonable rates. I would definitely hire him again for other home projects. He can do a variety of different jobs including: drywall,...
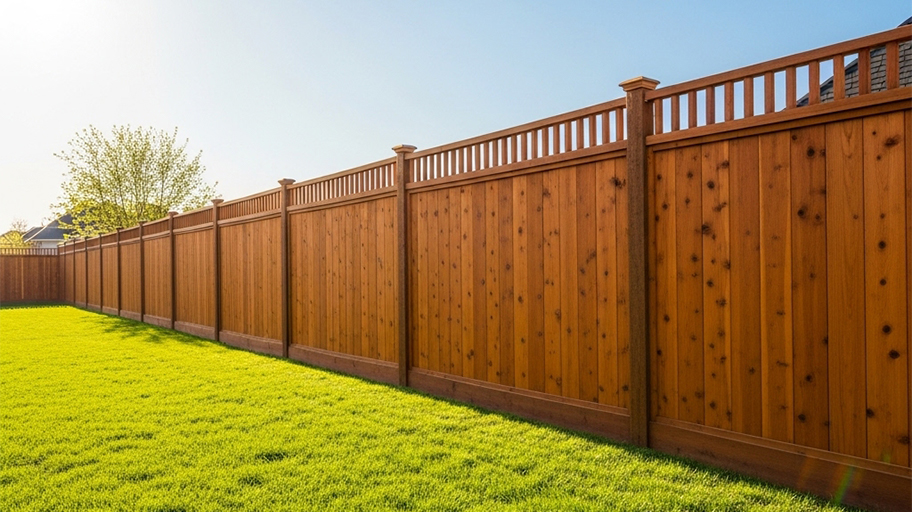
Installed a fence in the back yard. High quality cedar fence.
 Ace Fence & Deck LLC
HAD ISSUES WITH RETURNING PHONE CALLS DURING BID PROCESS AND SCHEDULING JOB. BUT JOB DID COME IN $100 LESS THAN BID. WORKERS WERE PROFESSIONAL, PROMPT, AND DID NOT GET SEALER ON NEIGHBORING FENCE.
 B&C Blacktop
I CALLED AND LEFT A VOICE MAIL AND BOB CALLED ME BACK WITHIN 15 MINUTES. HE CAME OUT TO DISMANTLE THE SWING SET ON THE SAME DAY. HE WAS VERY PLEASANT, AND HAULED AWAY THE WHOLE SWING SET AND LEFT NO DEBRIS BEHIND. I WAS VERY SATISFIED WITH THE WORK.
From average costs to expert advice, get all the answers you need to get your job done.
Fence repair costs depend on the extent of damage, your fence's material, and how much of the fence you need to fix. Explore all the price factors in this guide.

Explore the key factors that impact vinyl fence installation costs in Columbus, OH, including labor, materials, permits, layout, design, and yard conditions.

A fence can be a beautiful and functional addition to your property. Learn all the factors that determine your fence installation costs in Columbus, OH.
Did you know you can extend the height of your fence for more privacy? Read on to learn how to make a fence taller.

There are a lot of different types of farm fencing. Find the one that’s right for your property with our handy guide.

A leaning or damaged fence post can make your fence unstable and look unattractive. Learn who to call to fix a fence post and prevent future damage.