
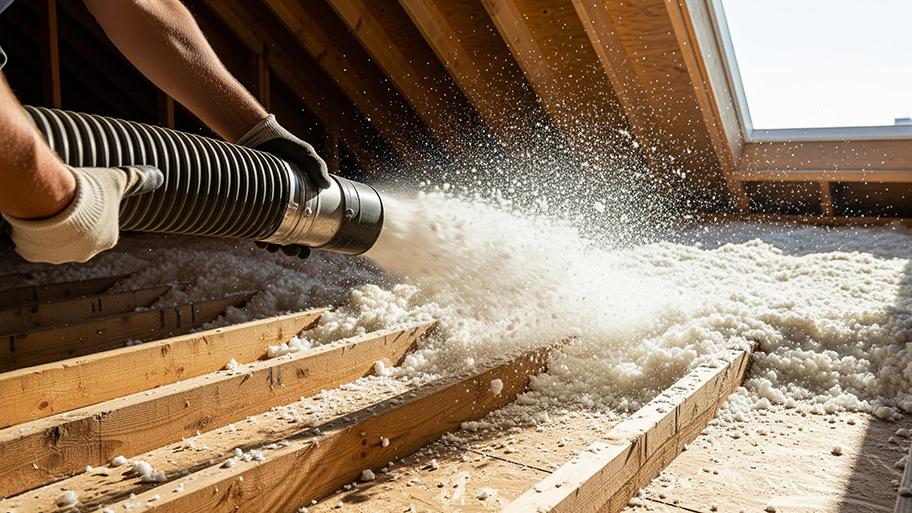
The cost of blown-in insulation costs varies depending on the type of insulation, labor, prep work, and more. Learn more about the cost factors in this guide.
Insulate air ducts in your crawl space and save money.


Crawl space ducts are often easily neglected when someone is insulating the crawl space. However, uninsulated ducts in the crawl space can lose up to 30% of their capacity, wasting your heating and cooling while driving your energy bill higher. Fortunately, you can insulate air ducts in the crawl space by yourself at an affordable cost. Nonetheless, this is an intermediate project and may be challenging for some.
Correctly installing insulation can be difficult. Health and safety risks are involved; therefore, we highly recommend contacting a pro to ensure the job is completed safely and correctly.

Star by purchasing duct wraps for insulation. You will find fiber and fiberglass insulation options in the market. Since fiberglass insulation can be dangerous and also harder to install, we recommend you go for other alternatives. Woolen duct insulation wraps cost somewhere around $100 per 25 feet. We recommend you purchase at least 50 feet of wraps so you don’t need to run back out mid-project to get more.
Make sure you check your local residential building code before buying anything. Most areas will require an R-8 insulation for crawl space ducts, but some places may have a different requirement.
Always ensure a clear path anytime you work in a confined space. Remove any nails, hanging wire, or wood pieces above your head to avoid injury. Declutter the space by removing obstructions or pushing them to the edge. Lay down tarps to gather whatever dust, caulk waste, and insulation waste that may occur.
Measure the circumference of your air duct in the crawl space and add two inches to the number. That’s the measurement for your insulation wrap. Peel away the foil backing, cut that additional two-inch off, and discard. You now have an insulation wrap with a flap you can use to seal with.
Cut out enough pieces to cover all your air ducts. Stack them aside and make sure they are easily reachable so you don’t have to go back and forth during the insulation project.
Remove the supporting brackets around your air duct with a cordless drill. Remove the screw from the joist then rotate the bracket to take them off. Make sure you have a small bowl to hold the screws since it is easy to misplace small objects in the darker crawlspace.
Furthermore, removing brackets in sections will make your project go a lot faster than removing everything all at once.

Slide the insulation around the top of the air duct. Make sure the aluminum backing is facing upward. Keep pushing the wrap forward and wrap the other side around the air duct. Ensure your hand still has a good grip so it’s easier for you to fasten the edges together.
Overlap the 2-inch foil onto the end of the wrap and seal together with aluminum duct tape. Gently pad or press the tape for extra security. Rinse and repeat until all rectangular ducts are insulated.
Place two steel wires on each section of the duct wrap and twist them tight with a pair of pliers. This relieves stress and prevents your wraps from falling apart by the seam. The section length is determined by your wrap’s dimension. For example, if you purchased a 4ft by 25ft roll, your sections should be 4 feet each.
Repeat the same steps to wrap the round ducts. They typically have a smaller circumference and are easier to conceal. Tape shut and secure with steel wires.
Put the brackets back as you wrap and secure each section. This is far more efficient than reattaching all brackets in one sitting at the end of the project. Cut a small hole in each bracket, rotate it back up, and reattach it to the joist. Seal the brackets along the edge with duct tape.
Crawlspaces create a tight work environment that poses multiple challenges to someone who is not familiar with insulation work. Additionally, insulation projects are almost always intermediate projects given the associated duration, labor, and risks.
We recommend you hire an insulation company specializing in crawl space and air duct insulation. On average, an insulation contractor charges $40 to $80 per hour plus material cost. Therefore, it’s a better deal for you if you hire someone to insulate your entire crawl space – just make sure you ask them to insulate the air ducts as well.
Precision and professionalism define Custom Paint Jobs LLC. We couldnt be happier.
Window Depot did an amazing job on my deck. I wasnt sure what I wanted to do, but their composite decking was affordable and will last a long time. I am excited to have family over, and I am no longer embarrassed by my backyard. Jeff and the ground crew were polite, respectful, and caring for...
Storms Mobile Welding was great to work with. They were prompt, professional and did an overall excellent job on the project. I highly recommend.
Great tree company, very professional and honest. Glad we found them, they had the best pricing
Fred and his brother are great. They are always on time. We are very pleased with their work. They incorporated some of their ideas to make things look nicer. We would use them again.
 Honey Do Home Improvements LLC
Great experience all together. Dog friendly, courteous, great results and honest with recommendations. Will certainly be using Cardinal in the future for any carpet repairs
Maple Tree Service should serve as a mentor for other business! Customer service was superior and beyond expectation. Response to request was prompt. The representative was very courteous and proud of the company. Quote was given during initial visit and work date established. A follow up...
 Maplewood Tree Service
Eugene returned my call within minutes and was able to complete the job within a couple of days. Friendly and professional, and I feel his prices are reasonable.
We used Unique Hardwood Floor LLC three years ago to work on the floors of a 70 year old home that needed a great deal of work. Some floors needed repairs, some were replaced and others just needed to be refinished. It was a complicated job as they needed to blend the old and the new to...
 Unique Hardwood Floor LLC
We hired Jim to replace our hardwood floors with new hardwood. He and his helper Jerry did a fantastic job. Their work ethic is impeccable!! We would highly recommend McColl Floors!
From average costs to expert advice, get all the answers you need to get your job done.
The cost of blown-in insulation costs varies depending on the type of insulation, labor, prep work, and more. Learn more about the cost factors in this guide.

Learn the key factors that influence the cost of renting a blown-in insulation machine.

Trying to calculate how much spray foam insulation costs? Our in-depth guide breaks down pricing by type, amount, and where you install it.

Learn the simple steps on how to insulate an attic door if you're worried that a flimsy barrier is driving up your home's energy bill.

A major detail in keeping your home at the optimal temperature is choosing between duct insulation types. Here's how to narrow down your options.

Our guide helps you select the right type of garage insulation to regulate temperature, sounds, and smells in your garage space.