How to Wire a Light Switch Safely
Make your DIY electrical wiring skills shine


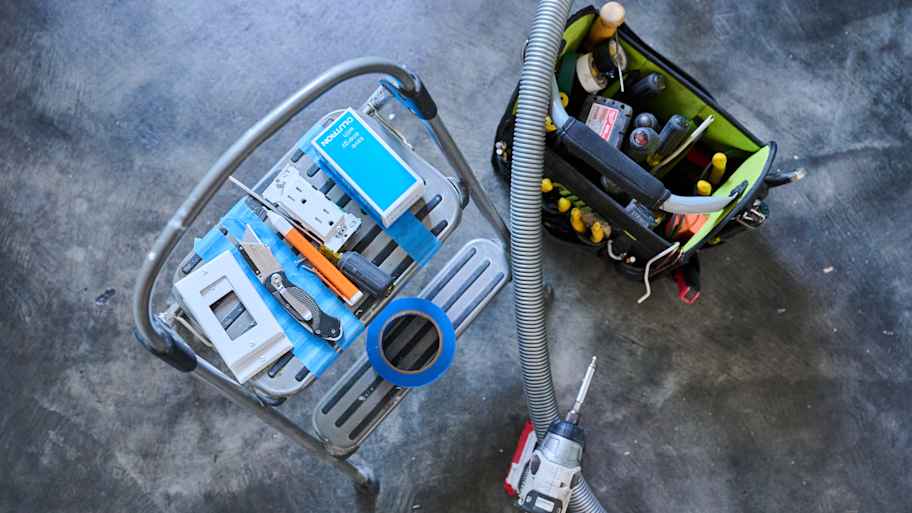
- Flathead screwdriver
- Multi-tool (optional)
- Multimeter
- Needle-nose pliers
- Phillips-head screwdriver
- Light switch
- Electrical tape
After repeated use, light switches can wear out, eventually short-circuiting or malfunctioning. While DIY projects involving electric work can seem intimidating, swapping out a light switch is an achievable project with the right tools and knowledge. Whether you’re fixing or upgrading a switch, learn how to wire a light switch with this how-to guide.

Gather Materials
There’s not too much prep work involved in this DIY since it’s a relatively simple project. However, there are a few things to keep in mind to make sure you work safely with electrical systems.
First, ensure you’re always wearing the proper safety equipment while working. You should have on rubber electrical gloves and rubber-soled shoes at all times. Rubber is an insulator, which means that if electricity does happen to jump out at you, it won’t be able to pass through your rubber safety equipment. Water and other liquids, on the other hand, are conductors and should be kept safely away from your work area.
Turn Off the Power at the Breaker
 Photo: Marvin Tolentino / EyeEm / Getty Images
Before beginning any electrical work, it’s essential to turn off the power at the circuit breaker box. If you’re unsure which breaker leads to the light switch you’re working on, test each breaker by turning the switches on and off until you find the match.
It’s important to note that sometimes the breakers can be mislabeled, so even if the room is labeled on the panel, testing the light switch is a good idea as an added safety precaution.
Remove the Switch Plate and Light Switch
 Photo: powerofforever / Getty Images
1. Remove the switch plate by taking out the screws with a flathead or Phillips-head screwdriver (most are attached with flathead screws). Set the switch plate and the screws aside if you plan to reuse them.
2. To be extra cautious, use a multimeter around the exposed switch to ensure there isn’t any live voltage. Once you’re certain there’s no current, you can remove the screws to the light switch with the corresponding screwdriver.
3. Then, gently pull out the existing switch, leaving the wires attached.
Identify and Disconnect the Wires
 Photo: skhoward / Getty Images
Before you disconnect the wires, it’s helpful to identify the electrical wires by their color codes. Here are the main points to know about the colors of wires when you’re wiring a light switch:
Black wire: The black wire (sometimes red) is the load or hot wire that carries the voltage through the switch. In a light switch, the black wires connect to the brass screws on the side of the switch, which are known as terminal screws.
White wire: The white wire is the neutral wire, and it’s sometimes connected to another white wire covered by a wire nut.
Copper wire: The bare copper wire is considered the ground wire. It can also be green or green with a yellow stripe. In the switch, the ground wire is attached to the green grounding screw.
Loosen the screws holding the black, neutral, and ground wires in place with a screwdriver, pulling away the old switch and discarding it. You may need to free the wires with needle-nose pliers if the coil is too tight.
Inspect and Prepare the Wires
 Photo: andresr / Getty Images
1. Check over the ends of the wires for fraying or shredding. If you locate any issues, trim away the damaged ends using wire cutters or a multi-tool. This is an important step, as you want to ensure that any part of the wire that’s touching the screws is in good condition.
2. Using a pair of wire strippers, remove half an inch of wire insulation, leaving that much wire exposed.
3. Then, bend the exposed wire into a “U” shape so that it can be positioned around the screw in a clockwise direction.
Wire the Switch

1. Start by wrapping the exposed portions of the black wire and white wire around the brass terminal screws on the right side of the switch in a clockwise motion. It doesn’t matter which one goes on the top screw and which one goes on the bottom.
2. With your screwdriver, tighten the screws in a clockwise direction to secure the wires into place.
3. Repeat this process with the copper or green wire, attaching it to the copper or green screw on the lower left side, also called the ground terminal. If you’re installing a double or three-way light switch, make sure to wire to each terminal.
Note: It can be helpful to use needle-nose pliers to hold the wires in place, but it’s not necessary to connect the switches.
Attach the Light Switch
 Photo: Jose Luis Pelaez Inc / Getty Images
Once you’ve connected all the switch wiring, you can reassemble the parts.
1. Wrap the switch and terminal screws with electrical tape to prevent any arcing in the electrical box, which occurs when an electrical current jumps from one connection to the next.
2. Then, neatly and gently tuck the wires into the switch box and screw the new switch into place with a screwdriver.
Test the Switch and Attach the Cover Plate
 Photo: GetUpStudio / Getty Images
Turn the breaker back on and flip the switch. At this point, the light should turn on. If it doesn’t, there may be a loose or incorrect connection.
1. To fix a loose connection, turn off power at the breaker box and unscrew the light switch.
2. Then, check each screw to ensure you’ve tightly wrapped the wires around them and that the screws are secured firmly into place.
3. Once you’ve done that, screw on the light switch, turn the breaker back on, and flip the switch again.
4. If the light works, you can re-attach the switch plate or install a new one using a screwdriver. If the light still isn’t working, you should call an electrician to diagnose the problem.
DIY vs. Hiring a Pro
The cost to wire a light switch can range from $25 to $50, depending on the type you want to install. It’s a relatively inexpensive DIY project because you likely already own a lot of the tools you’ll need.
However, hiring a professional electrician near you to wire your light switch can be worth the investment—especially if you don’t have electrical experience. While this project is relatively simple, you’re still working with live wiring, and it can be dangerous if you don’t know what you’re doing. The cost to hire an electrician for this job is between $85 and $200, but there’s no price on your safety, so if you’re not feeling confident, there’s no shame in leaving it up to the pros.
Keep in mind that, at the end of the day, you’re still working with wires and electricity, and there’s always room for something to go wrong. Incorrectly installed wiring for light switches can lead to shock and electrical fires in worst-case scenarios, so if you’re even a little bit uncertain about being able to safely complete this project, leave it up to the pros.
Different types of light switches include single-pole switches (the standard switch in your home), double-pole switches, toggle switches, three-way switches, four-way switches, dimmer switches, and more.
A single-pole light switch controls the power to a single device, whereas two-way, three-way, and four-way light switches control lights from different locations, increasing the number of connections in the home.
Wiring a single-pole switch incorrectly typically results in the light not turning on. Single-pole light switches only have an “on” and “off” function, so it's only essential that the hot wire connects to one terminal and the wire to the light connects to the other. Examples of incorrect wiring on a single-pole switch include not sufficiently tightening the terminal connections or ground wire. These instances can cause arcing and trip a breaker or create a fire hazard.
Wiring a light switch wrong can cause a fire if the incorrect wiring causes arcing, meaning the current jumps uncontrolled from one conductor to another. Loose wires or worn wires that are not repaired or replaced can cause arcing. If you’re not 100% sure you can do the job safely, don’t attempt to wire a light switch on your own.
The common, marked as COM or C, is one of the terminals found in your light switch. It houses the live wire that supplies the input voltage. The other terminals, marked as L1 or L2, are the outputs to the light fixtures. Depending on if you have a one-way or two-way switch, you’ll either have just an L1 terminal or both an L1 and L2 terminal.


- Home Generator Repair
- Lamp Repair
- Electric Repair
- Generator Installation
- TV Antenna Services
- Emergency Electricians
- Commercial Electricians
- Attic Fan Installation
- Attic Fan Repair
- Exhaust Fan Installation
- Electric Inspectors
- Subcontractors
- Electrical Construction
- EV Charger Installer
- Chandelier Installation
- Doorbell Installation
- Bathroom Fan Installation
- Ring Installers
- Electrical Panel Upgrade
Get our Angi-powered app


