
Your well tank replacement cost will vary depending on a few key factors, such as the size and capacity of the well pressure tank.
When being under pressure is a good thing

When you turn on your faucets or water fixtures, your well delivers water using pressurized air. If your well pressure tank doesn’t have the correct air charge or settings, you might deal with inconsistent water flow and pressure. With a few simple steps, however, you can easily check and set your well pressure tank.
A few signs can point to issues with your well tank’s pressure charge, such as frequent on-off well pump cycling and low water pressure. Besides disrupting your shower, laundry, or any other water-based chores, incorrect well pressure tank settings can lead to unnecessary wear and tear and premature well tank replacement. If you notice any of these issues, checking and resetting your well pressure tank is a low-effort troubleshooting step.

To check and set a well pressure tank, the tank and well pump must be disconnected from any power source to avoid unnecessary wear on the pump and its components. If you haven’t installed your well pressure tank yet, you won’t need to do anything at this step. If you’re working with a well tank that’s already been installed, disconnect the pump from power by shutting off the breaker at the electricity panel. Keep the power off until you’re done checking and setting the tank.
Draining the well tank of all water is also key to this process. If you don’t drain the tank, any reading you get is based on the pressure of the water in the tank at that time and not what the tank is actually pressurized to. As such, any pressure reading you get won’t be accurate.
Make sure to shut off the main valve during this step to prevent the plumbing system from draining back. To drain the well tank, connect a garden hose to the boiler drain, which is usually located at the bottom of the tank, and turn the drain on to let water flow from the end of your hose outside. If you can’t access the boiler drain or the tank doesn’t have one, you can also turn on any faucet in your home and run water until the pressure switch reads at 0 PSI.

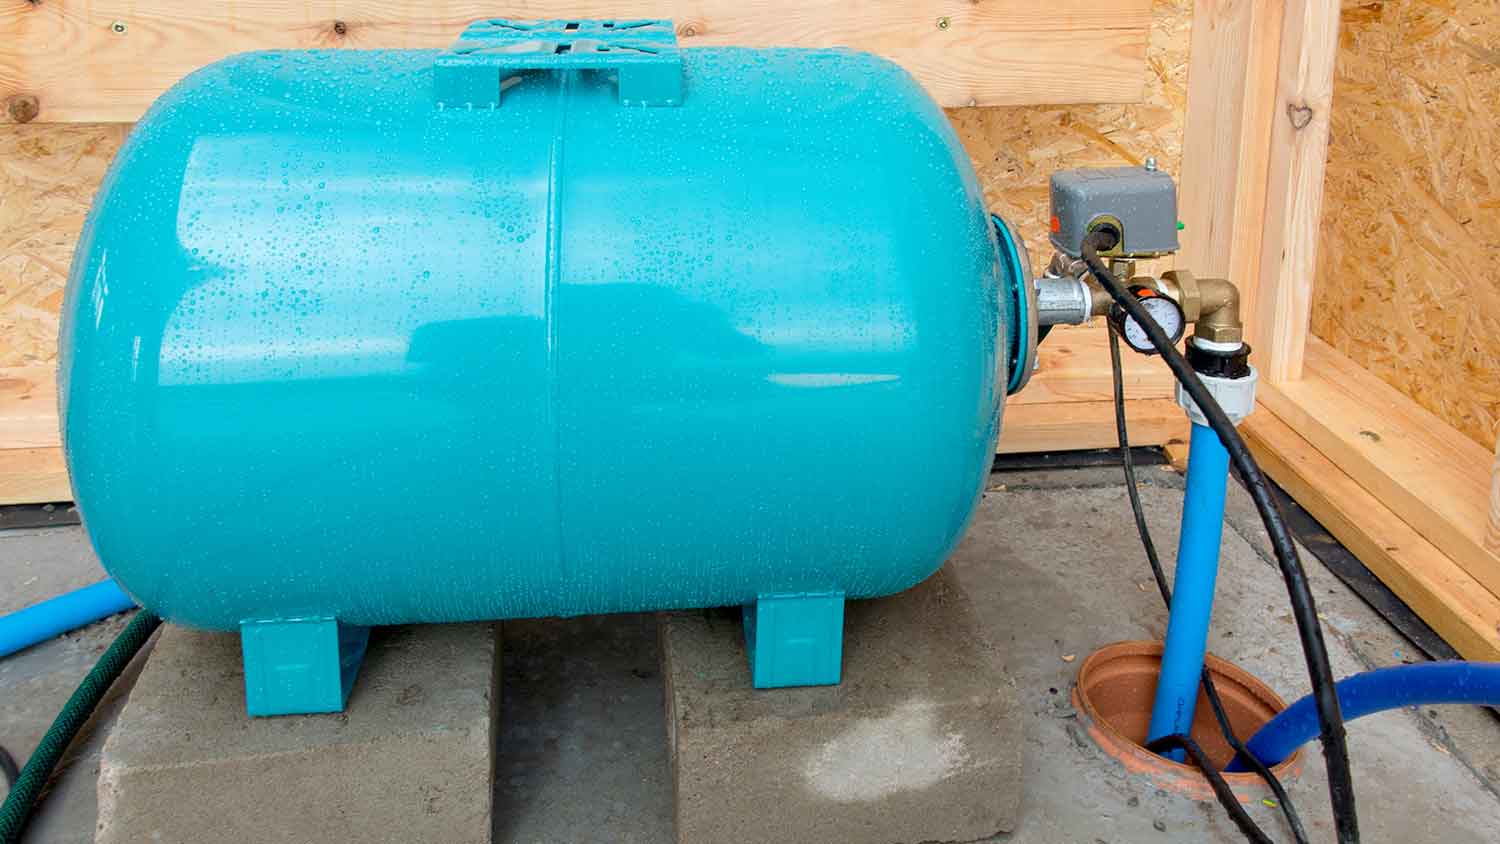
To test your well pressure tank, you will need a pressure gauge. A specialized well pressure gauge is great, but a tire pressure gauge works as long as it fits a standard Schrader valve that you find on most bike or car tires.
On most tanks, you can find the valve either at the top of the tank or near the base. Unscrew the valve cap, and press the tire gauge down to measure the air pressure. Screw the cap back on.
Now that you’ve measured the pressure of the well tank, you can compare it to the ideal pressure setting and make adjustments as needed.
The ideal pressure setting for your well tank depends on the pressure switch setting. Pressure switch settings feature a low and high PSI, with these numbers indicating the range of pressure to trigger the pressure switch on. The pressure of your tank should be 2 PSI below the low-end number. You can find your pressure switch settings inside the cover of the pressure switch.
Use this list to determine the right well pressure tank air charge PSI based on the pressure switch setting:
20/40 PSI = 18 PSI
30/50 PSI = 28 PSI
40/60 PSI = 38 PSI
For example, if your pressure switch settings are 30/50, and your well tank air charge measured at less than 28 PSI, you’ll need to add air to make up the difference. Attach an electric air compressor to the same valve you used to check the air pressure, and add air to the tank to reach 28 PSI (but don’t exceed that number). Wait a few minutes, recheck the air pressure to ensure there are no air leaks, then screw the cap back on. If you find the air pressure is too high, press the valve to release air to the appropriate level.
If you already have a pressure gauge and air compressor handy or can borrow these tools, setting your well pressure tank on your own is a simple DIY task that you can accomplish in less than an hour.
If you’re having a well tank and pump installed by a professional, they’ll likely configure all your settings for you as part of the installation service. If you’re having water flow issues with an existing well and find that resetting the well pressure tank doesn’t resolve the issue, a local well contractor can help you with troubleshooting and repairs at their regular labor rate.
Joseph did a great job with the staircase and trim. Timely and efficient, clear communication about the work, very fair pricing. For the stairs in particular, done very skillfully in an old house (1893) in a tight spiral, and very creative with how to do the handrail. Did a nice job with...
Great experience!! Dion was prompt, professional and very polite. He is hands down the best plumber I have ever used.
Cole has been handling plumbing and general contracting for our four properties over the past three years, and he’s always done a great job. Most recently, he installed a sink and countertop in our retail store where none existed before, and it turned out exactly how we needed. He’s...
 ANB Renovations LLC
Matt is a consummate professional. The work turned out to be far more difficult than expected and rather than turn the job down, Matt rose to the occasion and completed a near impossible task. I can not recommend Greene's Plumbing Service more highly. On a scale of 1-5 I would give Matt a...
The technician was very professional and friendly. He answered all my questions and was very thorough. He left the fireplace area very clean . He inspected from the roof and advised me as to other work that might need to be done. There was no pressure there. I was very satisfied with the...
 Supreme brick & chimney
Custom Paint Jobs LLC pays attention to every detail, ensuring a job well done every time.
When we had the winter freeze, I called Quantum Waterworks Waterline & Drain Cleaning Services and within 1 hour I received an e-mail and he sent someone out the next day and he was on time, he was nice and did the job quickly and cleaned up after himself. We had a leak in our kitchen from...
From the beginning , every appointment was met with punctuality! The day of installation, they arrived on time and worked tirelessly all day until the job was finished. ( Even through a very heavy down pour) Ilia, the owner is a professional, knowledgeable, and fair man. He is absolutely, and...
The service was excellent! They gave me a quote, and had it done 4 days later. My driveway looks amazing, very professional! I would definitely recommend their service to anyone. I have had neighbors stop by and ask for their information as well.
 All Star Paving and Sealing
They are very reliable and available. They the drains all the time
 The Waterworks
From average costs to expert advice, get all the answers you need to get your job done.
Your well tank replacement cost will vary depending on a few key factors, such as the size and capacity of the well pressure tank.

A water pressure booster can add a lot of volume for a small price. Discover booster pump installation costs and cost factors in this guide.
Drilling a well is no small feat. You’ll need to plan for excavating, a pump, and more. This guide will help you estimate and manage your well drilling costs.
You don’t always need to leave it to the pros to set up your well pump and pressure tank. Follow this guide to learn how to do it yourself.

Is your water pressure too low? Learn what pressure your well tank should be to get your system running smoothly and your showers and faucets back on track.
Extend the life of your well pump with a healthy water well pressure tank. Learn the steps to install a new well pressure tank successfully in your home.