

Many homeowners upgrade their old fireplace with inserts to get more heat and save energy and money. Learn more about the cost of installing a fireplace insert.
Sealing this small part of your roof makes a big difference in keeping you dry


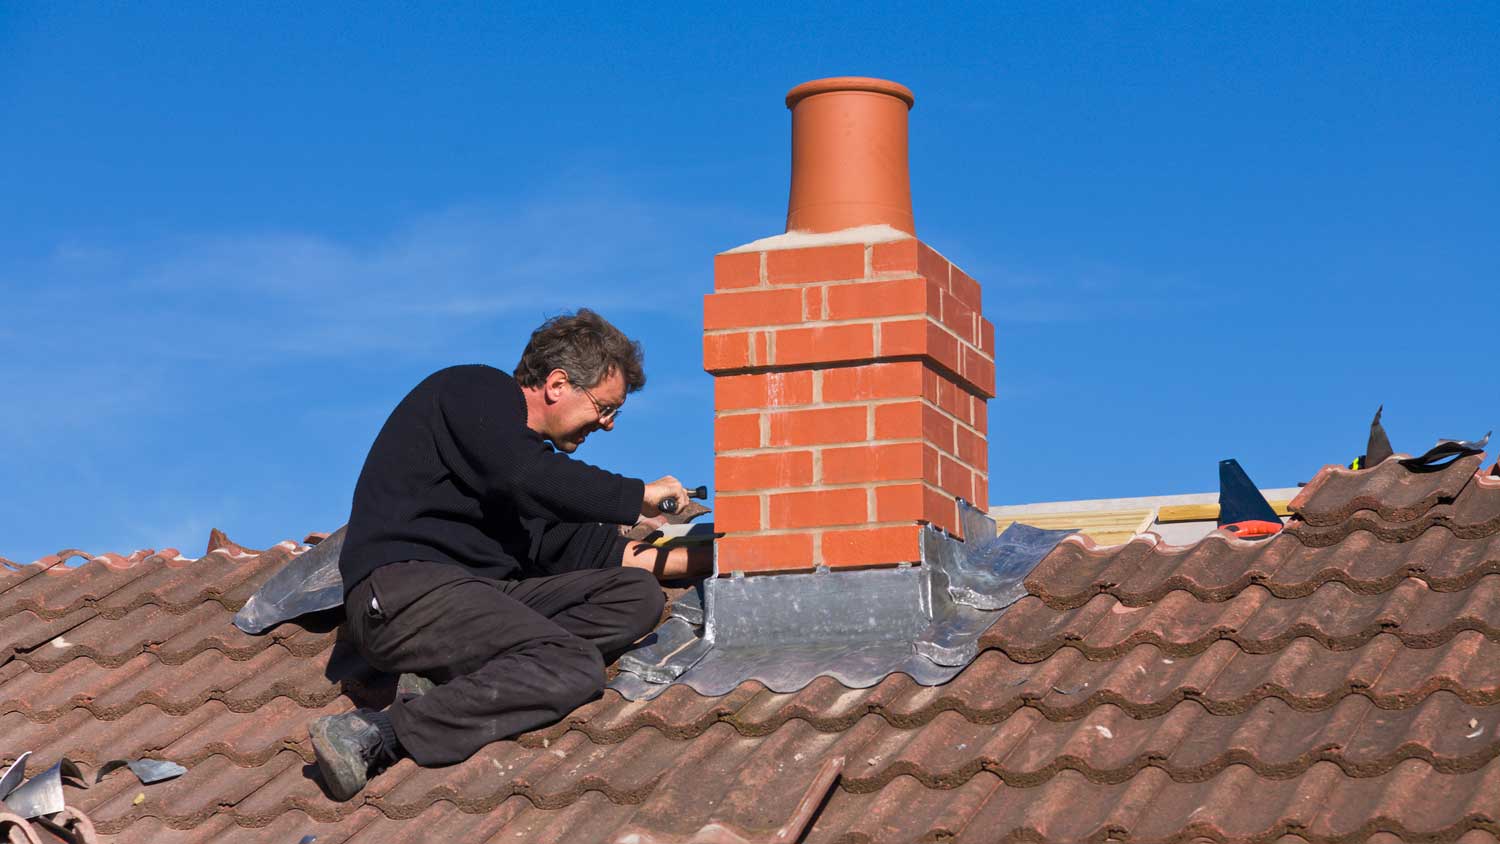
Your home's exterior is a network of materials that keep you dry and safe from water damage. Flashing refers to metal sheets installed over gaps and transitions in a roof, especially around chimney brickwork. While damaged flashing warrants full replacement, smaller issues can still lead to moisture problems. Learn how to seal chimney flashing to close gaps in your defenses.
Many types of caulk degrade quickly when exposed to heat and weather, and you can’t use just any product to seal your chimney flashing. The best caulk for chimney flashing is a high-quality, weather-resistant silicone caulk designed specifically for roofing applications. Expect to spend an average of $25 per tube, though some products cost more.
If you inspect your chimney and discover that the caulk around your flashing is wearing away, you need to reseal it. To seal the chimney flashing, remove the old caulk and clean the surface of the flashing. Then, carefully apply new weather-resistant silicone caulk along flashing edges and in mortar joints.
Start with a close inspection of the caulk on your chimney flashing. Telltale signs that it needs to be sealed include dry or flaking areas, visible gaps between the caulk and the brickwork, or sections where the caulk is missing completely.
If your flashing is seriously damaged, or if you discover spongy areas underneath, then simply sealing it won't suffice. Instead, you'll need to replace the chimney flashing, which is a much more complex and risky project to DIY.
Use a putty knife or scraper to remove old, dried-out caulk material. Be careful not to damage the surrounding brickwork or the flashing itself in the process, and avoid pulling the flashing away from the chimney.
Use a stiff brush to scrub the area around the flashing to remove moss, grime, dust, and other debris. Leaving debris on any surface will prevent your caulk from holding properly.
Use your caulk gun to carefully apply caulk to the following areas:
Along the top edges where the flashing meets the chimney
In mortar joints where flashing is inserted
Over nail heads
Use your putty knife or scraper to smooth the caulk into an even layer. Avoid air gaps to ensure an effective seal. Allow the caulk to dry per the manufacturer's instructions, then inspect your work and repeat as needed to correct any gaps or flaws in the seal.
Sealing chimney flashing as a DIY project is inexpensive and takes very little time. The cost to seal a chimney can be much higher if you hire a pro, since labor alone will cost $130 or more.
However, any project that involves working on a roof is inherently risky for homeowners. You should always have a spotter when working on a ladder or roof. Additionally, removing material from a chimney poses a risk to the masonry, which can be costly to repair.
To avoid the risk of personal injury or damage to your roof or chimney, consider hiring a local roof repair company to handle sealing your chimney flashing.
From average costs to expert advice, get all the answers you need to get your job done.
Many homeowners upgrade their old fireplace with inserts to get more heat and save energy and money. Learn more about the cost of installing a fireplace insert.

The average cost to remove a fireplace is $4,500, but your overall cost will depend on the type of fireplace, its condition, and other factors.

The cost of removing a fireplace insert depends on the type of insert that’s installed. Read on to learn why electric is cheaper than a gas or wood insert.

Discover who installs gas fireplaces and why hiring the pros ensures safety and efficiency. Learn the benefits and installation steps in our expert guide.

There are many working parts of a fireplace, and a basic understanding of their functions can help homeowners properly maintain all of them over time.

Find out if you really need a chimney to install a fireplace in your home. This guide helps you understand your options, such as a ventless fireplace, when choosing the right fireplace for your home if you don't have a chimney.