

•
Discover the cost to winterize a sprinkler system, including average prices, key cost factors, and tips to save. Learn what impacts your estimate and how to budget.
Misty-eyed over backyard misters


Installing a misting system is a complex project that involves plumbing expertise, proper pump and filter selection, and careful planning.
If you DIY, you’ll need to understand how the misting system works and how to connect it to a water supply, as well as purchase the right pump and filtration system, making this a complicated DIY project.
Hiring a pro—typically $50 to $100 per hour—ensures it’s done correctly.
The cost to install a misting system averages between $1,900 and $3,550.
A sprinkler installation pro will have the right tools and knowledge necessary to install a misting system, so you can enjoy a cooler outdoor experience—your plants will love it, too.
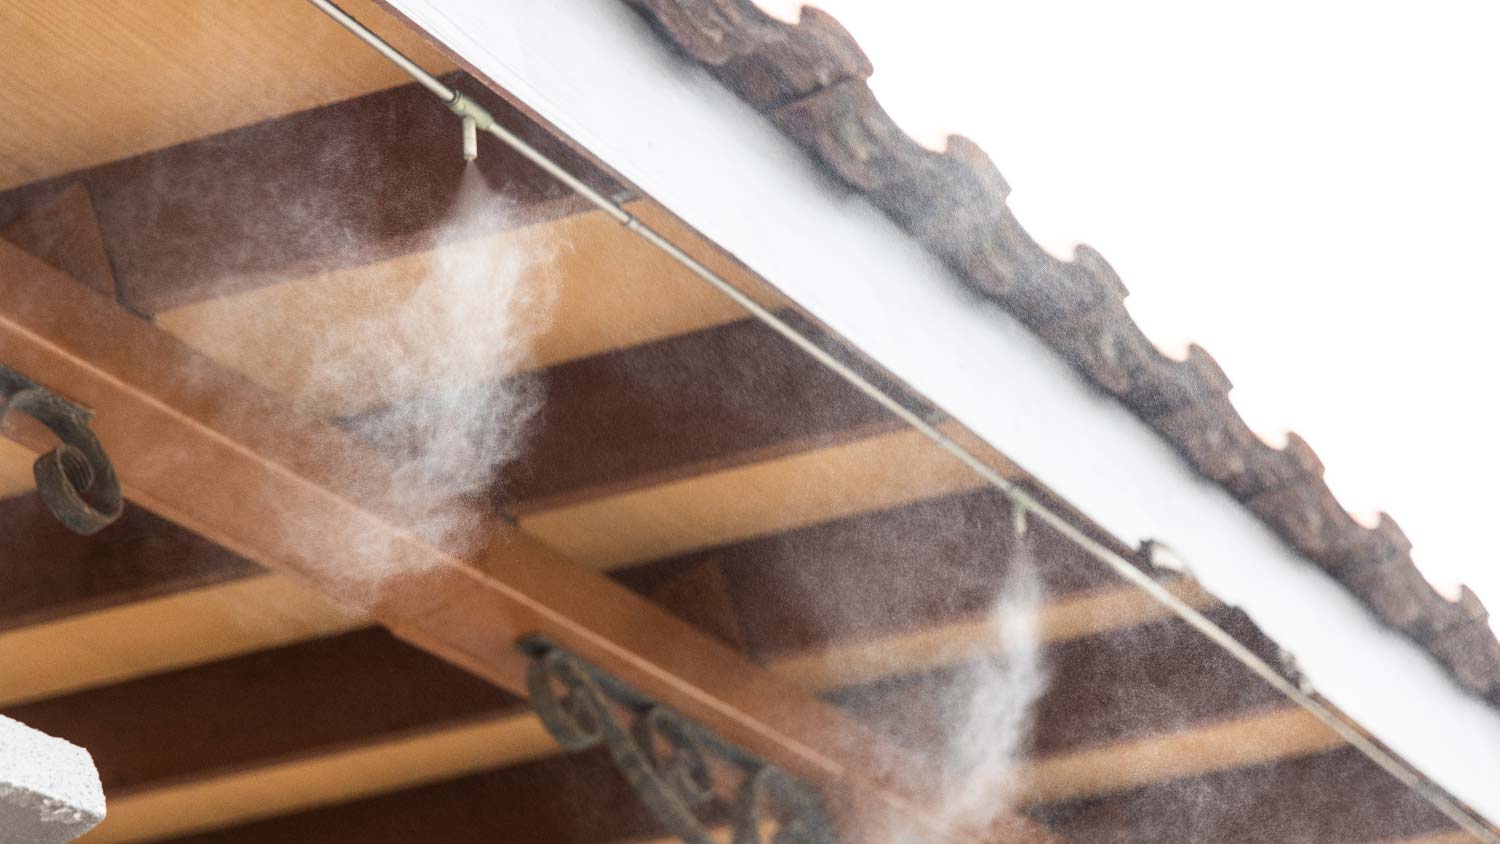
When summer heat starts sweltering and temps rise toward the triple digits, you may consider learning how to install a misting system to save the day. These misters spray pressurized water into the air to help cool people in the yard, remove pollen, and refresh nearby plants.
While a misting system can be very effective, it’s also a significant expense and takes serious planning. Here’s what you need to know about the process, necessary supplies, and if you should hire a professional sprinkler installer.
An outdoor misting system is an increasingly common addition to patios, porches, and decks in areas with some of the hottest climates. (You’ve probably seen them at outdoor venues as well.) When installed properly, misters can address several problems, including:
General heat tolerance: Misters don’t lower the general temperature, but they place cool water on our skin and other surfaces, which then evaporates. That draws heat away and helps everything feel cooler. In the right conditions (especially less humid heat), it can lower experienced temperatures by up to 15 degrees or more.
Watering plants: Casual cooling misters can’t really give deck or patio plants with all the water they need unless you’re strictly working with low-water succulents. But they can help keep plants healthier and less likely to wilt in extreme heat.
Preventing burns: Pavers, vinyl, fiberglass and other materials can grow very hot in the summer. The evaporation and moisture from misters helps cool them down and make them safer to walk on in bare feet.
Energy efficiency: An outdoor fan or evaporative cooler can’t do much against oppressive heat, but it can chew through electricity. Misters generally accomplish better cooling while using significantly less energy.
Some pest control: Misters won’t prevent every bug, especially determined, larger insects. But they can create a barrier that can help keep small bugs like gnats out of an area. Bees and wasps tend to avoid misters, too. Some misters ward off mosquitos with insecticide but these should not be used around people.
Some allergen control: The water vapor can also attach to allergen particles like pollen and prevent them from traveling through the air. This process can cut down on allergens spread in the area and may help reduce some associated symptoms.
The good news is that you can buy a full misting kit with almost everything necessary to install a mister on your own. However, these installations often require working with your home’s plumbing and electrical systems, which is not for a novice DIYer. Instead, consider hiring a local sprinkler installation company with experience in misting systems. You can expect to pay between $1,900 and $3,550 for an outdoor misting system, including labor and the necessary permits.
Start with several preparation steps for misters before you start making final hiring decisions:
Before you commit to a specific layout or location, inspect all nearby materials to check if they are susceptible to water damage or moisture problems. The last thing you want is for nearby outdoor seating to develop mildew or for vulnerable wood to start blistering and cracking. Misters don’t produce a lot of water, but over time they can affect nearby surfaces.
Check on the chosen surface several times per day during the spring and summer. You’ll want a good idea of what surfaces get the most sun exposure as you start planning your layout.
Take a look at local guidelines for permits. Some states with particularly hot summers or water usage concerns require permits for installing these kinds of misting systems.
Ahead of the installation days, remove all plants, pots, outdoor furniture, décor, and other objects from the space and give it a thorough cleaning.
When you’re ready to install your water misting system, follow these steps for the best results.
A water tank may take more work, but it makes installing the pump easier and you can choose to fill it with distilled water to help keep the misting lines clean. A connection to your home water supply takes extra installation steps and may limit where you can put the pump. But you have a continuous source of water with less maintenance.
Before making a final decision, consider the water in your area. If it’s hard water and known to cause scaling problems, you may want to choose a water tank option instead. Distilled water is more expensive over time, but it will keep your misting system from breaking down.
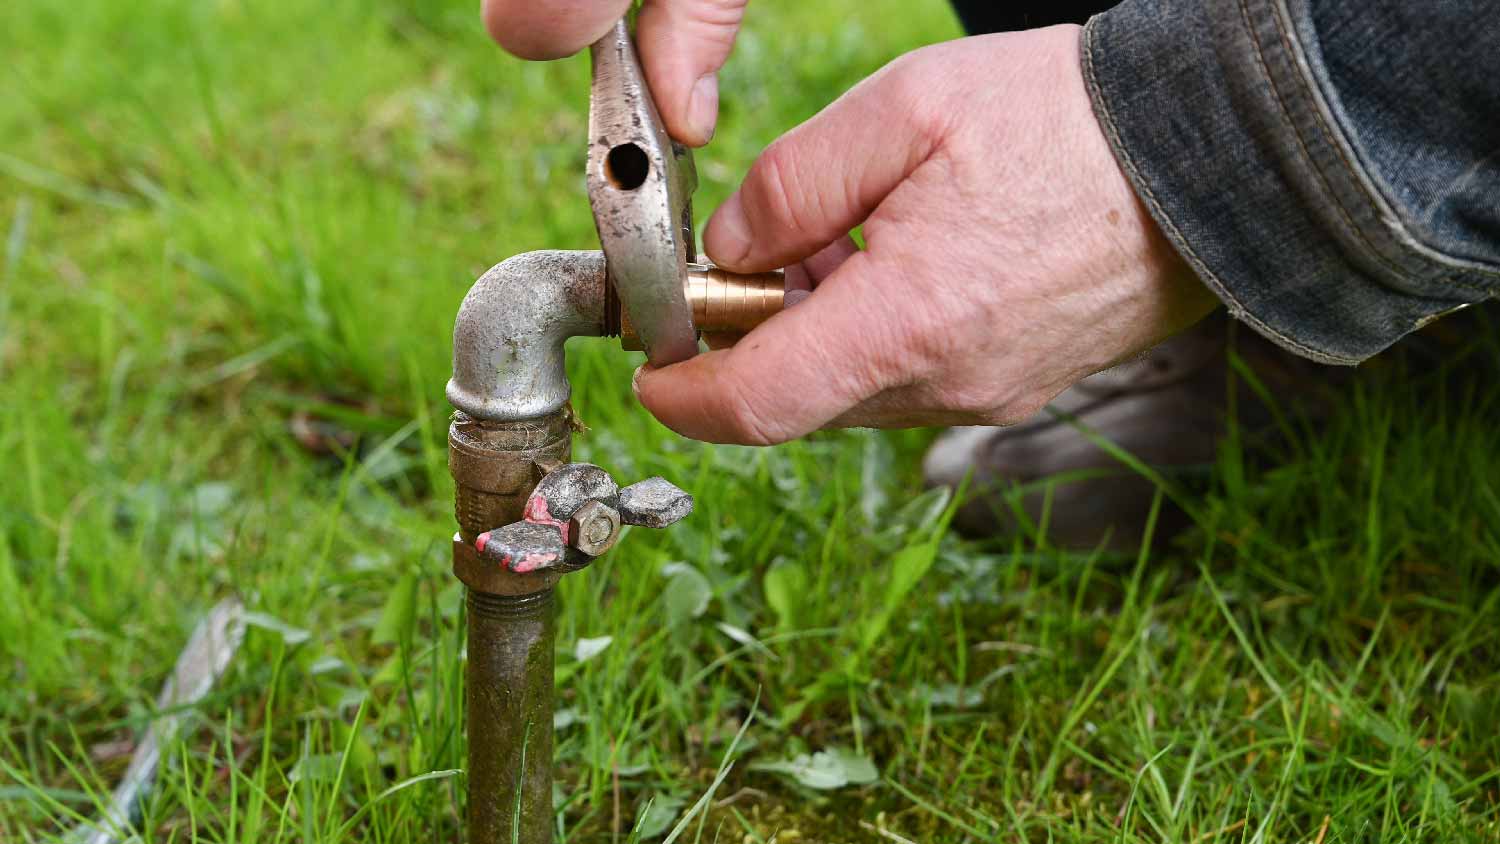
Choose the installation site for your pump. Make sure it’s close enough to water and power connections. If necessary, contact local contractors to install a junction box or hook up plumbing. Pumps need to be on a level surface free of puddles or dust, so prepare a space accordingly. A cement floor or similar surface is recommended.
Take out the tape measure and carefully measure the route that your mister tubing will take along your patio, deck, porch, or other outdoor area. Considering where misters will be most effective. In many cases, the best spot for misting tubing is at the edge of the space, where the mist can spray freely without dampening exterior walls. Plan on placing misters around 8 to 10 feet high.
As you measure for the network, look for spaces where you can screw or nail in brackets, which are vital to system stability. Mark down the numbers as you prepare to buy.
The misting pump must provide enough pressure to dispel water in mist form. That can vary based on the size of your misting system, but it shouldn’t require a commercial-level pump. Look for pumps rated specifically for home misting systems.
High pressure systems typically use pumps rated around 1,000 to 1,500 PSI, but those are relegated to commercial use. Several hundred PSI is enough to power home systems.
Based on your measurements, purchase tubing and connectors that will work with your pump, including a sturdy end cap, joint adhesive, and other important components. Plastic or nylon mist tubing can suffer from durability issues over time. The hardiest tubing is made from stainless steel or copper piping, but it’s more expensive and will take more work to install. Some people use a combination of both. If you want a system that will last for years, it’s better to choose durable metal piping.
Purchase the proper-sized brackets. You can find adhesive brackets, but we suggest nail or screw versions for outdoor tubing. If you are building from a misting system kit, it should include the pump as well as the tubing, brackets, and nozzles. This helps simplify buying choices, but it’s important to purchase a kit with enough tubing and the right-size pump for your plans.
Install the pump and filtration system in the chosen location. Connect it to your power supply and your water line. Remember, this task is best handled by a professional sprinkler installer. If you are using a water tank, place and connect it. This step can vary, but pumps that connect to outdoor plugs are the easiest to install as a DIY project. Connect the filtration system as you set up the pump. (If the pump has an internal filtration system, this step should be easy.)
The drain valve automatically drains the system when not in use (usually into a nearby lawn or flowerbed). That feature helps relieve pressure, remove standing water, and maintain the system. It’s a common part of misting kits and you should install it in your tubing as you begin to connect your network.
You can choose when to attach misting nozzles to your tubing network. In some cases, it’s easier to attach nozzles as you go, such as with stainless steel piping sections. For other kinds of tubing, you may want to install the nozzles first as you lay the tubing in a clean spot.
However, installing nozzles after you bracket the tubing allows you to choose their placement more carefully, especially if you’re working between columns or awnings. Either way, space the misters around three feet or so apart. Tubing or pipe cutters may be necessary for this step.
If you are using plastic or nylon tubing, do not poke holes in the tubing for water to spray from. That works for drip irrigation—it does not work for misters where water is under higher pressure.
Run the tubing along your route and bracket it every few feet for stability. This step will involve some careful ladder work with a drill and hammer, so take the necessary ladder precautions. If you’re using flexible tubing, make sure it’s drawn flush to the surface.
As you connect and bracket your tubing, check that the nozzles are pointing downward. In some cases, you can point them slightly inwards toward your space, but straight down tends to cover the most area. Keep nozzles away from nearby walls.
Once the tubing is placed, turn on the connect pump and run water through the system for about a minute or two on very low pressure. This flushes out the pump, filter, and tubing, preparing them for use without the danger of sudden clogs. Cap the tubing and turn on the nozzles when you are finished.
Now you’re ready to mist! Start the pump on low pressure and increase until your nozzles are spraying a fine mist. Adjust nozzles as necessary for effect and direction. Check that nearby surfaces aren’t getting constantly soaked, which could cause moisture damage.
Misters work best with a solid installation and proper maintenance. Follow these tips to help prevent future problems and improve performance.
Avoid direct sunlight: Sunlight will eventually damage tubing and nozzles, especially those made from plastic components. Keep your tubing out of direct sunlight whenever possible. If you can’t, choose tubing materials that are highly rated against UV damage or come with extra layers.
Use cleaning solution: You can purchase mist cleaning solution or use a solution of water with some white vinegar. Remove any rubber components and soak your nozzles in this cleaning solution for an hour or so, once every year or two. This helps keep nozzles from dripping and cleans up any hidden dirt.
Use a water filter: A water filter is a very important part of a misting system. It keeps the system from getting clogged and discourages the growth of bacteria, as well as preventing damage to the pump.
Use distilled water: Distilled water is free of all bacteria and doesn’t have the minerals that can cause buildup in the system.
Install a cutoff valve: A cutoff valve allows you to quickly shut down the system if it springs a leak or runs into other serious problems, lessening damage.
Shield from the wind: Wind can blow a lot of dust into your nozzles, creating problems over time. Keep tubing out of the wind as much as possible.
Plan maintenance and flushing: Every year or so, clean your pump, clean out your filtration system and replace filters as needed, and flush out the system. Frequently depends on how much you use the system and how exposed it is to contaminants.
Add a timer to the system: A timer helps automate the system and makes sure it gets turned off. It’s even more important if you have nearby plants that depend on the misters to stay healthy.
Add adjacent fans: Fans help push mist away from corners or walls toward people and plants. A well-positioned fan can help a misting system work safely.
DIY mister projects depend largely on the pump connections. If you have prior experience installing a pump, connecting it to a water supply, and connecting it to a source of power, then the rest of the task is well within your reach.
However, since pump installation requires more technical work, like running electrical lines and obtaining the associated permits, we advise homeowners to trust professional sprinkler companies with this installation. A professional installation will likely cost between $1,900 and $3,550. Before you make a final decision, arrange for an inspection and get a couple of estimates from nearby outdoor contractors. It may be possible to pay only for a pump installation and handle the tubing yourself to save money.
From average costs to expert advice, get all the answers you need to get your job done.
Discover the cost to winterize a sprinkler system, including average prices, key cost factors, and tips to save. Learn what impacts your estimate and how to budget.

If your sprinkler system isn’t working, it may be time for a new pump. Find out sprinkler pump replacement costs with this guide.

Discover the average outdoor misting system cost, key price factors, and ways to save. Get transparent, expert-backed estimates for your installation.

Learning how to convert your sprinkler to drip irrigation saves you money on water use and reduces weed growth. Follow this guide to learn how to do it.

From convenience to consistent watering, there are many benefits of sprinkler systems—but there are also drawbacks. Here’s what to consider before installation.

Your backflow preventer is a critical component of your irrigation system, so it needs regular checkups that can only be done by a professional. Here’s who to call.