

Warm floors, warm feet. Learn how much radiant heated floor costs, types of radiant floor heating systems, and pros and cons.
Winter won’t seem so harsh once you upgrade to cozy heated floors


Installing heated floors costs $1,500 to $6,500 on average, and hiring a pro ensures the job is done safely and efficiently.
While it’s possible to DIY this project, some aspects require specialized knowledge.
Due to safety risks, tasks such as connecting a hydronic system to your boiler or wiring a control box into your electrical system should be performed by a local flooring pro.
Heated floor installation is a complex process and, if done incorrectly, involves potential risks such as electrical or water leaks.
Heated floors banish chilly feet during the winter months. This type of heat, also known as radiant floor heat, can act as a primary or supplementary heat source. While not a project for beginners, a quick guide on how to install heated floors can give you a good idea of whether or not you are ready to make the jump to a warmer, cozier life.
Heated floors or radiant heated floors refer to when either an electric mat or tubing for heated water is installed underneath the flooring. The mat or tubing is attached to a thermostat, so you can adjust the heat to varying degrees and in different areas, based on your temperature preferences. This type of flooring is popular in bathrooms and similarly small spaces. It is often laid under tile, which can feel very cold otherwise, but is able to absorb and radiate the heat.
The easiest heated floor installation happens during a new build as part of the general construction process. You can install it in an existing home, but this will include pulling up the old floor. This type of floor installation takes time and attention to detail and requires potential skills in both electrical and plumbing, depending on the type of heated floor you install.
On average, heated floors cost $3,800 for a fully heated floor system. However, the price of heat floors can fall much lower if you are doing a small room, like a bathroom, entryway, office, or a partial area. Several factors influence the price, including:
Size of the room
Flooring type laid over the heating system
Type of radiant heat flooring system
If you contact a local flooring company for installation, you will need to factor in labor, which can run between $550 and $2,500. There may be additional costs when working with a professional, such as the cost of site preparation and debris disposal.
If you are building a new home, preparation includes cleaning the subfloor and room where installation will occur and removing any debris that could puncture the heating system. A renovation project that includes heated floors, however, will require significantly more preparation, including removing the existing flooring.
Floor removal could mean cutting and pulling up old carpet or chipping away at grout and tile, but these materials have to be completely removed to access the subfloor. The subfloor should be in good condition. Look for cracks, warping, or any other damage that could undermine the integrity of new flooring, like excess moisture on concrete. It should also be flat and even from one side to the other.
Lastly, DIY radiant heated flooring will require access to power and/or water. In some cases, you may need to rewire and, in others, the system will need to connect to a water heater. That could involve drilling holes through walls or installing a manifold that controls the water that enters and exits the heating system.
The two most popular types of heated floors are electric and hydronic. Both will be covered in this DIY guide. Other types of heated flooring that are less common (and not included in this guide) are geothermal in-floor heating, solar radiant heating, and propane underfloor heating.
Geothermal and solar radiant heating are similar to hydronic heated floors in that they use pipes through which a heated fluid (sometimes water) circulates, which also makes their installation similar. Their differences lie in the energy source: A hydronic system connects to a water heater to warm the water before it circulates through the flooring, while geothermal and solar-heated floors use these alternate energy sources.
Talk to an electrician (or test the electrical system yourself) before installing electric heated floors to make sure the existing wiring can handle the new power demands. Before installing any electric heated floors, keep these safety factors in mind:
Read through the manufacturer’s instructions that come with the system.
Check whether the heated flooring system has integral Ground Fault Circuit Interrupter (GFCI) protection or if it requires Arc Fault Circuit Interrupter (AFCI) or GFCI protection through a circuit breaker.
Turn off the power to the area before installing the system control unit, which includes the on/off switch, timer, and/or thermostat.
Keep the power off while connecting any wiring.
Check all local building and electrical codes.
Installation will then depend on the type of system you have, either loose cable or mats.
Install appropriate wiring: This could include installing a 12 or 14 AWG feed wire from the circuit or breaker that provides power to the electrical box.
Decide on the installation pattern: You can lay the wire in a close pattern to shorten the time it takes to heat the floor or space the wire further apart to reduce the amount of wire used.
Install tile backer board over the subfloor: The backer board reduces the amount of mortar needed.
Install end channels: End channels are spacers that help keep the layout consistent. You can place the wire closer or further apart in the channels based on how warm you want the floor to get.
Lay the wire: Secure the wire with hot glue or pneumatic staples every six inches to keep the wire in place when laying the mortar.
Cover the cable with thin-set mortar: Be very careful when spreading the mortar. A trowel can easily nick the wire, causing the entire system to fail.
Let the mortar cure: Mortar may take a few days to cure.
(Optional) Apply a second layer of thin-set to smooth the floor: Thin-set mortar shrinks as it cures, so you might need to apply a second layer to even out the surface.
Install your flooring of choice: Thin-set mortar can work for a floating floor or ceramic tile, but it will not create a smooth enough surface for vinyl.
Install the appropriate wiring needed for the control box.
Install the end channels—the spacers used to create a uniform pattern for the cable.
Lay the cable, securing it every six inches with hot set glue or staples.
Mix the self-leveling compound (SLC).
Pour the SLC over the wire and let it harden.
Install plastic lath to reinforce the SLC.
Install your flooring of choice, which can include tile, vinyl, a floating floor, or carpet with this type of heated floor.
Electric mats come in different dimensions and may be made of mesh or fiber. You can cut the mesh or fiber to fit the floor, but you cannot splice the wire, so consider your layout carefully before picking the mat size and making any cuts.
Install appropriate wiring: Connect a feed wire, 12 or 14 AWG, from the breaker or circuit that will provide power to the electric box.
Test the mat with a multimeter: Check the mat with a multimeter to make sure it is working according to the manufacturer’s instructions before installation.
Lay the mat: Place the mat so the power lead on the mat reaches the electrical box.
Roll out the mat or mesh: Follow the manufacturer’s instructions for layout guidance. For example, some mats cannot be laid within four to six inches of plumbing or appliances. Electric mats should not be laid under baseboards or casings.
Use double-sided tape, pneumatic staples, or hot glue to secure the mat to the subfloor: Make sure any staples are at least ¼ inch from the wire.
Feed the temperature sensors and power lead to the electrical box: This should be simple if the mat is laid correctly.
Notch the floor: Create a notch in the floor into which you can fit the factory splice so that it is flush with the mesh.
Connect the power lead: Make sure the power is off. Connect the power lead from the mat to the feed wire.
Connect the controls: Again, make sure the power is off. Connect the heating mat’s power lead to the feed wire. Connect the thermostat and controls following the manufacturer’s instructions.
Mix thin-set mortar or SLC, and apply: Apply a thin-set mortar or self-leveling compound to encase the mat.
Let the SLC or mortar cure: Curing times may vary, and you might need to apply a second layer of mortar.
Install your flooring of choice: This type of heated floor is appropriate for hardwood floors, carpet, or laminate. Keep in mind that the type of flooring you choose will affect the floor installation costs.

Installing a hydronic system blends electrical, concrete, and plumbing skills, which are each complicated in and of themselves. If you have experience in one area, you might consider DIYing part of the installation and calling in a pro for the areas where you do not have experience.
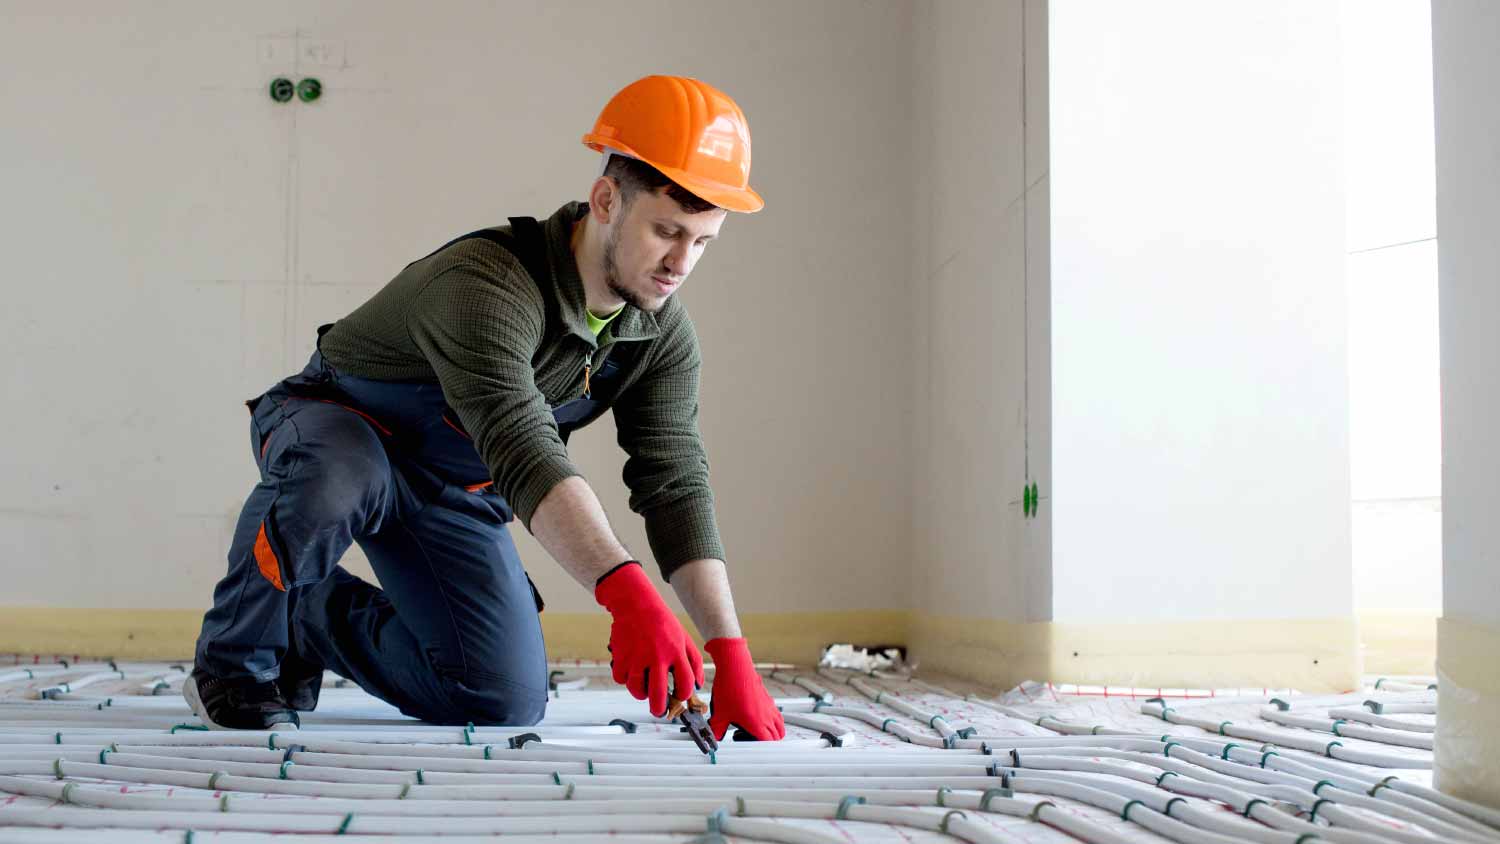
We have chosen one of the simplest methods for hydronic heated floors. You will need a special underlayment called BEKOTEC-THERM. It comes in panels that fit together and have polystyrene studs through which you loop PEX tubing. The studs eliminate the need to tie the tubing to a wire mesh laid over the subfloor.
Before you begin laying the BEKOTEC-THERM, consult a local plumber about installing a manifold to control the water as it comes from the boiler or water heater. Drill two holes in the wall where the tubing can pass in and out to connect to the water manifold.
Use the following steps to complete the installation:
Level the floor (optional): Use a leveling compound if the floor is uneven.
Install foam edging: Install foam edging around the edge of the room so the BEKOTEC-THERM panels fit tightly.
Lay the first row of panels on the floor: Match the panels up and click them together.
Trim the last panel in each row to fit the room: Measure the width of the last panel and trim one side for a snug fit.
Continue to lay the panels: Repeat the process of laying and clicking the panels in place until the floor is covered.
Decide the tube spacing: The studs on the panels create easy spacing options that include layouts that leave the tubing six, nine, or 12 inches apart.
Lay the tubing: Gently snap the tubing between studs. Leave a few extra feet by the hole where the tubing will pass to connect to the water manifold. Be careful not to crush the studs because they hold the tubing in place. Use at least two studs on turns to prevent kinks. You can lay the tubing closer together around cold spots, like windows or doors.
End with the opposite end of the tube near the holds that connect to the water manifold: Leave a few feet of extra tubing to connect to the manifold.
Connect to the water manifold: Connect the tubing to the water manifold. If you do not have experience with plumbing, this is the part that you may want to hand over to a plumber.
Check the water pressure: You want to catch any leaks before you cover the tubing.
Mix concrete: Mix a “dry pack” of concrete with a 5:1 ratio of sand to standard Portland cement.
Spread the concrete: Spread the concrete over the panels and tubing. You want at least 5/16 inch of cement above the studs.
Let the concrete cure: Curing can take several days, depending on the temperature and humidity.
Install your flooring: Install your flooring of choice.
The best thing you can do to maintain heated floors is to properly maintain the flooring you put on top. If you have hardwood floors, follow the manufacturer’s instructions, which typically include avoiding harsh cleaners. If you have carpet, tile, linoleum, or something else, taking care of it will protect the heating system below. If you need to repair your floors, be extra careful and check to make sure there is no damage to the heating system underneath.
Installing heated floors can be expensive, especially if you install them throughout your home. There are portions of the installation process that you can easily do yourself to save money, like removing old flooring or evening out the subfloor. Other parts, such as connecting a hydronic system to your boiler or correctly wiring a control box into your electrical system, are often better left to the pros unless you have experience in plumbing or electrical work. The costs will go up if you use a professional, but the pros will follow local building codes and have experience with the more complicated aspects of installation.
From average costs to expert advice, get all the answers you need to get your job done.
Warm floors, warm feet. Learn how much radiant heated floor costs, types of radiant floor heating systems, and pros and cons.
Find out the average vinyl floor repair cost, key price factors, and ways to save. Get accurate estimates to plan your vinyl floor repair project.

Updated flooring can make any room in your home feel brand new. Explore flooring installation costs in St. Louis, MO, from materials to labor costs.

Looking to upgrade your kitchen with affordable kitchen flooring? From cork floors to vinyl, learn seven budget-friendly flooring options you’ll love that can stand up to traffic.

Vinyl flooring is affordable and DIY-friendly, whether you make a template or cut it in place. Learn how to install sheet vinyl flooring with this guide.

It can be easy to get overwhelmed when considering laminate flooring options. Use this guide to hone in on the best laminate flooring for your kitchen.