How to Paint Over Stained Wood in 7 Simple Steps
Refresh a deck or tired piece of furniture with these painting tips


- Power washer
- Ear plugs
- Dust mask
- Tack cloth
- Rubber gloves
There are many reasons you might want to paint over stained wood, but the most important one is the long-term protection of the underlying material. If the stain and varnish protectant system has been neglected over the years, you’ll likely need to start from scratch anyway, so why not go back over it with the classic primer and paint system? It’s a done deal if you do paint over stained wood, so be sure that you’re committed to the painted look before tackling the following steps.
Can You Paint Over Stained Wood?
You can paint over stained wood, but you must have the right supplies to do the job correctly. If you want to avoid using a chemical stripper, a bonding primer—available in water or oil-based formulas—is essential for coating wood-stained furniture or decks before painting. This primer promotes adhesion between the paint and the stained surface, no matter the type of paint you pick.
Stained wood often contains oils, resins, or other contaminants that can prevent paint from sticking properly. The bonding primer creates a stable surface for the paint to adhere to, ensuring better durability, coverage, and a smoother finish. Of course, you should only apply a bonding primer after sanding and cleaning.

How to Paint Over Stained Wood
Painting over stained wood? Starting from properly cleaning your deck or piece of furniture to applying the topcoat, here are the steps you need to follow.
Remove Loose Varnish
Taking a putty knife or paint scraper to the surface, gently remove any wood stain or varnish that immediately flakes or peels off from the wood. Be careful not to damage the wood. Concentrate on the big pieces, and don’t work too hard on this step—you just need to get the loose stuff. Your paint job over the wood surface will only be as good as the underlying material, so if the varnish has started to flake, powder, or bubble up off the wood, you’ll need to make an effort to remove as much as possible before painting over the stain, which will seal in what’s left. If you’re unsure of your capabilities to prep the service, hiring a local handyperson isn’t a bad idea for ensuring the job gets done correctly.
If the varnish adheres to the wood so that removal is impossible, creating enough “tooth” on the varnish with sandpaper or a power washer will enable primer and paint on top. If you use a power washer, let the wood cure out to be dry enough for primer and paint after you’ve injected water into it. If the job is a big one, you might consider bringing in a professional pressure washing service near you to handle this step for you.
Sand Entire Surface Area
Starting with 50- or 80-grit sandpaper, do a first pass of sanding across every square inch of the wood surface, again looking to remove loose varnish that breaks away fairly easily. On the second pass, use between 100- and 150-grit sandpaper to burnish the edges of old varnish and bare wood. The goal for the sanding step is to create a smooth transition between raw wood and the old finish by breaking down the barrier between them. In most cases, you’ll have some old varnish that stays in place, which is okay. Still, if you can get all of it off, you’ll be in better shape during the finishing process.
Clean With a Vacuum or Power Washer
At this point, you’ll have created a lot of dust and detritus as you work down toward the raw wood beneath the stain and varnish. To keep your hard work pristine in preparation for the final touches, you’ll want to vacuum up all small particles in this step. To take it to the next level, use a tack cloth to zap up every bit of microscopic powder.
Let Wood Cure
If you’ve used a power washer to remove some of the finish, you’ll need at least two weeks of dry air to be sure you’ve let the wood dry out before moving to the priming step. Close injection of water into porous wood can easily take an entire season of dry weather to cure, so use pressure washers with this in mind. Everything will fail in a couple of years if you are too aggressive with powerful machines like these.
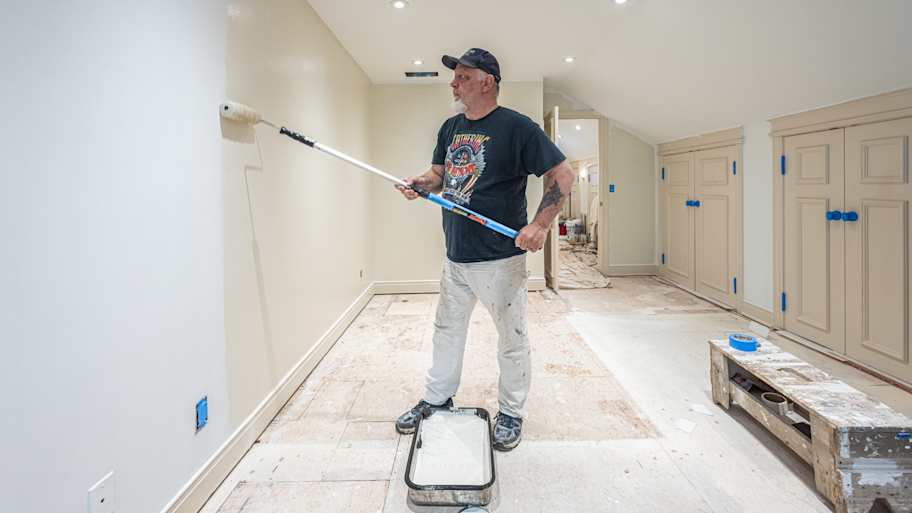
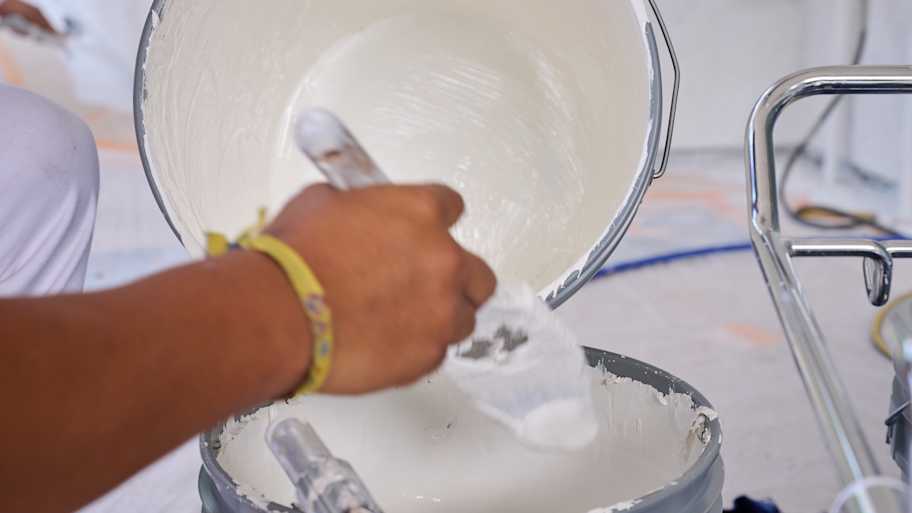
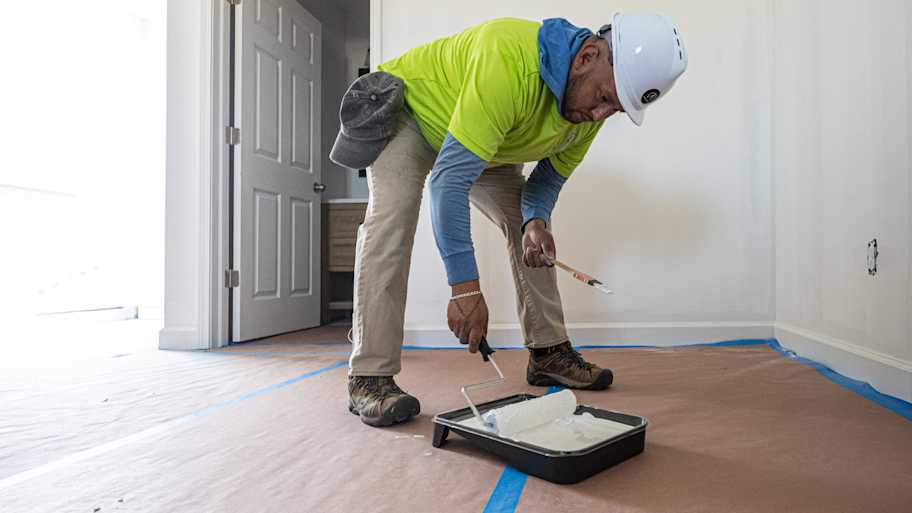
Prime Wood With a Quality Oil Primer
 Photo: Supersmario / iStock / Getty Images Plus / Getty Images
There are two things oil primer provides that a water-born product does not: penetration and durability. While it’s messy and not necessarily the most environmentally friendly material to use, you can minimize both situations if handled correctly. You’ll want to wear gloves—and if you’re working in an enclosed space, use a respirator—but this liquid is your best chance to create an environment conducive to covering up old stain with paint. Proper disposal of the waste product from clean-up, commonly done by letting it dry out or delivering it to a local recycling company, is imperative. Thoroughly paint the surface with the primer to ensure a quality base coat that will last more than a few years.
Clean Up Defects and Caulk Seams
Once the primer is dried, you’ll go back over your work with a keen eye on imperfections and visually unappealing cracks or seams. If you’re particularly picky, sand everything once more, vacuum, and go back over everything with caulking or wood filler. This is your last chance to make the final finish perfect.
Select the Best Paint Type for Your Project
The paint type for different wood surfaces depends on the application and desired finish. Always consider the wood's location, exposure to elements, and the desired aesthetic when choosing the best paint type for your project. Proper surface preparation, priming, and sealing will ensure the paint adheres well and provides long-lasting results. Remember, while it is tempting to skip the primer, you will be happier with the results if you don't.
Here are some common wood surfaces and the best paint types for each.
Interior Wood (Furniture, Trim, Cabinets)
Water-based interior latex paint is ideal for most interior wood surfaces due to its low odor, easy cleanup, and quick drying time. It provides a smooth finish and comes in various sheen levels, including satin, semi-gloss, or gloss finishes.
Exterior Wood Surfaces (Decks, Doors, and Porches)
Exterior latex paint is resistant to weather, UV rays, and moisture, making it the ideal paint for outdoor wood surfaces. It comes in various finishes and provides good longevity.
Exterior oil-based paint offers superior durability and protection against the elements. It's especially suitable for areas lacking shade or cover from the elements.
Epoxy paint forms a waterproof and impermeable surface when properly applied. This feature makes it ideal for decks exposed to moisture, such as those near pools or in areas with frequent rain or humidity. It is also resistant to various chemicals, including oils, grease, and harsh cleaning agents.
Non-skid paint is your solution for ensuring surefootedness on decks, steps, and any outdoor wood surfaces where you want to avoid slipping. These paints create an enduring, non-slip texture that feels comfortable underfoot and is a breeze to clean.
Interior Wood Floors
Always reach for paints specifically designed for interior wood floors. These paints are durable and resistant to foot traffic and abrasion. They are available in both water-based and oil-based options.
Vintage or Distressed Furniture Finish
Chalk paint is famous for achieving a distressed or aged look on furniture. It adheres nicely to wood and can be easily distressed for a rustic finish.
DIY vs. Hiring a Pro
The additional tools and materials needed for a DIY wood painting job, like a power washer and chemical strippers, make this a project suited for a local professional painter. Preparing the surface for painting requires attention to detail that can easily muck up the project if not done properly.
The work involved in removing a bad paint job is immense and can more than triple the cost to make it right after the fact. If you opt for the DIY route in painting over stained wood, pay particular attention to the preparation side of the equation. The top coat is the fun and easy part; it’s all the steps before that are the difference between a professional end product and one clearly done by a novice.
Cost to Hire a Professional Painter
When considering the cost of hiring a professional painting team, you can expect to pay approximately $2 to $6 per square foot or an hourly rate of around $25 to $100 per painter. This pricing covers both the application of primer and the actual painting.
The cost to paint a deck depends on its size, ranging from $2 to $5 per square foot. Depending on factors like deck condition, length, style, paint type, and whether you DIY or hire a pro, costs may vary between $500 and $2,000.
Kristin Luna contributed to this article.
Frequently Asked Questions
Since you’ll be going back over an oil-based paint (stain or varnish), you need the proper material for good adhesion. Using an oil primer is critical to ensuring that the longevity of your work stands the test of time. You can apply any type of paint (oil or latex paint) on top of an oil primer after it has cured.
To evaluate whether you can paint the old wood stain and varnish, closely examine the entire surface to check for rot, mold, or moisture intrusion. Repair any damage with a good wood filler and scrape or sand any loose material until you have a uniform surface.
If you don’t want to follow a two-step priming and painting process and instead would like to keep the varnished wood look but your old coating has failed, it’s possible to go back over the stained wood with a solid stain product, which is a blend of color pigments and varnish.
Solid stain applies like paint, is typically oil-based, and will hide many imperfections, particularly with two coats. With colors ranging from deep purple, blues, red, and shades of tan and white, solid stain is one method to reduce the amount of work required to recover stained wood, but the look isn’t for everyone. Preparation steps are the same for solid stain applications as for paint products.
Painting over polyurethane without sanding is not advisable. Sanding, followed by priming, is pivotal in ensuring proper adhesion of the new paint. Sanding creates a rough surface that allows the primer to adhere firmly, which helps paint cure correctly, providing a long-lasting and smooth finish. Neglecting thorough sanding, followed by a paint primer, could lead to the paint not adhering effectively, causing peeling or uneven application.


Get our Angi-powered app


