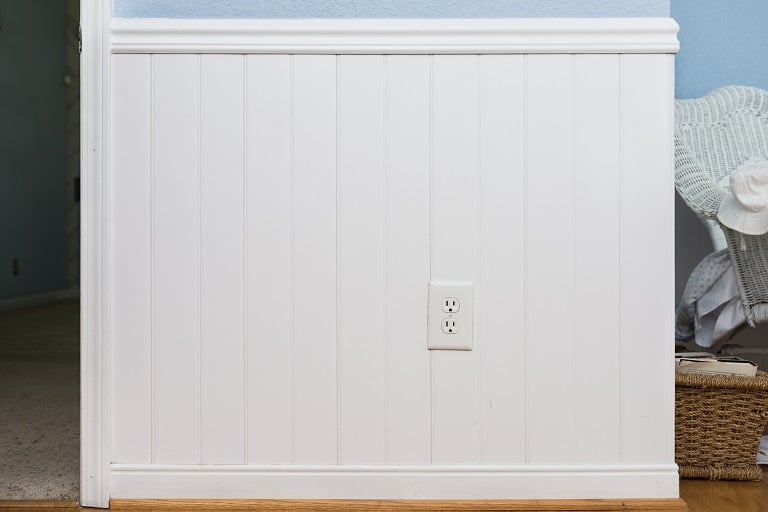
Beadboard Paneling Is a ‘Groove’-y Way to Add Charm to Your Home
Beadboard paneling is wood paneling with vertical grooves often installed on ceilings or walls.


Beadboard paneling is the most common style of wainscoting, giving any room a classic cottage or stylish bungalow feel. So if you’re looking for a quick and budget-friendly way to give your space a fresh look, beadboard is an excellent option. And if you’re handy, you can even install it yourself.
Beadboard Characteristics
Beadboard paneling can give your home a certain je ne sais quoi. The vertical grooves can make any home look fresh and stylish. Swanky bungalow? Check. Country style cottage? Check. Breezy summer lake house? Check!
Designers introduced beadboard as paneling for interior walls in the 1800s. Since then, homeowners have gravitated towards the material because it offers a layer of insulation, acts as a form of protection against cosmetic damage, and looks chic. Today, it’s used in homes of all types.
Fresh, unpainted beadboard is white, but you can paint or stain it to match any aesthetic. White panels offer a beachy feel, while blues or greens can give your space a more country cottage vibe.
Beadboard planks are most commonly made from pine. To create a beadboard panel, tongue and groove assemblies join a series of thin wooden pine strips together to form a panel. Using adhesive, a hammer and nails, you can attach the panels to your wall or ceiling.
What Is the Difference Between Wainscoting and Beadboard?
Beadboard and wainscoting are practically one and the same. Some people even use the terms interchangeably, though there is a key distinction.
Wainscoting is a broad term that refers to decorative paneling used to protect a wall, act as insulation, and add an accent. It’s installed to cover the lower portion of an interior wall and is generally made from wood, and can be numerous styles.
Beadboard is the most common type of wainscoting. It’s characterized by long, vertical panels and raised “beads,” small indentations or ridges between each plank. Homeowners often apply beadboard paneling to the lower portion of interior walls or to the ceiling to give a home character.
Other types of wood paneling include shiplap, board and batten, and raised panel wainscoting. While each has its own unique style, they are all part of the wainscoting fam.
How to Install Beadboard Paneling
Hiring a pro to install your beadboard paneling for you will take less than a day, requiring little to no effort on your part. Plus, professionals come with the experience necessary to make your beadboard paneling look perfect. If you’d rather relax with a glass of lemonade than worry about precise measurements and power tools, hiring a pro is a good idea.
But you do have the option of installing it yourself as long as your woodworking skill level is somewhere between “beginner” and “intermediate.” The project will take a day or two, possibly longer depending on how much paneling you choose to install.
Here’s how to do it:
1. Prep Your Space
You’ll need to pick out your paneling, measure the space where you’re installing it, and prep your walls or ceiling by dusting and cleaning them. Don’t forget to remove old baseboards and outlet covers, too.
2. Find Any Studs
Use a stud finder to locate studs in the area you’ll be installing the beadboard. The top and bottom of the paneling will be held in place by a cap rail and a baseboard nailed into the studs. Mark the studs with a pencil.
3. Apply the Beadboard
Make sure all of your wainscoting is the exact same length and begin gluing it to your wall or ceiling. Use construction adhesion and wood glue to help everything stick.
Continue gluing more panels together, sliding the tongues into the grooves. Wherever a board is over a stud, use a nail gun or a hammer to nail it into place. Tie everything together by nailing in the finishing touches, the cap rail and baseboard.
Voila! Your transformed space is now Instagram-worthy.

Pros and Cons of Beadboard Paneling
As with everything, beadboard paneling isn’t the go-to answer for everyone. Make sure you know the benefits (and setbacks) before adding it to your home.
Pros
Affordable
Easy to install
Looks good
Compared to other ceiling or wall treatments, beadboard is inexpensive. So if you’re ready to give your space a makeover on a budget, beadboard is one of your best options. And if you know your way around a tape measure and saw, you can cut costs even more by installing it yourself. There are DIY beadboard installation kits on the market if you decide to go that route, but there’s no shame in hiring a pro either.
Cons
Takes commitment
Tedious to remove
Can rot or warp
Beadboard paneling is a statement, especially if you install it on your ceiling. It isn’t a subtle accent, so be positive you love it before moving forward with installation.
If you decide beadboard isn’t right for you, it’s a pain to remove. Not only will you have to remove panels one by one, but you’ll also be left with a ton of nail holes scattered on your wall or ceiling that you’ll need to meticulously cover with caulk.
You’ll be in the same boat if your beadboard is exposed to a water leak (leaky ceilings are often the culprit) or if it’s in a humid environment. These could deform the beadboard paneling and warrant a full paneling repair or replacement.
How Much Does Beadboard Paneling Cost?
Beadboard paneling made with real wood costs about $1 per square foot. Imitation versions are cheaper at about $0.50 to $0.75 per square foot. Finishing pieces, including caps and baseboards, cost $0.30 to $2.50 per square foot.
If you’re worried about getting your beadboard just right, consider calling in a pro. Contractors will charge $4 to $6 per square foot to install beadboard paneling.
If you’re handy, you may decide to install your beadboard yourself. If you can install everything the right way on the first try, you can save up to 50% on the project.


- Everything to Know About Shiplap vs. Beadboard So You Can Choose the Best One for Your Home
- 18 Stylish Wall Paneling Ideas
- How to Cover Wood Paneling: 4 Simple Methods
- 15 Charming Wainscoting Ideas for Every Room in Your Home
- The 6 Best Types of Wainscoting for Your Home
- 12 Alternatives to Drywall for Your Renovation
- What Is the Right Bathroom Wainscoting Height?
- 22 Wall Covering Ideas to Add Interest to Your Rooms
- Where to Put Knobs and Handles on Kitchen Cabinets: Tips to Nail Your Hardware Placement
- How to Build a House: Your Complete Guide to the Home-Building Process


