Discover the leading factors affecting your main water line replacement cost in Columbus, including length, material selection, and installation details.
Get your drink on, not your ice on


Failing to address frozen pipes quickly can lead to pipe bursts and extensive water damage.
Using a blowtorch incorrectly can also cause a pipe to burst.
Misusing heating elements near water can also create electrocution risks.
A professional plumber comes equipped with professional-grade heating cables, pipe thawing machines, and insulation materials that provide faster, more reliable results than DIY methods.
If you turn on your faucet after a night of severe winter weather and nothing comes out, it’s possible that you’re dealing with frozen well pipes. In the case of well water, it is common for pipes leading from the well to freeze, even when the well water itself remains fluid. Wells are typically too deep to freeze, and the same goes for insulated well pumps. Pipes, on the other hand, are fragile things that freeze with little warning. Once you find these frozen pipes connected to your home, you have some thawing options.
Just as the sun sets and rises each day, pipes freeze when exposed to extremely cold weather. This is true of any home plumbing system, whether the water sources from a nearby reservoir, a standard aquifer, or even a well. The actual wells do a great job at resisting winter freeze, as they are dug below the freezing line. Well pumps are also typically placed below the freezing line and insulated to boot. The pipes that lead from the well to your home, however, are not below the freezing line and, as such, are subject to the mercurial whims of nature.
Before fixing the issue and basking in the glow of flowing tap water, you need to find the frozen pipe and pipe sections. Turn off the water supply to the house. Start by looking along the exterior of your home or exactly where the pipes enter the home’s foundation from the well. Look for bulging sections that indicate pipe expansion due to ice or any exposed pipes covered in frost or ice. Cracks are another tell-tale sign of a frozen pipe.
If the pipe leads behind a wall, check the wall for frost and condensation, which could indicate the pipe has frozen over. Make a note of any likely segments in your system with frozen pipes. This comes in handy later.
So now you know your pipes are frozen and you even have a pretty good idea as to the location of the freeze. Here are some methods for fixing frozen well water pipes. As a note, keep heat sources on their lowest settings and never use something like a blowtorch for this task.

Wait, a simple hair dryer? It’s true, though this typically only works for exposed pipes.
Find the segment of exposed frozen pipe and bring along a hairdryer, heating pad, or even a heat lamp. Don’t forget a lengthy extension cord to power these appliances.
Simply place the heating element close to the frozen pipe, away from standing water, and power it onto a low setting.
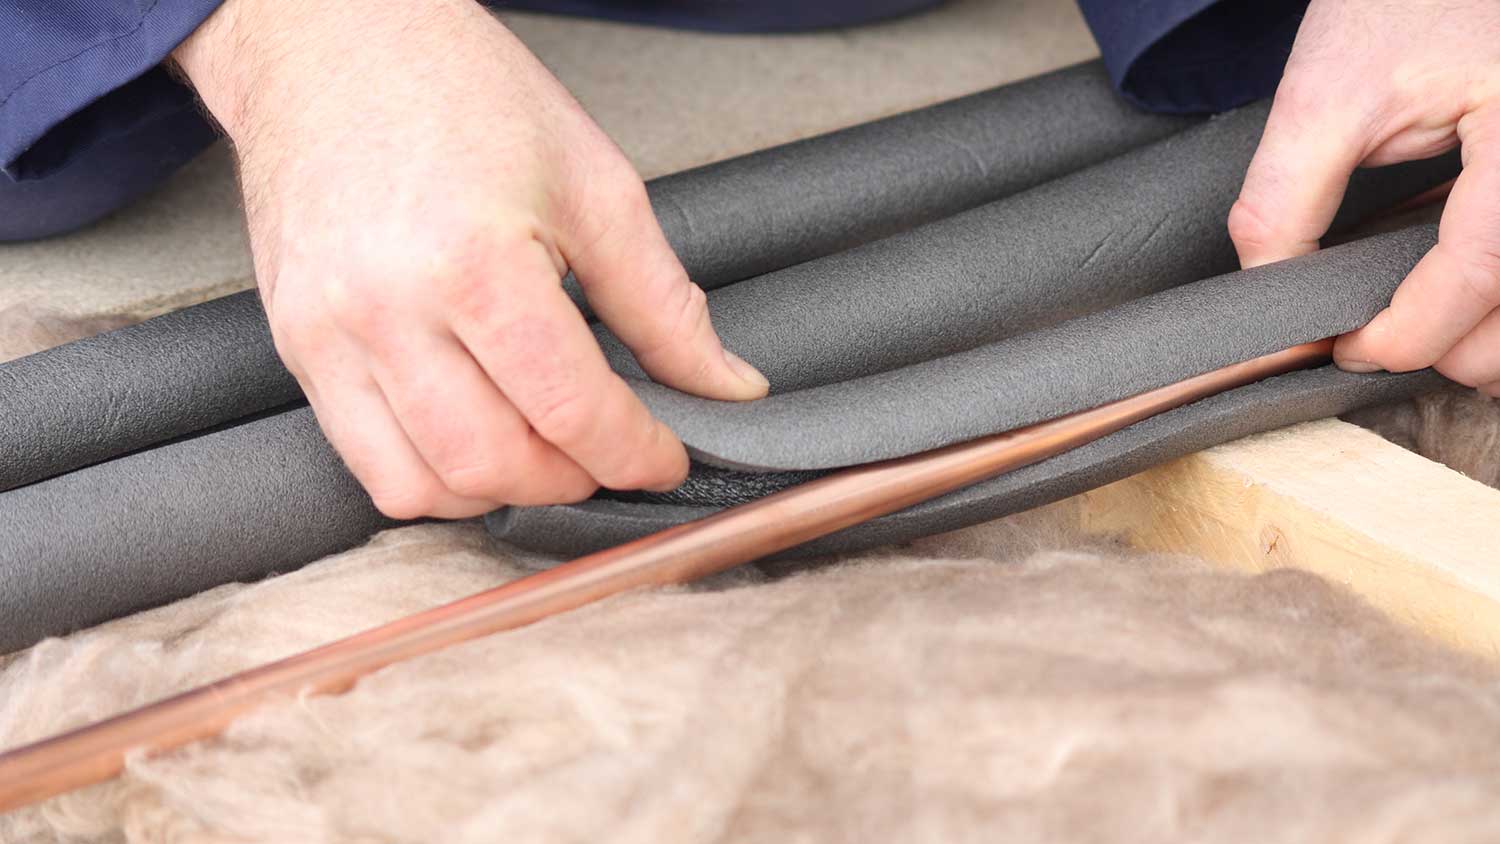
Once the pipe thaws, wrap the area in simple pipe insulation to minimize the risk of repeat performance. Turn the water on and test the flow.
In rare instances, this method works to thaw out pipes inside of a wall. Hold the heating element up to the wall and let it do its thing. This will take a lot longer than with an exposed pipe, if it even works at all.

For more extreme cases, a space heater does the trick. Again, this is for exposed pipes but could work for a pipe behind a thin wall given enough time.
Bring the space heater and an extension cord to the exposed pipe.
If you are getting a trickle from the faucet, leave the water on, as the flowing water can help speed up the thawing process. If there is a total blockage, turn the water off.
Place the heater on a stable surface away from standing water next to the pipe and power it onto a low setting. Now it is just a waiting game.
For slight freezes, the heater-assisted ambient air temperature could work its magic in just a half hour or so. Larger freezes take a few hours, so check on the heater every 15 minutes until the pipe thaws.
Test the water for adequate flow and cover the exposed pipe with insulation to prevent future mishaps.
If you desire a less-involved method to thaw out exposed pipes, use heating tape or heating cables.
Apply the tape or cable snugly in a single layer around the pipe. Go for more of a candy cane approach, wrapping in a single layer and moving up or down the pipe as needed.
Plug the cable or tape into a power outlet via an extension cord and let the heating elements do their thing. Give them several hours to work and keep these materials away from standing water.
A similar option involves soaking towels in hot water and wrapping them around the pipes, switching them out as the towels cool.
After a few hours, try running the faucet and seeing if the flow is improved.

Give frozen pipes behind walls a helping hand by raising the heat in your home.
Let the heat run for several hours, or even overnight, before testing for adequate water flow.
This does not work for outdoor exposed pipes.
If you strongly suspect your frozen pipe is behind a wall and cranking up the heat didn’t help, it is time for extreme measures.
Check your home’s blueprints to ensure the wall is not load-bearing and that there are no electrical lines directly beneath the excavation area.
Excavate a small area of the wall with enough room to approach the pipe with a hairdryer or related heating element.
This is done with a hammer or small sledgehammer, marking tape, a line level, and some sort of precision blade for finishing details.
Once excavated, try all of the above processes to thaw the pipe. Test for adequate water flow afterward.
Cover the pipe with insulation to prevent future incidents.
Patch the hole up with filler and a filling tool.

Now that your pipes are thawed and the water is flowing, take some precautionary steps to ensure this never happens again. Winter comes every year, so they say, and preparation is key.
Pipe insulation: The best precautionary step here is to cover any exposed pipes with winter-worthy pipe insulation materials. There are plenty to choose from. Do the same with pipes buried behind walls if you have access.
Install an insulated well box: An insulated well enclosure, otherwise called a well box, is a fantastic safety measure. Not only will these prevent the pump from freezing, but the insulating properties carry on to nearby pipes.
Insulate, insulate, insulate: Catching a theme here? It is not just the pipes that require insulation. Don’t forget any drafty areas of the home. Insulate basements, attics, and crawl spaces, among other locations. Insulate windows, doors, and other entrances.
Open up doors and cabinets: Open up interior doors and cabinets to help air circulate, especially during cold snaps. At the same time, make sure exterior doors like garage doors remain closed.
Let water trickle: During an extreme winter weather event, keep the faucet on to allow a light trickle. Moving water creates energy and friction, and this decreases the possibility of frozen pipes.
You have nothing to lose by going the DIY route at first, so long as you practice caution. These simple thawing methods run little risk of adding to the damage, but a hairdryer or space heater may simply lack the power to fix serious instances of frozen pipes. If you perform the above processes to no avail, contact a local plumber. These pros have the tools and expertise to thaw even the tundriest of pipes and, as a bonus, could suss out other problems with your plumbing system as they work.
From average costs to expert advice, get all the answers you need to get your job done.

Discover the leading factors affecting your main water line replacement cost in Columbus, including length, material selection, and installation details.

Learn about main water line repair costs in Columbus and what affects pricing to be prepared before you start getting estimates.

Learn how much plumbers cost in Columbus, Ohio. Discover pricing for faucet repairs, pipe work, and emergency services, plus how you can save money.

Installing a new kitchen sink involves removing the old sink and putting in the new one. Follow these steps to learn how to install a kitchen sink like a pro.

If your faucet hasn’t been working like it used to, you might need a replacement. Here’s how to replace a kitchen faucet like a plumbing pro.

Winter can be particularly harsh on your plumbing—from water heater issues to frozen pipes. As the weather gets chilly, use these tips to prepare your home and avoid a costly winter plumbing leak.