

Your dry rot repair cost will depend on factors such as the extent and size of the damage and its location within your home. Here's what you need to know.
Restore your home to a dry and undamaged state


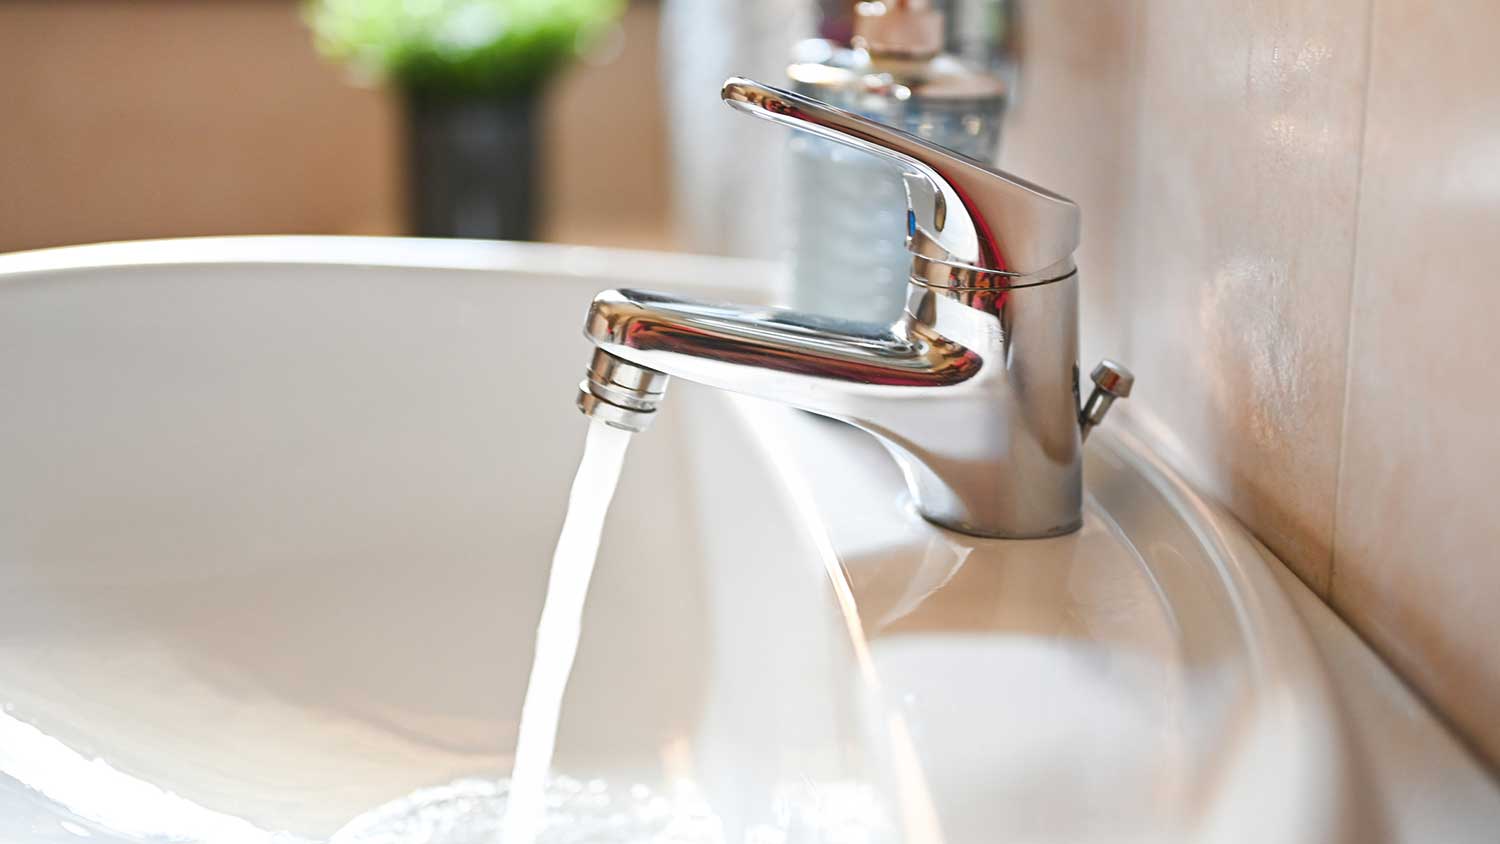
Water damage restoration starts with stopping the damage from worsening and drying the area to prevent mold growth.
The restoration process can vary greatly depending on the category of water damage.
The average cost of water damage restoration is $3,800, but prices can fall anywhere between $500 and $19,000, depending on the severity.
Make sure to have your home inspected for any mold or mildew following the cleanup.
Whether a pipe has burst or an environmental disaster has occurred, water damage restoration is paramount to reclaiming your peace of mind and your property's integrity. In this guide, we break down the water damage restoration process step by step so that you know what to expect and how long the cleanup and rebuild will take.
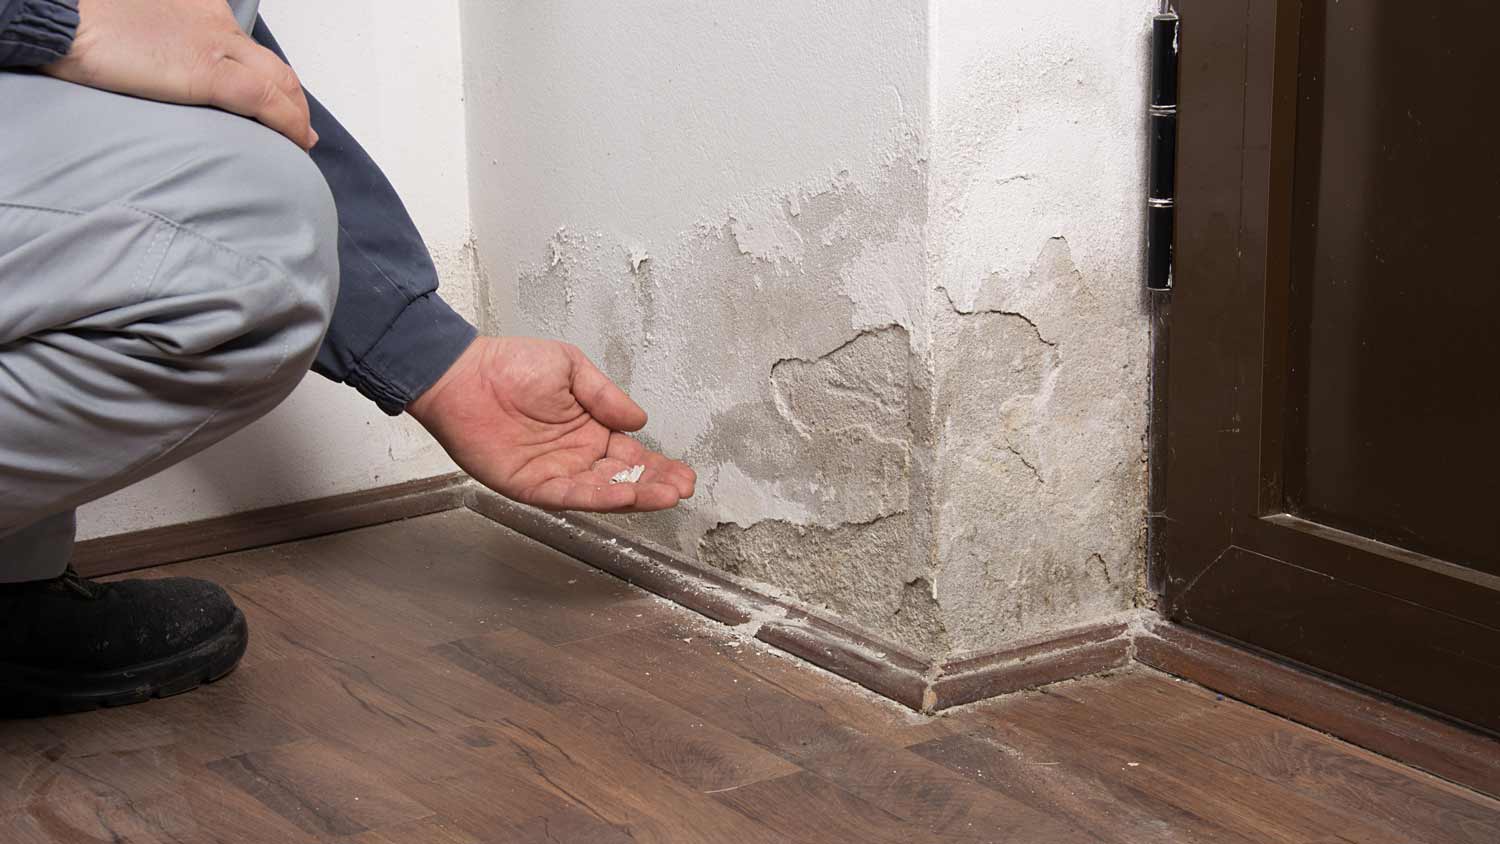
Water damage can occur following a plumbing leak or any kind of water intrusion, including roof leaks, leaks through windows and doors, moisture wicking through your foundation, and more. Similarly, the actual damage in your home can take many forms, including waterlogged building materials, warped floorboards, mold growth from the high moisture content, and even pest infestation.
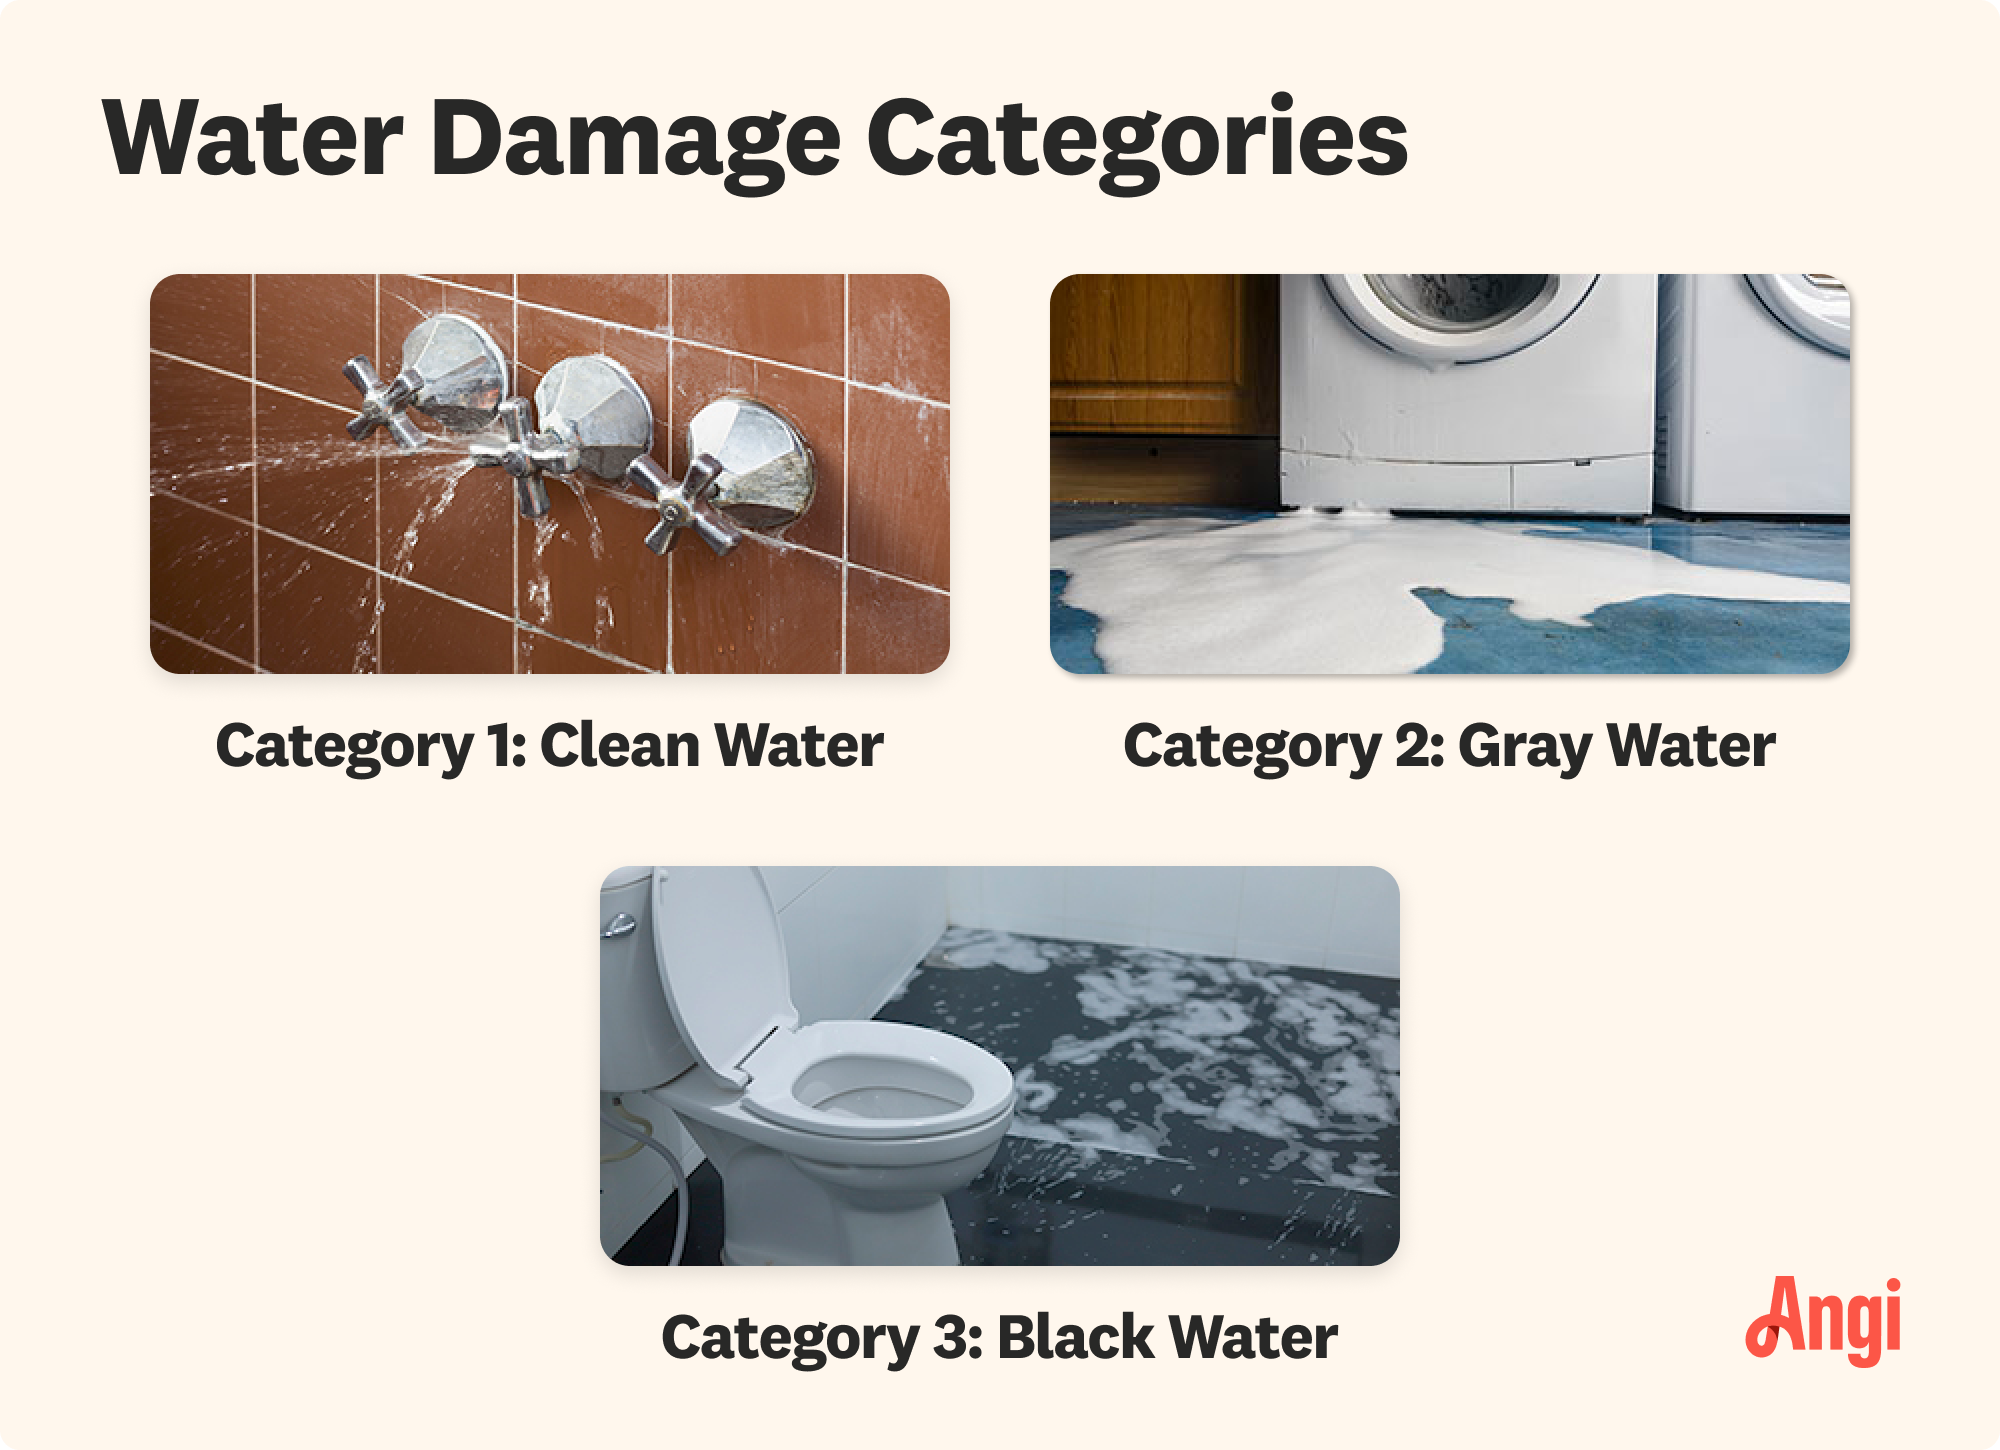
Just like hurricane categories, water damage is classified based on severity and the accompanying health risk. There are three categories of water damage.
Category one water damage indicates that the water came from a sanitary source, such as rain, melted ice, or plumbing supply lines. If inhaled or ingested, the water would not pose a major health risk. With this type of water damage, you can often dry out wet drywall, hardwood flooring, and other materials and salvage them, so you’re less likely to need full replacement or sanitization.
Category two water damage, also known as gray water damage, involves incidents with water that you’ve already used in your home for cleaning or bathing. This type of damage occurs when you have a leak from a drain line running from any plumbing fixture other than your toilet. The water isn’t safe to consume, but it doesn’t cause immediately hazardous conditions in your home. It’s best to add sanitization to the water damage restoration process if you’re dealing with category two damage.
As you can probably guess, category three is the most severe level of contaminated water; it is also known as black water damage. Category three water damage is caused by water that contains pathogenic, toxigenic, or other agents that can cause significant health reactions in humans if contacted or consumed. It might be from a sewer backup, a leak from your toilet, or infiltration from an overflowing river or stream and will require an extensive sanitization process. You’re more likely to have to remove materials that become waterlogged.
The water damage restoration process includes a few key steps that a local water damage restoration professional will carry out to avoid additional damage from occurring and to get your property back to its original condition.
The first thing your professional will do is find the source of the water and stop the problem from worsening. That could mean tarping a leaking roof, shutting the water main off, or taking other steps to stop water and moisture from continuing to enter your home. Your pro will do this first part of the water damage restoration process on an emergency basis.
Next, your professional will remove as much water as possible. They may use water pumps to pump out standing water, shop vacuums to remove puddles, and towels to pull some moisture out of building materials.
Once your expert addresses the underlying problem and removes the bulk of the water, they’ll inspect your home during the same trip to assess the damage. They’ll take note of all water-logged materials, assess the underlying problem, and determine what you’ll need to fix or replace to prevent it from happening again, come up with a plan to dry out your living space and develop a scope of work to restore it to its former condition.
Some furniture or building materials in your home may not be salvageable, so the water damage restoration specialist you hire will remove them as quickly as possible. This might include drywall, carpeting, furnishings, and other belongings. If an expert determines that there is no structural damage to your home, they will begin the process of drying out the property.
The water restoration specialist will use equipment to dry out large areas, such as blower fans and commercial-grade dehumidifiers. In addition, they might leave windows and doors open to encourage air circulation throughout your home. Most pros will monitor moisture levels during this step and will run fans and dehumidifiers for 24 to 72 hours.
Wearing PPE (personal protective equipment), the specialist will use professional equipment such as a HEPA vacuum, air scrubber, and negative air machines to sanitize the space. If your water damage was in categories 2 or 3, the professional will also clean surfaces with an antimicrobial solution. For category 3 water damage, your pro will more likely remove exposed materials like finished flooring and drywall below where the water reached and then sanitize the rest.
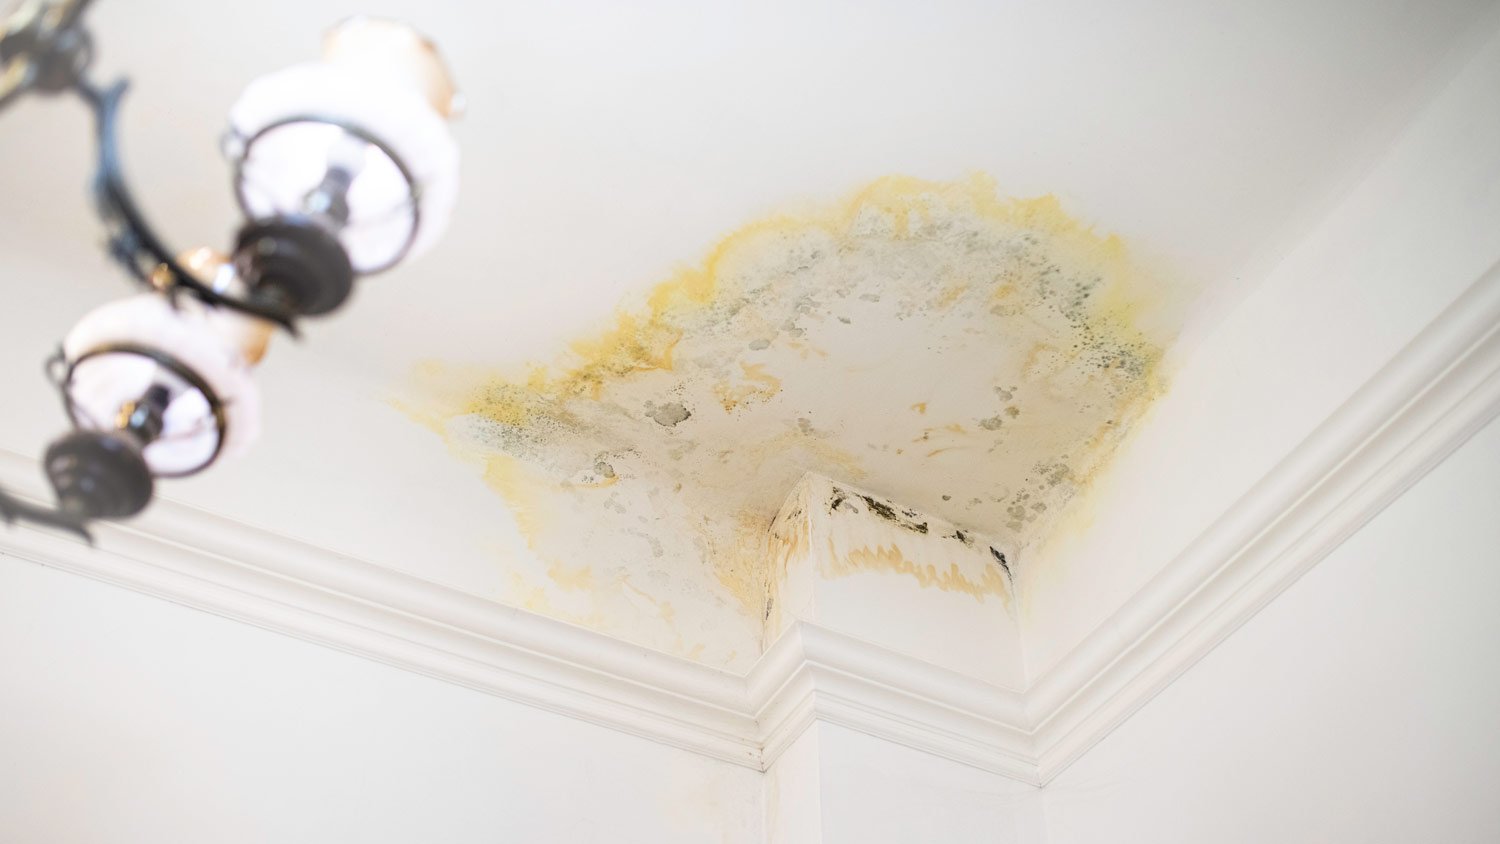
After the space is sanitized, the water damage expert will check the moisture levels in your home again using a humidity sensor. They’ll look for signs of mold growth and might recommend that a mold remediation expert come in to confirm there is no mold or mildew present. Even if they don’t recommend this, it’s always a good idea—mold and mildew can grow and spread quickly and are health hazards.
Once your home is as dry as it should always be, you can begin the process of repairing any damaged materials. This could mean replacing drywall and installing new carpeting or flooring, or it could include much more comprehensive repairs if the water and moisture caused structural repairs. Luckily, your homeowner’s insurance policy will likely cover the cost if the underlying issue wasn’t avoidable and was an accident. You should check your policy for specifics, though.
While the bulk of the work is done by this point, you and your pro will still need to take a few steps to safeguard you and your home in the future.
Complete a final moisture inspection: Your pro will begin by completing a final moisture assessment using humidity-sensing tools. This ensures that hidden moisture isn’t still contributing to a problem.
Have you sign off on the buildback: Your pro will walk the property with you to look at the work they completed and confirm you’re pleased with the final results.
Document work for insurance: The contractor will take “after” photos for your insurance company and will normally submit them themselves for approval. These will confirm for your insurer that the work they paid out for was completed according to the approved repair scope.
Provide advice to avoid water damage in the future: Finally, your professional will make recommendations on how to avoid future problems, depending on what caused the water damage in the first place. They may recommend installing a French drain outside, having plumbing inspections completed regularly, replacing your roof, and more.
Generally speaking, a smaller, local provider provides better customer service and may be able to customize the buildback they complete depending on what you’re looking for. Larger companies have a stronger reputation, tend to be more affordable, and have larger teams that can respond more quickly to emergencies. Choose whichever option you feel more comfortable with, but read through online reviews before deciding.
You should also pay attention to the services mentioned by the companies because some water damage is more severe than others and thus requires more advanced skills and equipment to achieve the best restoration results. Some companies also offer multiple services, such as water damage restoration and mold treatment or restoration and plumbing services. These companies may be able to tackle everything you need from start to finish rather than just handling the initial water removal and drying process.
If your needs are urgent, companies with 24/7 availability would be your best option. However, those companies often charge a higher rate for emergency services.
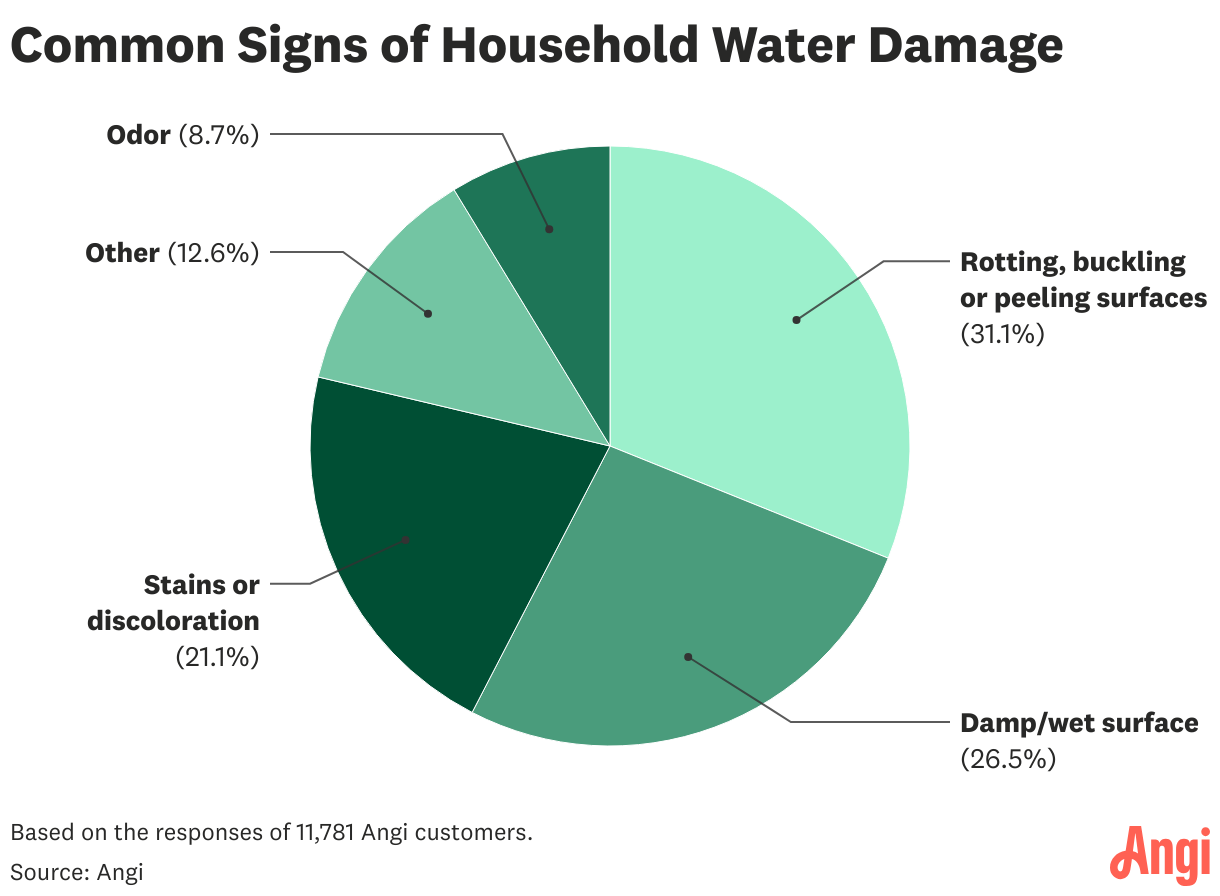
It’s important to catch water damage early. The most common signs that indicate you have a moisture problem are rotting, buckling, or peeling surfaces, which show up in 31% of cases. Damp or wet areas are also common indicators at 26.5%. Homeowners should also watch for staining, discoloration, and odor.
From average costs to expert advice, get all the answers you need to get your job done.
Your dry rot repair cost will depend on factors such as the extent and size of the damage and its location within your home. Here's what you need to know.

Ozone treatment can help with lingering smoke odors. Learn about ozone smoke removal costs to get an accurate idea of how to budget for this service.

Fire damage restoration costs vary widely based on the extent of the damage. Learn how to assess your home and estimate your total after a fire.
That plumbing leak in your home may just be the start of your issues. Learn how fast mold can grow after water damage and how to prevent it.

Protect your home from water damage with these 10 top tips. Prevent mold, mildew, and other problems that stem from water leaks and plumbing problems.
Water damage is classified by how much water there is and what materials are affected. Learn about the four classes of water damage and how to identify them.