
Curious about your home’s radiator replacement cost? Let’s discuss what affects the price of a new unit and how to determine if repairing or replacing is in order.
Too bad there isn’t an “on” button

When chilly temperatures set in, having a properly working heating system is of the utmost importance. If you have a steam heating system, you’ll also need to know how to turn on a radiator. This guide outlines eight simple steps to turn up the heat, plus some troubleshooting tips.
Complex, high-risk projects demand more than typical DIY projects. They require time, specialized tools, and trained expertise to make sure the job is done safely and correctly. We made it easy for you to find a local pro—with our skilled network, you'll get the job done without the stress of doing it yourself or significant safety risks.
Before turning on a radiator, ensure your heating system is off. You’ll turn your water-circulating or steam heat system on and off throughout this guide, so follow the steps carefully. When turning the system off, wait for the radiator to cool down completely before proceeding with the next step to avoid injury.
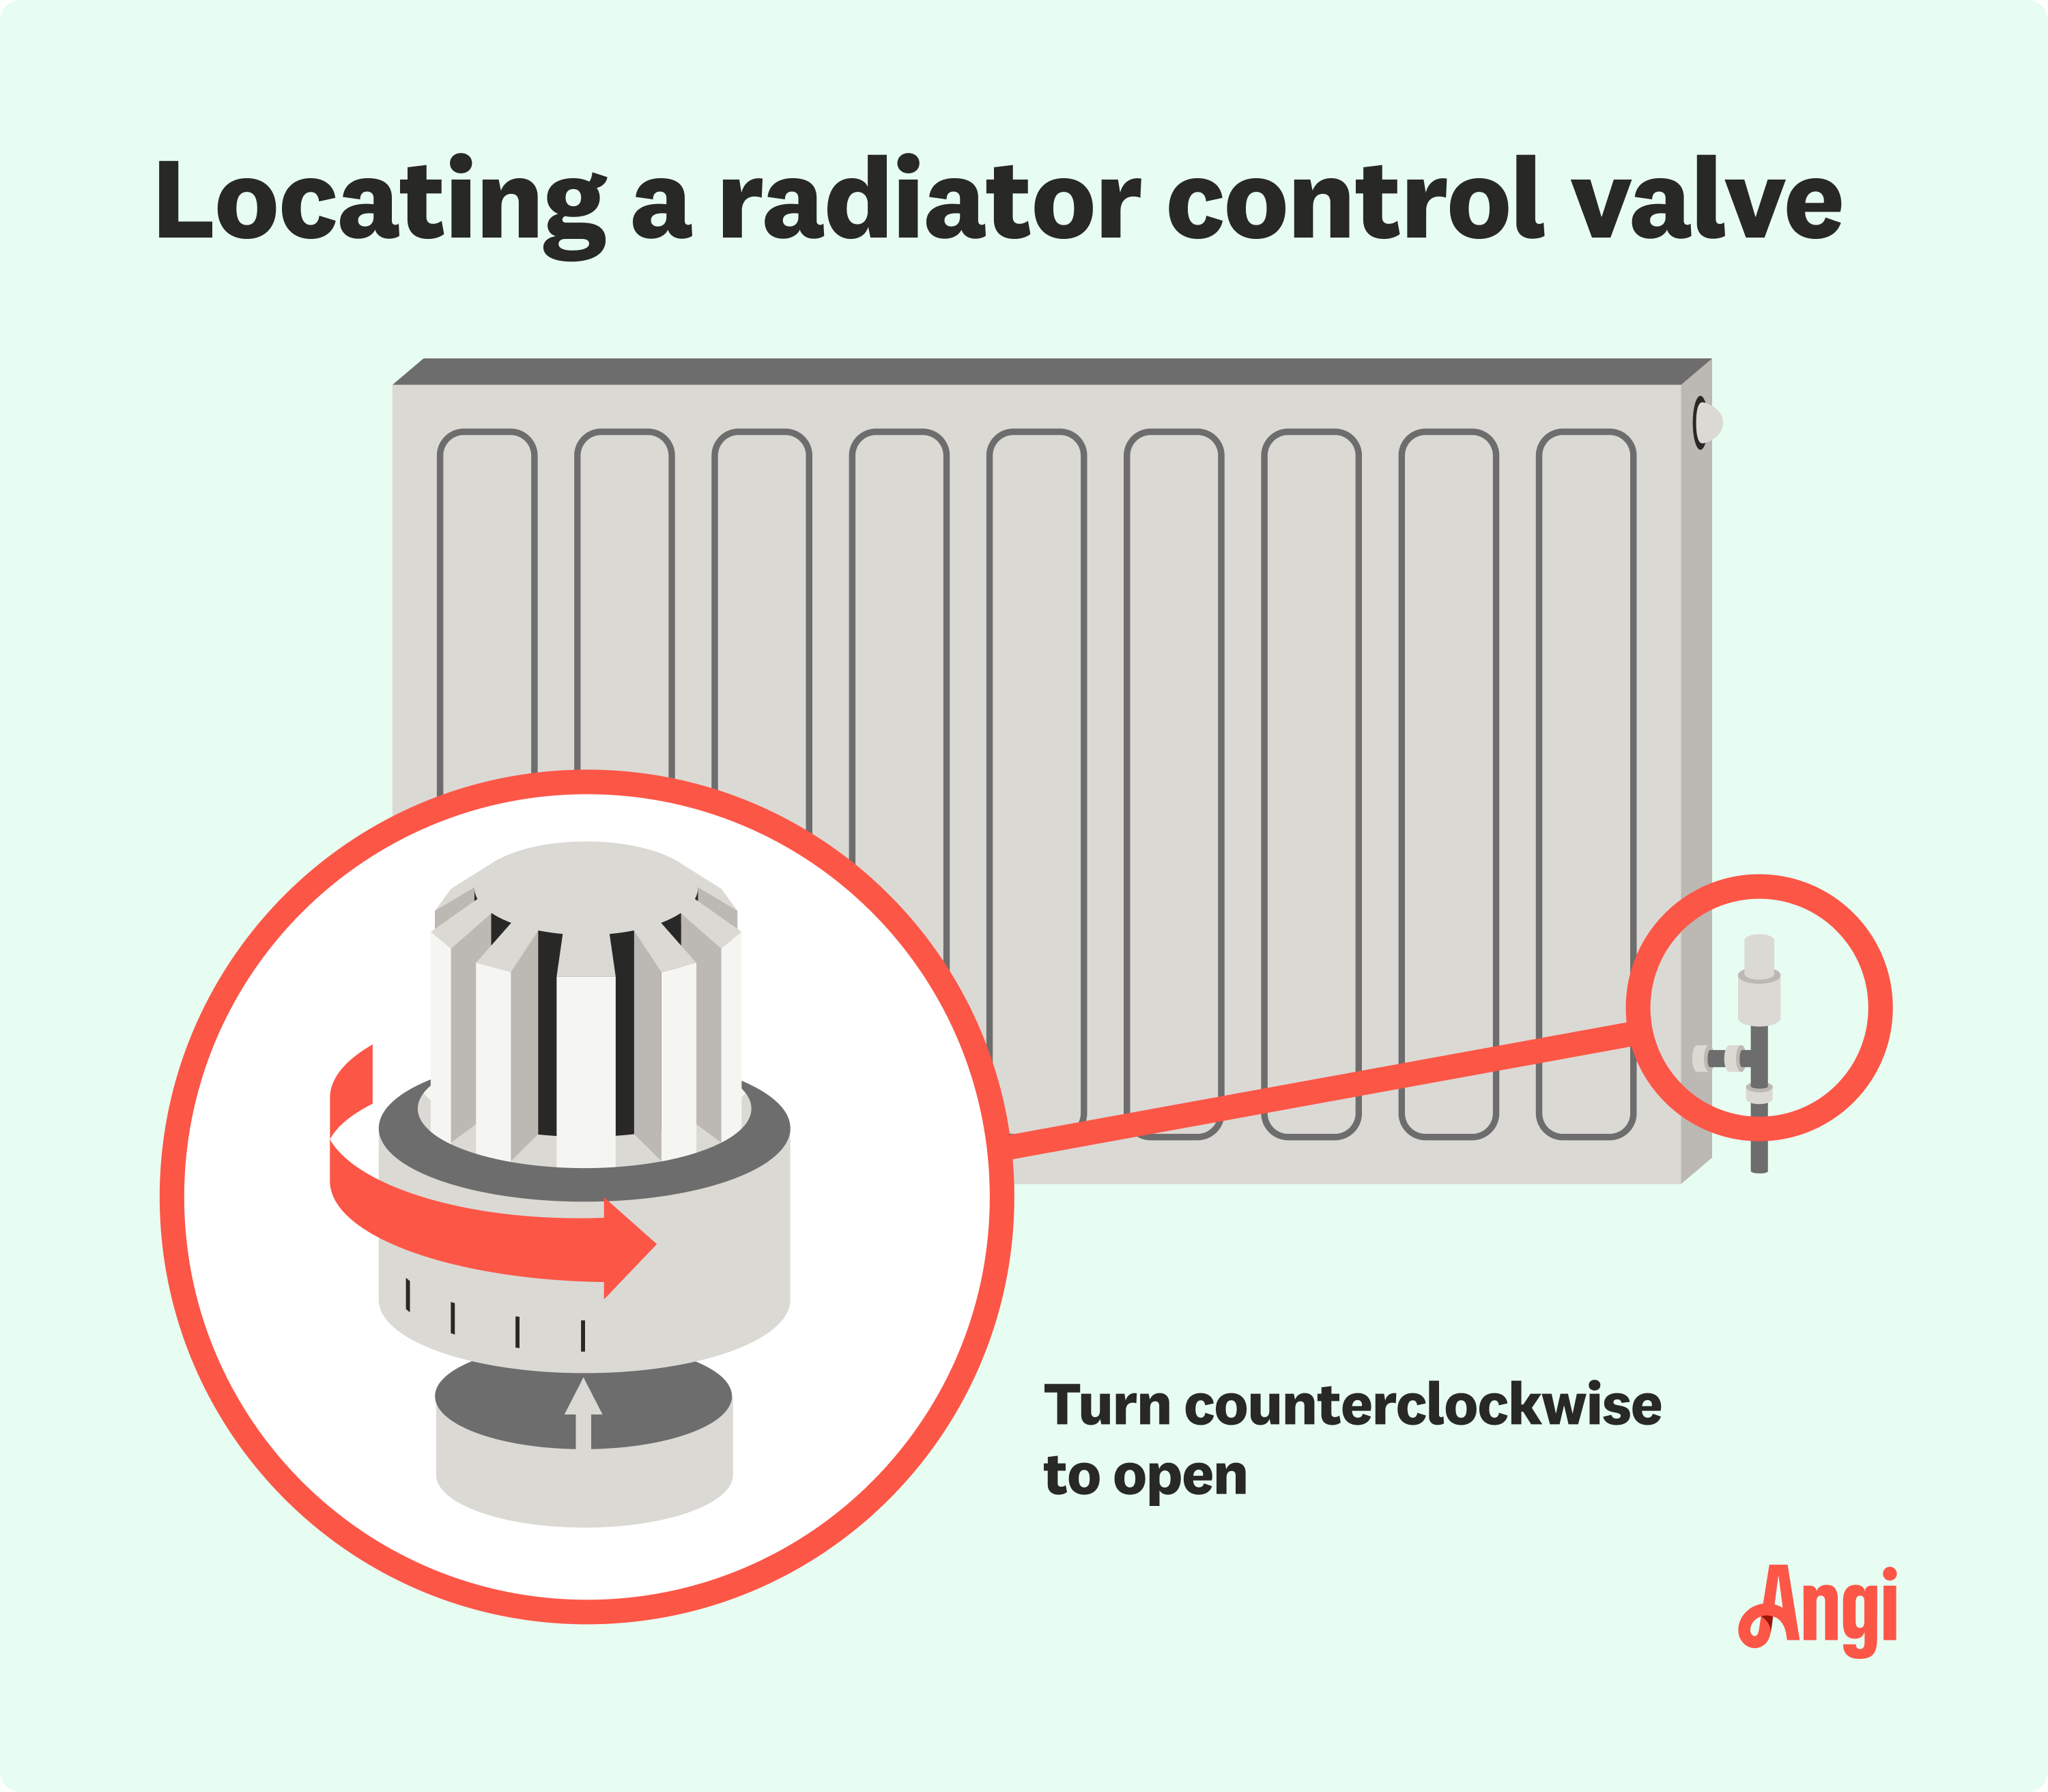
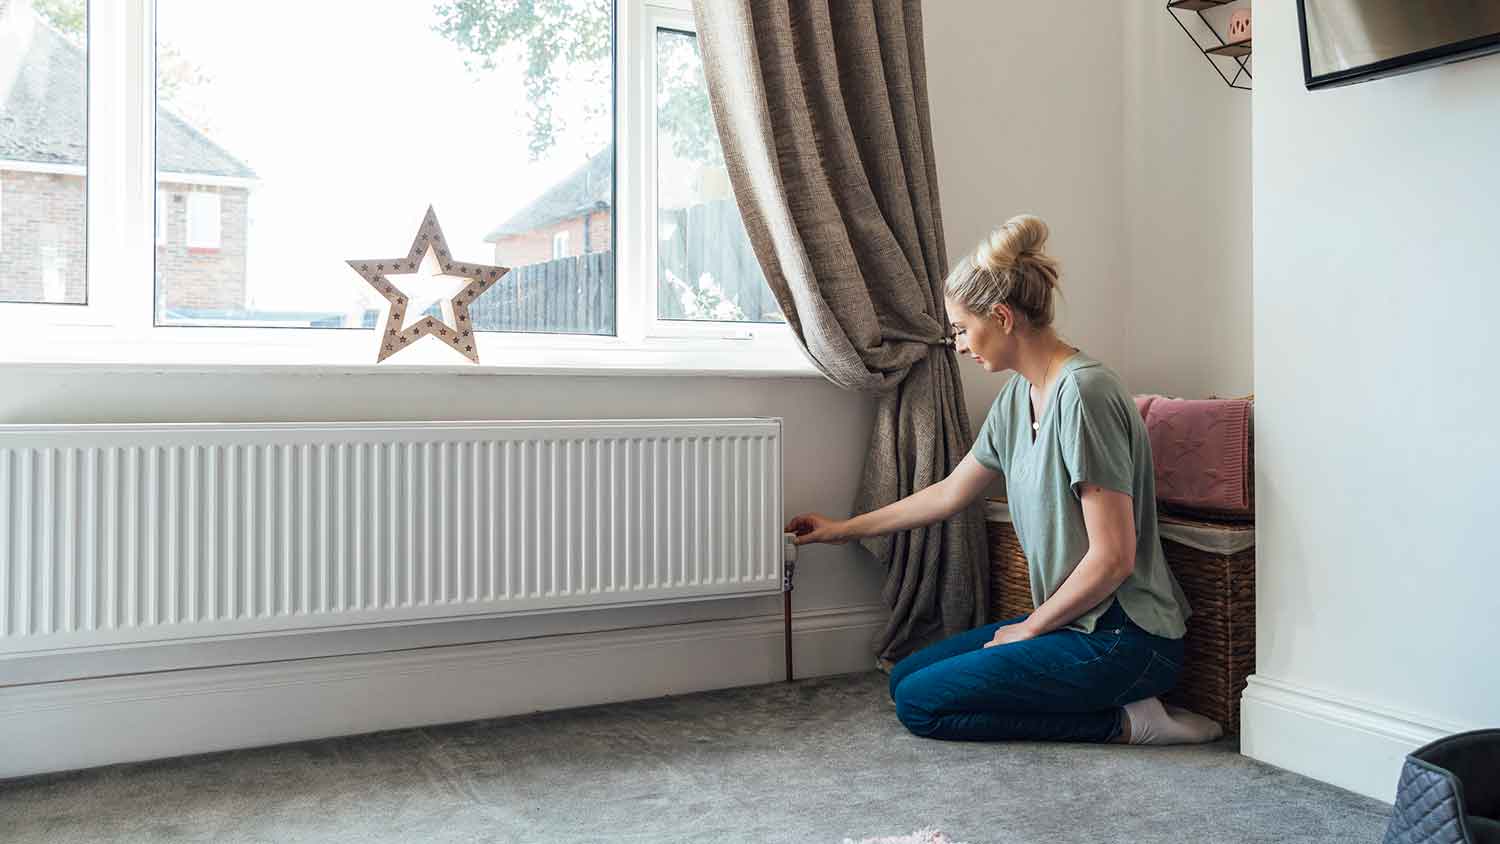
To turn on a radiator, start by rotating the control valve near the bottom of the radiator where the hot water pipes connect to it; you may also find a temperature dial (if it’s a thermostatic valve). Turn the control valve counterclockwise to open it, and make sure it’s open all of the way so the radiator can reach its maximum temperature.
Turn your heating system back on and determine if there is heat coming from the radiator. If the radiator is still cold after the system is up and running, proceed to the next step.
If a radiator is still not working after turning on the control valve, it may need bleeding. Bleeding a radiator means letting out any trapped air or clogged water. Find the radiator's bleed valve with your heating system turned back off and completely cooled down. This valve is usually at the top of the radiator on either the left or the right side.

You will use a radiator key, sometimes called a bleed key, to turn the bleed valve. If you don’t have a radiator key, you can pick one up at a local hardware store or online. Sometimes, needle-nose pliers can turn the valve, or a flathead screwdriver might fit into a slot at the top of the valve.
Before turning the valve, hold a towel, small bucket, or cup beneath the valve to catch any drops of water. Using your radiator key (or pliers or screwdriver), slowly turn the valve counterclockwise about half a turn.
As you open the valve, you’ll hear a hissing noise as air escapes from the radiator and water fills the space within the system. Once the hissing stops and a steady stream of water starts coming out of the valve, it’s time to close it in the next step.
Again, using your radiator key (or pliers or screwdriver), turn the bleed valve in the opposite direction (clockwise) to close it. Go slowly and be careful not to break the valve. You do not need to force the valve closed—stop turning once you feel a bit of resistance. Use your towel to wipe away any remaining water on the radiator.
Take the time to bleed the rest of the radiators within your system to ensure they aren’t causing any more common home radiator issues. Experts recommend bleeding all of your radiators twice a year to ensure they produce plenty of heat and to reduce the pressure in the heating system.
After bleeding all of the radiators, turn your heating system back on. Check your boiler pressure gauge—it should be between 1 and 2 bars. If the particular radiator you want to turn on is still not producing heat, turn your system back off and move on to the next step.
About halfway down the side of a steam radiator, there will be a metal air vent. This vent is usually cone-shaped and has a small hole at the top. If the vent is clogged, the radiator won’t get hot. Use a small wire or sewing needle to puncture the hole at the top of the air vent. Also, ensure the vent is positioned vertically with the tip of the cone facing up.
With the air vent cleared and re-positioned, turn your heating system back on and determine if the radiator is heating up. If clearing the air vent did not fix the issue, you may have a larger issue that requires the assistance of an HVAC professional.

If your radiator is still not heating up after trying all the methods in this guide, it’s time to call in the professionals. An HVAC contractor will inspect your steam heating system as a whole and can take apart the radiator to find any internal issues.
In a worst-case scenario, you may need to replace the entire system. Steam radiators can last decades, but there will come a time when you’ll need to swap out the system for a new one.
Learning how to turn on a radiator is simple, as you can tell. Turning valves and unclogging vents is a DIY project that most people can tackle. You may need to purchase a radiator key, but this will cost less than $25. Hiring a local HVAC technician costs about $100 to $250 per hour if you're not feeling up to turning on and troubleshooting your radiator.
If your radiator still needs to be fixed by the end of this troubleshooting guide, you may need to pay between $100 and $500 for radiator repair prices. If it’s time for a whole new system, a radiator replacement costs $100 to $2,500 per unit, or $1,500 on average.
Great company! Price was competitive, technician showed up on time and completed the job (exterior electric Radon fan replacement) quickly. Would hire them again.
As usual with ECO, tech Jordan was outstanding, very professional, very knowledgeable, and very thorough with repairs made to tankless water heaters. Very highly recommend ECO!!!
 Eco Plumbers, Electricians, and HVAC Technicians
Raven and crew does absolutely fantastic job. They are very professional if any concerns were to occur with any of her work she always took responsibility and finished out with a great job. I have worked with her business for a year and have always been satisfied. Very trusted business and...
I would recommend this company to anyone! He showed up on time, was friendly, completed a very difficult repair on our dryer vent cover, was responsive, and pricing was extremely fair and competitive. I would have him back to do any of our repairs or cleanings without hesitation!
Ace Fireplace Services' chimney sweep service is truly exceptional. They used advanced technology to ensure a thorough cleaning process, and my chimney has never looked better. I highly recommend their services.
 Ace Fireplace Services
The technician was very professional and friendly. He answered all my questions and was very thorough. He left the fireplace area very clean . He inspected from the roof and advised me as to other work that might need to be done. There was no pressure there. I was very satisfied with the...
 Supreme brick & chimney
Excellent experience with hiring Tether House to Mount our 77’ Samsung TV in our bedroom. Fast, friendly, and knowledgeable. Highly recommend.
On time, clean and finished fast. Windows seem sturdy and the finish is good. Caulking was done with no smudges. Would recommend.
Great job...edging and pre clean up went well with a great job with seal coat. Friendly, efficient and professional.
 All Star Paving and Sealing
Good workers and they do a good job.
From average costs to expert advice, get all the answers you need to get your job done.
Curious about your home’s radiator replacement cost? Let’s discuss what affects the price of a new unit and how to determine if repairing or replacing is in order.

When your heat goes out, it can cause a bit of a panic. But knowledge is power, so let's go over radiator repair costs before that happens.

During the cold months, you may keep your radiator on all the time. But if you need to turn it off, read this guide to learn how to turn off a radiator.

Balancing your home’s radiators is a simple way to increase the efficiency and effectiveness of your HVAC system. Check out these 8 tips before you start.
Two of the most common types of radiators are steam and hot water radiators. Learn how to identify different types of radiators and their pros and cons.

How do radiators work to keep your home cozy year-round? Keep reading for insight into this important system.