
•
Discover stamped concrete cost. Learn about installation prices, cost factors, and how to save on your stamped concrete project.
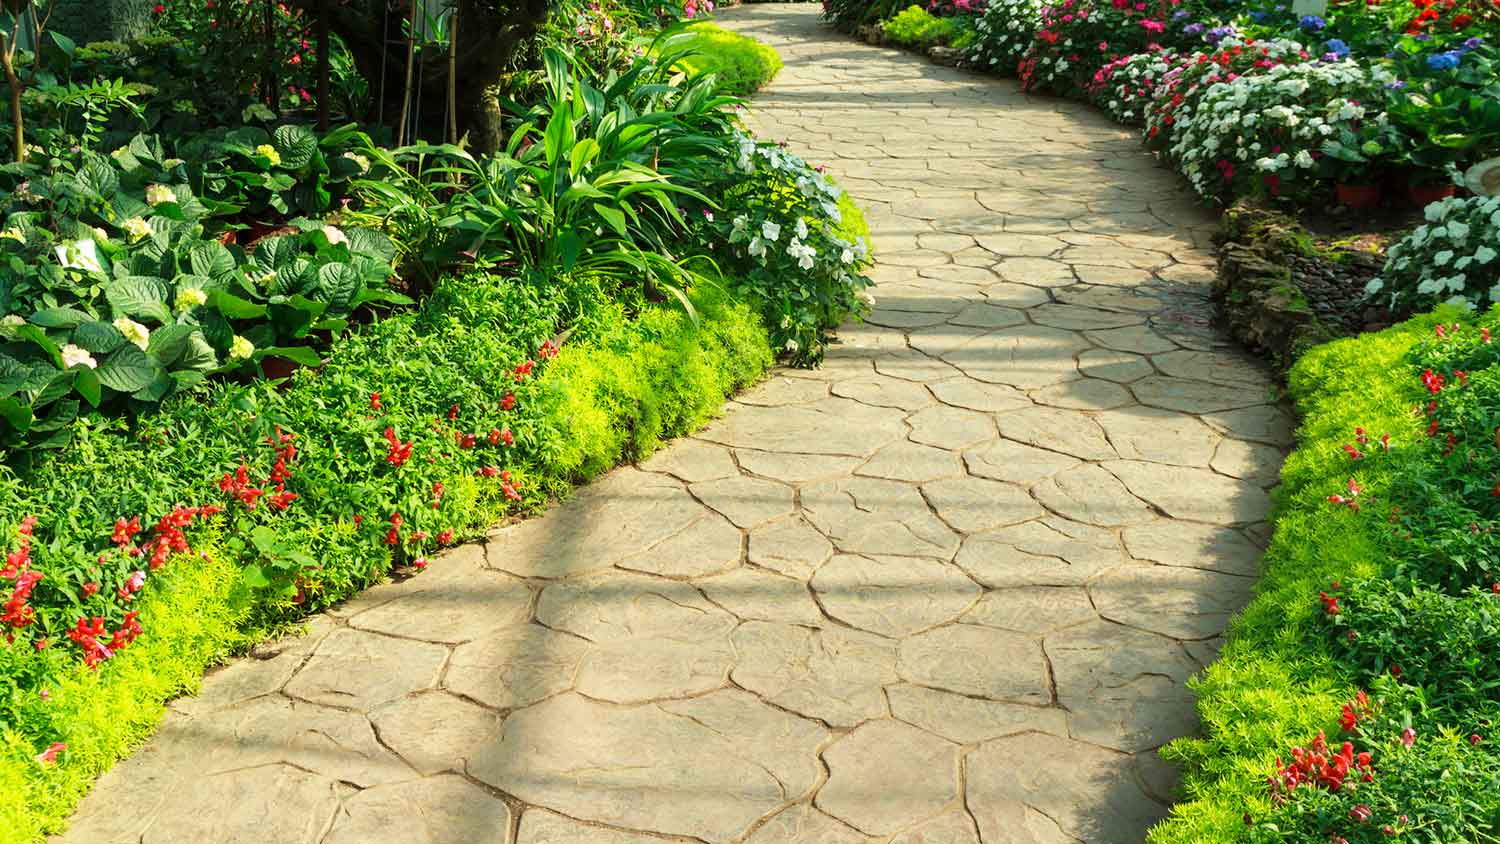
Forget boring old concrete. Here’s how to leave a stylish stamp on your property


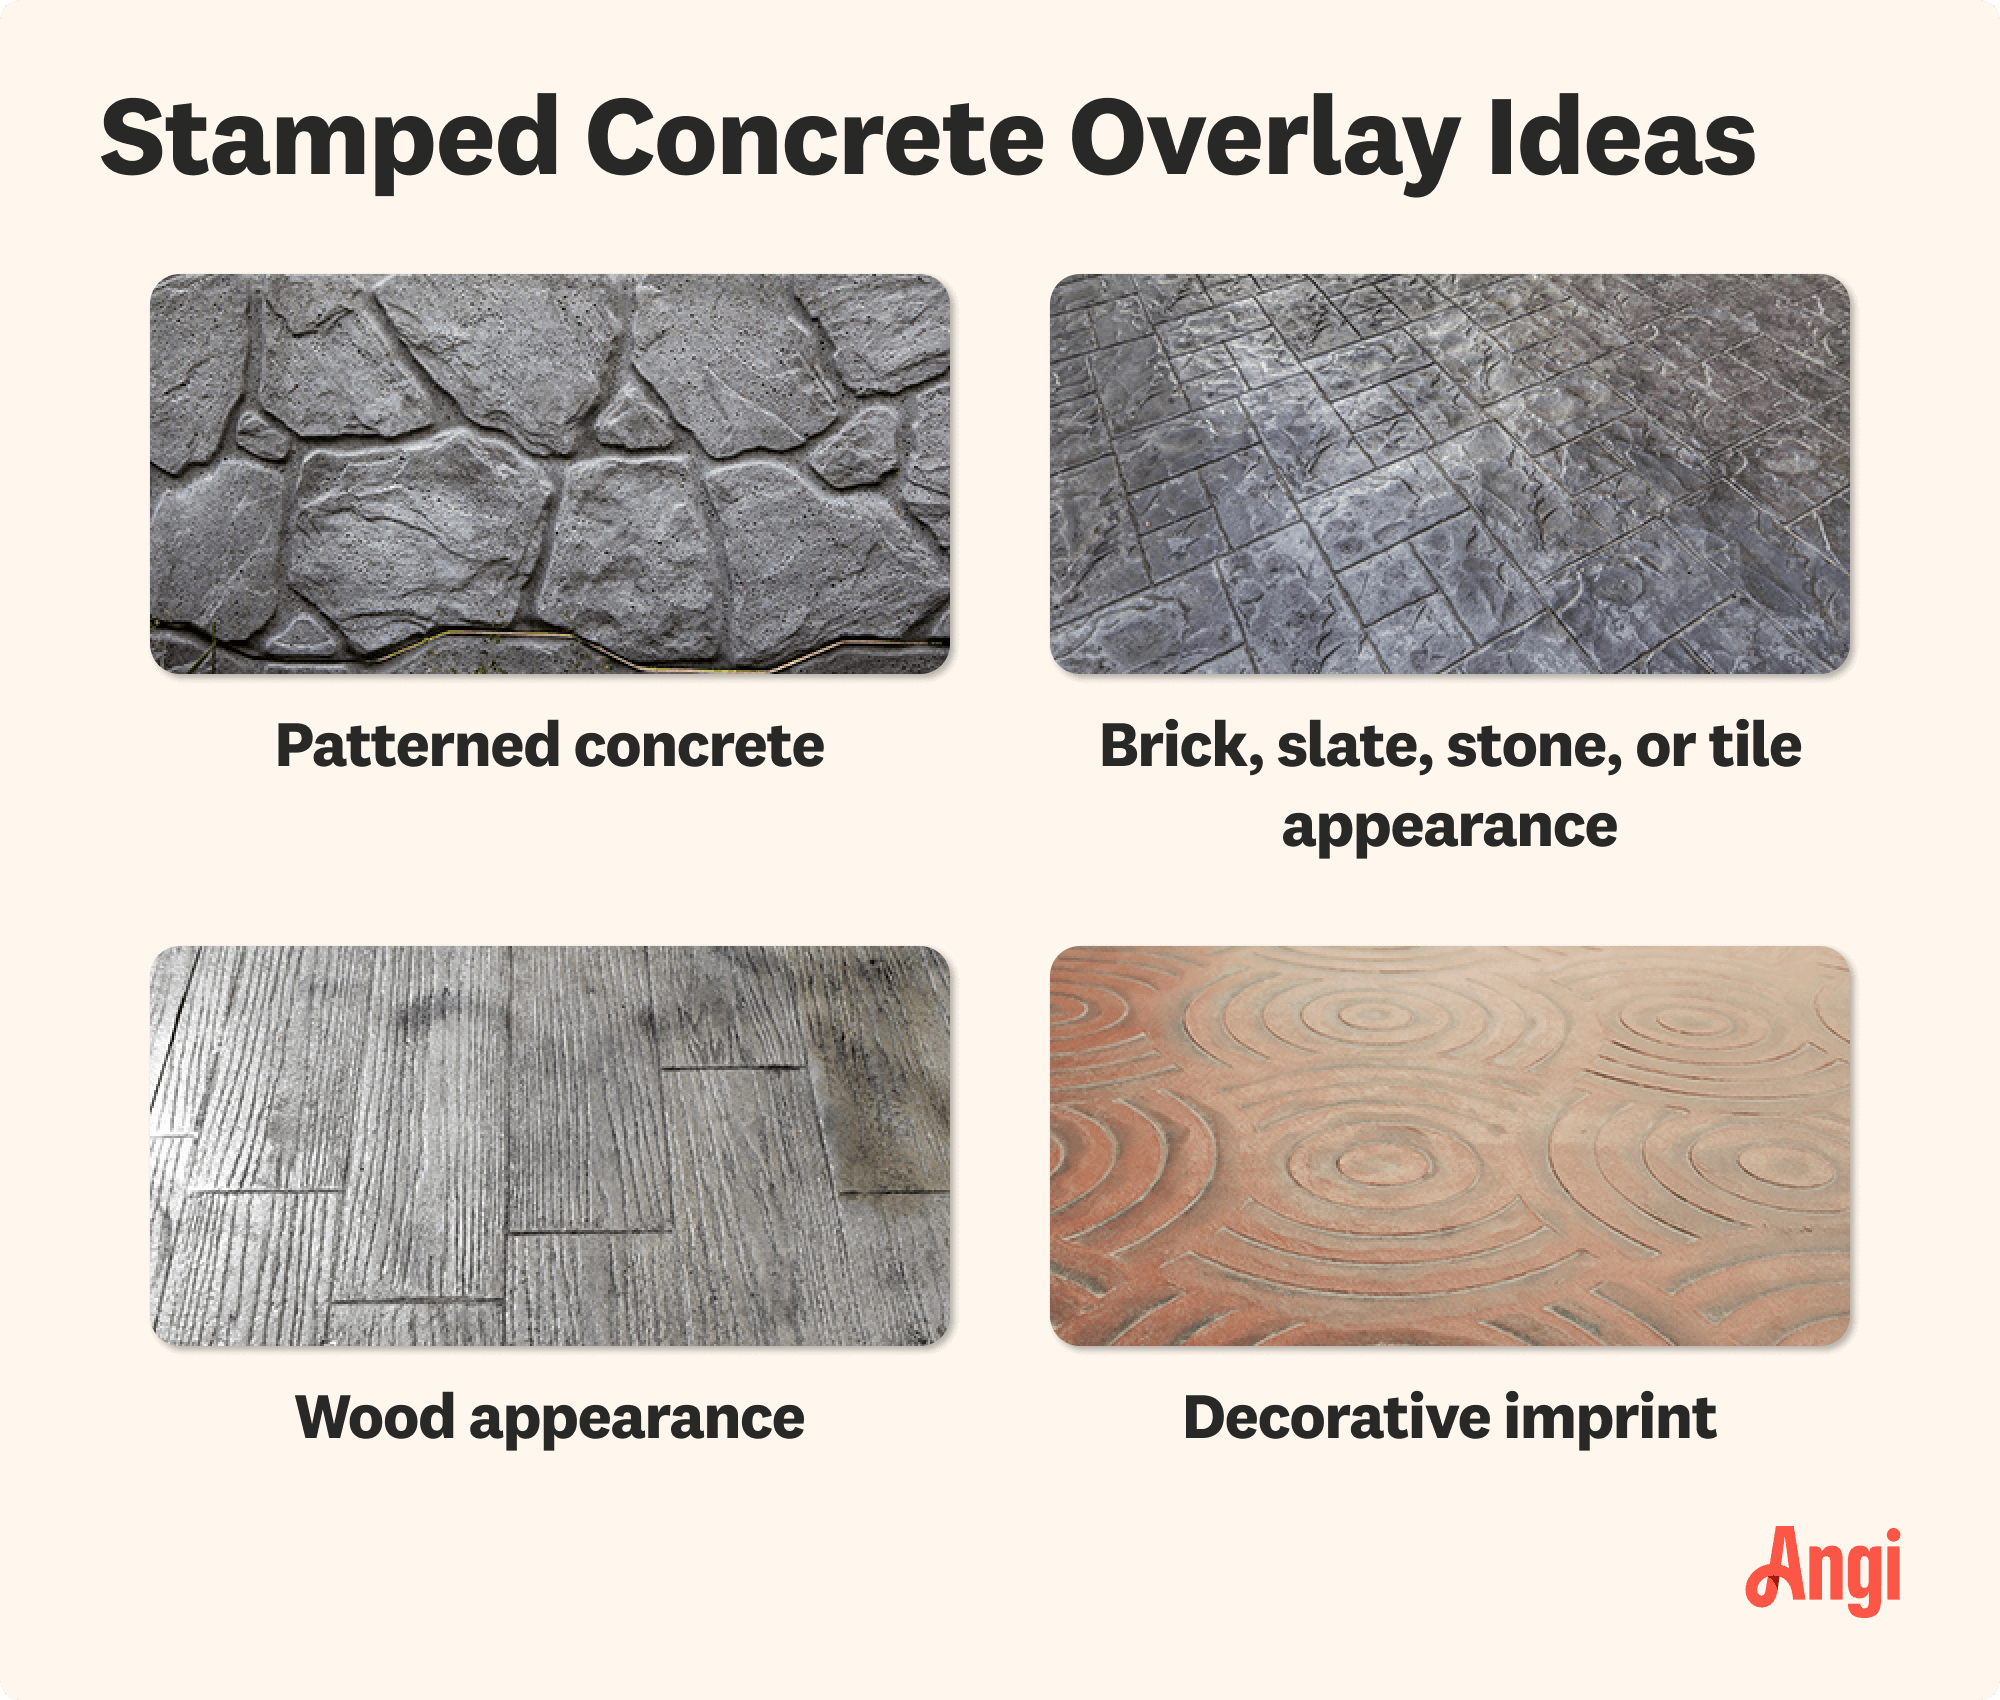
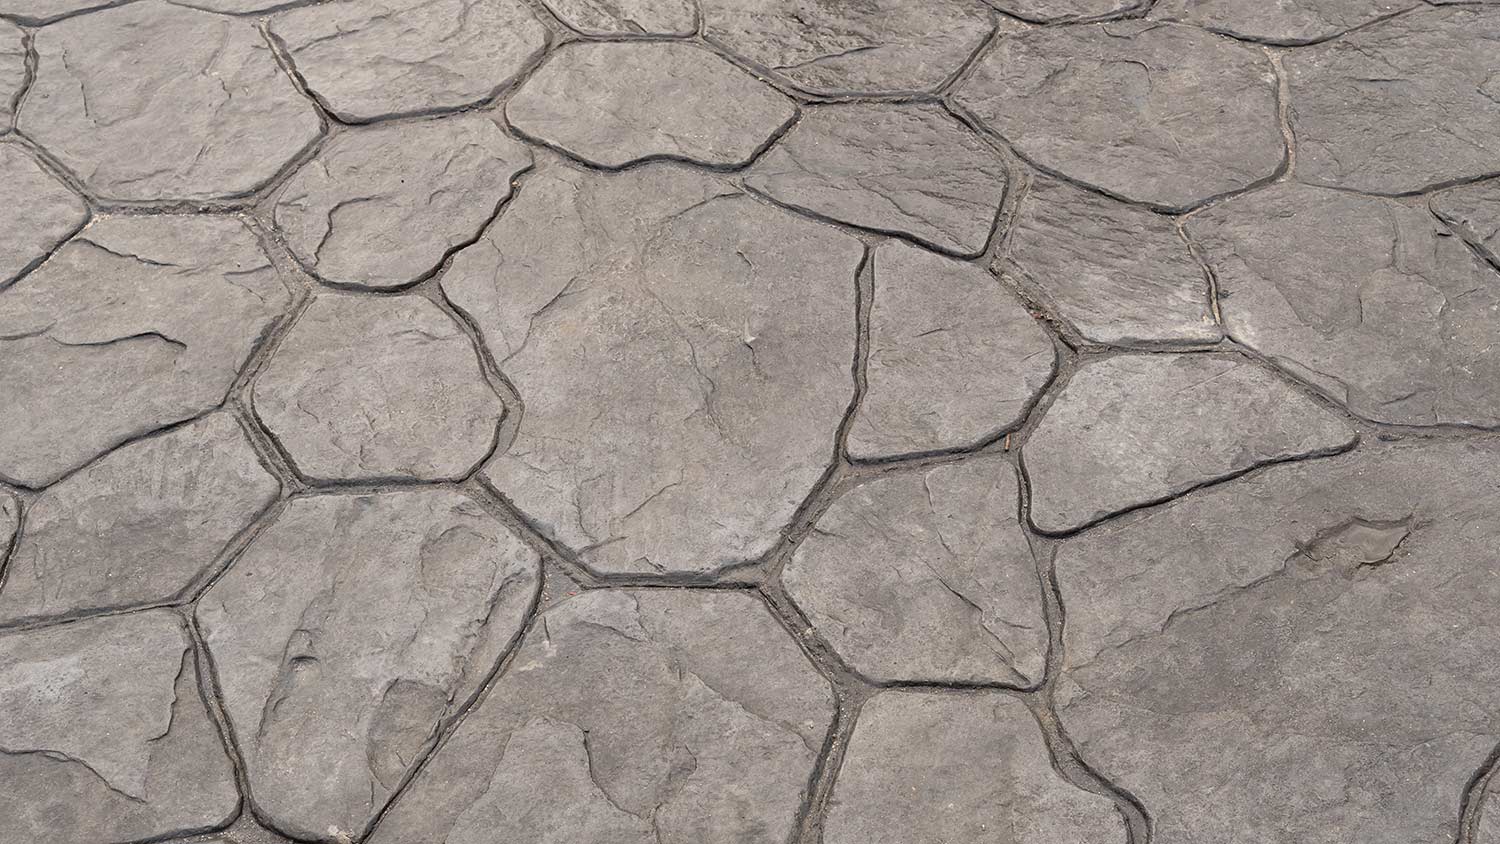
Stamping concrete adds decorative flair, making for an aesthetically pleasing alternative to plain old poured concrete. The process allows for many different colors and designs to suit the tastes of various homeowners. Hiring a pro to stamp concrete costs an average of $2,800, leading many consumers to consider DIY methods.
Whether you’re stamping concrete for your patio, walkway, or driveway, going the DIY route is not for the faint of heart. The process is time-sensitive, time-consuming, and fraught with potential hazards. Still, if you are itching to spread your wings, this is a good project to help you learn more about working with concrete while building your DIY skills.
First, make sure you have your budget fully worked out; the cost of the concrete slab itself will range from $4 to $8 per square foot. Next, spend some time preparing your outdoor space for the stamping procedure.
First, make sure to have friends or family members around to help. Pros bring a crew for this process, so follow their lead. Start by making an accurate measurement of the work area. Use a tape measure and jot down the results. This informs the number of supplies required.
Make sure the work area does not interfere with any doors or windows. If this is your first time trying this, start small with an area maxing out at 50 square feet. Once you have an accurate perimeter, go shopping for the designs and colors that you want to add on top of your concrete. Choose something that complements your outdoor space.
Cover nearby areas with tarps to protect them from splashing concrete. Finally, hire a concrete contractor to run through the area with a compactor machine to ensure the ground is level. If you have the time and money, rent one of these machines from a local hardware store and give it a whirl.

You have an accurate perimeter that you measured earlier, so start by driving in four stakes on each corner and use a line level, string, or builder’s level to check on the slope. Once you are sure the area is even and has the proper slope, attach forms to the stakes to prevent the concrete from flowing out from the intended worksite. These concrete forms are basically thick boards that act as a border around the perimeter. Some forms require a kicker, which is another stake that extends at an angle from the form into the ground for stability.

Your next step is to prepare the area where your concrete will go, focusing on stability and reinforcement to prevent shifting and cracks in the future. Grab your wire mesh reinforcements and place them on the ground strategically to provide the most coverage and the best security. This mesh stays where it is, so you don’t have to worry about removing it later. A general rule of thumb here is to place the mesh in a standard grid pattern with an approximate spacing of 12 inches. For larger areas, swap out the wire mesh in favor of steel rebar.

To determine how much concrete you need, multiply the length by the width by the depth (in feet) of the worksite to get cubic feet and purchase accordingly. If you purchased a dry mix, prepare it now. If you are using wet concrete and pouring via traditional methods, such as a truck and a chute, get those tools ready.
Pour the concrete via truck chute or wheelbarrow, keeping plenty of people on-hand to ensure this part goes smoothly. Once poured, smooth out the concrete with tamping tools and by running a 2x4 screed board directly over the top of the worksite. Use a float for making minor adjustments to the overall level, but refrain from passing over the top more than three or four times to avoid pulling up moisture.

Now is the moment you’ve been waiting for: the actual stamping. As with pouring the concrete, have several helpers on hand to make this process go as quickly as possible. You are on a clock here, as this step requires completion before the concrete dries, but you also want to wait a bit for some moisture to clear out. Push a thumb into the concrete. If your thumb only sinks in ¼-inch or so, it is ready.
Start by applying a release agent to help achieve a crisp look with the finished product. Place stamping mats around the edge of the concrete, following the perimeter. Next, move on to larger mats and follow the order in which the concrete was originally poured. For instance, if you started pouring in the center before moving on to the left side, do the same when applying stamping mats. Constantly check the alignment and stamp placements throughout this process to avoid any visual hiccups.

Tamp down the stamps by pressing firmly on them with tamping tools, working slowly and carefully to avoid disturbing the concrete any more than necessary. Once the stamps are tamped down, peel back an edge and give it a quick visual inspection. If you like how it looks, carefully peel all of the skins from the stamp mats. Work in rows and, again, conscript friends and family to help out.

Now that the stamps are tamped and flattened, go around the worksite and look for anything that requires immediate attention. If areas require adjustments or cleanup, do that now. For example, remove any excess concrete that squeezed out between each stamp and deepen any grooves on any stamps that seem particularly shallow. Use a simple chisel for this part of the process.

Wait for the concrete to dry. This takes anywhere from a few hours to a few days, depending on local weather conditions and the size of the slab. Once completely dry, wash off the release agent and apply a curing compound. Letting concrete cure helps it harden correctly and increases the durability of the final product. Each curing compound requires a different application process, so read the instructions thoroughly.

Concrete has a habit of randomly cracking over time. So, it's best to get ahead of the problem by advising the concrete how to crack if it's going to do it anyway. Construction joints are cuts along the stamped concrete that allow the concrete to shift and settle without throwing off the lovely pattern you just spend so much time adding.
There are two ways to go about this. In newly laid concrete, you can use a hand groover to press a line from one side of the slab to the other about one inch into the concrete. If you'd rather wait until the concrete cures, cut the line with a diamond concrete saw blade.
The number and placement of contraction joints will depend on the size and shape of the slab.

This optional step depends on whether you want colored concrete. With this step, and the next one, time is of the essence, as you won’t be able to make changes once the concrete fully dries. Apply the coloring agent on top of the concrete and follow the instructions with regard to mixing and creating an even layer. Each coloring product is slightly different, so read the instructions carefully. If all else fails, you should be able to distribute the coloring agent with a standard broom.
The key to learning how to stain concrete is finding the right product for your desired look. Acid-based stains offer a natural, earthy look that lasts a long time, but they can be hard to apply in an even coat. Water-based stains are a bit easier to apply but may wear down with time.
After reading the specific instructions on your stain, clear and clean the fully cured and stamped concrete. Some stains adhere best to slightly damp concrete, in which case you'll need to apply a quick layer of water with the hose.
Again, read the directions on your given stain carefully. Each one will come with specific dilution and staining instructions. In most cases, you can either spray or pour the stain in even layers and spread it with a push broom until you get the hue you desire.

Now it is time to play a waiting game. Sealant manufacturers recommend waiting a few weeks after curing before performing this step. This ensures that the concrete is fully dry and that there is not even a hint of moisture trapped under the sealant. Each sealant is different, so follow the recommended application process. However, most sealants require thoroughly spraying the top layer and evening it out with a roller. Make sure the sealant gets in every crevice of the concrete and that it forms a thin, even layer. Once the sealant dries, you’re all set.
Stamping concrete is a finicky business, so move slowly and patiently. If you're looking for a more forgiving project, consider pavers vs. stamped concrete—pavers will cost more, but they’re generally easier to install.
That being said, here are some tips on how to stamp concrete with a bit more ease.
If you already have an existing concrete slab, consider a stamped concrete overlay to save money, materials, and time.
If stamping a natural pattern, you’ll get a more organic look if you avoid repeating the same position each time.
Follow instructions for proper stamping timing. Waiting too long can cause the stamp to cure too widely, leading to drainage issues.
Press the stamp into the concrete as evenly as possible from the beginning, being careful not to apply harder pressure to the edges of the slab.
Clean your shoes and clothing before walking on the stamping mats.
Start at the center of your slab and work your way out to avoid inconsistencies on either end of the area.
Once you complete the project, learn how to clean stamped concrete properly to avoid scratches, mildew, and general wear over time.
As you probably sussed out already, this is not an easy job. It requires specialized tools, equipment, and expertise. Additionally, you really need a team to get this done, so don’t even try a DIY concrete stamping job without at least three sets of helping hands. If you are set on taking on this project, start small with a worksite area of around 50 square feet. If you are unsure about any of the above steps, contact a local stamped concrete contractor for an estimate.
From average costs to expert advice, get all the answers you need to get your job done.
Discover stamped concrete cost. Learn about installation prices, cost factors, and how to save on your stamped concrete project.
Discover stamped concrete wall cost estimates, including average prices, key cost factors, and tips to help you budget your project with confidence.

Here’s what you need to know about stamped concrete overlays, including pros and cons, what they cost, and how they can give your concrete new life.

Stamped concrete maintenance takes a bit more delicacy than other surfaces. Here are seven ways to keep stamped concrete surfaces looking sharp.

A stamped concrete finish can brighten your dull driveway, walkway, or patio. Here are the questions to discuss with a stamped concrete installation pro.

Maintaining stamped concrete makes it look slick and fresh, boosting the look and feel of your home. Learn how to clean stamped concrete in this guide.