
•
Get a detailed breakdown of skylight repair cost, including average prices, key cost factors, and tips to save on your skylight repair project.
For when you’ve had enough light to last a lifetime

Skylights are a wonderful addition to any home, providing natural light and a sense of openness. However, there may come a time when you need to remove a skylight due to damage, remodeling, or other reasons. If you're wondering how to tackle this task, we've got you covered! In this step-by-step guide, we'll walk you through the process of removing skylights from your home.
Removing a skylight (naturally) involves working on the roof, which can be incredibly dangerous. If this is something you’re uncomfortable with, don’t have the proper safety tools for, or just plain old don’t want to do, stop now and call in a professional.
Before you begin, make sure you have the right tools and materials on hand. You can circle back to the above tools and supplies list to help you identify what you need to buy and what you already own.
It's important to prepare the work area properly before you start this project. Clear the area surrounding the skylight, removing any furniture or objects that may obstruct your work or get damaged during the process. Then, lay down a drop cloth or tarp to protect the floor from debris and dust. If there are any pieces of furniture or valuable items nearby, cover them with plastic sheeting to prevent damage.
If your skylight has electrical connections, it's essential to disconnect them before removing the skylight. If you don’t know your way around an electrical panel, you should put down the tools and call a pro for this part.
Turn off the power supply to the skylight from your home's electrical panel.
Locate the electrical box or junction where the skylight is connected.
Use a screwdriver or power drill to remove the screws holding the cover of the electrical box.
Carefully disconnect the electrical connections, ensuring you don’t damage any wires.
Once the electrical connections are disconnected, cover the exposed wires with wire nuts and electrical tape for safety.

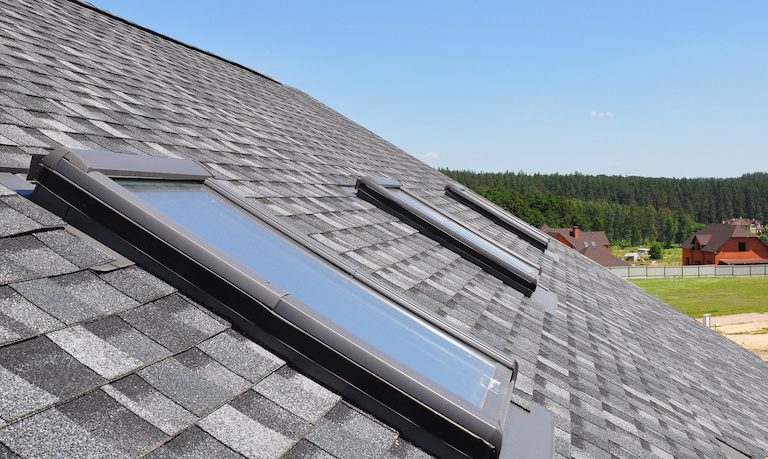
You’ll need to get up on the roof to remove the shingles that overlap your skylight. Put on a roof harness, then place roof brackets and a staging plank on your roof. Hook your harness to the roof brackets to ensure your safety. Additionally, make sure you follow ladder safety protocols at all times.
To remove the shingles:
Place your pry bar under the shingles.
Gently lift each shingle, ensuring you don’t damage it.
Continue until you’ve removed two to three rows of shingles on the top, bottom, and sides of the skylight, making sure at least 1 foot of space is exposed on all sides.
Place the shingles to the side, keeping them in a safe spot to put back on later, if applicable.
Now it's time to remove the exterior flashing around the skylight.
Use a utility knife to cut away any caulking or sealant between the skylight and the flashing.
Next, use a screwdriver or power drill to carefully remove any screws or fasteners securing the flashing to the roof.
With a pry bar, gently pry the flashing away from the roof, starting at one corner and working your way around.

With the exterior flashing removed, it's time to remove the screws securing the skylight to your ceiling and roof.
Look for any screws or fasteners holding the skylight frame in place. They’re usually located on the sides and top of the frame. Use a screwdriver or power drill to remove these screws and set them aside.
Once the screws are removed, carefully pry the skylight frame away from the surrounding structure using a pry bar.
Apply even pressure and work your way around the frame, gradually separating it from the opening.
If the skylight is sealed with caulking or adhesive, use a caulk remover to soften the material and make it easier to pry apart.
Remove any remaining caulking, adhesive, or debris from the opening using a scraper or utility knife.
If you're unsure about any part of the process or if the skylight removal involves more complex elements, it's always a good idea to consult a professional skylight installer near you to ensure the job is done correctly and safely. While hiring an expert to remove skylights will cost more (around $100 to $250), doing so can save you a lot of time, frustration, and possible injury.
From average costs to expert advice, get all the answers you need to get your job done.
Get a detailed breakdown of skylight repair cost, including average prices, key cost factors, and tips to save on your skylight repair project.
Discover skylight installation cost in 2026, including average prices, key cost factors, and tips to help you budget for your home skylight project.

Discover the average solar tube installation cost, key price factors, and ways to save. Get transparent, expert-backed estimates for your home project.

A skylight or solar tube brings natural light into your home, but it shouldn’t bring in moisture. If you’re dealing with skylight issues, take these steps to determine if you can repair or if it’s time for a replacement.

Find out about the different types of skylight shades and which one is right for you. Learn all about skylight shades here.

Skylights can enhance natural light and boost a home's appeal to some buyers. Use this guide to learn how factors like skylight size, type, and installation quality impact resale potential.