A home's primary water supply is crucial. Learn the factors that will affect your main water line replacement cost in Washington, D.C., to help you budget.
A dream kitchen isn’t complete without one
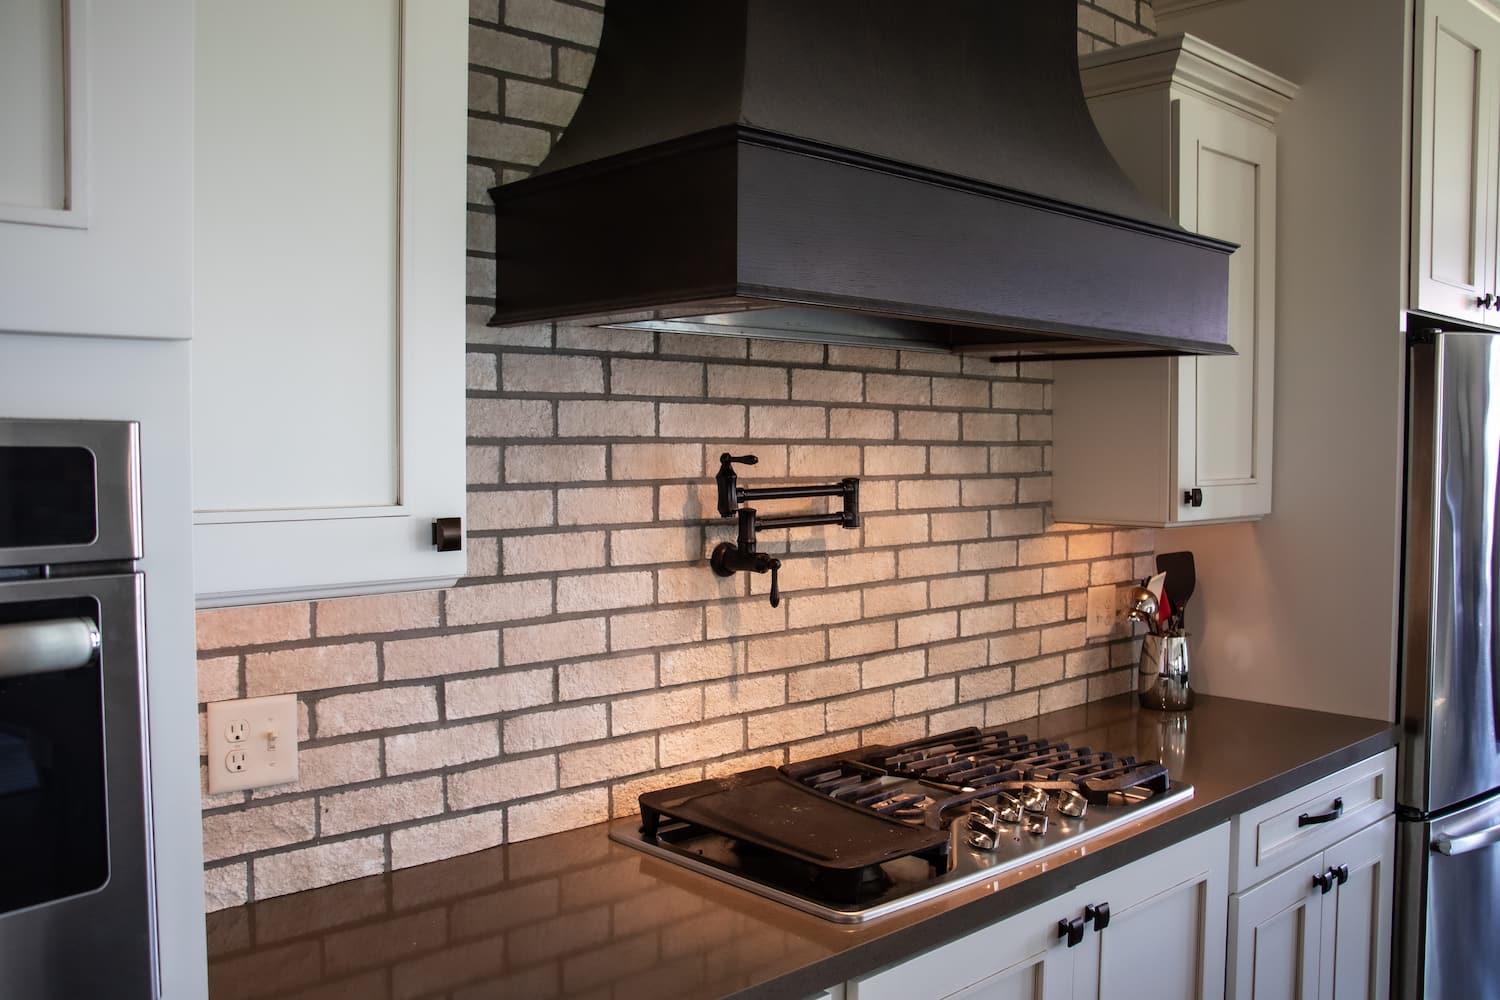

A pot filler faucet lets you fill a pot with water over the stove, eliminating the need to carry it from the sink.
Choosing the right pot filler faucet—fixed, swing-out, double-jointed, or deck-mounted—depends on the stove's dimensions and kitchen style.
On average, pot filler installation costs $1,650 if you have existing plumbing, and up to $3,000 to install a new plumbing line.
Due to potential leaks, pot fillers can lead to fire or water hazards if poorly maintained.
There’s no doubt about it—a beautiful pot filler over the stove looks gorgeous against a trendy backsplash. But is the look and convenience of a pot filler worth the money and labor involved with installation?
We’ve compiled a breakdown of everything you need to know about pot filler faucets, including their pros, cons, costs, and answers to your most common questions.
Also known as a kettle faucet or pasta arm, a pot filler faucet is a water spout mounted on the wall above a kitchen stove. The purpose of a pot filler is to fill pots with water over the stove instead of using the sink faucet. This way, you don’t have to carry a large pot of water across the kitchen to cook dinner.
Are you on the fence about adding a pot filler to your kitchen design? Consider the pros and cons listed below to help guide your decision.
| Pros | Cons |
|---|---|
| Convenience | Fire and flood hazard |
| Aesthetics | Difficult to clean |
| Avoid spilling water | Plumbing cost |
Nothing says “culinary pro” quite like a custom sink just for your new Dutch oven. Because of this, pot fillers have become a popular kitchen remodeling idea, and many homeowners install one for the aesthetics.
But if you cook most dinners at home (especially if spaghetti is frequently on the menu), having a pot filler above your stove can reduce the physical strain of holding your pot in the sink, waiting for it to fill, and then carrying it to your stove. If you’re accident-prone, it can also reduce the risk of dropping that pot and spilling water on your kitchen floor.
While an increasingly popular choice, pot fillers also come with their fair share of cons, some of which pose safety hazards. First, while you’ll save energy not having to lug a pot to the stove, you will still need to carry a full pot to a nearby sink to drain it when you’re done cooking.
On a more serious note, pot fillers can pose a fire or water hazard if not maintained. Leaking faucets and pipes are dangerous when placed above gas stoves. And if your pot filler starts to leak, it could damage the wall behind your stove. If you need to address an issue with your pot filler in a hurry, be prepared to pay emergency plumber rates—sometimes three times as much as the typical cost of a plumber.
It can also be a nuisance to clean as it’s one more fixture you’ll need to wipe greasy stove splatters off of.
Finally, the biggest deterrent to installing a pot filler is the cost. If you don’t have an existing plumbing line, expect to pay up to $3,000 on top of the cost of the faucet itself, depending on how much work needs to be done and the average cost of plumbers in your area. For a faucet that may not be regularly used, you’ll want to weigh the feature against your other kitchen remodeling costs.
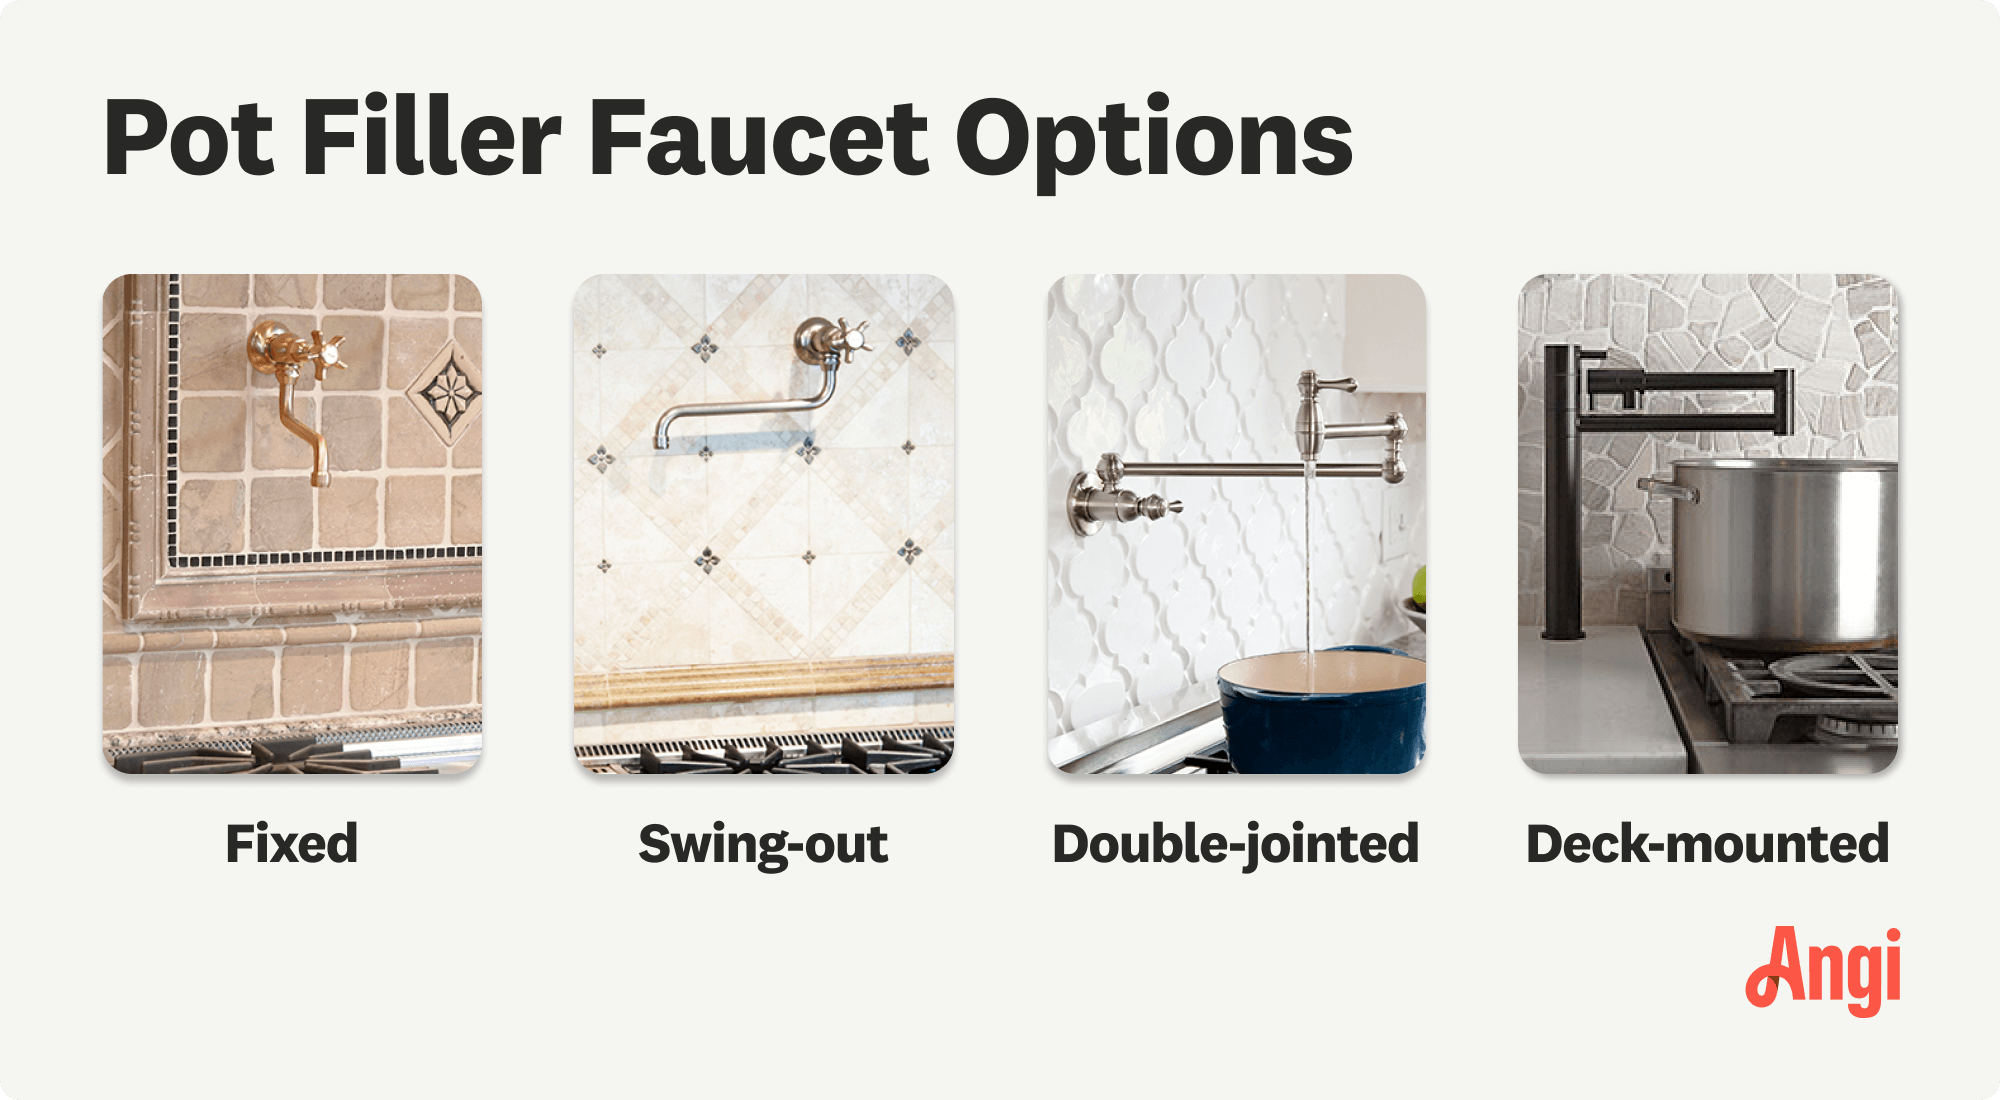
There are three types of pot filler faucets: fixed, swing-out, and double-jointed. You’ll want to understand your stove dimensions to ensure you’re selecting the right configuration. Additionally, you may want to select a style that matches the other types of faucets in your kitchen (like over your sink).
Fixed pot fillers stick out from the wall and can only reach one burner. This option doesn’t typically include the mechanisms required to reach multiple burners. If installing a pot filler yourself, this will be the easiest to add (so long as there is existing plumbing).
Swing-out pot fillers are mounted to the wall and swivel from left to right to reach all of the back burners.
Double-jointed pot fillers have dual swing joints that expand and swing to reach multiple burners. After use, the faucet can be pushed back to the wall for a tidy look. Many homeowners prefer this option for its versatility.
Deck-mounted pot fillers are installed in the counter top immediately next to the stove or sink and can swing out to the side. This may be a better option if you don’t want to remove parts of your backsplash or have limited plumbing options.
Pot fillers offer convenience and are a mark of an upscale kitchen, but they are also a costly investment. The most obvious alternative to a pot filler is the easiest solution: Simply fill your pots from the sink faucet and then transport them over to the stovetop, the way you’ve always been doing it.
However, if you’re tired of lugging a heavy pot from the sink to the stovetop or accidentally spilling water on your nice kitchen floor, you aren’t entirely out of options. A deck-mounted pot filler may be the best route.
For this to be a viable solution, your sink would need to be relatively close to the stovetop; this won’t work if either your stovetop or your sink is isolated on an island, for instance. Usually, deck-mounted pot fillers cannot extend as far as a traditional wall-mounted pot filler, but they are generally tall enough and extendable enough to fill pots on at least one side of the stovetop.
In most cases, adding a pot filler faucet to an existing kitchen is more expensive than designing a new one. While a pot filler faucet costs between $150 and $200, installation can increase the project total because of the water line extension and additional plumbing fixtures required.
Labor costs for installing a pot filler can cost up to $3,000 depending on your kitchen layout, current plumbing setup, and regional rates. This is not a recommended DIY project unless you have plumbing experience.
From average costs to expert advice, get all the answers you need to get your job done.

A home's primary water supply is crucial. Learn the factors that will affect your main water line replacement cost in Washington, D.C., to help you budget.

Discover what it costs to hire a plumber in Washington, D.C. and what impacts plumber costs, such as permits and home age, plus how to hire a local pro.

Learn the pricing factor details that will affect your main water line repair cost in Washington, D.C., including the repair type, size, and accessibility.

A new showerhead is an easy, affordable way to upgrade any bathroom. Learn how to change a showerhead, from removing the old to installing the new.

Not sure who to hire for undermount sink repair? Countertop specialists are the best place to start, but plumbers may also be helpful.
Find the right type of toilet tank flapper for your bathroom, including rubber, silicone, standard, adjustable, and dual flush.