Find out how much a soil test costs and what you get for your money with our expert guide. Know what to budget for different types of soil tests.
Expanding your garden? It doesn't take much to mulch like a pro


It's easy to assume that transforming large patches of your landscape requires hours of digging, tilling, and weeding. Well, gardeners, meet sheet mulching—the unsung hero of DIY landscaping that is quick, environmentally friendly, and cost-effective. By simply covering an area of your lawn with biodegradable materials—typically cardboard, newspaper, compost, and mulch—you can rejuvenate soil, kill persistent weeds, and break down turf to make more room for flowers and veggies.
Take a moment to assess your landscaping goals. Do you have a tired, unhealthy patch of soil that simply won't grow healthy plants? Or how about an area of grass you're looking to turn into a flower garden? While the sheet mulching process is similar in either case, these preparatory steps can help you make decisions down the line.
Order a home soil test for as little as $15 to check the nutrients, pH, and composition of your soil. Major imbalances in your soil test can help you decide what type of compost—if any—will help the sheet mulching process.
"Contact the local extension service in your area as well for information on how to test your soil," says Tara Dudley, Angi Expert Review Board member and owner of Plant Life Designs.
Pull up any tall grasses, weeds, or invasive species in the sheet mulching area. If you're unsure about which plants may be invasive, chat with a local landscaper for tips.
As long as you cut a hole for sprinkler heads, you can absolutely sheet mulch over an irrigation system. Just make sure to mark heads before you begin so you don't cover them up.


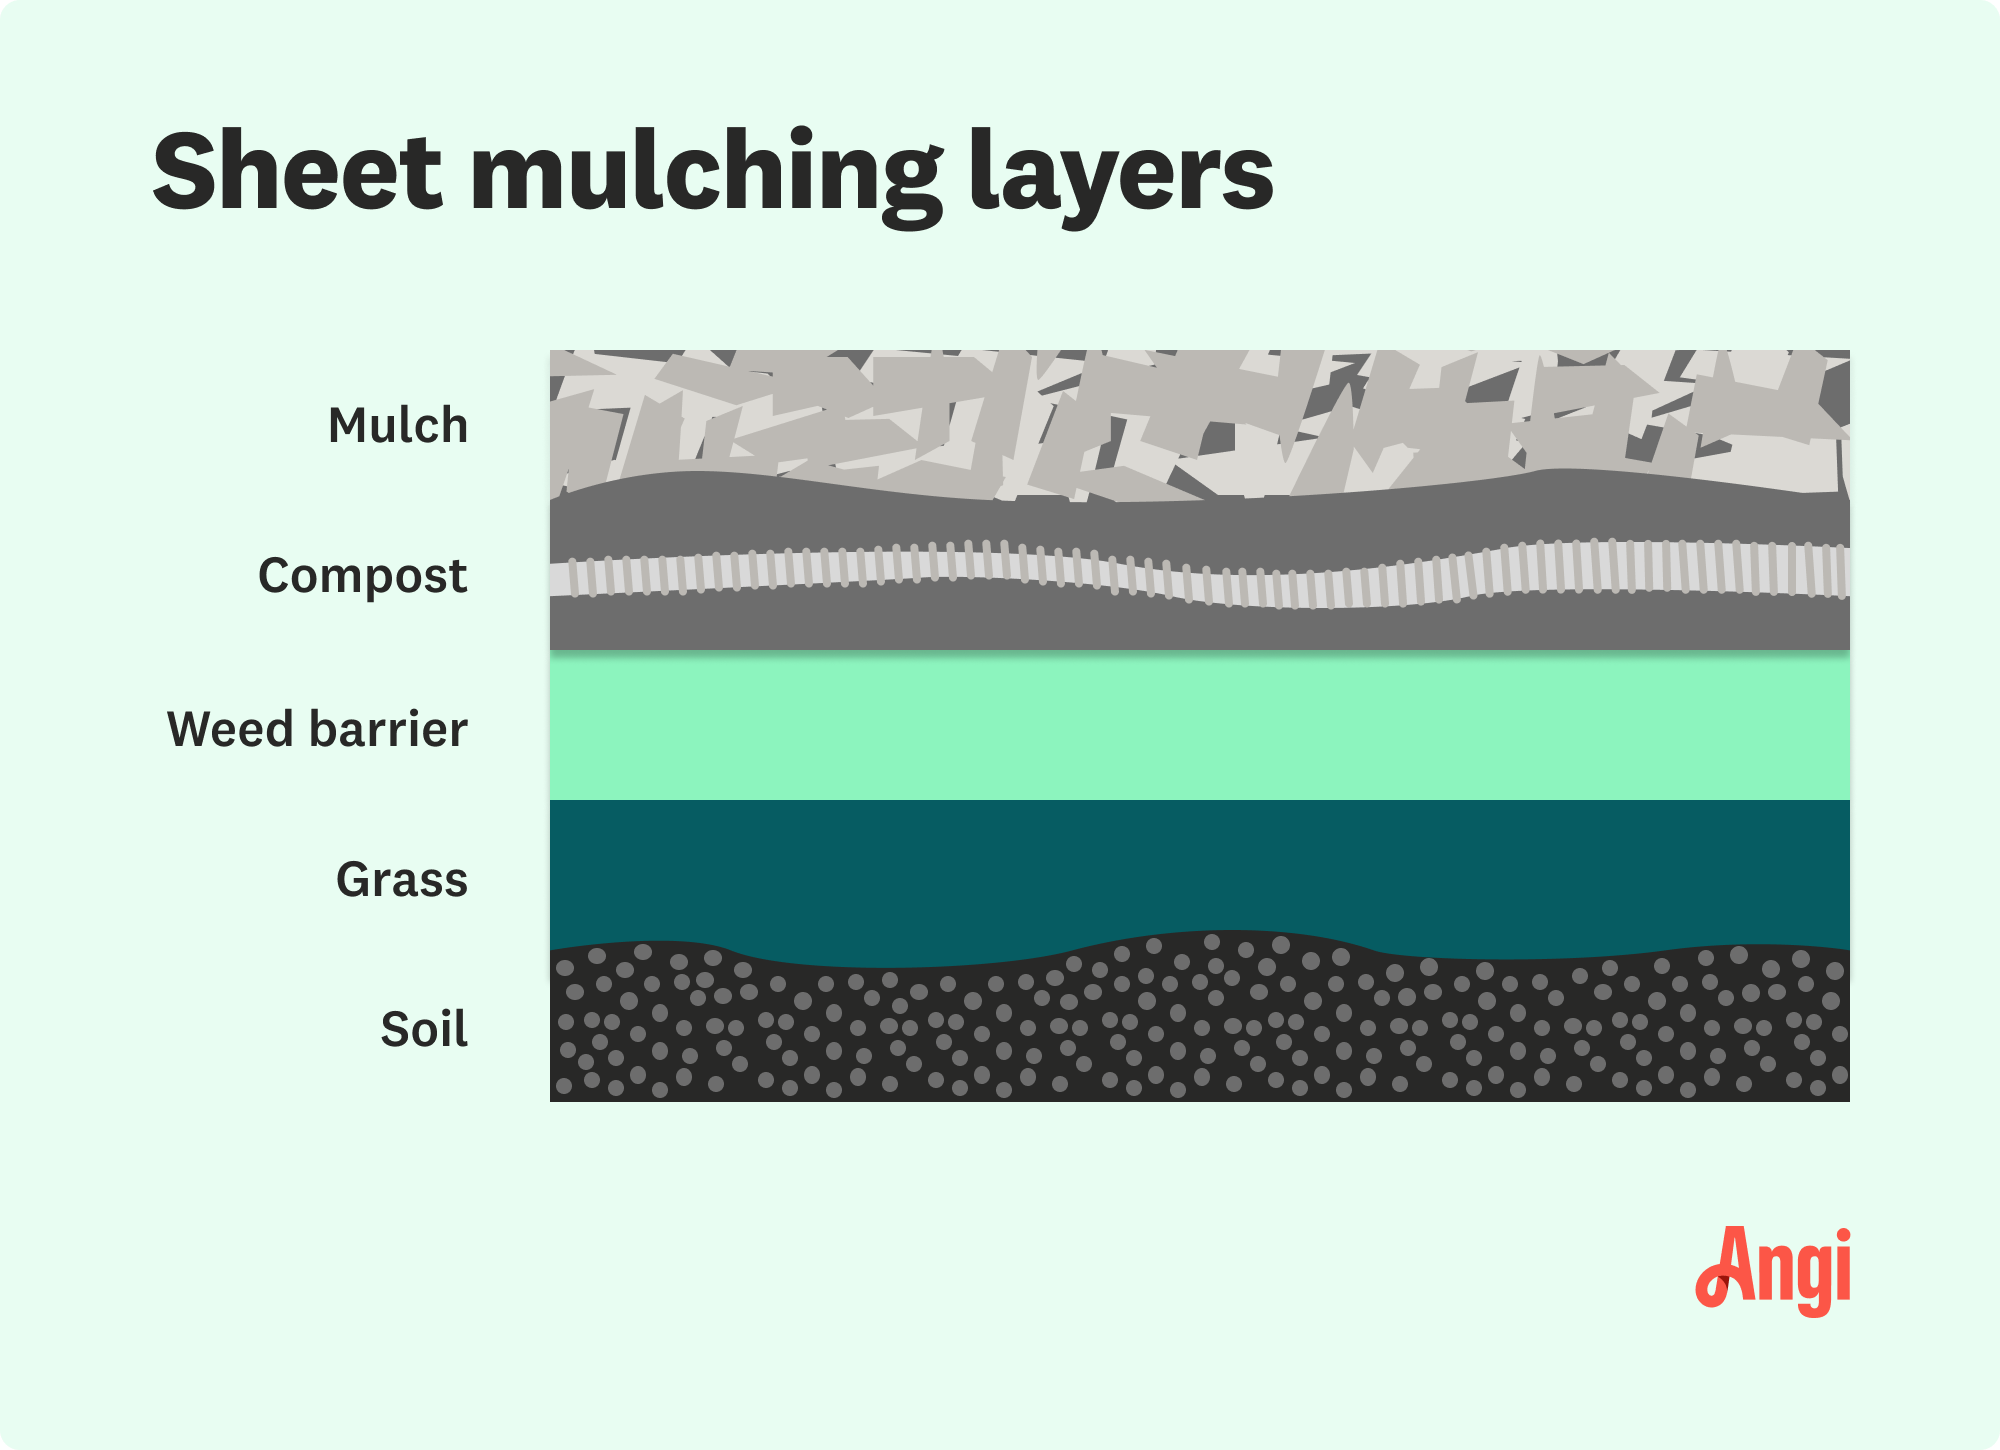
Sheet mulching requires two main things: a weed barrier and a mulch layer. Adding compost between the base and the mulch assists with soil remediation as well.
The most common weed barriers are newspapers and corrugated cardboard. Skip any glossy inserts or magazines, as they are not typically biodegradable. All forms of cardboard work fine; just avoid ones with an abundance of ink. Remove tape and staples as well.
Ensure that you have more cardboard and/or newspaper and mulch than you think you need. For example, if you plan to sheet much between 100 and 200 square feet of yard, order between four and eight cubic yards of mulch.
Create a barrier around the outside of your sheet mulching area by digging out a small trench around its border. Use a spade or hoe to cut diagonally into the ground, creating a natural slope up to your new garden patch. If you are sheet mulching close to a sidewalk, driveway, or path, remove about six inches of turf between the stone and your mulching area.
In addition to removing tall weeds as we did in the prep phase, adjust your mower to the lowest setting and mow the grass. Again, there is no reason to pull up grass unless it is invasive to the area.
For the first time in the process, moisten the patch as you would water any area of your lawn, with one to one-and-a-half inches of water.
If you've opted for cardboard, cut the pieces to fit the exact shape of your mulching patch. When mulching around trees or shrubs, cut the cardboard to fit around the base of the trunk. You should hold off on planting annuals during the sheet mulching process, but trees, shrubs, and hardy perennials can stay.
Lay a single sheet of cardboard or about ten sheets of newspapers on the area, overlapping about 6 inches between each piece. Overlapping ensures that pesky weeds and grass have no hope of striking through the mulch.
Press the edges of the paper or cardboard into the trench you dug to hold it in place.
Break out the hose again and water the layer of paper or cardboard with a good soaking. This water layer will both keep it in place and kick off the decomposition process.
Again, if you're hoping to increase nutrients in the soil below, start by adding an inch of compost on top of your weed barrier. You can either purchase compost from your garden store or use it from your own compost pile if it's fully broken down.
Add an average of 6 inches of mulch on top of your compost or barrier. Any variety of organic mulch made with local materials will do, including straw, grass clippings, wood chips, or bark.
Water the area one last time to keep the mulch from blowing away in the wind, and yet again, to encourage the decomposition process.
Ideally, give the sheet mulched area between four and six months to do its thing. Water the mulch about once a week unless the rain does this for you. The area does not need frequent attention, but it shouldn't dry out for weeks at a time.
While you absolutely can plant new flowers or veggies immediately, it's best to wait for the decomposition process whenever possible. If you do plant early, cut an X shape in the cardboard and bury the seeds or seedlings right in the soil.
Sheet mulching is an ideal DIY project both for its simplicity and cost. Professional mulch installation costs an average of $510 for a 500-square-foot area when you add up the materials, delivery, and installation fees. Add in landscaping costs for the sheet mulching process—typically between $50 and $100 an hour for a landscaper—and you could end up with a several-hundred-dollar bill.
The price of sheet mulching yourself, however, depends on how much you can get from your own home. Make your own mulch at home to avoid the store's $30 to $150 per cubic yard price tag. Add in homemade compost and leftover paper or cardboard, and you're only left with the price of minimal tools.
Sheet mulch before the first frost in the fall to give your sheet mulch plenty of time to decompose. This way, it will be ready for your spring landscaping and gardening. You can sheet mulch in the spring as well, but you will need to cut into the weed barrier to add plants.
The cardboard or newspaper will break down naturally during the sheet mulching process and even support the soil's health. Therefore, there is no reason to dig up and remove the barrier.
While landscape fabric can be helpful for things like pallet gardening and vertical gardens, it can inhibit the sheet mulching process. The weed barrier should naturally break down and allow the transfer of earthworms, nutrients, water, and air between barriers in the long run.
From average costs to expert advice, get all the answers you need to get your job done.

Find out how much a soil test costs and what you get for your money with our expert guide. Know what to budget for different types of soil tests.

Discover the average sand delivery cost, key price factors, and tips to save on your next project. Get transparent, up-to-date estimates for sand delivery.

Gravel is an inexpensive paving material overall, but costs vary by type. Find out what average gravel prices will look like for your project.

How you add mulch to your trees depends on the type of mulch, your climate, and more. Keep reading to learn how to mulch around trees.

Discover mulch removal cost estimates. Discover what influences pricing, compare DIY vs. professional services, and find expert tips to save on your mulch removal project.

What’s the debate between wood chips vs. mulch? Wood chips are pieces or shredded wood from the interior of a tree trunk, while mulch can be made from a variety of materials.