Installing a dedicated line in your home or garage is fairly straightforward, but may have a wide range of cost-affecting factors, like materials, labor, and necessary permits.
Say ‘goodbye’ to extension cords and power bars


Unless you’re confident in your ability to do electrical work safely, it’s best to hire a local electrician, who will have the expertise and tools for the job.
Having an electrical outlet professionally installed costs between $130 to $300, on average.
If you’re doing other remodeling work, it’s a good idea to add new outlets at the same time.
Whether you want an outlet for your TV, floor lamp, or phone charger, you can connect a new outlet from an existing outlet. Homeowners who have extensive experience doing electrical work can add a new electrical outlet to an existing circuit without having to open a wall then patch and repaint. However, working with electrical wiring carries risk, so more often than not, this is a job best left to a professional electrician.
But if you have the skills and know-how to take on electrical work, follow this guide to learn how to wire an outlet from another outlet.
The first order of business is ensuring you have all the tools and supplies for your project.
| Tools | Supplies |
|---|---|
| Stud finder | Electrical cable with ground (14-gauge for a 15-amp circuit) |
| Voltage tester | New outlet |
| Tape measure | Old work electrical box suitable for drywall |
| Pencil | Wire connectors |
| Drywall saw | |
| Philips screwdriver | |
| Flathead screwdriver | |
| Needle-nose pliers | |
| Lineman pliers | |
| Wire cutter | |
| Wire stripper |
This is a quality electrical company with very professional and well-trained technicians. They installed new switches, outlets and light fixtures in my 2nd floor, removing the knob and tube wiring and installing new grounded lines. I will be recommending them to all my friends and family.

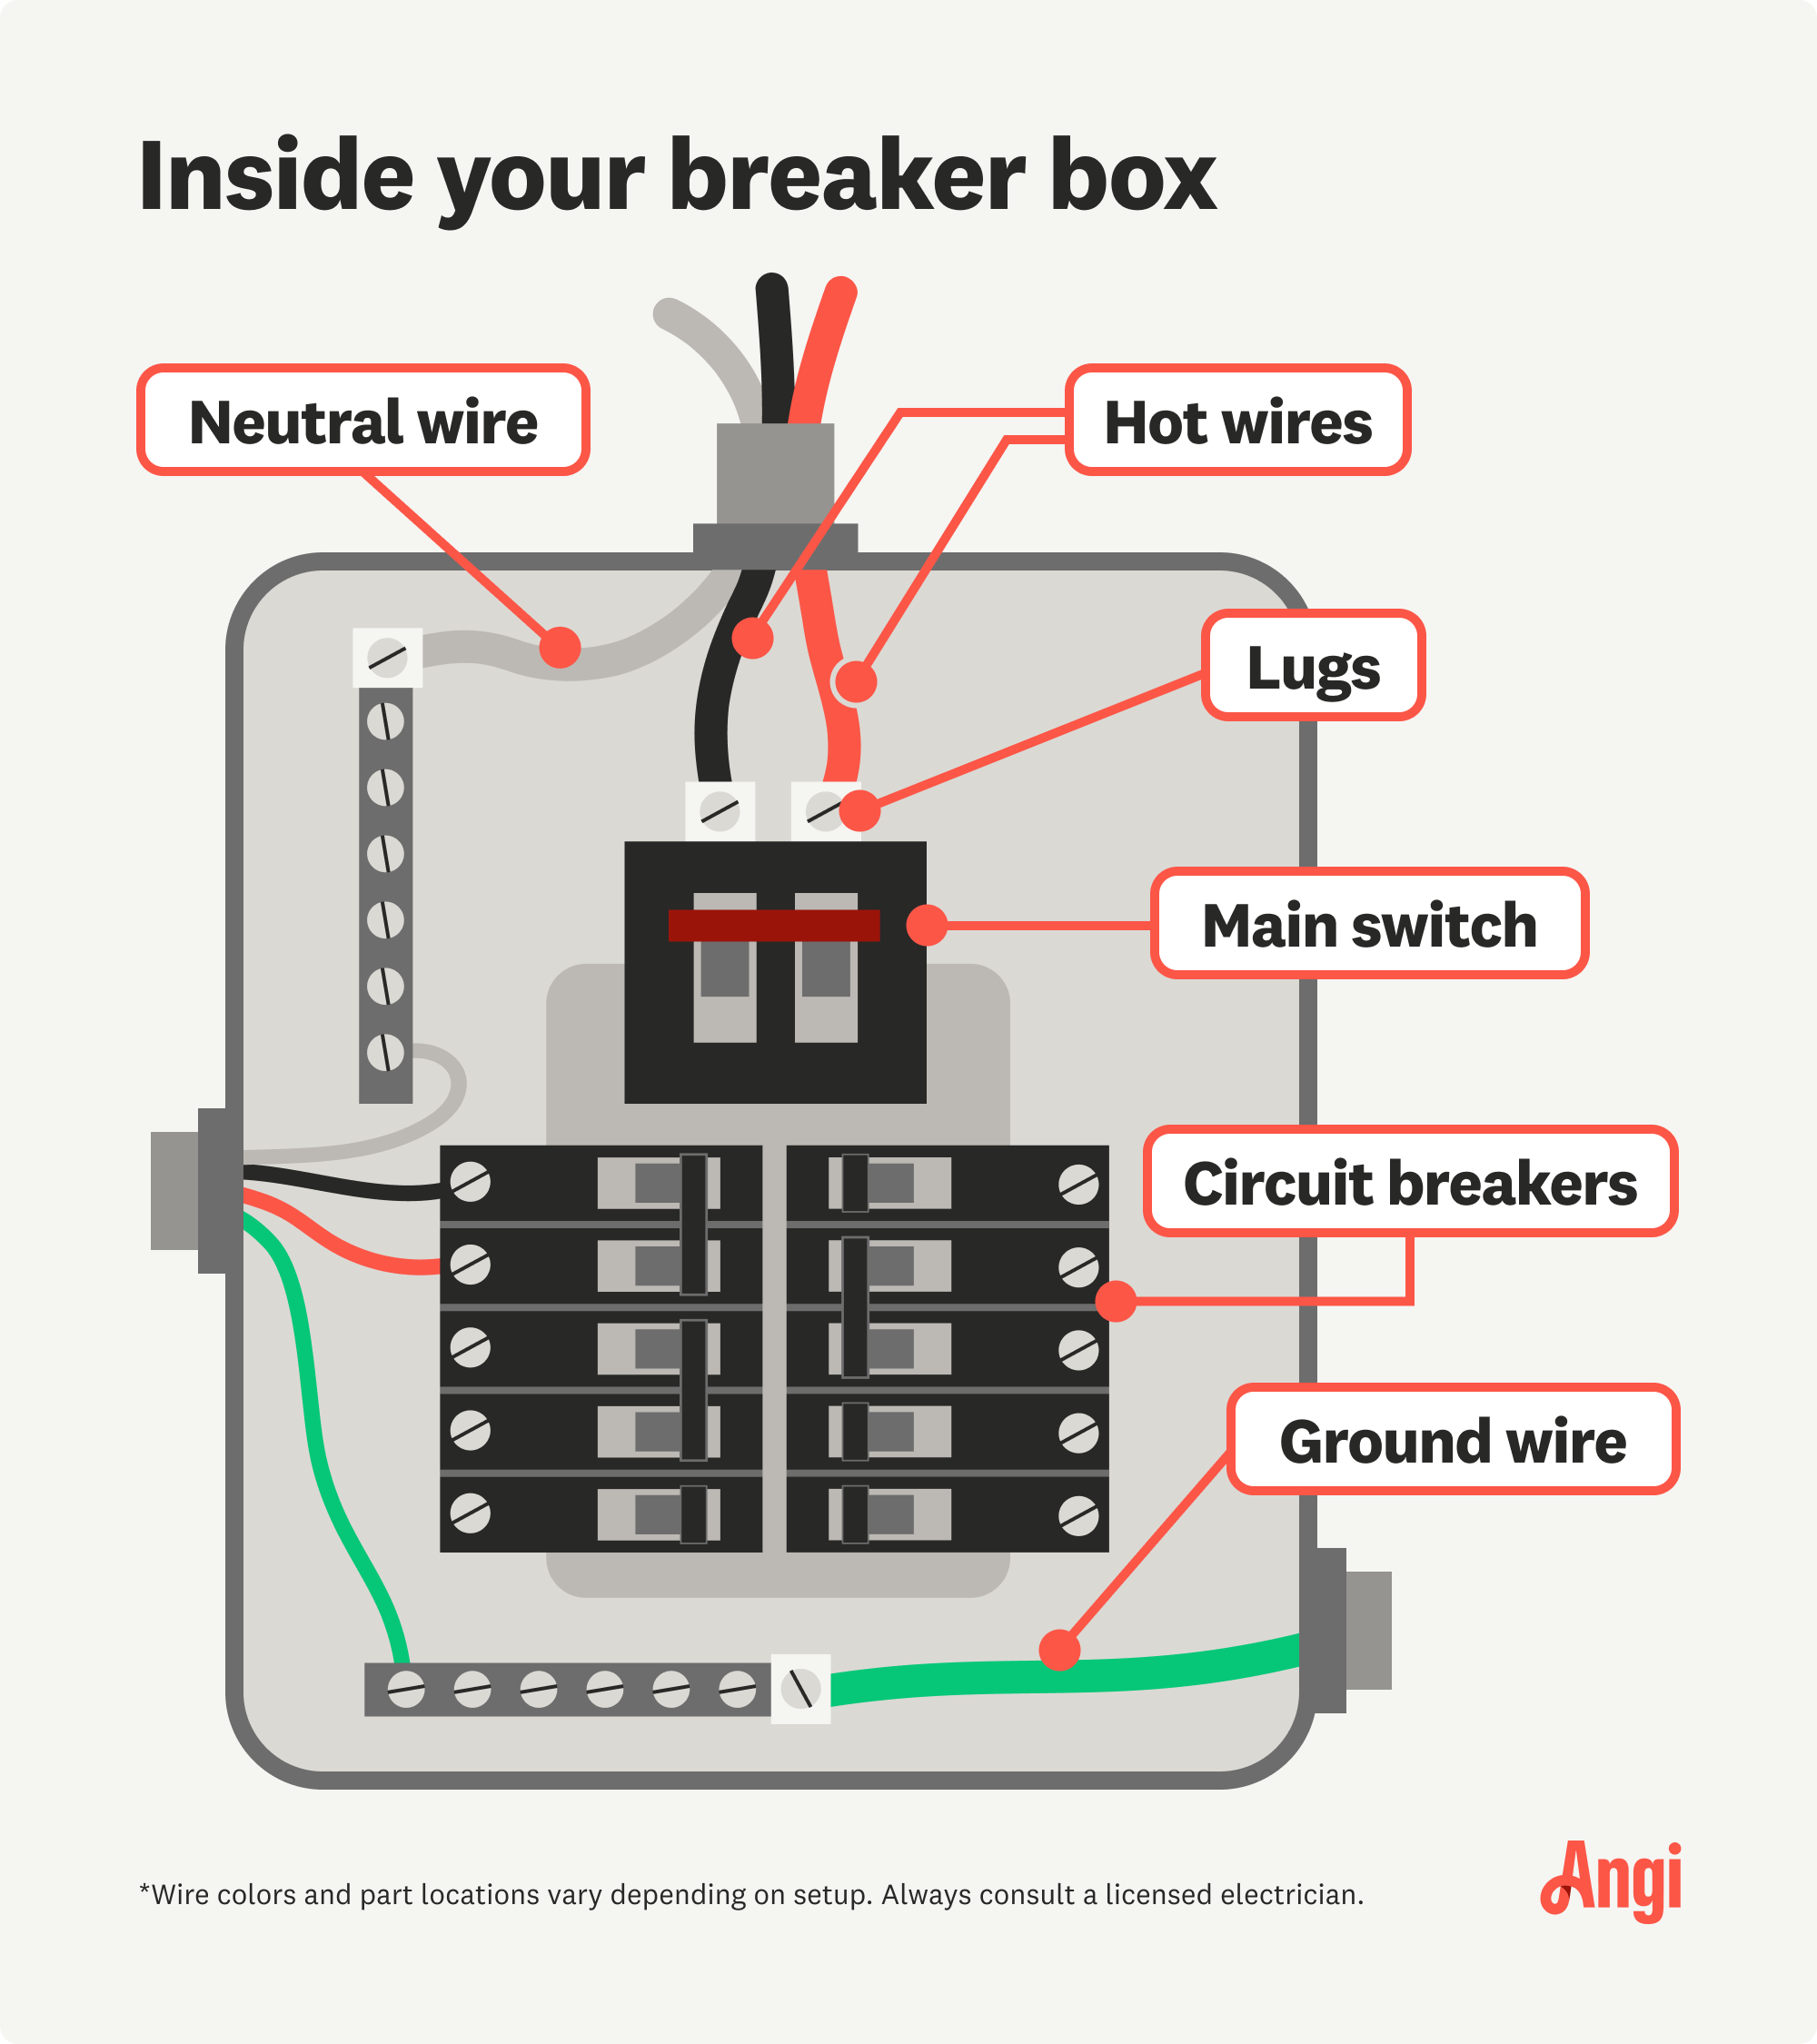
Turn off the power to the circuit you're working on at the circuit breaker. Go to the circuit breaker box in your home and switch the breaker to "off." If you aren’t able to figure out which breaker connects to the room you're working in, you can shut off the power to the whole house.
Working on an outlet that still has power poses a severe risk of electric shock and injury. Make sure everyone in the house knows you’re working on the electrical system and inform them not to turn on the power while you’re working.
After you’ve shut off the power, check to make sure the outlet has no charge by using a non-contact voltage tester. Insert the pen tip of the voltage tester into each slot of the receptacle to confirm that the power is off. The separate slots within the same receptacle can be individually wired, especially in an older home.
If you have old, fabric-insulated wiring, it’s best to call a licensed electrician to continue the project. It can be hard to distinguish the neutral wires from the hot wires, and you likely don't have a ground wire.
Select an existing outlet opposite the desired new outlet location, ideally in the same stud bay. Use a stud finder to locate wall studs. If the outlet is near a stud, drill a hole to fish the wire to the next stud bay for more placement options.
Alternatively, run the wire through the ceiling to the attic or the basement, though this is more complex. For additional outlets, consider replacing an existing outlet with a quad receptacle.
You must be sure that the circuit can handle the new outlet. Most codes allow up to eight outlets or switches on a 15-amp circuit; overloading can trip the breaker.
Turn off the breaker to identify which outlets lose power. Outlets in kitchens and bathrooms must be on a 20-amp circuit with a GFCI for safety, which is vital in electrical work. If unsure, it's always best to hire a licensed electrician.

Determine where you want to place the new outlet. If your existing outlet is on the opposite side of the wall, make sure the new outlet is within the same stud bay. With a tape measure, note the distance of one outlet from the edge of the wall, and do the same on the other side to determine placement.
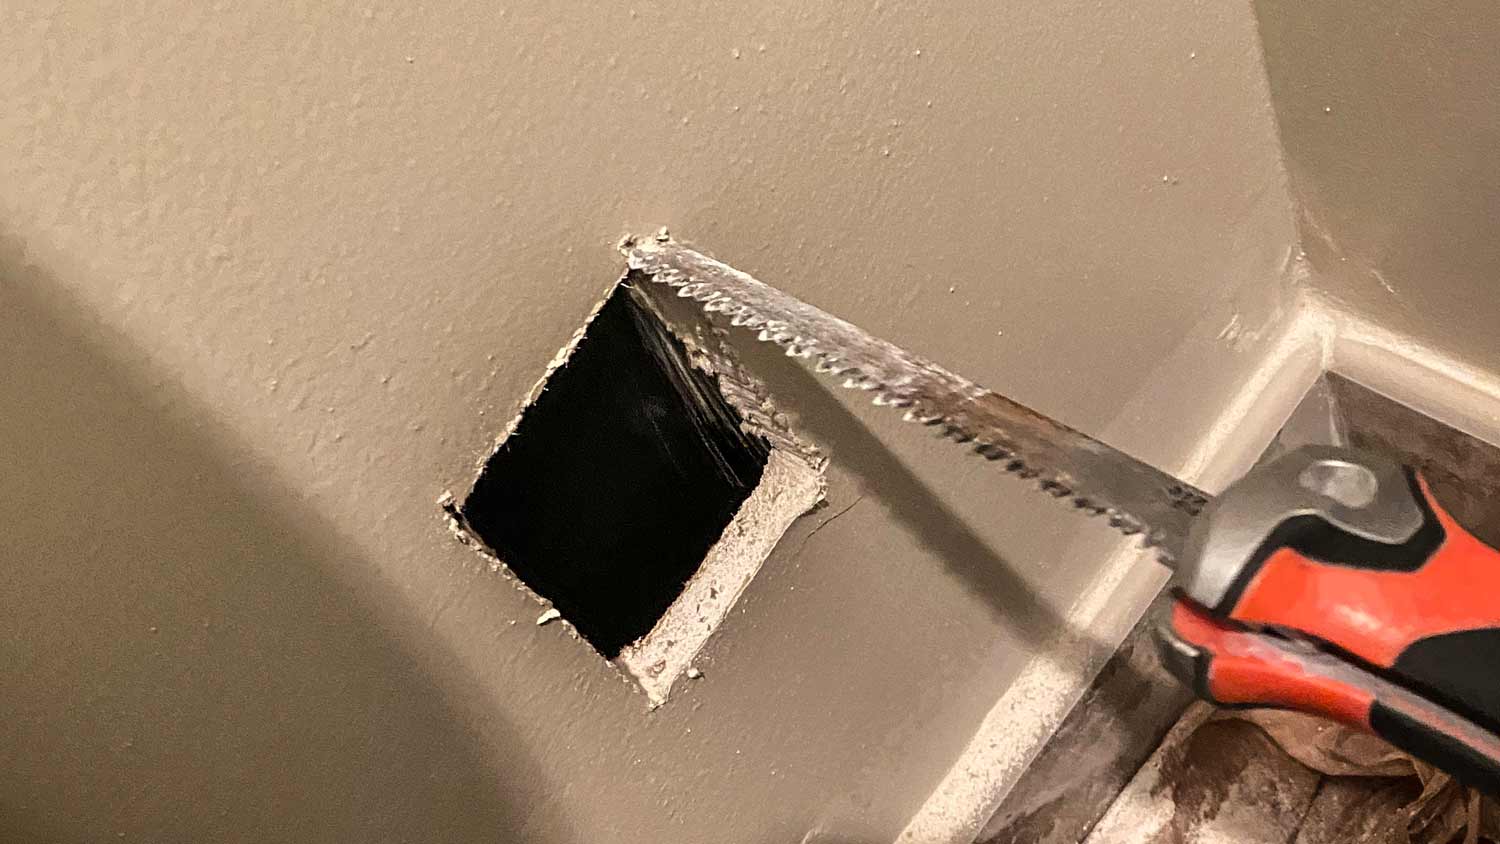
Place the electrical box face-first against the drywall and trace the edge of the box with a pencil. With a drywall saw, cut along the marks to create a hole.
With a screwdriver, unscrew the existing outlet cover plate. Next, unscrew the outlet and carefully pull it away from the wall about two inches. Let it hang to one side. Punch out one of the knock-outs at the back of the box with a screwdriver.
Feed the new electrical cable through the opening of the back of the box, sending enough wire through the wall to reach the new outlet plus an extra foot of wire. Go to your new outlet and look for the new cable, then pull it through to the new box.
You want to have approximately 10 inches of new wire coming into the box. Place the new box into the opening in the drywall and turn the screws attached to the tabs until the receptacle is secure.

Look at the wires connected to the existing outlet. Take a photo to remember how they connect. The box should have three wires: a black (hot) wire, a white (neutral) wire, and a bare copper or green wire (ground). Again, if you don’t have a ground wire, it’s best to pause this project and hand it over to a licensed electrician.
Loosen the screws holding the wires to the outlet with a screwdriver. Or release the outlet wire if it's a push-in receptacle. Straighten any hooks in the wire with needle nose pliers.
Use lineman pliers to twist together the ends of the existing wire and the new wire. Connect the wires in three sets: the black wires, the white wires, and the ground wires. Cap the end of each twisted bundle with a wire connector.
Create pigtails at the end of each wire coming out of the connector. Form a J-shape at the end with needle nose pliers, then hook them to the outlet around the proper screws, going clockwise. The white wire goes to the silver screw, the black wire to the gold screw, and the copper or green wire to the green ground screw. Tighten the screws with a screwdriver.

Strip the new cable about 5/8 inch to expose the bare wires. Use needle nose pliers to bend the ends of the wire into J-hooks and attach them clockwise to the proper screws.
Gently bend the wires so they fold nicely into the outlet box. Tighten the screws of the outlet so it fits securely into the electrical box. Attach the outlet cover with screws.

Turn on the circuit breaker at the breaker box and test the outlet with a device or appliance. If both slots work, congratulations! You just added a new outlet to your home.
Clean your project work area by vacuuming and mopping any drywall dust and disposing of wire fragments.
Adding new outlets allows you to plug in appliances and electronics with ease. It can also eliminate the need to use extension cords and power bars. Follow these tips for adding outlets to your home.
Install new outlets at the same time you're tackling other remodeling work.
Rewire through unfinished spaces such as the attic and basement if possible.
Add more outlets than you think you might need, especially if an electrician is creating a new circuit.
Label all your wires and take photos so you can rewire the outlet properly.
Use an electrical fish stick to help fish wire through obstacles in the wall.
Always follow safety precautions, especially turning off the power and testing the outlet with a voltage tester before you begin.

Wiring a new outlet from an existing outlet requires the least amount of work when it comes to adding a new outlet to your home. You won't need to fish wire through the walls or cut open your drywall more than the size of the electrical box. It can be an advanced-level DIY project if you have a strong background in doing electrical work and follow proper safety precautions, most importantly, turning off the power at the breaker before beginning.
According to data from Angi customers, 57.8% of electrical projects are repairs-based, while 42.2% are for initial installations or relocations. Call a professional electrician for any electrical problems you have or projects you’re thinking about.
It costs less than $50 to wire an outlet yourself if you already have the tools. If you hire a local electrician, the cost to install an electrical outlet ranges from $130 to $300 on average.
You can wire an outlet yourself if you take the right safety precautions and follow the proper technique. If you have a more complicated project, such as adding a circuit to your home or many outlets to a room, it’s best to hire a local electrician. A licensed electrician has the skills, experience, and tools to ensure a safe job.
From average costs to expert advice, get all the answers you need to get your job done.

Installing a dedicated line in your home or garage is fairly straightforward, but may have a wide range of cost-affecting factors, like materials, labor, and necessary permits.

Attic fan installation costs vary based on location, fan type, and other factors. Get the cost breakdown for labor, materials, and additional extras so you can work out your budget for this essential home renovation project.

Rewiring a house can be a complex project but don’t let it catch you off guard. Read this to plan ahead and discover the cost to rewire a house.

Wondering how to tell if a circuit breaker is bad? There are several warning signs you should know to help keep your family, home, and electronics safe from shortages and fires. Keep reading to learn the signs to watch out for with circuit breakers.

A dead outlet is more than an annoyance. It can be a fire hazard, too. Here’s how to deal with a dead outlet to keep your home safe and prevent fire.

Ready to upgrade your front door and learn how to wire a doorbell? You may be able to handle this relatively simple DIY installation without an electrician.