How to Wire Your House For Ethernet
Your hard-wired answer is ethernet


If you’re remodeling or use your home internet for work frequently, you might have considered ethernet as an option. Since not everyone has wireless access, and wireless internet connections can be slower than wired connections, upgrading to ethernet might make sense whether you choose to DIY or go with a local pro. Here’s how to wire your house for ethernet so you can get the speed and reliability of a wired connection.
Why Wire Your House for Ethernet?
Wireless internet is the most common type of connection out there for home internet access; however, if you want better speed and a more stable connection, ethernet is the way to go. If you have large files to share, security concerns, or require a stable internet connection for work, ethernet can help you get it done. Ethernet is also a good alternative if you live in a remote area without access to wireless internet.
Better Security
Because ethernet is hard wired to your device, you would need to plug directly into it to intercept any data on your network. A hacker would have to physically connect to your network inside your home to access your data. Because wireless internet uses airwaves, it can more easily be intercepted, so a hard-wired connection is the most secure option you can get.
Faster
Ethernet cables can transmit more data through their wires than a WiFi connection can using airwaves. On average, ethernet connections are about twice as fast as WiFi connections, but results will vary based on location and how much your bandwidth is shared. Since ethernet is hard-wired, the speed you get will be relatively constant, and you won’t be sharing bandwidth with anyone else.
More Stable
Since wireless signals need to be transmitted through airwaves, they can be disrupted by other devices using similar bandwidths, including neighbors, electromagnetic interference from microwaves, and physical obstructions like walls from buildings. Devices that can cause interference include baby monitors, Bluetooth devices, other wireless networks like neighbors, and cordless phones. Ethernet doesn’t share its signal outside of the cable it’s traveling through, so it tends to be less susceptible to interference and more reliable overall.

Planning For Wiring Your House for Ethernet
Making sure you have the right materials for your ethernet wiring project is important. Setting yourself up with the best speed and volume for your purposes and staying in bounds with your local electrical code requires some planning.
Measure and Plan Your Layout
To get ready for your ethernet install, you’ll need to measure first to figure out how much cable you’ll need and plan the places you’ll need an ethernet connection so you can count all the parts you’ll need for receptacles. This step can also help you plan where to locate your router. You can use an app that lets you make a simple floor plan, or you can choose to sketch a floor plan with a pencil and paper. The important thing is to measure and plan for all of your parts.
Choose the Right Cable and Parts
In addition to measuring distances, you should also take stock of how much bandwidth you think you’ll need. A simple CAT 6 cable will suffice as a home internet connection for most circumstances. Since it’s a significant cost savings over using a slightly faster cable called a CAT 6a, most homeowners will choose this option. CAT 6 cables will carry 10 Gbps over 180 feet and have a bandwidth of 250 Mhz. CAT 6a will carry 10 Gbps over a very long distance, with a bandwidth of 500 Mhz.
In addition to choosing the speed and volume your cable carries, it’s also essential to check your local electrical codes to see what is required in your area for internet wiring. To run your ethernet through HVAC or behind drywall, you might be required to use Plenum CAT 6 cables or Riser CAT 6 cables that are fire resistant. It’s essential to check your local electrical codes to ensure you have the correct cable type for your job.
How to Wire Your House For Ethernet
To wire your house for ethernet, you’ll need to get your basic materials in order, choose a cable route, and install your wiring. Here are the steps you need to take to wire your house for ethernet.
1. Install a Patch Panel
To connect your wiring to the switch, it’s much easier to use a patch panel. This allows you to use stranded rather than solid core wires that are more flexible and less brittle when bent to connect your house wiring to the switch. You’ll need to choose a panel that accommodates the number of ethernet cables you need to run.
2. Cut Holes for Your Wall Sockets

For this step, you’ll need to punch through the wall at each location where you want to place a socket. It’s a good idea to locate the stud in the wall and make an opening adjacent to the stud so that you’re sure to have clear space behind your receptacle and so that you have a good structure to attach your receptacle to. Cut a hole about an inch smaller than the faceplate of the receptacle so that the face plate will cover it when you’re done.
3. Run Your Wires
Once you have cut your holes, you can run your wires through the walls from the patch panel to the socket locations. You can usually run your ethernet cables along routes where electrical wiring is already run. Still, you might also find it simpler to run the wiring through a basement, below the floor, or to use an alternate route like an HVAC duct. These options will allow you to run cable through the wall for the most part without removing the drywall or plaster. If you are already renovating and have opened up your walls, you can choose your route more freely because you’ll have access to all your options. If your walls are closed, using fish tape and some strategically placed holes in your wall is the way to go.
4. Label Your Cables

As you run each cable, label the end near the patch panel with its corresponding location in your home. This will help later when connecting the wires to your patch panel. If you have any issues with your wiring, it will be simpler to track down the source if you know the origin of all of your cables.
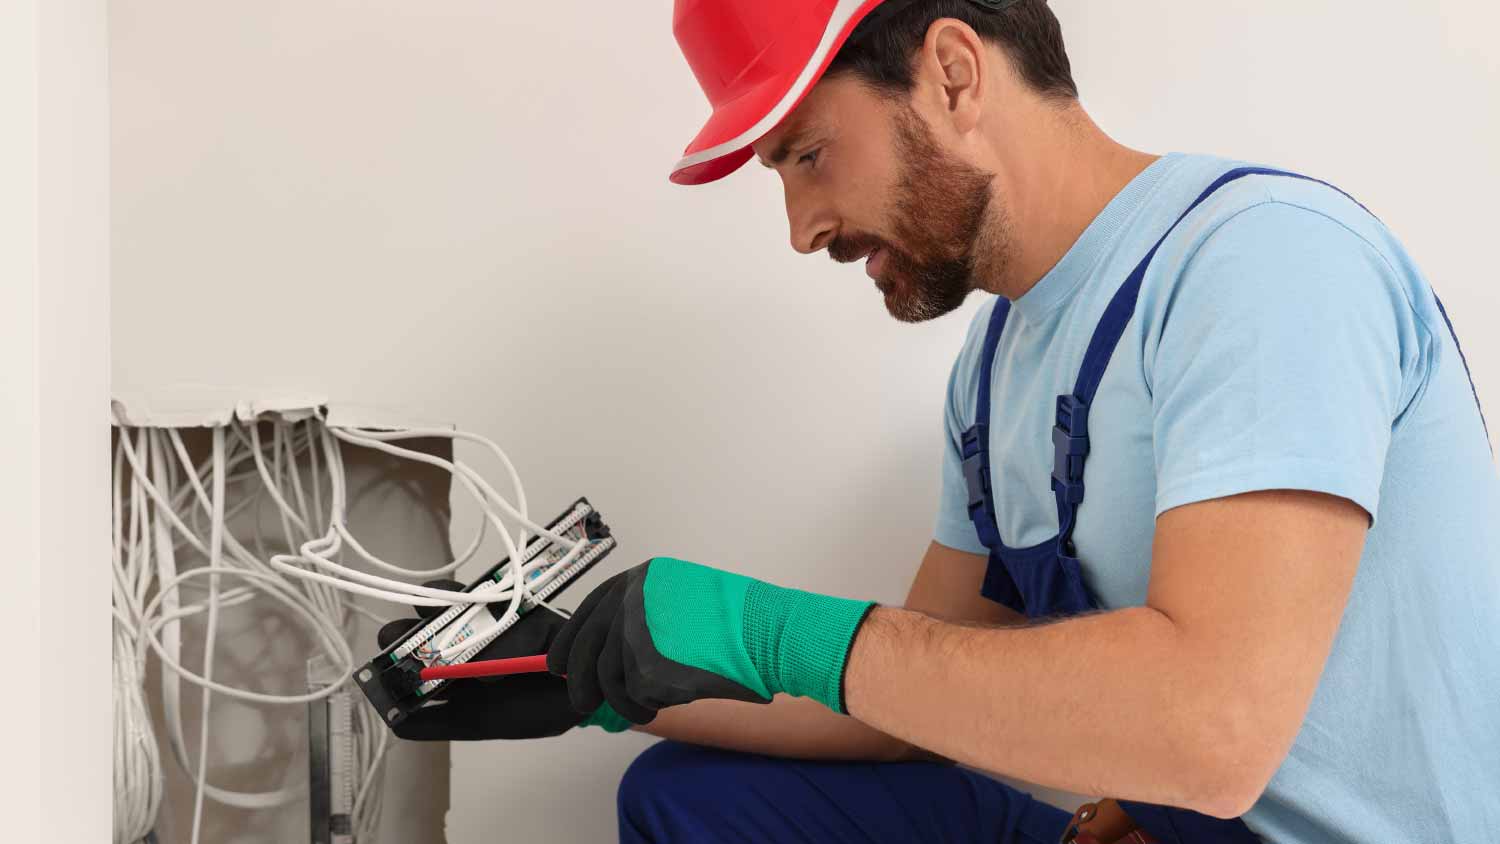
5. Attach Your Wires
To connect your wires, open the connectors and look for the color-coded map. These usually come with a system that’s pretty simple to follow to connect each individual wire in your cable to the circuits in the connector. A similar method can be used to wire the wall receptacles.
6. Connect Your Patch Panel
From your patch panel, you can run short patch cables to the switch. These shorter, flexible cables can make it around tight corners from the patch panel to the switch more easily. Using the connectors you installed on the ends of your cables from the wall, plug them into the output jacks on the patch panel. Then, use the patch cables to connect these circuits to the corresponding outputs on the switch.
7. Test Your Network
Using a patch cable, plug a laptop into each receptacle in each room, and while it’s plugged in, look for the light above the corresponding switch on the router. If the light comes on, it indicates a network connection between the wall socket and the router. If not, it suggests that there’s a problem with the wiring. It could be a crossed wire, a dispatched receptacle, or a connector that’s not fully wired or has a missed connection. You can troubleshoot these problems as you go and address them.
8. Connect Your Internet

The next step is to connect your cable to the router input. In some cases, this will require using a splitter or multiple splitters to allow you to use the cable for other things in your home as well. Then, you can connect the cable to the modem. Once you have your modem connected, plug it into the “untrusted” input on your router, and then from the “trusted” input, plug the router into your switch uplink. This should complete your installation, and you should now be able to set up your internet connection from here.
9. Attach Your Face Plates
Once you’re sure everything works, you can attach your face plates. It’s a good idea to leave them open until you’ve tested your wiring to avoid detaching and reattaching them while troubleshooting.
Tips For Dealing With Running Ethernet Wiring
When you run wires through a closed wall, you will come up against unforeseen obstacles. While following the path of previously installed wiring can help you get past some of these obstacles, you will likely come up against situations where fish tape and other tools don’t quite get you far enough, so you’ll need to cut a hole in the wall for access. Here are some tips for dealing with running wire.
Use an automotive camera with a light that can help you see what’s going on through a small drill hole before you cut a larger hole in the wall.
Use a stud finder before drilling or cutting into your wall to ensure you’re cutting into an open area between studs.
Before cutting into the wall, look for plumbing and other wiring to avoid damaging your other household systems.
To use “punch through” connectors for your ethernet cables, you can use a small screwdriver instead of a punch-through tool if you don’t have one.
You can avoid cutting through studs or drilling into them by running wiring through a basement or a crawlspace and then drilling into the room where your receptacle will be.
DIY vs. Hiring a Pro
To have ethernet installed in your home by a pro, the average cost is $3,800; doing the installation yourself can cost as little as $200. Keep in mind that the more receptacles you need for using the internet, the more time it will take to run the cables, and while this project is doable for an experienced weekend warrior as a DIY, it does require an understanding of your local wiring codes to stay clear of any violations. If you’re in a situation where you’ll need to cut multiple holes in the walls to run your ethernet and where you might need specialty components, it might be worth hiring a pro. Ethernet installation might also require a license. However, if you have the time and the patience to run and connect your wire, you can save a lot by doing the work yourself.
Frequently Asked Questions
Technically no. You can connect an ethernet cable directly to your router and run any device that can connect to it from there. The downside to this approach is that wires will run everywhere in your house if you want to use the internet in more than one room. If you have a particular place in which ethernet would be helpful, like a home office, you might be able to use an ethernet jack from your router, but if you plan to use it in multiple rooms, it’s better to install some wiring to accommodate your use.
The answer to this will depend on where you live. Some municipalities require a permit for any permanent wiring, while others might have exemptions for internet-related wiring. The best practice is to check with your local permitting authority before proceeding with any home wiring project to avoid fines or problems if you sell your home.
Yes. You can use a wireless network with your ethernet connection for things like cell phones that often use an internet connection and can’t be easily connected to an ethernet port. You can use an output on your router to set up a wireless hub and use it when your ethernet connection isn’t convenient or accessible.

.jpg?impolicy=leadImage)
- Home Generator Repair
- Lamp Repair
- Electric Repair
- Generator Installation
- TV Antenna Services
- Emergency Electricians
- Commercial Electricians
- Attic Fan Installation
- Attic Fan Repair
- Exhaust Fan Installation
- Electric Inspectors
- Subcontractors
- Electrical Construction
- EV Charger Installer
- Chandelier Installation
- Doorbell Installation
- Bathroom Fan Installation
- Ring Installers
- Electrical Panel Upgrade
- Who Can Run Ethernet Cable Through Your Walls?
- How To Install Under-Cabinet Lighting: Step-by-Step Guide
- 8 Types of Electrical Wires You Can Find in Your Home
- How to Build a House: Your Complete Guide to the Home-Building Process
- 6 Tips to Prepare for a Successful Home Remodel
- Which Home Projects To Put On Your To-Do List First After Moving
- 14 Home Renovation Tips for a Stress-Free Project
- Home Electrical Repairs: Basic Wiring and Electrical Repairs
- 45-Point Moving Cross-Country Checklist
- 9 Things That Will Slow Down Your Home Renovation
Get our Angi-powered app


