Discover how much a plumber costs in Dallas, explore local cost factors such as water quality and home age, and learn how to hire the right licensed pro.
Keep your water flowing even in the coldest weather


Hiring a plumber for $45 to $200 per hour is often the safest and fastest way to deal with frozen pipes.
This is a particularly finicky task for DIYers, as mistakes can lead to bursting pipes and water leaks.
Professionals know how to locate deep or hidden freezes, safely thaw pipes, and assess any damage.
They will also perform maintenance to prevent pipes from freezing in the future.
Deep frozen pipes are more difficult and expensive to thaw, with pros charging up to $500.
Frozen underground pipes can quickly become a homeowner’s nightmare. If left unchecked, they can cause bursts and significant water damage, leading to costly repairs. But don’t panic—many homeowners can thaw frozen underground pipes themselves in a free afternoon. This guide outlines everything you need to know about identifying, thawing, and preventing frozen underground pipes.
Thawing frozen underground pipes is crucial to preventing severe damage. When water freezes inside a pipe, it expands, putting pressure on the pipe walls. If the pressure becomes too great, it can cause the frozen pipe to burst or crack, leading to water leaks that can cause significant damage to your property. Even if the pipe doesn’t burst, the blockage caused by the ice can disrupt your water supply, leaving you without water when you need it.
Thawing frozen pipes yourself rather than letting them thaw naturally lets you control the process, monitor for leaks, and potentially prevent sudden bursts, minimizing the risk of extensive water damage.
The cost to thaw frozen pipes usually falls around $100 to $200 when you hire a professional, which includes the labor, equipment, and time required to safely and effectively thaw. However, deep underground pipes can be more labor-intensive and time-consuming to thaw, so costs can reach as high as $500 depending on your property and situation.
Thawing frozen pipes yourself can save you quite a bit of money since many homeowners already have the equipment to do it. Even if you don’t, you can purchase or rent equipment for less than it would cost to hire a pro to do the job.
Noticing the signs of frozen underground pipes early can prevent a minor inconvenience from becoming a major disaster. Here’s what to look for:
Reduced Water Pressure: One of the earliest and most common signs of a frozen pipe is a sudden drop in water pressure. If you turn on a faucet and only a trickle of water comes out, there’s a good chance that ice is blocking the flow somewhere in your plumbing system.
No Water Flow: In more severe cases, you might find that no water comes out of your faucets at all. This typically indicates that the pipe is frozen and the ice is blocking the water flow.
Frost or Condensation on Pipes: If you have access to any part of the underground pipe, such as in a crawl space or basement, check for frost or condensation on it. This indicates that the pipe is freezing and could already be blocked by ice.
Unusual Sounds: Frozen pipes can sometimes emit strange noises, such as banging, clanking, or whistling, as water tries to move through the blocked area.
Odors from Drains or Faucets: If the pipe is partially blocked by ice, it can trap odors that would otherwise be carried away, so if you notice strange smells coming from the drain or faucet, it could indicate frozen pipes.

Thawing frozen underground pipes requires careful handling to avoid further damage, so if you’re uncomfortable with any of the following steps, call a local plumbing repair company to handle it for you. But if you want to give it a go yourself, here’s a step-by-step guide to thawing them.
You’ll need to begin by identifying the area where the pipe is frozen, which can be a little tricky for underground pipes. First, check where the pipe enters your home, as this is often where freezes occur due to exposure to cold air. Walk along the path where the pipe runs, paying close attention to any areas near the foundation. You might notice frost on the ground or colder spots above where the pipe is buried, which can indicate the frozen pipe’s location.
If you're still unsure, look for any areas where the ground seems raised or disturbed, which could signify a freeze underground. In some cases, you might need to trace the pipe's route from inside your home, following it to the exterior to pinpoint the problem area. Unheated spaces like crawl spaces and basements are also prime suspects for freezing and are worth a closer inspection.
Before thawing a frozen pipe, you need to shut off the main water supply to prevent a potential flood. The sudden release of pressure during thawing can cause cracks or bursts that were previously kept in check by the ice.
To do this, locate your main water shut-off valve—it’s usually found where the main water line enters your home, often in the basement, utility room, or outside near your water meter. Turn the valve clockwise (righty-tighty) until it’s completely closed.
There are a few ways to thaw underground pipes depending on their location and your comfort level. One method is to use a submersible water pump, which is best for pipes with a clear entry point and relatively shallow sections where you can easily insert tubing. Here’s how to do it:
Prepare the Water Pump: Fill a five-gallon bucket with warm water and drop a submersible water pump into it.
Attach the Ice Maker Tubing: Attach 1/4-inch ice maker tubing to the pump, ensuring it’s securely fitted to prevent any leaks.
Connect the PEX Tubing: Connect a four-foot length of flexible PEX tubing to the frozen pipe, creating a path for the warm water.
Feed the Tubing: Carefully feed the ice maker tubing into the PEX tubing until you reach the ice blockage.
Activate the Pump: Plug the pump into a GFCI outlet and start it. The pump will push warm water through the tubing, melting the ice. As the ice melts, the water will flow back down into the bucket.
Monitor the Thawing Process: As the warm water circulates through the pipe, monitor the system to ensure everything is working correctly. You may notice that water flow increases as the blockage clears.
Check for Water Flow: Periodically check the faucet or valve connected to the frozen pipe to see if normal water flow has resumed. This indicates that the ice blockage is thawed.
Withdraw the Tubing: Once the water flow is fully restored and you’re confident the ice has melted, withdraw the ice maker tubing from the PEX tubing.
Inspect the Pipe for Damage: Check the pipe carefully for any signs of cracks or leaks caused by the freeze. If you find any damage, turn off the water supply again and consult a professional plumber for repairs before using the pipe.
Restore the Water Supply: Once you’re sure there’s no damage, turn the main water supply back on and resume use.
This method is ideal for pipes that are frozen near the surface or in accessible areas like crawl spaces or basements. It involves applying heat to the affected area to thaw the ice.
Locate the Frozen Section: Identify the frozen part of the pipe. This is often found in areas where the pipe is exposed, such as along exterior walls, basements, or crawl spaces.
Choose Your Heating Tool: Decide whether to use heat tape, a space heater, hot towels, or an infrared heat lamp. Don’t use high-heat devices like blowtorches or open flames, as they can damage the pipe and cause safety hazards.
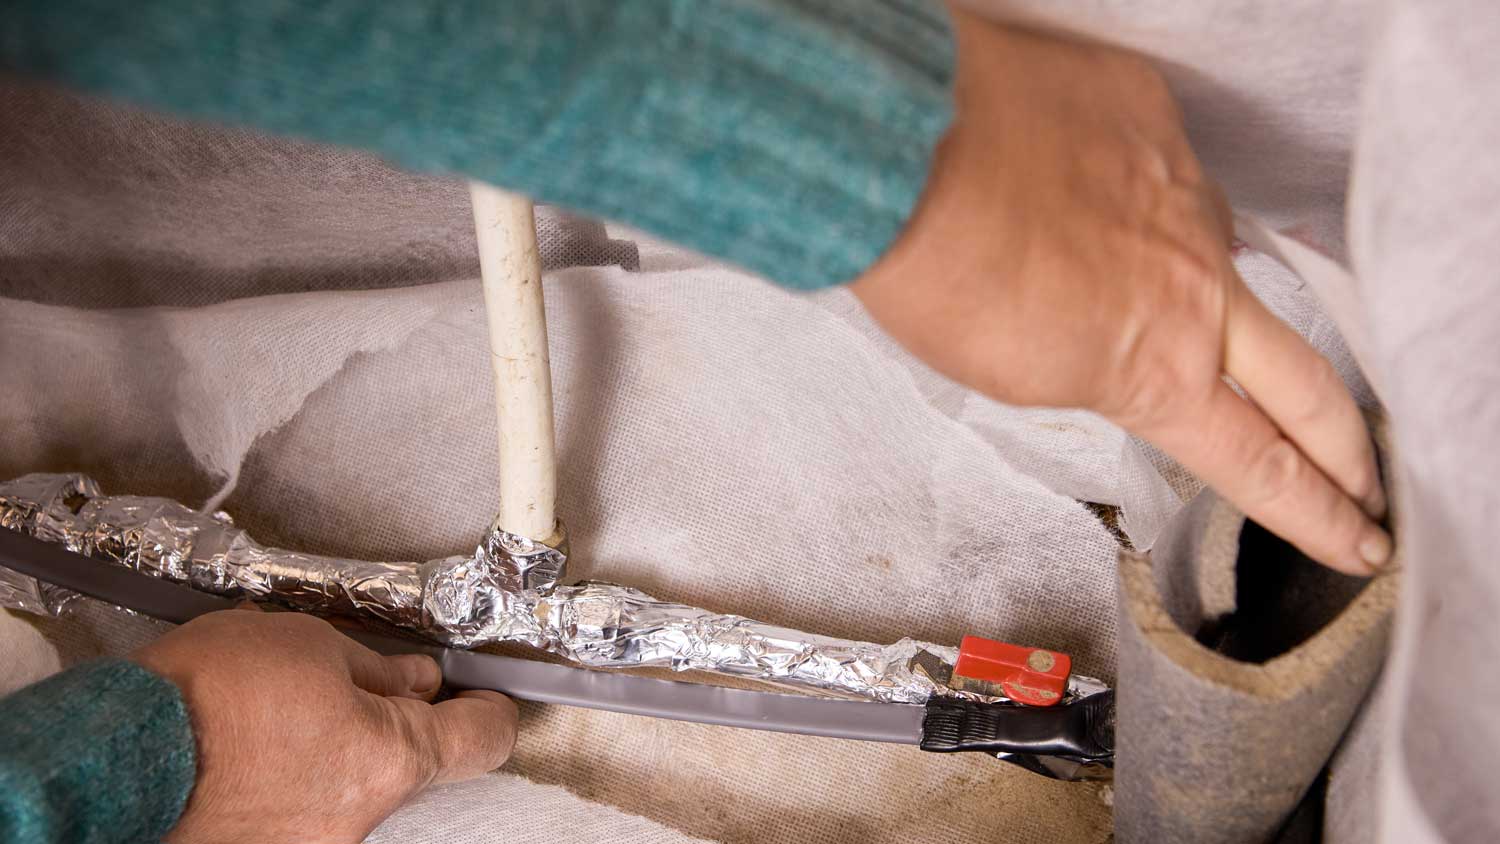
Heat Tape: If part of the underground pipe is accessible, you can use heat tape.
Unroll the tape and wrap it tightly around the exposed section of the pipe.
Plug the heat tape into a nearby outlet.
Monitor the pipe to ensure it is thawing properly.
Hot Towels: If part of the underground pipe is accessible, you can also use hot towels in lieu of heat tape.
Soak some towels in hot water.
Wrap the hot towels around the frozen area of the pipe.
Monitor the pipe for proper thawing.
Infrared Heat Lamp: If you have a section of the underground pipe that is close to the surface but not directly accessible, you can use an infrared heat lamp.
Position the lamp toward the area where the pipe is frozen beneath. The lamp's radiant heat will penetrate the ground and gradually warm the pipe.
Adjust the distance between the lamp and the ground to ensure gradual thawing without causing damage to the pipe.
Space Heater: A space heater can be effective in situations where the frozen pipe is located in a crawl space, basement, or shallow trench.
Place the space heater near the frozen section, making sure it's safely positioned to avoid direct contact with any flammable materials.
The heater will raise the ambient temperature around the pipe, gradually thawing the ice inside.
Monitor the Thawing Process: No matter which tool you use, make sure to regularly check the pipe as it warms and watch for any signs of leaks or damage.
Check for Water Flow: As the ice begins to thaw, check the nearest faucet or valve to see if water flow is returning, indicating the blockage is clearing.
Restore Water Supply: After the ice has fully melted and water flow is restored, inspect the pipe for any cracks or leaks before turning back on the water supply and resuming use.
This method should only be attempted if you have some plumbing experience, as it’s more complex than the others. It works best for deep underground pipes and longer stretches of frozen pipe where access is limited. It requires using a hot water jetting system, which you can either rent or purchase.
Rent or Purchase a Hot Water Jetting System: Obtain a hot water jetting system designed for thawing pipes from a tool rental shop or plumbing supply store. Make sure it comes with hoses and attachments suitable for your pipe size.
Shut Off the Water Supply: Turn off the main water supply to prevent flooding in case the pipe bursts during thawing.
Access the Frozen Pipe: Locate the frozen section of the pipe. If it’s underground, you may need to carefully excavate the area to expose the pipe. In some cases, this requires heavy equipment, which should be left to the pros.
Attach the Jetting Hose: Once you have an entry point to the pipe, connect the jetting hose to the hot water jetting system, ensuring a secure fit to avoid leaks.
Insert the Hose into the Pipe: Carefully feed the hose into the pipe until it reaches the ice blockage.
Start the Hot Water Jetting System: Turn on the system to direct a steady stream of hot water at the ice and begin the thawing process.
Monitor the Process: Keep an eye on the thawing process. Be prepared to shut off the system if any issues arise.
Remove the Hose and Restore the Water Supply: Once the ice has melted and water flow is restored, remove the hose and turn the main water supply back on.

A little preparation goes a long way when it comes to preventing frozen underground pipes. Here are some preventative measures you can take.
Insulate the Pipes: Add insulation to any exposed sections of underground pipes, especially where they enter or exit your home. You can use foam pipe insulation or pipe sleeves for this. For pipes that are closer to the surface, consider insulating the ground above them as well to add an extra layer of protection against the cold.
Maintain a Consistent Temperature: If your underground pipes are connected to an area like a basement or crawl space, make sure these spaces are kept warm during the winter months. Seal any drafts or gaps in windows and doors to prevent cold air from entering.
Keep Water Flowing: During extremely cold weather, let a small trickle of water run from faucets connected to the underground pipes. Moving water is less likely to freeze, and a small stream can help prevent ice from forming inside the pipes.
Bury Pipes Deeply Enough: When installing or repairing underground pipes, make sure they’re buried deep enough to be below the frost line. The frost line varies depending on your location, so consult local building codes or a professional to determine the correct depth.
Use Heating Cables or Tape: For pipes that are particularly vulnerable, consider installing heating cables or heat tape along the length of the pipe. These cables provide consistent warmth and can be a lifesaver in areas prone to severe cold snaps.
Seal Off Access Points: Any openings where pipes enter or exit your home should be properly sealed. Use caulk or foam insulation to close gaps and prevent cold air from getting in.
Winterize Outdoor Faucets and Sprinklers: Before winter sets in, disconnect garden hoses, drain outdoor faucets, and blow out your sprinkler system. This step prevents water from being trapped in the pipes, which could freeze and lead to bursts.
Monitor and Maintain: Check your pipes regularly during the winter, especially during extreme cold spells. Being proactive can prevent a small issue from becoming a big, expensive problem.
Whether you should DIY or hire a professional to thaw underground pipes depends on the complexity of the job and your comfort level. Many homeowners can use more basic methods themselves, such as using a submersible water pump or applying external heat. These approaches can work well for relatively simple, accessible situations.
However, hot water jetting for deep underground pipes is best left to people with plumbing expertise. A plumber can quickly diagnose the issue and thaw the pipe using specialized equipment, ensuring the job is done efficiently and safely.
From average costs to expert advice, get all the answers you need to get your job done.

Discover how much a plumber costs in Dallas, explore local cost factors such as water quality and home age, and learn how to hire the right licensed pro.

A main water shut-off valve controls water flow for your entire home. Here we break down the cost to replace a main water shut-off valve.

Learn about main water line repair costs in Dallas and what affects your total so that you can budget accurately and avoid surprise charges.

Severe winter weather causes well water pipes to freeze, obstructing water flow and leading to pipe bursts. Here’s what to do if your well water is frozen.

Learn how to remove a bathtub drain for cleaning or replacing, whether you’ve got a simple toe-touch stopper or a more complicated trip-level model.

Before purchasing and installing a new toilet, you need to know the toilet rough-in measurement to ensure proper integration. Here’s how to get it done.