

The cost to install a 220v outlet will depend on factors such as what type of 220v outlet you need and other key factors you can learn about in this cost guide.
Check your GFCI outlets with a quick DIY project


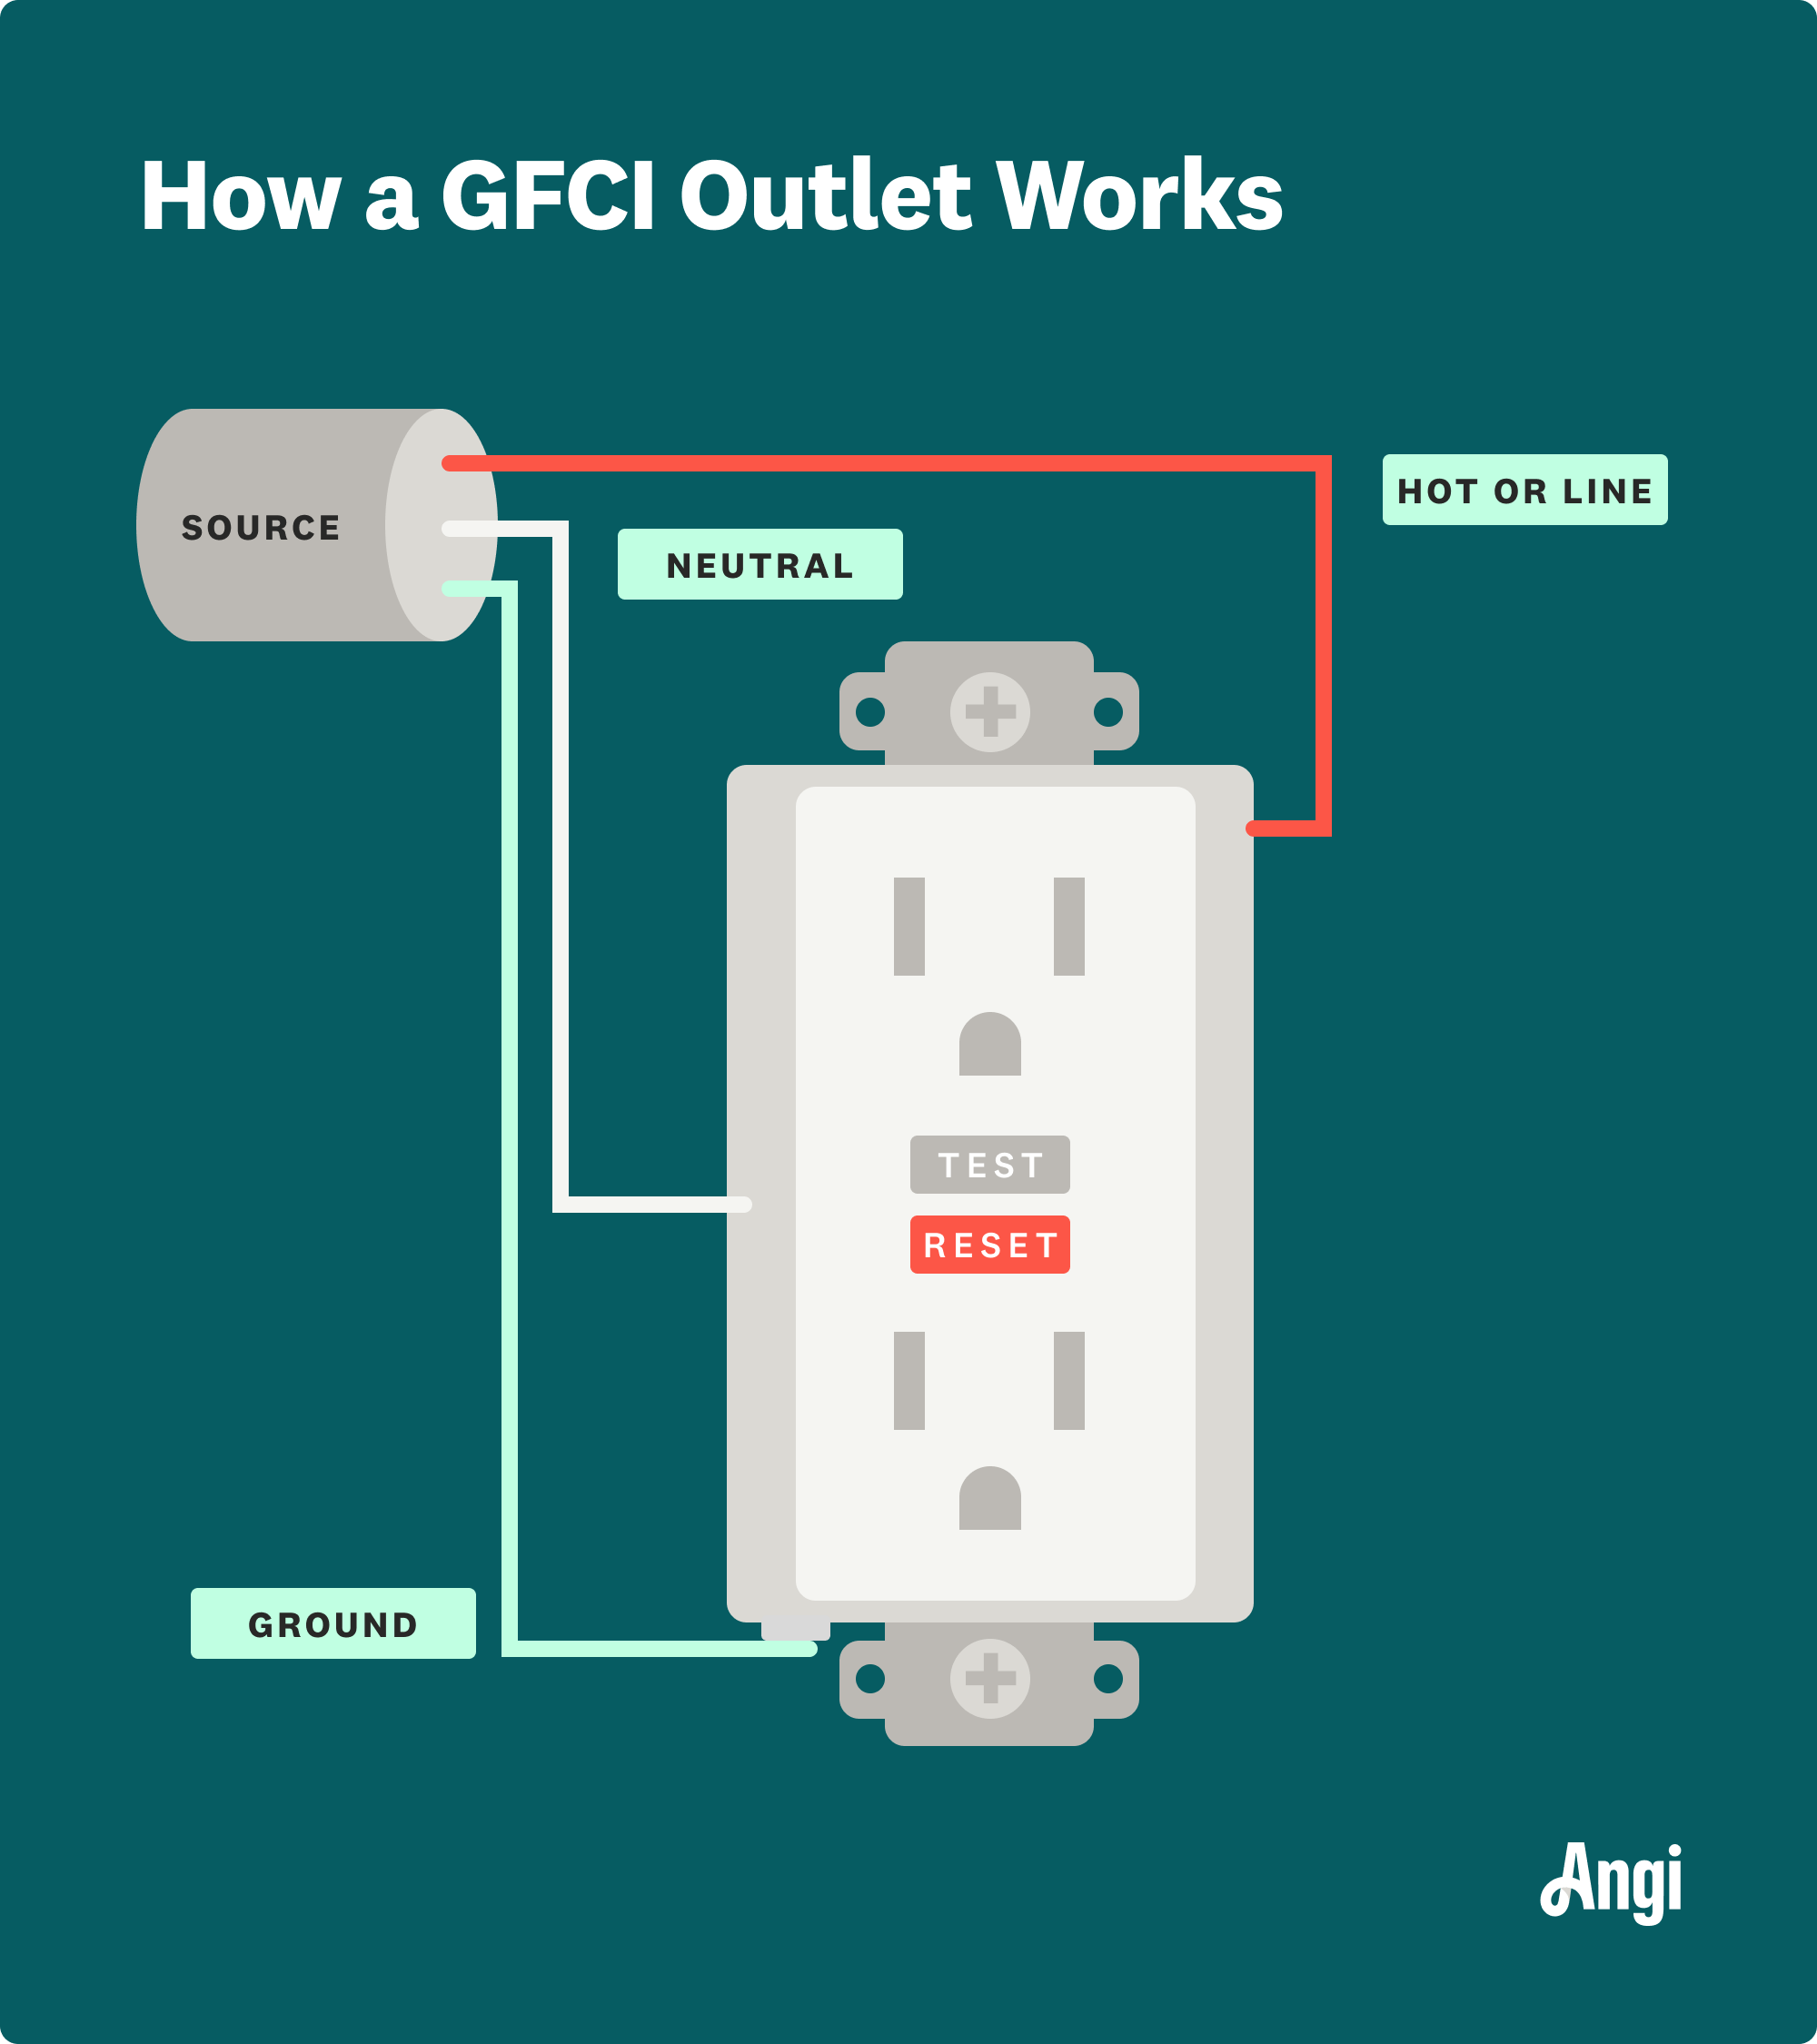
Ground fault circuit interrupter (GFCI) outlets in homes and other buildings help prevent ground faults. Learning how to test a GFCI outlet can ensure your home’s outlets are in working order, providing protection against harmful ground faults and electrical shocks.
The National Electric Code (NEC) requires GFCI outlets in certain areas that come in contact with water, like garages, bathrooms, and kitchens. GFCI outlets benefit from periodic testing to ensure they’re working as intended. Let’s dive into how to test GFCI outlets in a few simple steps.
With a button push, you can quickly examine and test your GFCI outlet:
Identify the "test" and "reset" buttons in the middle of the outlet.
Note if the reset button is protruding; if so, press it to reactivate the outlet.
Check if the power is working by plugging in and turning on an appliance.
Reset your circuit breaker if the power is still not flowing.
If none of the above works, you don't hear a click when pushing the reset button, or it doesn't stay in position, the outlet will need further inspection.

If the GFCI outlet is still not working, don't worry. Testing the wiring is simple; you can do it without unscrewing the faceplate and removing the outlet. Just grab your multimeter, and you're ready to go.
Set your multimeter to measure AC voltage—if you need a range, use the closest to 120V.
Push in the test button to trigger the GFCI.
Insert the black probe of the multimeter into the neutral slot of the outlet.
Insert the red probe into the outlet's hot slot, which imitates inserting a plug.
Check your multimeter readings for zero voltage, indicating that the GFCI has shut down the outlet.
If you get a voltage reading, your outlet has a problem. Here's what to do.
Keep the probes in the outlet slots and press the reset button to activate the outlet.
Recheck your multimeter readings.
Check for a voltage near the expected 120V—if the reading is slightly lower, all is fine.
Next, if you are measuring a double-pole outlet, run the test on both outlets.
If you don't get the expected readings, it's time for some maintenance.
Testing the ground wire is essential to ensure your GFCI outlet functions safely. This wire helps redirect current to the earth if the neutral wiring fails. Follow these steps to test the ground wire using a multimeter:
Keep the hot red probe in its slot.
Remove the black neutral probe from its slot.
Place the black probe in the bottom slot.
Run through the test and reset buttons again.
Check your multimeter readings.
When triggered, your multimeter shouldn’t show any readings. When the outlet is on, it should show 110V to 120V. If you get any other readings, it indicates that something is wrong. In this case, it’s best to contact a local electrician to handle the rest of the testing and diagnosing process.

If the readings indicate a problem, hiring a professional electrician to inspect and work on your home's electrical wiring is best. However, you can move forward if you have previous electrical experience that allows you to identify electrical wires correctly.
Go to your breaker box and shut down the power supply to the appropriate room.
Use your screwdriver to unscrew the faceplate.
Gently remove the receptacle a few inches from the wall to inspect it.
Identify the electrical wires.
Check that the wires connect to the proper terminals.
Switch the wires to the correct terminals if necessary.
Inspect the screws or other attachment mechanisms.
Tighten the screws if the wires appear loose or poorly connected.
When identifying wire connections, keep the following in mind:
The hot or live wire should be black and connected to the terminals marked "line" (for incoming current).
The neutral white wire should connect to the terminal marked "load" (for outgoing current).
The copper wire should be connected to the ground terminal.
If you made significant wiring improvements during your inspection, it’s time to test again. Restore power to this section of your home, and run through the testing procedures above. If the outlet responds as it should this time—great! If the outlet still isn’t working, you’ll likely need to replace the outlet, requiring the help of a local electrician.
With the help of a professional electrician, you can replace the GFCI outlet that’s not working. We recommend hiring an electrician to remove the existing GFCI outlet and replace it with a new one to ensure the installation goes smoothly and safely.
The cost of replacing a GFCI outlet is $100 to $300, plus the cost of materials. A licensed professional charges an average of $210 to replace or upgrade a standard outlet to a GFCI. The labor fees in your area also affect your GFCI outlet replacement costs.
While testing your GFCI outlet with a voltmeter or multimeter is possible to DIY, you’ll need the help of a professional electrician if your test uncovers more serious issues with the outlet. In most cases, you should put more complicated work in the hands of professional electricians near you.
Hiring a professional to replace the outlet will cost somewhere between $130 and $300, depending on the type of outlet, your location, and other price factors. However, replacing the outlet is only one possibility. GFCI problems may originate from other wiring issues and could require extensive testing. Your electrician may have to do a broad inspection to locate the source of the problem and find a fix.
From average costs to expert advice, get all the answers you need to get your job done.
The cost to install a 220v outlet will depend on factors such as what type of 220v outlet you need and other key factors you can learn about in this cost guide.

Get a clear estimate for attic fan repair costs to learn what impacts pricing, how to save, and whether to repair or replace your attic fan.

Keep pool-side dreams from getting short-circuited by being aware of pool electrical installation costs and how they can affect your overall budget.

A dead outlet is more than an annoyance. It can be a fire hazard, too. Here’s how to deal with a dead outlet to keep your home safe and prevent fire.

There are a few signs to look out for if you think you might be experiencing an issue with your electric system. Here are some common warning signs for electrical problems, plus what issues you can tackle yourself and when you should call a pro.

Flickering lights and breaker trips can be a sign that it’s time to replace a circuit breaker. Find out the cost, safety tips, and how to replace a circuit breaker.