
Wondering about the cost to tarp a roof after a large storm or before a major roof renovation? We'll break it down by size, style, and scenario.
If you have the right skills, tarping your roof can prevent major water damage

.png?impolicy=thumbnail)
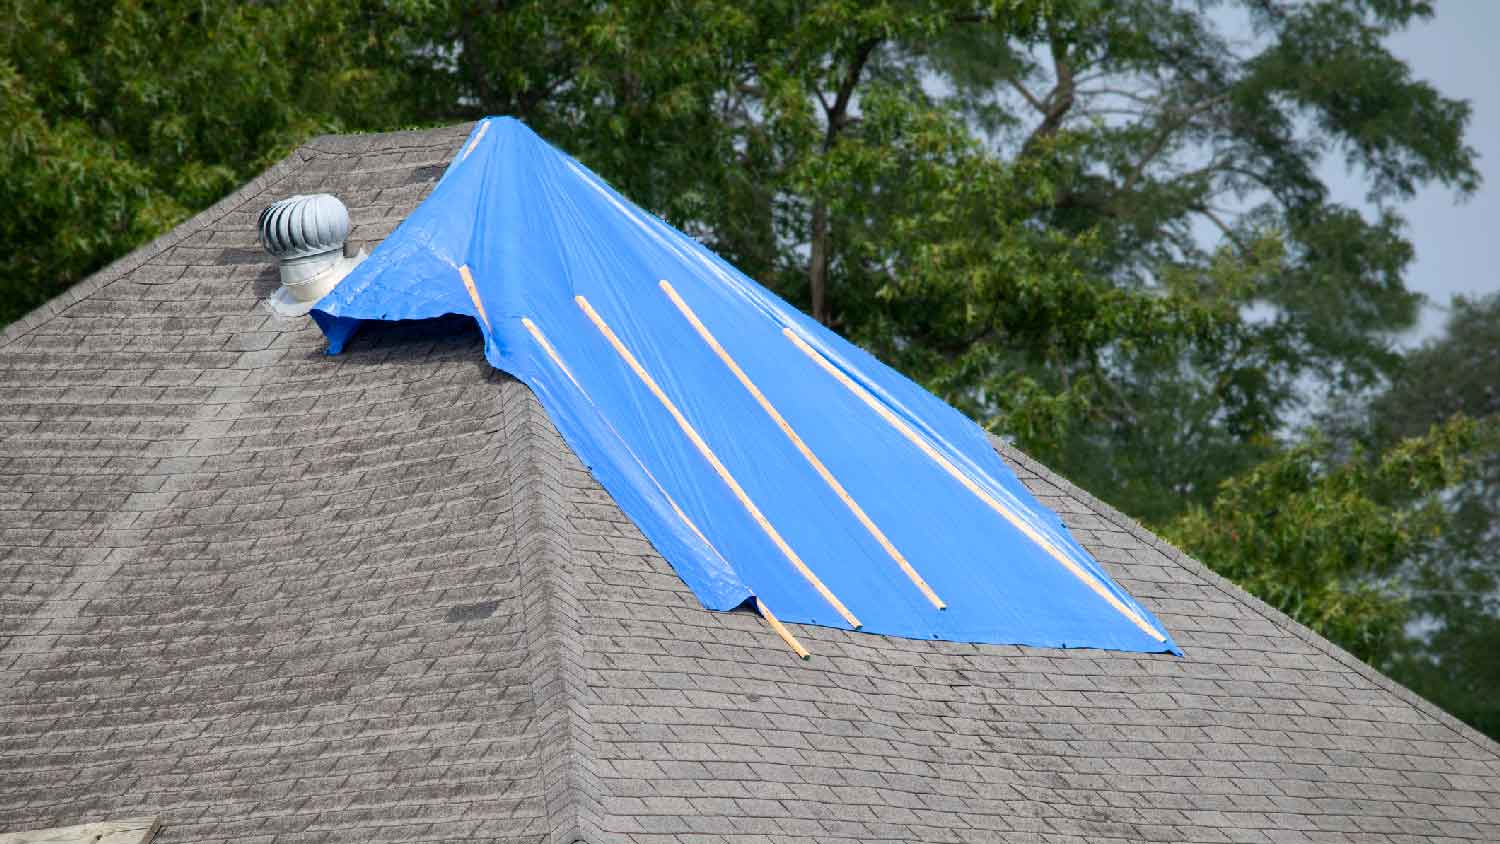
After a major storm, your home’s roof may be left with holes or missing shingles that can lead to leaks. You may have to wait for roofing repairs or replacement, especially if other homes in your area were affected. To stay dry in the meantime, you can learn how to tarp a roof with just a few affordable roof repair materials and tools—but don’t worry because using a roof tarp is a temporary measure and you can remove it when you’re ready for roof repairs.
Before taking steps to tarp your roof, ensure that you’re doing so safely. Roofing work is dangerous, especially after a destructive storm. Conditions may be slippery and debris can present a tripping hazard. Extremely damaged roofs may even collapse under your weight.
If you don’t have proper training and a safety harness, it’s best to wait for a pro and take other steps to prepare for a roof replacement or repairs. If you do have the experience and equipment you need, you should still take these additional steps for your safety:
Never tarp a roof during a storm, during strong winds, or while it’s raining.
Wear personal protective equipment including gloves, eye protection, long sleeves and pants, and sturdy, soft-soled boots.
Have at least two experienced assistants tohold the ladder and help you handle the tarp, which can be heavy and unwieldy for one person.
Never step or stand on the tarp, as it can be slippery.

With an assistant holding it steady, climb your ladder to view the damage on your roof. Stepping directly onto your roof can be dangerous and may cause additional damage, so assess from the safety of your ladder. Look closely for broken shingles and use a camera, smartphone, or drone to take photos for your roof damage insurance claim.
Your DIY efforts may need to end here if you don’t have the proper safety training and harness equipment. If you’re unable to take photos of the full extent of the damage, have your roofers take additional photos when they arrive to lay a tarp. Otherwise, proceed to step two.
Carefully step onto your roof and use a broom to slowly clear away branches, leaves, rubble, loose shingles, nails, and other debris from the roof. Work in sections and be mindful not to push any debris into your gutters.
Use your plywood sheets to cover any large holes, securing them by drilling screws through the board and into your shingles. This will create a flat surface for the tarp to sit on so water does not pool in the hole.
To ensure you buy the right tarp or tarps for the job, use a tape measure to carefully calculate the approximate length and width of the damaged areas.
The tarp you choose should be able to cover the entire damaged area with three feet of excess on all sides, plus enough length to hang over the peak of your roof by four feet. This will prevent water from getting underneath the lip of the tarp.
If the damage on your roof is near features such as chimneys or plumbing vents, account for these when measuring and cut a hole for them to stick up through your tarp. Blocking vents or chimneys can create a safety hazard.
With the help of your assistants, unfurl the tarp and position it over the damaged area. One end should hang four feet over the peak, while the other end can hang safely over the roof’s edge.
To anchor the tarp and prevent it from flapping or ripping, you’ll secure it horizontally to the side hanging over the roof peak.
Leaving one foot of lumber sticking out on either end of the tarp’s width, roll a batten under the tarp using an overhand motion. Make at least two rotations for a tight, clean fit. This creates a surface for water and debris to roll off of rather than pooling. Nail through the board into the roof decking with nails every two feet.
Space your batten boards six feet apart horizontally across the rest of the tarp, with a batten on either perimeter edge. The battens should run vertically down the roof’s slope so rainwater can run along them. Nail them down as you did the anchor board. Don’t nail any battens into valleys.
Alternatively, you can use adhesive if you’re concerned about nails or screws possibly damaging your roof. Some roof tarps have built-in adhesive for this purpose.
If you had vents or other features that required you to cut holes in the tarp, use high-quality butyl tape to create a watertight seal around these areas.
While you can tarp your roof as a DIY project, some homeowners may not have the skills and experience to do so confidently, safely, or effectively. For example, if you aren’t comfortable getting up on the roof, you can bring in a pro. Hiring a nearby roof repair company is a better solution in most cases, and doing so will provide a reliable temporary solution while you wait for proper repairs or a full replacement.
Tarping doesn’t take much time for a pro roofing team to complete, and may be included in the cost of roof repairs if you choose to hire the same roofers for both projects.
Mitchell and the crew were top tier i am so happy with my new roof
D1 Roofing delivers outstanding service from beginning to end, backed by a strong warranty and expert teams. I highly recommend them for their excellence in meeting and surpassing expectations with unmatched communication. Choosing D1 Roofing was flawless decision
This place took $25,000 for a flat roof job with a five-year warranty and never returned to fix the leaks that were caused by their work. These people are not professionals and should not be doing this type of work. They incorrectly changed the pitch of the roof, and caused more damage than...
The technician was very professional and friendly. He answered all my questions and was very thorough. He left the fireplace area very clean . He inspected from the roof and advised me as to other work that might need to be done. There was no pressure there. I was very satisfied with the...
 Supreme brick & chimney
I am really impressed with their timeliness and turnaround. Mitchell came out, and we decided to move forward with their pricing. Our roof was on within a week, and we could not be happier with their team! Amazing company, great prices and honest, dependable craftsmanship. I highly recommend...
Manuel Calvillo is the best option in the area for roofing and you won't be disappointed.
They damaged multiple items on my property, including a marble slab used as a table top, tried to hide it, and refused to pay or replace. Arrived day one without a ladder to access roof & delayed a day. Left a mess in back yard; didn't wear face masks; no show by owner to property to see damages
I've hired Gary/Cherokee Roofing for two different homes, work quality, responsiveness, and completion have been great both times. And the prices quoted were very competitive. I would definitely hire again.
Lyle did a great job removing asbestos shingles from our front porch roof. They worked together with our roofer to make sure that the new roof was able to be installed on the same day that Lyle removed the asbestos shingles.
 Lyle Environmental
Bradley Builders did a good job replacing the roof on our front porch. They color-matched the existing shingles on the rest of the house and installed a metal ridge roll since we live in a historical neighborhood. They did the job while we were out of town. When we got back, everything was...
 Bradley Builders, Inc.
From average costs to expert advice, get all the answers you need to get your job done.
Wondering about the cost to tarp a roof after a large storm or before a major roof renovation? We'll break it down by size, style, and scenario.
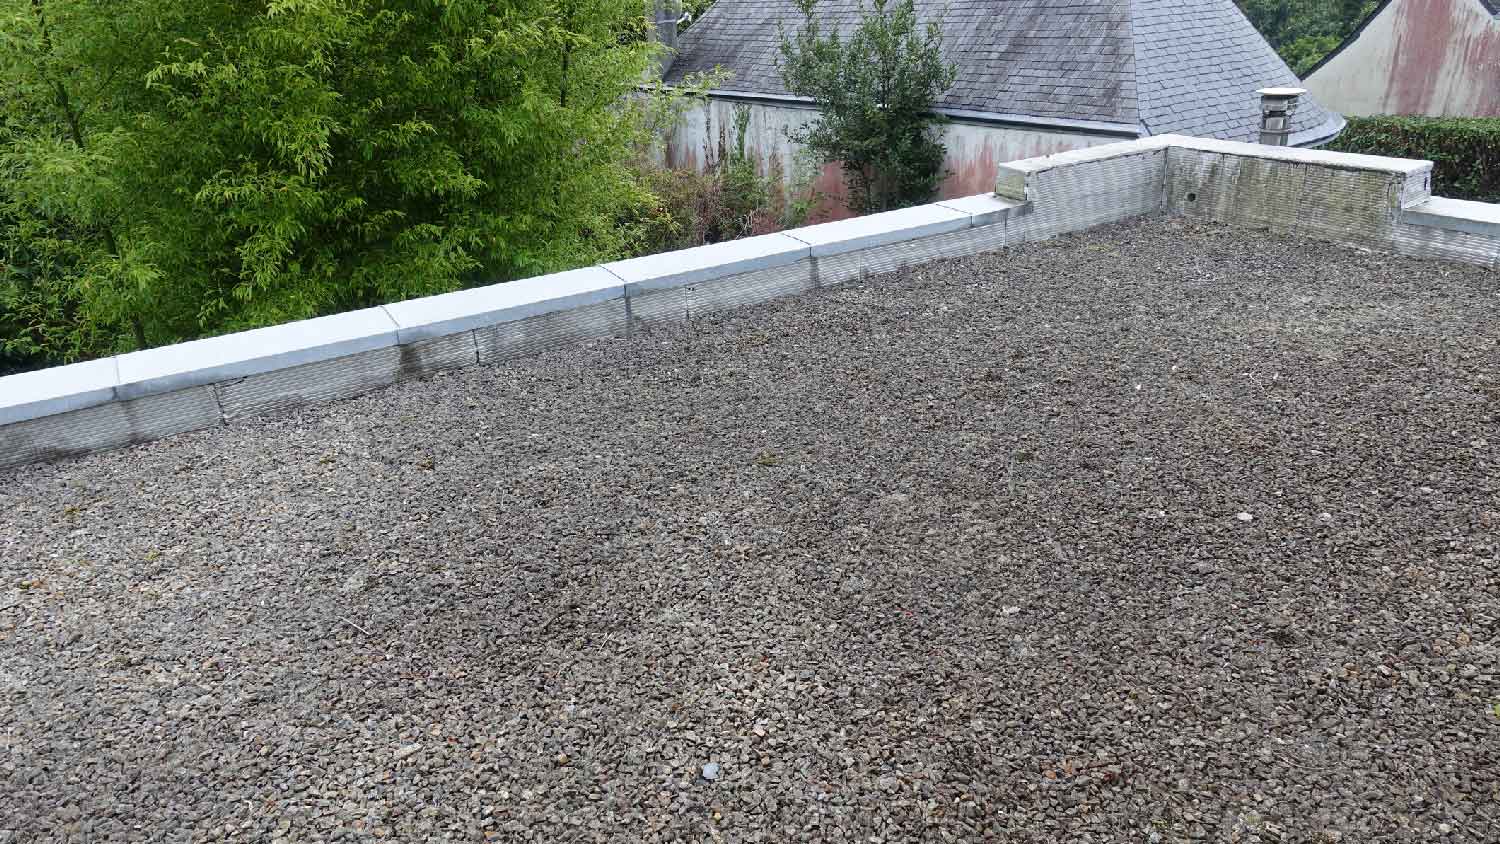
If you need a new flat roof, learn about tar and gravel roof costs and what can affect your total to make sure you budget accurately.
Sealing your roof can help preserve its life span—you just have to choose the right coating. This guide will help you budget for your total roof coating cost.

Roof leaks are an emergency, so knowing who can tarp your roof quickly and correctly can save you from major water damage if you ever experience a leak.
A leaky roof is less than ideal. Learn how to patch a roof while you wait for repairs from the pros to prevent further damage to your home.

If you notice your roof leaking, it is important to act fast. A new leaking roof could cause tremendous damage to your home if left unrepaired.