A landscape designer can elevate your outdoor space and bring your vision to life. Use this landscape design cost guide to budget for your next project.
And why you should stop putting seeds on top of your fridge


Learning how to start seeds indoors is a vital skill for any expert green thumb or budding gardener to have. Why? It gives you a head start on the growing season, which can lead to a more bountiful harvest and more fresh caprese salads throughout the summer. In colder climates, it can also ensure that you get a full growing cycle in before the weather turns. Plus, it’s simply cheaper than buying young plants from a garden center.
It’s easy to do, too. Here’s everything you need to know about starting seeds inside, from how to start tomato and other vegetable seeds indoors to frequently asked questions about the indoor seed-growing process.
Difficulty: Easy (1/5)
No need to have a green thumb to grow seeds inside
Total Project Time: one hour to get set up; six weeks to grow the seeds
Cost: about $45–$70 for materials
Seed packets cost about $3–$8, all-purpose potting mix is about $12–$15, plug trays and leakproof water trays are about $10–$20 each, and fluorescent strip shop lights are about $20–$30. Most of these materials can be reused each year.
Seeds
Seedling trays/plug trays with drainage holes
Leakproof water tray
All-purpose potting mix or seed starting mix
Plastic wrap
Plant label or toothpicks for labeling
LED grow lights or fluorescent strip shop light with one warm bulb and one cool bulb
Note: You can either use an all-purpose potting mix or a special seed starting mix. Seed starting mix is lighter and designed to give seeds the best chance of germination.
However, seeds eventually need to be transplanted out of this fine mix to a more dense, nutrient-rich potting soil. On the other hand, seeds may have to work harder to germinate in potting soil, so it’s really a personal preference.
Watering can with a fine sprinkling rose

This method discusses how to start growing vegetable seeds indoors using seedling plug trays—containers that contain deep individual pods. Each pod holds multiple seeds. This method removes the need to transfer seedlings when they’re young and fragile.
Fill the trays to the top, and then tamp down the soil with your fingers. Add a little more soil on top, and gently brush away any spillage.

Place multiple seeds into each plug, then use your finger to press them down into the soil. Be sure to push them down to the depth specified on the seed packet. (Tomatoes, for instance, might be placed at a depth of ¼ inch to ½ inch.) If no depth is listed, it’s best to sow them at a depth of no more than two to three times their diameter.
After sowing, cover each seed hole with soil.
How many seeds should you sow?
Check the packet instructions to see if you should place multiple seeds in a plug or just one. In general, it’s recommended to plant 2–3 seeds per plug. That’s because typically, not every seed will germinate. If they do, you can leave the germinated seedlings to grow in a cluster or you can choose the seedlings that look the strongest, and snip away the other weaker seedlings to kill them.
For large seeds like melons, you’ll usually use one seed per plug. That’s because large seeds generally need more room in the germination process. For herbs like basil and cilantro, it’s fine to use multiple seeds per plug and leave them to grow in a cluster, as they can handle growing right next to each other. Follow your seed packet’s growing instructions for best results.
Use a watering can outfitted with a fine sprinkling rose to gently saturate the freshly sown seeds. The fine spray is key to avoid dislodging the seeds with a forceful burst of water. Soak the seeds, wait for the water to drain out of the drainage holes onto the tray below, then water them again.
Use plant labels or toothpicks to label the seeds. It’s easy to forget what they are once they start sprouting.
Keep your soil from drying out by covering the plug tray loosely with plastic. Just be sure you poke a few holes in the plastic for ventilation and to prevent mold growth. At this stage, they don’t need light.
Water your seed plugs once or twice a day from the bottom; i.e., place water in the water tray so the soil can soak up the water through the drainage holes in the plugs. Seeds should germinate in about 1–2 weeks.

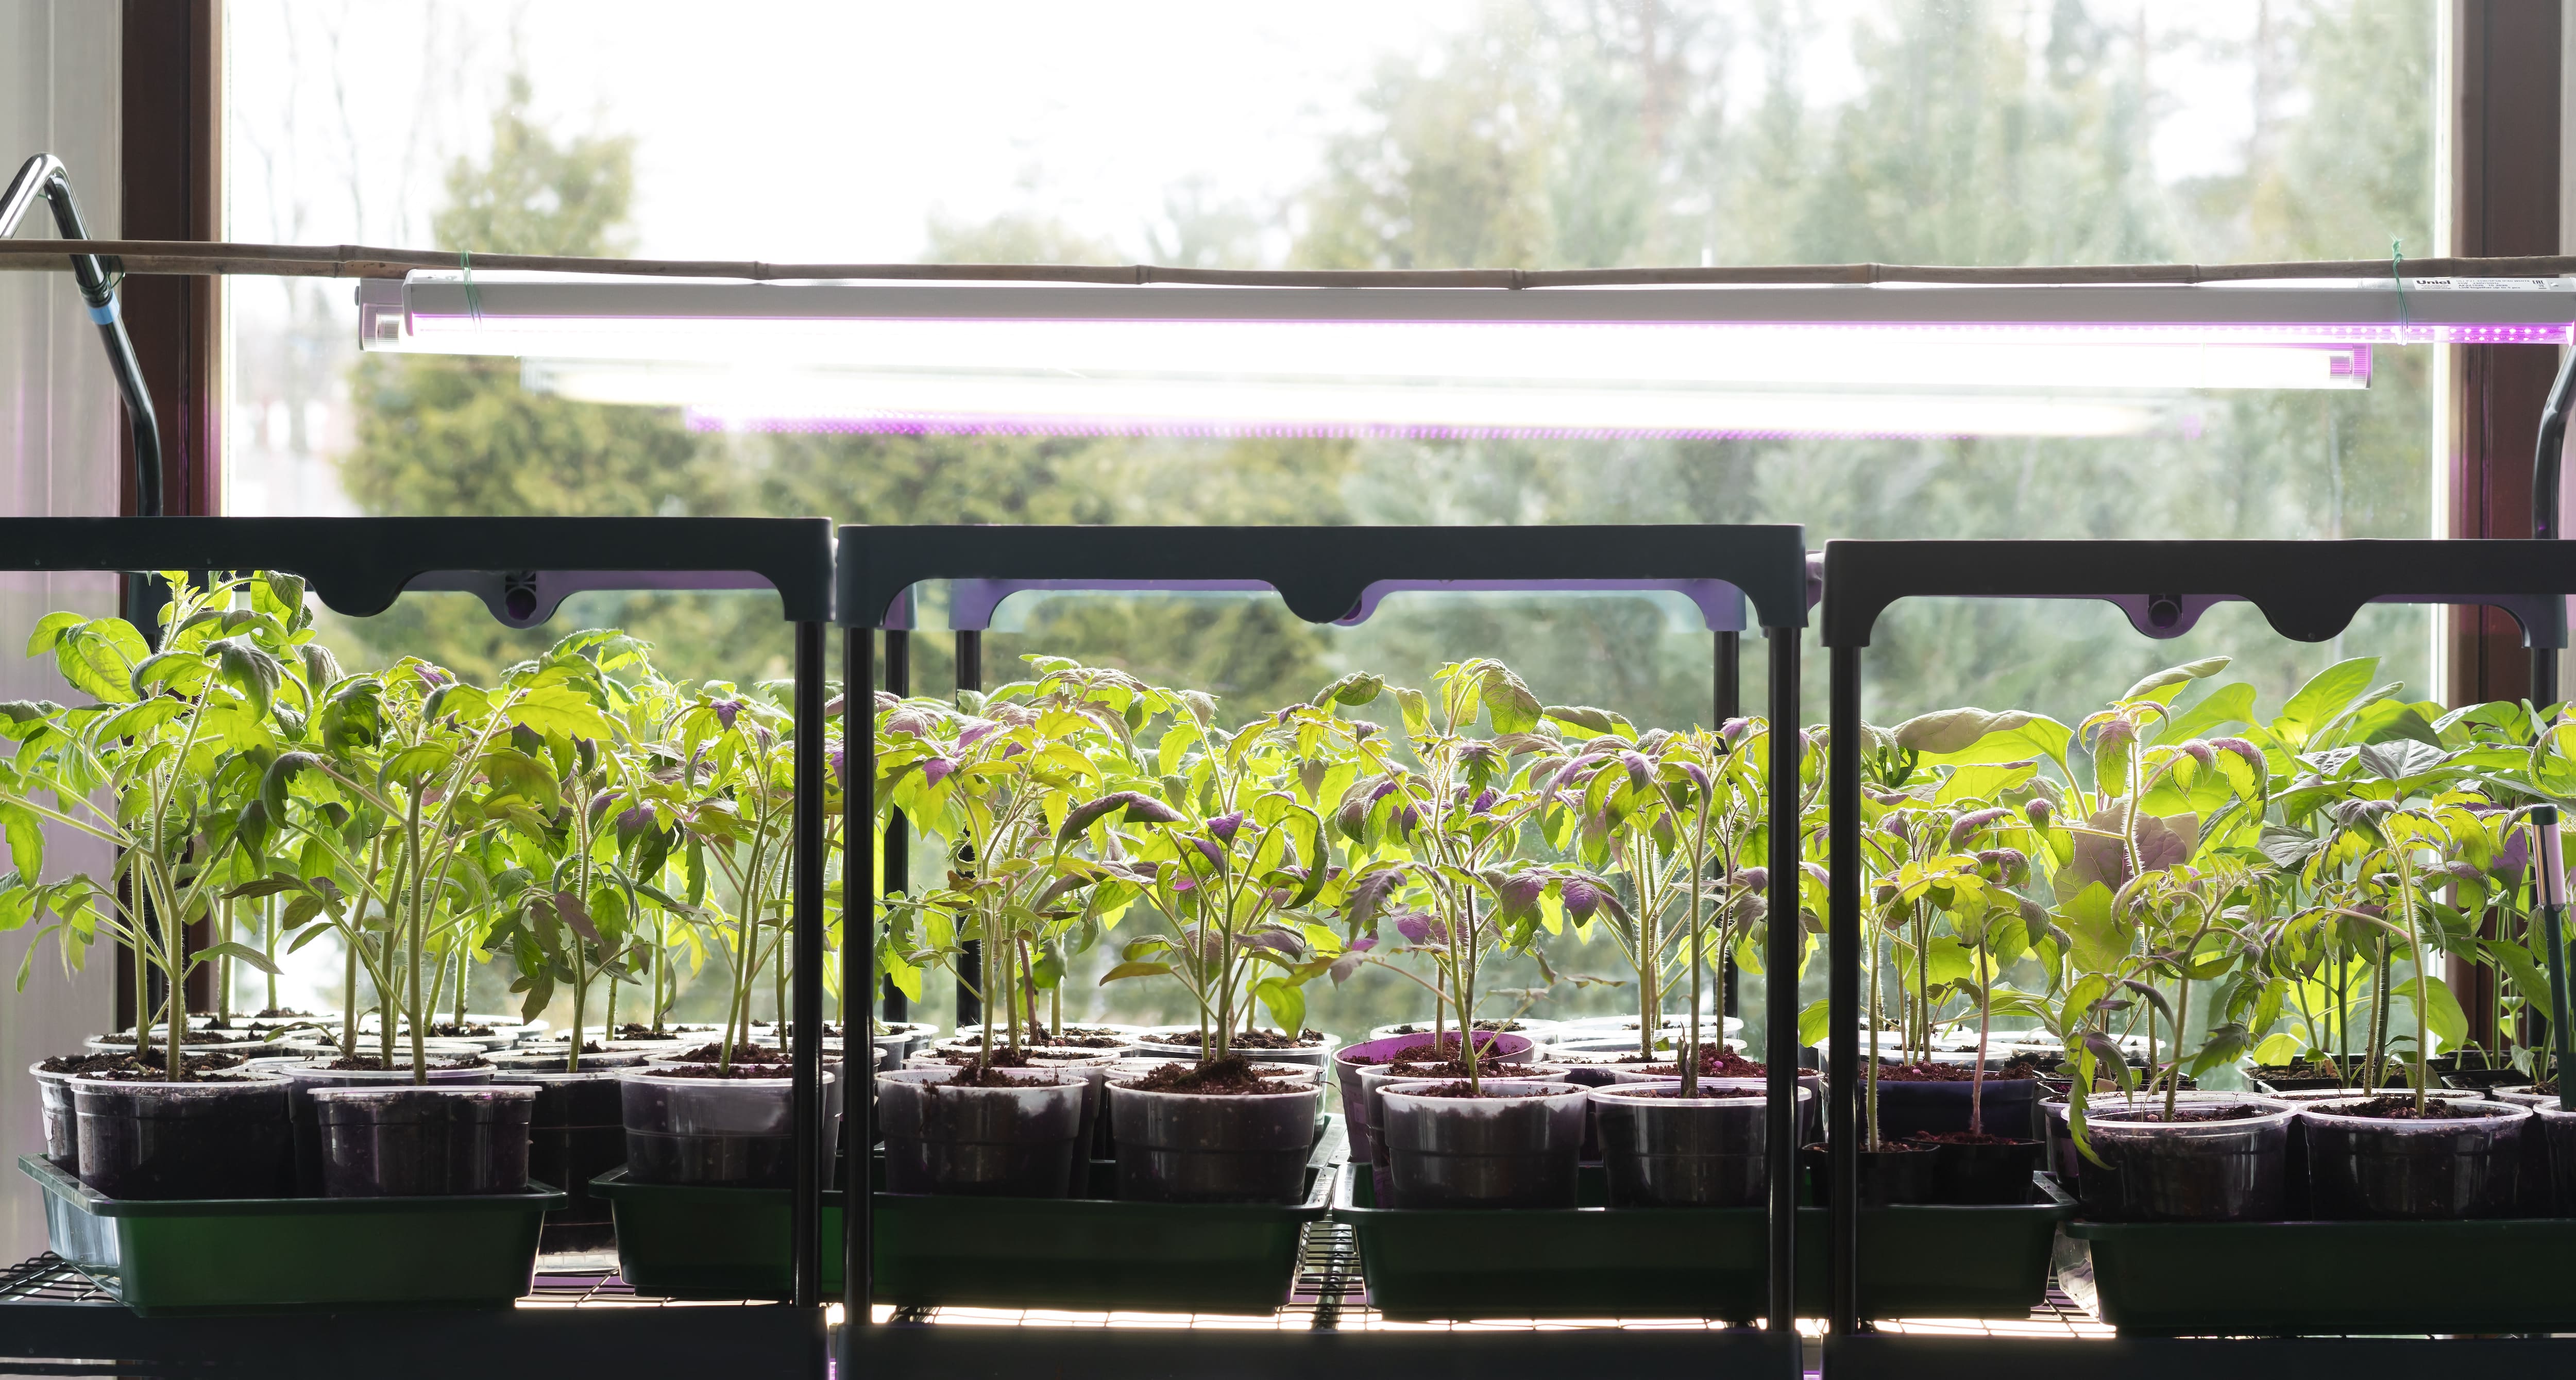
Once about half the seedlings have sprouted, remove the plastic cover and move the plug tray and water tray under your LED grow light or fluorescent strip shop light.
Keep the light just above the seeds, about 2–4 inches away. Leave the light turned on for 12–16 hours per day. Save money by keeping the lights on at night, when less energy is typically used in a house. Otherwise, turn it on in the morning and off when you go to bed at night. An automatic timer can also be used to make this process seamless.
Water the seeds once or twice per day, making sure the soil is always slightly moist. Don’t overwater them.
If you sowed multiple seeds together, you may need to thin the seedlings out once they start growing. Again, to do this, choose the seedlings that look the strongest, and snip away the weaker seedlings.
Your seedlings are ready to be thinned when they have two sets of leaves sprouting. These are known as true leaves and are different from the first leaves that appear, the immature cotyledons. Plants are on average 2–3 inches tall when the true leaves appear.

Your plants should be ready to move to their new homes in the ground after about six weeks inside. If your seeds are cold-season crops, such as lettuce, they can be moved directly outside as soon as the soil is about 50 degrees F.
Tender plants, such as tomatoes and peppers, need to be introduced to the outdoors slowly, a process called “hardening off.” Otherwise, they can grow weak from weather variations.
How to harden off seedlings
Start about 7–10 days before the final frost date in your area.
Set the seedlings outdoors in partial shade for about an hour (make sure the location is sheltered from the wind), then bring them back inside.
Gradually extend the amount of time they stay outside each day, until they are out all day.
Keep the soil moist at all times throughout this 7- to 10-day hardening-off process.
After the hardening-off process is over and when the weather permits, remove the seedlings from the plugs and plant them in the ground. The earlier you can plant seedlings, the better as younger seedlings typically establish quicker in the ground. Once the seedlings are in the ground, follow our tips on how to grow a healthy garden.
Deciding which seeds to start indoors really depends on which plant hardiness zone/growing zone you live in, as well as your gardening preferences. In general, these seeds can be started indoors:
Broccoli
Brussels sprouts
Cabbage
Cauliflower
Celery
Eggplant
Lettuce
Peppers
Tomatoes
Plants that do not transplant well should be started outdoors once it’s warm enough. These include cucumbers, watermelon, squash, and most root veggies.
Check your seed packet for information about when to start your seeds. In general, sow seeds about six weeks before the last expected frost date in your area. The National Gardening Association’s frost date tool lets you input your zip code and see when the last frost is estimated for your area.
Plants should be ready to be transplanted outside after the final frost of the season.
Yes, you need to use some type of artificial light for your indoor seed gardening. That’s because most houses do not get enough natural light to grow seedlings. Even if you have a south-facing window, you still need to supplement with artificial light. To save money, skip the grow lights and use fluorescent strip shop lights with one warm bulb and one cool bulb.
It depends. Most seeds germinate in warm temperatures—about 65 to 75 degrees F. Because that’s generally the temperature range in a standard house, there’s no need to add additional heat. In fact, too much heat can hinder the germination process.
With that said, some people like to start their seeds in a cold basement, and a heat mat can be beneficial as long as you pay attention to how much extra heat it provides above the ambient room temperature.
No, but it’s not a bad idea. Many gardening guides will tell you to “water your seeds from the bottom” by placing a seed container with drainage holes in a tray of water and letting the soil soak up the water that way. This technique can help you evenly wet the soil, avoid disturbing or damaging the seeds, and avoid soil compaction.
Yes, you can start seeds in a flower pot. This is a good way to save money on supplies as many people have old flower pots lying around. Just remember to leave enough space between each seed as they need to be able to spread out. If your pot is small, you’ll also have to transplant seeds into their own pot or plug after they germinate.
It’s probably not the best idea to start seeds in an empty egg carton. Despite its popularity—it’s cheap and readily available—an egg carton doesn’t provide enough space for seeds to grow. If you really want to, you can germinate your seeds in the egg carton, and then transplant them into a larger pot or plug. The downside to this is that you may disturb fragile roots during the transplantation process.
You may have gotten some advice to start your seeds on top of your fridge, but it’s not necessary. The reason people used to do this is that older refrigerators would ventilate heat from the top, creating a warm environment thought to be ideal for seed germination.
Nowadays, fridges ventilate heat out the back. Plus, we know that you don’t typically need extra warmth to germinate seeds. So all in all, there’s no need to start your seeds on top of the fridge, though you can if you want.
From average costs to expert advice, get all the answers you need to get your job done.

A landscape designer can elevate your outdoor space and bring your vision to life. Use this landscape design cost guide to budget for your next project.

Xeriscape costs depend on materials, the size of your yard, and if you DIY. This guide will help you determine what your xeriscaping project will cost.

The cost to remove a boulder depends on the size, location, and equipment needed. Learn the average boulder removal cost and how to save money on removal.

While similar, comparing dirt versus soil comes down to what's inside the material, its usefulness, and how it performs, depending on how you intend to use it.

St. Augustine grass generally fares well in warm climates, but brown spots happen. Here are some ways to revive seemingly dead St. Augustine grass.

It isn’t immediately obvious who to hire when you need to regrade your yard. Here are the contractors perfect for this critical home project.