
Concrete driveways stand up to a lot of pressure over the years. How much do concrete driveway repairs cost when it's time to give it a little TLC?
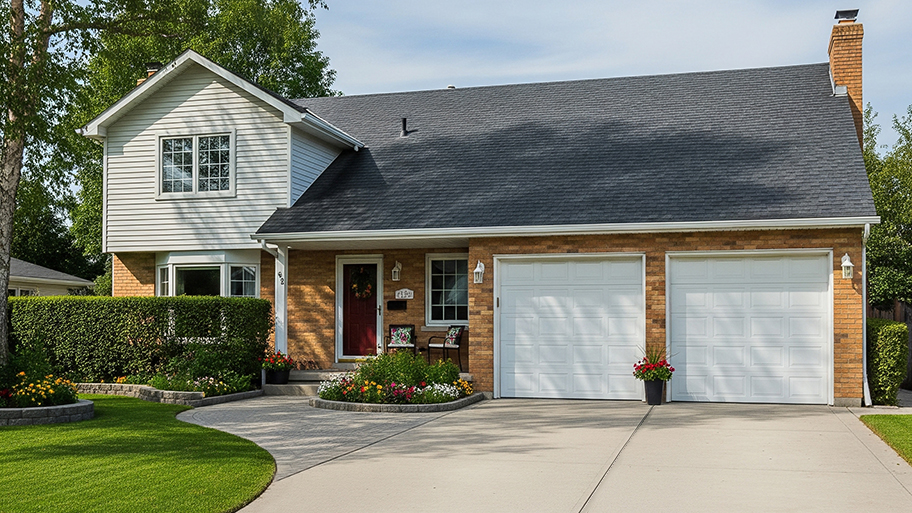
Make your driveway look as good as new


A cracked or crumbling concrete driveway isn't exactly the first thing that comes to mind when driving up to your charming abode. But, if your driveway has seen better days, resurfacing the concrete could return your home to its former glory. The best part is that you might not need a pro to resurface the concrete. Follow this guide to learn how you can resurface a concrete driveway yourself.

Knowing when to resurface your driveway can help you prepare for a smooth project. With this in mind, here's what you need to know about planning a resurfacing project.
When you decide to resurface your concrete driveway can make or break your project. Apply a resurfacer when it's too cold, and the concrete could weaken; apply it when it's too hot, and the resurfacer may dry before you're finished spreading it or crack. Avoid applying a concrete resurfacer when:
There's a chance of temperatures dropping below 50 degrees Fahrenheit
It's above 80 degrees Fahrenheit
It's raining or very windy

Cleaning your driveway is the first step toward a good-as-new concrete driveway. Power through dirt, grime, oil, and old, crumbly concrete using a pressure washer with a pressure level of around 3,000 pounds per square inch (PSI). Make sure you wear goggles, ear protection, long sleeves, boots, and gloves to protect yourself when using a power washer. Also, keep pets and children away from the area.

Before you can begin resurfacing your concrete driveway, you'll first need to repair any damaged concrete. To repair your driveway, use a repair kit to fix crumbled sections and a concrete crack filler to fix cracked sections.
If it's a hot day, give your driveway a quick spray with your garden hose before you apply a concrete resurfacer. Doing so helps cool the concrete down, giving you more time to work with the concrete resurfacer. Be sure to sweep away any excess water.
Keep in mind, if you used a power washer to clean your driveway in the first step, then you might not need to use a hose to dampen the concrete, as it's already damp from the pressure washing.

Mixing the concrete resurfacer is one of the most important steps to getting the perfect resurfaced concrete driveway. Much like mixing cocoa powder in room temperature water, mixing concrete resurfacer with water can be lumpy. The best way to mix a concrete resurfacer is by using a paddle mixer and drill rather than hand mixing.
Resurfacers have a different consistency than your standard concrete—aim for a loose, syrup-like consistency. Using a five-gallon bucket, follow the instructions on your resurfacing compound to ensure that you have the right ratio. Most resurfacing compounds require one part water and seven parts concrete resurfacer.

Pour the resurfacing compound onto the concrete driveway in small sections, using a trowel for smaller applications or a masonry brush for larger applications. You’ll want the mixture to be roughly 1/16 to 1/4 of an inch in thickness.
Once you've poured the resurfacer onto your concrete driveway, time is of the essence. Concrete resurfacers only stay malleable for around 30 minutes on a moderately warm day. If it's 75 degrees Fahrenheit or hotter outside, then the resurfacer will dry more quickly. So, factor in the weather as you're tackling your driveway.
If you have concerns about managing a larger driveway in only 30 minutes tops, consider dividing your driveway up into sections and applying the resurfacer one section at a time. Quikrete recommends sectioning up your concrete surface to no larger than 144 square feet.

You can also create a slip-resistant finish by brushing the driveway with a concrete brush before it dries. Sweep the brush across the surface in one direction so that the resurfacing material looks uniform.
Go in with a paintbrush to touch up the edges of your concrete driveway. This will give the surface that added extra touch that really pulls together the appearance of your driveway.
All that's left now is to simply wait for the concrete resurfacing compound to cure. It can take around six hours before the concrete is ready for you to walk on it. You'll need to wait a full 24 hours to park your car on a resurfaced driveway. But to be on the safe side, you might want to wait a complete 48 hours before you drive your car onto the driveway.

Resurfacing a concrete driveway is a fairly simple task that most avid DIY enthusiasts can handle. It requires few supplies, making for an affordable project that can be completed in a single day. And once you know how to resurface your driveway, you can also resurface other areas, like your concrete patio or walkway.
There are times, however, when it may be a good idea to work with a professional. If your concrete driveway is in really bad shape, you may need to hire a concrete driveway pro near you to fix large cracks or crumbling concrete. From there, it’s easier to have your pro resurface your driveway.
Archie did a good job cleaning up the driveway before he laid down the sealer. It looks good. He was gracious and even helped me bring up my groceries. His rate was comparable to another company who came out to give me a quote and he talked to me personally rather than just text me a quote...
Window Depot did an amazing job on my deck. I wasnt sure what I wanted to do, but their composite decking was affordable and will last a long time. I am excited to have family over, and I am no longer embarrassed by my backyard. Jeff and the ground crew were polite, respectful, and caring for...
We used Unique Hardwood Floor LLC three years ago to work on the floors of a 70 year old home that needed a great deal of work. Some floors needed repairs, some were replaced and others just needed to be refinished. It was a complicated job as they needed to blend the old and the new to...
 Unique Hardwood Floor LLC
We recently had our office sidewalk repaired and CT Concrete did an "Outstanding" job. They were quick, friendly and the job is "flawless". I would highly recommend CT Concrete for any of your concrete/sidewalk needs.
Best service I've received. Prompt, friendly, informative and trusting. Highly recommend.
 Climate Heating & Cooling
Called Mark on a Thursday morning. Not really knowing if he could help me or not. I was having driveway, flooding issues due to a clogged channel drain and I was trying to figure out what direction to take. Heavy rains had come on Monday and again on Thursday leading to flooding in my garage...
 Mark Rodgers Construction
What a pleasure working with a professional organization that takes pride in its work and wants to ensure customer satisfaction. Out of the several quotes I received for the re-roof, Capps was not the cheapest, but I felt I could trust them to do an excellent job and I was not disappointed....
 Capps Roofing
Jay's offered a great price and the job started off so well. I wanted to remodel the master bath and it was a big makeover to remove the existing tile floor, roman tub, and enclosed shower. I wanted the shower moved to where the tub was and the shower area to be converted to storage. I have...
 Jay's Floors & More Inc
From start to finish this company amazed us. After three long years of quote after quote we found who we were looking for right around the corner from us. We had a detached 2 car garage that was going unused becuase the driveway that had been there when the house was built in 1959 had long...
Dan did a great job with the driveway. He came when he said he would, and he talked with us for some time the first day to make sure he understood what we wanted. My wife asked him that morning - after he'd quote the job -- if he could widen the driveway. He changed his plan on the fly...
From average costs to expert advice, get all the answers you need to get your job done.
Concrete driveways stand up to a lot of pressure over the years. How much do concrete driveway repairs cost when it's time to give it a little TLC?

Whether you’re planning on putting in a concrete driveway, patio, or staircase, use this concrete delivery cost guide to get an accurate estimate.
Need to breathe new life into your exterior stoop? Use this guide on concrete step repair cost to see the price of a professional repair.

It’s important to choose the right driveway material. Learn the differences between gravel and concrete driveways to choose the right one for your home.

A concrete floor provides a solid base for any room, and adding a floor coating makes it feel less utilitarian. Here are the questions to ask a pro about this project.

Which one is better for your home, an asphalt or concrete driveway? Learn the difference in initial installation, pros and cons, and follow-up costs.