How to Replace a Hardwired Smoke Detector Like a DIY Pro
Don’t stress about swapping out your smoke detector—it’s a cinch

- Stepladder
- Headlamp or torch (optional)
- Phillips screwdriver
- New compatible alarm
- Alarm adapter (depending on your original and new alarm model)
- Wire stripper (optional)
- Wire nuts (optional)
- Electrical tape (optional)
It’s easy to get complacent about fire hazards hiding in your home and neglect learning how to replace your smoke detectors—unless you’re constantly setting them off when you burn your morning toast. However, according to the National Fire Protection Association (NFPA), from 2014 to 2018, 41% of fire fatalities were in homes with no smoke alarms and 16% in properties with smoke alarms that failed to operate.
Smoke detectors are your first line of defense against fire hazards, so it’s important to regularly test your detectors and swap them out before they fail. Thankfully, learning how to replace a smoke detector is something most homeowners can DIY in just around 15 minutes.
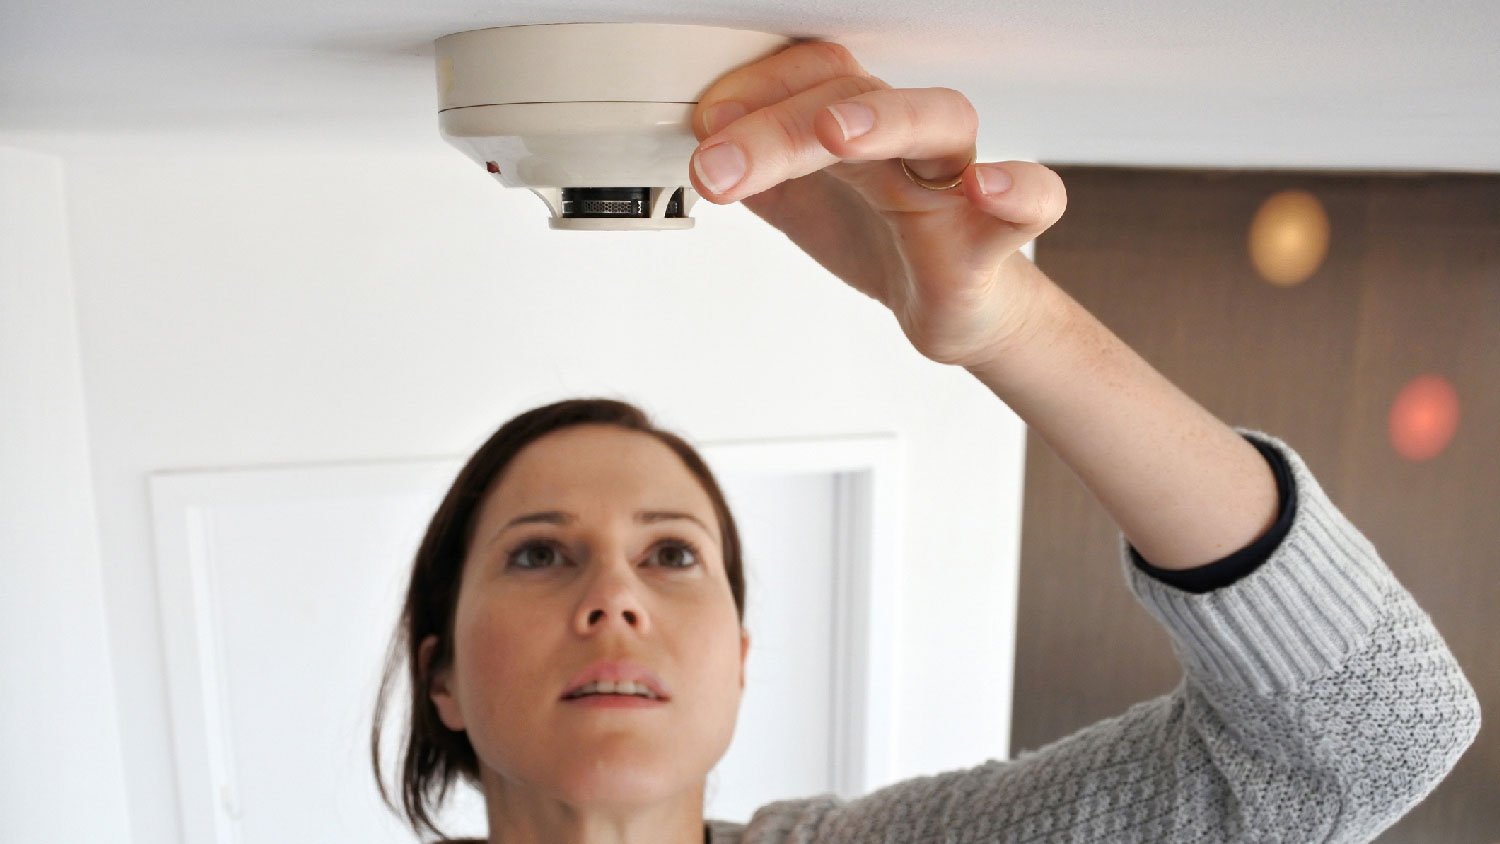
Prepping to Replace a Smoke Detector
 Photo: Rafael Ben-Ari / Photodisc / Getty Images
Most modern smoke detectors are hardwired to your home’s electrical system with a backup battery. Less commonly, alarms are powered only by battery. This step-by-step guide focuses on how to replace a hardwired smoke detector.
Before you buy replacement hardwired smoke detectors, there are a few things to do:
Test existing devices: Even if your alarm isn’t due for immediate replacement, test detectors regularly. And if the alarm is making a warning chirp, this is another indicator it needs replacing—or at least the backup batteries do.
Pick an appropriate new model: To avoid having to replace the mount or doing complicated rewiring, purchase a new smoke detector compatible with the old version. Alternatively, buy a wire adapter to apply while fitting.
Check manufacturer’s instructions: Read the instructions that come with the model you have to ensure there isn't any bespoke installation guidance.
Turn Off the Power
Always turn off the power on the linked circuit breaker before replacing a smoke detector. It might be marked “fire alarm” or could be on the same circuit as the room lighting.
Remove the Old Smoke Detector
Most of the time, you can simply twist the old alarm out of the mounting bracket. It’s ready to pull free when you hear a click. If the old mounting bracket isn’t compatible with the new detector, you might need to loosen the screws with your screwdriver and remove the bracket to replace it with a new one.
Disconnect the Wiring (If You Don’t Have an Adapter)
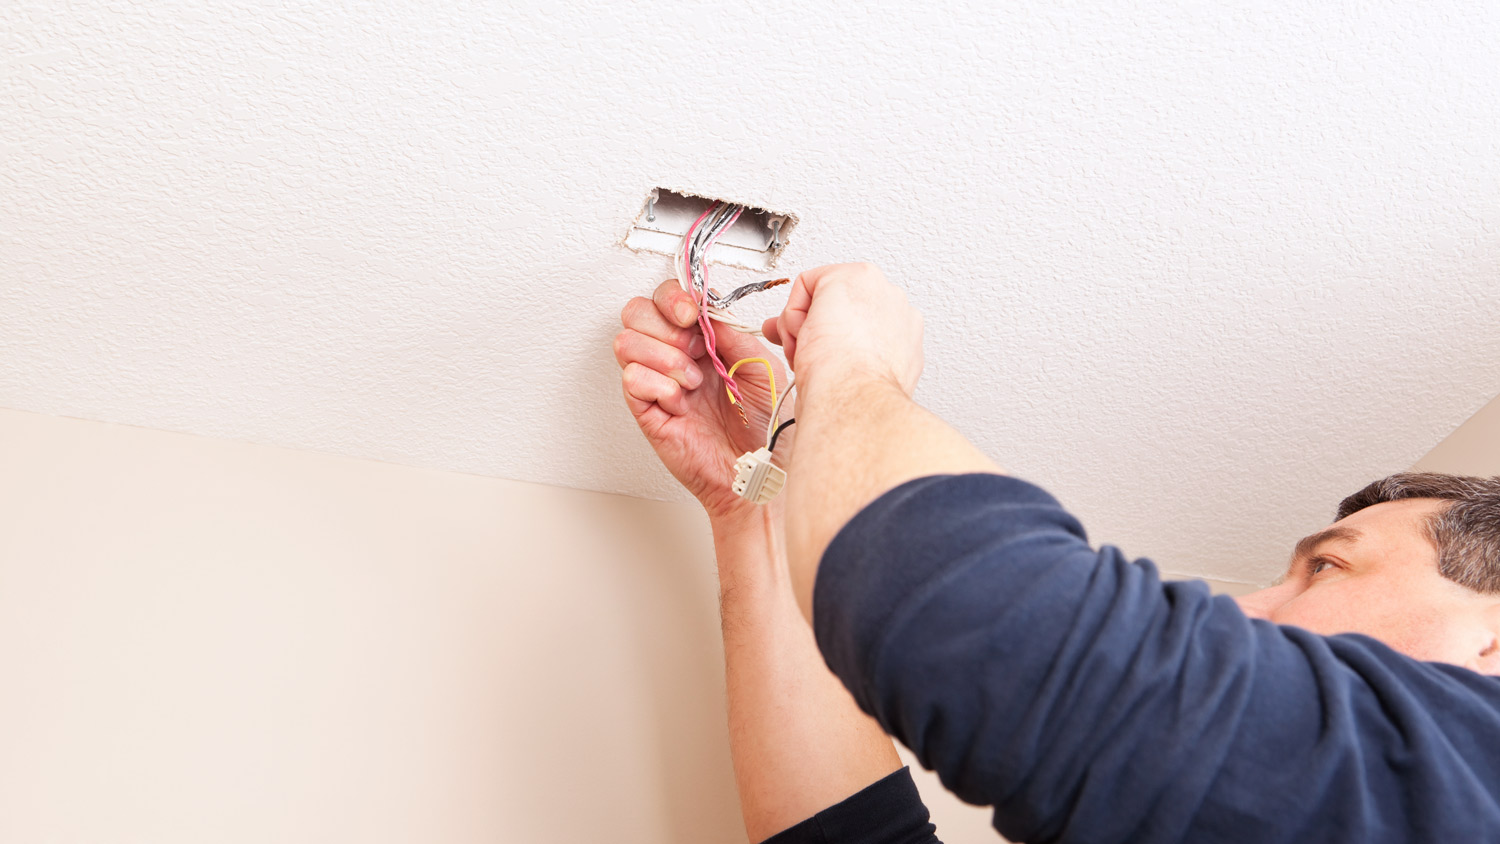 Photo: BanksPhotos / iStock / Getty Image
If you don’t have a compatible wiring harness or adapter, disconnect the old detector wiring first. There will be two or three wires. A 120-volt black wire, a neutral white wire, and there might be a red or yellow wire that is used if you have a multi-alarm system that is interconnected.
To release the wires, squeeze the side of the harness plug. You may need to remove electrical tape or wire caps before untwisting and removing the harness to expose the metal ends of the wires.
Connect the New Smoke Detector
If you have a new detector that’s compatible with your wiring, connect the new alarm to the wiring harness. Don’t forget to add or activate the backup battery if the detector has this feature. If the wiring harness isn’t a match, you might be able to plug it into an adapter to connect to your new smoke detector and save you from fiddling around with the wiring.
If you have some experience with electrical work, you can carefully match up and twist the wires of the new alarm together with the exposed ones of the same color before replacing the wiring harness and adding new electrical tape or putting the wire caps back on.
Pair the black-to-black wire, white-to-white, and red-to-red or yellow-to-yellow. If you have a yellow wire on the new alarm, but the old wiring is red, twist these two together. You might need to use a wire stripper and wire nuts to expose enough wire and secure the connection.
Note: Do not play with the wires if you’re not confident in what you’re doing. Electrical work can be dangerous, so call in a local electrician to help you if you need it.
Reinstall the Mounting Bracket
You can now click the smoke detector back into the mounting bracket. Alternatively, if the bracket isn’t compatible with the new alarm, you might need to screw in the new one.
Turn the Power Back On and Test
Once the wiring is securely connected, turn the power back on at the circuit breaker. Your new alarm might beep, and an LED light could indicate everything is good to go. Warn everyone at home before pressing the test button on the new smoke detector to check it's functioning properly.
If the alarm doesn’t work, check if you flipped the right breaker switch. If it still doesn’t work, you can turn the power off again and check all the wire connections. Still not working? It might be worth asking for a replacement from the retailer before calling the pros.
DIY vs. Hiring a Pro
Replacing a smoke detector is an easier DIY job than learning how to install a smoke alarm system from scratch, especially if you have a compatible wire harness or adapter because the wiring is already in place.
However, if you aren’t confident working with electrical, you can call an alarm company near you or a local electrician to assist. You may also need professional help if you’re replacing an older smoke alarm system with an updated one that doesn’t match your connectors.
The cost to install a smoke detector professionally ranges from $70 to $150 for a hardwired device. Or, a local handyman can help to replace your hardwired smoke detector at a price that might be lower than that of an electrician. It’s important to note that firefighters in most areas can install battery-operated smoke alarms in your home at no cost, but when it comes to hardwired units, calling in a pro is your best bet if you’re not taking the DIY route.
Frequently Asked Questions
Your smoke detector might be too high in some homes or circumstances to reach yourself. If you feel unsafe getting on a ladder to replace your hardwired smoke detector, call a licensed electrician or local handyman to knock this project off your to-do list. If you have a battery-operated smoke detector, your local fire department can change the batteries or help you replace the detector—just make sure you call the non-emergency number.
In any case, do not let this project go unresolved, as it could turn into a huge safety issue.
If your hardwired smoke alarm keeps going off, it could be because the backup battery needs replacing. When replacing the battery doesn’t stop your smoke alarm from beeping, try holding the reset button for 15 to 30 seconds or removing dust from the openings in the alarm. If it continues to chirp, it could be faulty and require replacement.
You should turn off the power when replacing a hardwired smoke detector to ensure your safety while working with electrical connections. To do so, simply locate the appropriate circuit breaker and switch it off. If you’re replacing a battery-operated smoke detector, it’s not necessary to turn off the power.
It’s critical to your safety to replace your hardwired smoke detector every 10 years from the date of installation. It’s just as important to test your smoke detectors at least once per month to make sure they are functioning correctly. If they don’t respond properly when tested, it’s best to replace it, even if it is before the 10-year mark.


- Home Generator Repair
- Lamp Repair
- Electric Repair
- Generator Installation
- TV Antenna Services
- Emergency Electricians
- Commercial Electricians
- Attic Fan Installation
- Attic Fan Repair
- Exhaust Fan Installation
- Electric Inspectors
- Subcontractors
- Electrical Construction
- EV Charger Installer
- Chandelier Installation
- Doorbell Installation
- Bathroom Fan Installation
- Ring Installers
- Electrical Panel Upgrade
Get our Angi-powered app


