How to Install a Replacement Garage Door Opener
Open the door of possibilities with this guide on replacing a garage door opener


This project can take a long time to complete if you’re doing it in your off-time. Hiring a pro ensures a job done well and a quicker turnaround—plus you get your weekends back.
- Drill
- Screwdriver
- Wrench
- Tape measure
- Ladder
- Garage door opener kit
- Lag bolts
- Hex screws
- Lithium grease
You’re running late and your garage door opener refuses to work. Or maybe you’re pulling up the driveway after a busy day only to find you can’t get your garage door to open. No matter the issue, a faulty garage door opener can be a major pain. Thankfully, replacing an old garage door opener can quickly make your garage a functional space again. This guide has all the steps on how to replace a garage door opener yourself for a smooth, hassle-free cruise out of your garage.
Types of Drive Systems
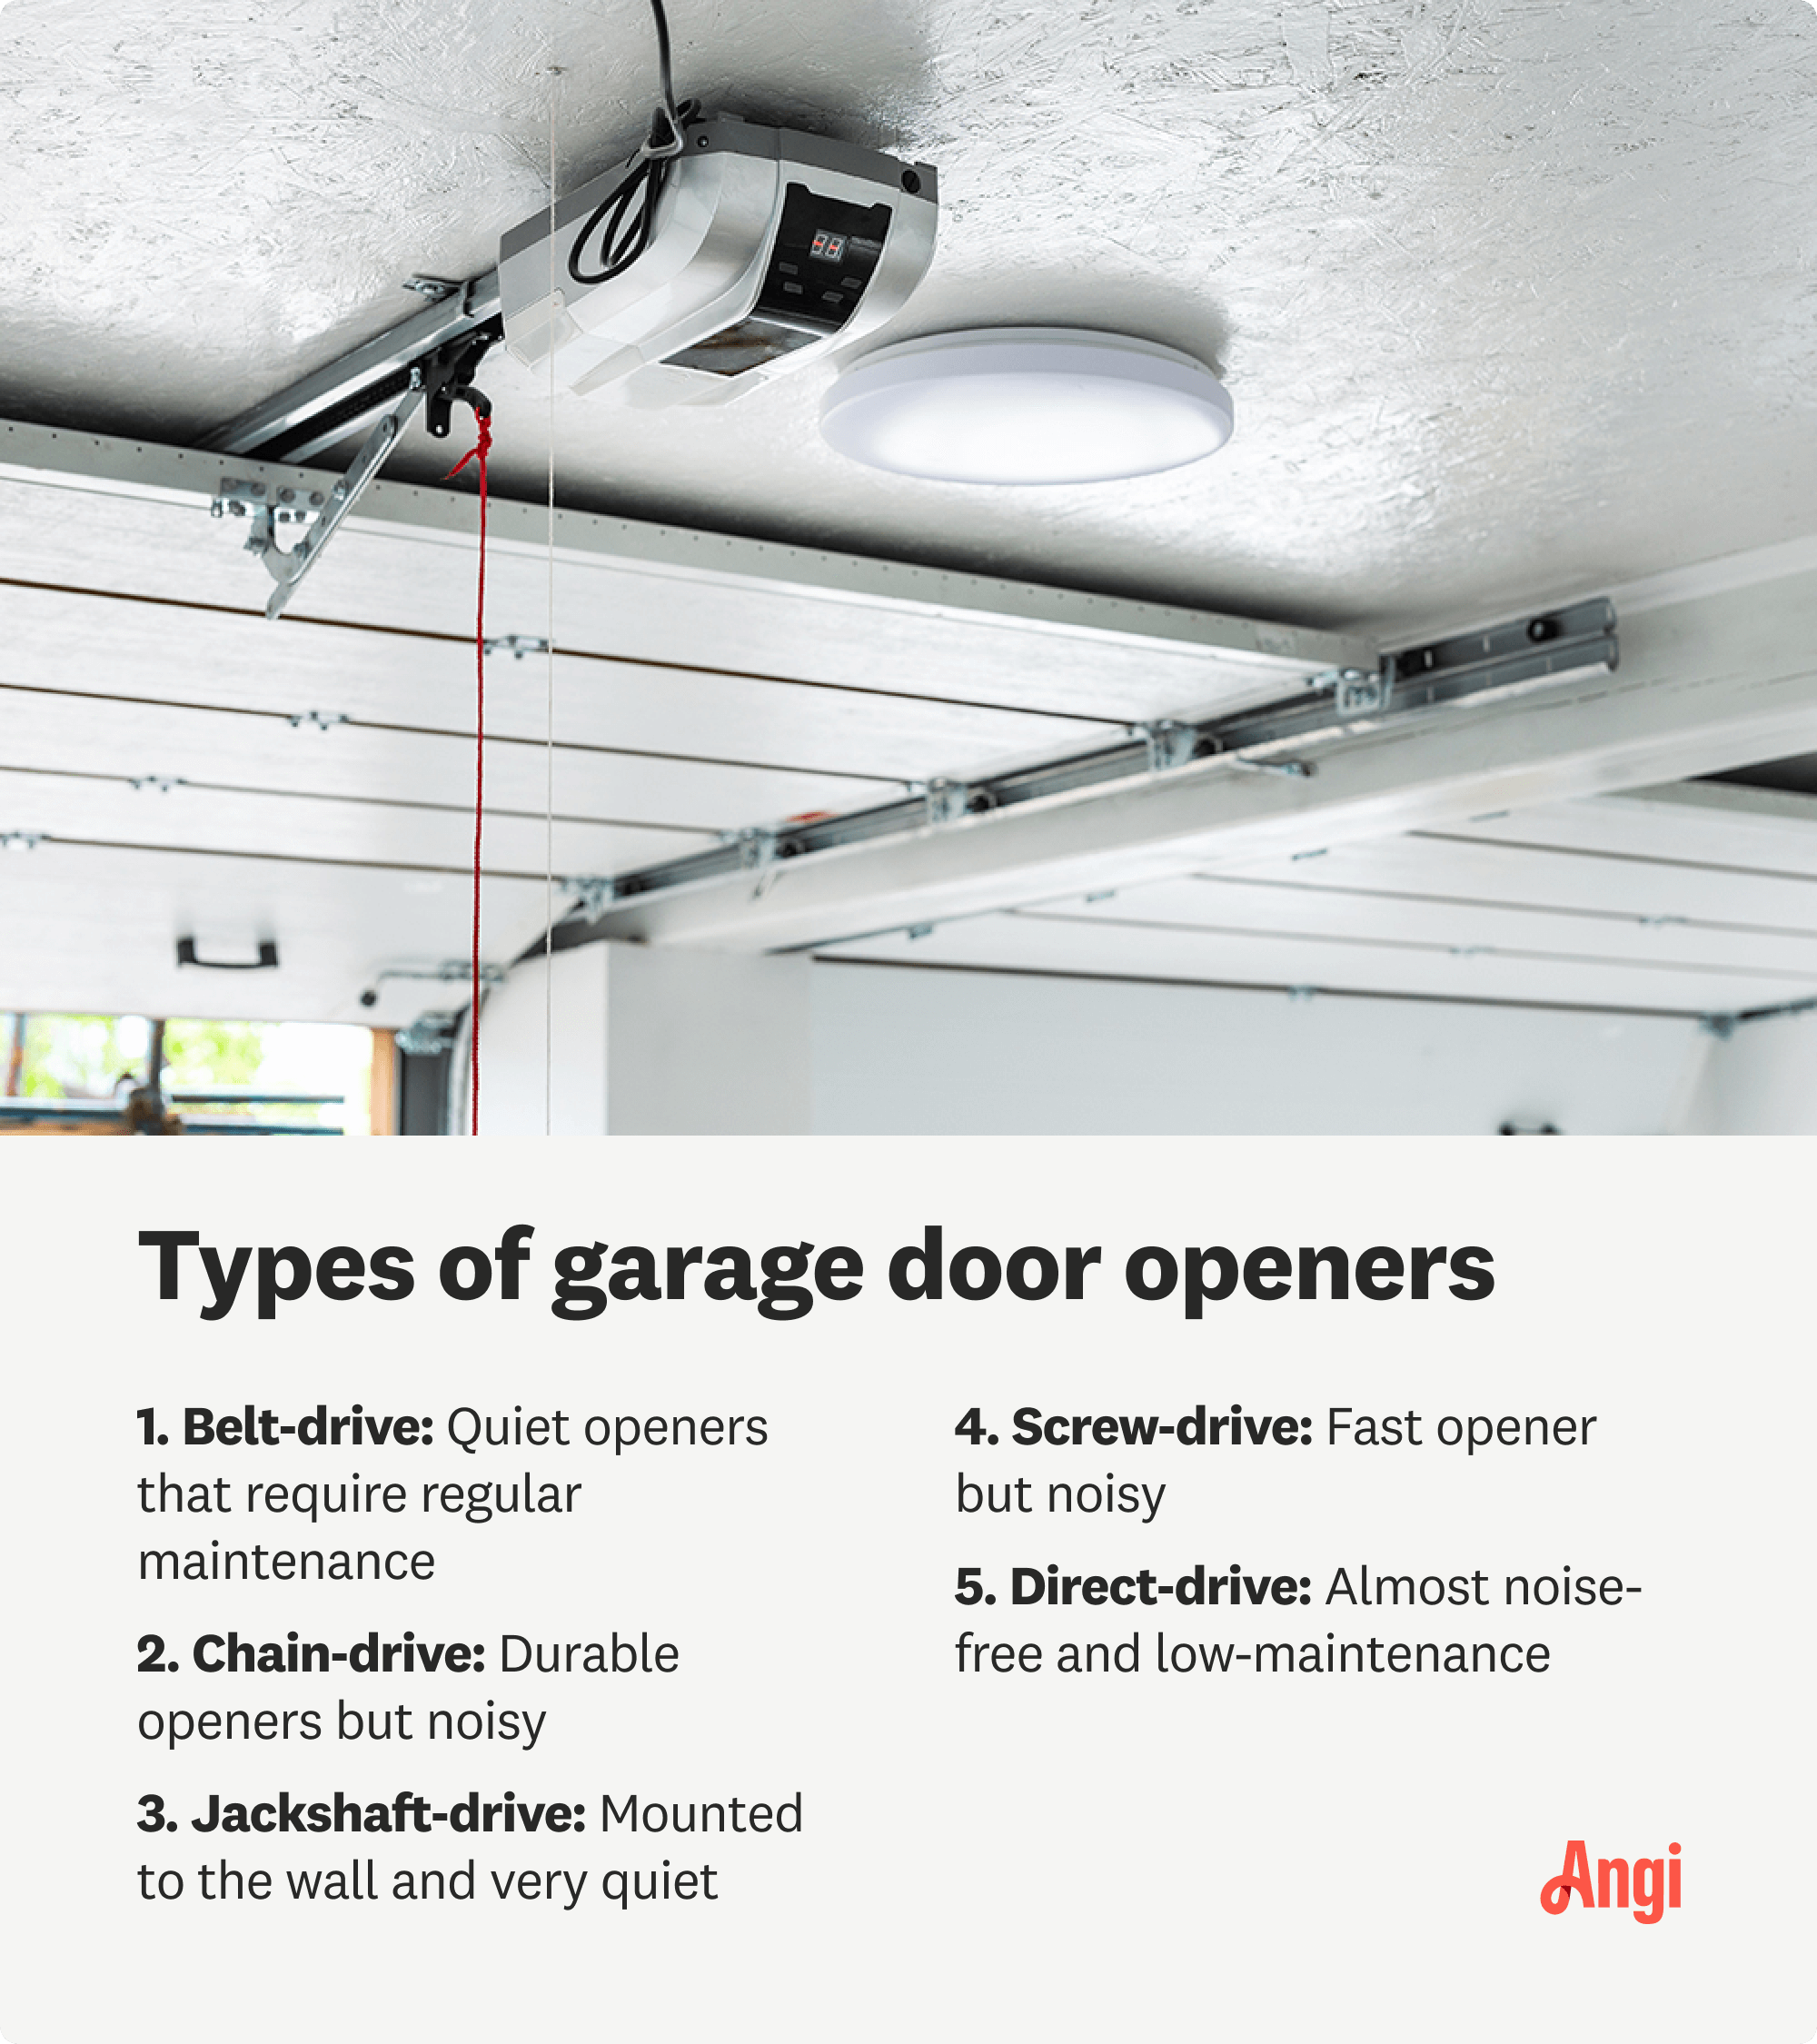
There are five types of garage door openers on the market. The one you choose could affect the replacement installation process, so let’s quickly review each type.

Belt-Drive
The belt-drive garage door opener is the second most popular type because it’s quiet and budget-friendly. Belt drives are easier to install than chain-drive competitors because the mechanisms use a belt to open and close the garage doors.
Chain-Drive
Chain-drive garage door openers are the most common type of garage door opener. These garage door openers are slightly harder to install than belt drive openers because the chains require precision to operate correctly.
Direct-Drive Openers
Direct-drive garage door openers are one of the easiest garage openers to replace. They lack a moving chain or belt. Only the motor moves across the track to open the door, which simplifies the mechanism and installation process. They are also incredibly quiet and low-maintenance.
Jackshaft-Drive Openers
Jackshaft-drive garage door openers are a type of wall-mounted opener that gives your garage extra overhead space. Because there is less wiring and no overhead mounting, jackshaft-drive openers can be easier to install than other types of openers.
Screw-Drive Openers
Another type of opener is the screw-drive opener. This garage door opener has a screw inside of a metal track that goes across the length of the opener—all the way to the door. There’s a trolley attached to the rod that attaches to the door with an arm extension. Used primarily in heavy or wide doors, screw-drive openers may be slightly more complex than other types, which can make the replacement process a little more challenging.
Check the Garage Door System
Before you invest time, money, and energy into installing a new garage door opener, it's a good idea to check your entire garage door system to ensure that the garage door opener is the problem. For all you know, it could be a faulty door panel, chain, spring, roller, or some other part of your garage door system on the fritz. You might even need to know how to replace a garage door instead.
Select the Right Garage Door Opener Horsepower
Garage door openers come in several different horsepower, including 1/3 horsepower, 1/2 horsepower, and 3/4 horsepower. 1/3 horsepower is the most affordable, but it also has the least amount of power. For doors with an average weight, 1/2 horsepower tends to do the job. Meanwhile, large doors and doors made from heavy-duty materials may require 3/4 horsepower.
Choose an Installation Site
Assess where you should install the garage door opener to avoid having to redo the installation afterward. For instance, if you’re switching from a jackshaft-drive garage door opener to a belt-drive opener, you can’t use the same installation site since your old jackshaft drive went on the wall and belt drives go on the ceiling.
Even if your replacement garage door opener is compatible with the new location, depending on the model, your installation site could be out of reach of electrical outlets. You’ll either need to install a new outlet or choose a new location within reach of an outlet.
Remove the Old Garage Door Opener and Track
If you have an existing garage door opener, you’ll need to remove the entire system, including the track. Use your socket wrench to remove the old opener and track, then apply some lithium-based grease to the new tracks with a rag.
Confirm You Have All the Parts
Check to make sure your garage door opener has all of the necessary parts before piecing together any sections of your garage door opener. This will save you the trouble of having to search for missing pieces or rush to the hardware store while you’re working on more challenging parts of the installation process.
Build the Carriage Tube
The carriage tube creates the pathway for your carriage to lift and lower the garage door. Follow the instruction manual to assemble the carriage tube correctly. You may need to use a socket wrench for this step. You'll also need your measuring tape to measure the carriage tube and ensure it’s at the correct length. Loosen the nuts or bolts just enough to adjust the tube length as needed.
Mount the Carriage onto the Tube
Next, it's time to mount the carriage onto the newly built carriage tube. Do this by sliding the carriage or trolley over the carriage tube following the specific instructions in your garage door opener manual.
Attach the Header Bracket
This step requires a helping hand. To connect the header bracket, one person needs to manually lift the garage door until it reaches the highest point it can move. Use a level to mark the highest point, then use your measuring tape to mark two inches above this line. This is where you’ll want to bolt the bracket to the wall with the fasteners in your assembly kit and secure it with a drill or screwdriver.
Double-check that the location of the header bracket lines up with where you plan on installing the power unit.
Secure the Carriage Tube to the Header Bracket
Lift the carriage tube until the end that doesn’t have the carriage tube on it lines up with the header bracket, and attach that end of the carriage tube to the bracket with the tools indicated in your instructions. To keep the carriage tube from bending after attaching it to the header bracket, rest the unattached end of the assembled carriage tube onto a ladder.
Mount the Power Unit to the Ceiling
Now it's time to mount the power unit to the ceiling of your garage. The power unit needs to be at least seven feet away from the floor. Most garage door openers come with angle irons and pre-drilled straps for securing the system to the wall.
Use lag screws to bolt the angle irons to the rafters in your garage, then attach the angle irons with the assembly materials. Follow up by connecting the strips to the power unit using the hardware materials that came with your garage door opener. Plug the power unit into a receptacle.
Connect the Carriage Arm Bracket
The carriage arm is a metal, elbow-shaped arm that works to raise and lower the door. Without these next two steps, your garage door won’t open. First, you need to install the door-mounted bracket by aligning it to the position of your carriage tube and using the provided screws and a screwdriver.
Secure the Carriage Arm
After connecting the carriage arm bracket, it’s time to secure the arm on both ends—one to the door bracket, the other to the primary carriage arm. Usually, you’ll use the hardware that came with the garage door opener kit to secure the carriage arm as per the instruction manual.
Install the Safety Devices
Garage doors must legally have safety sensors to stop the motor in case of an obstruction. Install the safety devices by aligning the mounts using a laser level. The sensors should be installed six or fewer inches away from the ground of your garage—with one sensor on each side of your garage door. Wire the sensors along the wall of your garage and connect them to the power unit according to the manufacturer’s instructions.
Wire the Keypad to a Wall
Before you can power your new garage door opener, you must wire the keypad to the wall of your garage. Mount the keypad to the wall in a location that is easily accessible and out of reach of small children. Follow the instruction manual closely for a safe installation. If you don’t have wiring where you plan on installing your keypad, then you may need to hire an electrician near you for this step.
Test the Garage Door Opener
To make sure the garage door opens properly, press the power button to test it out. If you notice the garage door is stuck, isn’t opening fully, or is opening too far, adjust the alignment with the controls on the power unit.
Garage Opener Maintenance
Following a consistent garage door opener maintenance schedule can extend the life of your garage door opener. Check out these garage door maintenance tips to set you off on the right start:
Regularly clean the tracks to prevent debris buildup that can erode the tracks, chains, or belt.
Keep metal garage moving parts well-lubricated to keep corrosion far away from your garage door opener.
Routinely check the balance of your garage door to detect torsion spring issues quickly. Garage door spring replacement costs go for around $150 to $350.
Annually inspect bolts and nuts and tighten any hardware loosened from the frequent motion of the garage door opening and closing.
Hire a pro to repair garage door parts right away. Garage door replacement costs range from $750 to $1,700 on average.
DIY Garage Door Opener Replacement vs. Hiring a Pro
Installing a garage door opener yourself is challenging because failure to correctly install it can cause accidents that damage your valuables or cause injury to pets or people. If you’re unsure about safely installing a garage door opener, or you also need to install a new garage door, play it safe by working with a local garage door opener repair service.
Hiring a pro costs between $65 and $85 per hour, depending on the cost of living and local going rates. Expect the installation to take anywhere from two to six hours, for a total cost of $130 to $390 in labor expenses. Garage door opener installations cost anywhere from $225 to $550 for the materials alone.
Frequently Asked Questions
Though you may be tempted to install a new garage door opener using the tracks of your old garage door opener, don’t use old garage parts. Every garage door opener has its own measurements, offsets, and requirements that could be incompatible with your old garage door opener. Using an old track could result in a collision or injury.
If push comes to shove, and you need to manually open your garage door, then you should be able to do so. To manually open your garage door, first, make sure that the door is in the down position. You’ll need to unlock your garage door opener’s emergency release mechanism, which is typically a red robe that you can find on the carriage. Once you’ve pulled the cord, you can manually lower the door.
If your garage door is stuck in an open position, consider contacting a professional to safely release the opener.


