

The cost to rip up carpets and install laminate depends on factors like labor prices, materials, and location. Use this guide to get a detailed cost overview.
Let’s lay the groundwork for a high-quality carpet installation

Plush new carpet can transform the look and feel of any room, and it’s an especially popular flooring material for bedrooms and living areas. But while it sounds easy to just lay out carpet and nail or glue it down, installing carpet actually requires a lot of specialized tools and plenty of patience to achieve a seamless, smooth surface. So, it’s important to consider if a DIY approach is really your best solution or if you should hire a pro. If you’re confident in your skills, learn how to install carpet like a pro, disguised seams and all, with this guide.
First thing’s first: You need to buy carpet. There are many types of carpet to consider, and choosing the right carpet for your home will depend on your budget, style preferences, room traffic, and lifestyle. No matter what carpet you decide on, you need to measure the room’s width and length, then multiply those two numbers to get the square footage of the room. Then, add 10% to 15% for extra flooring to buy to account for any mistakes.
Then, it’s time to convert the square footage (including extra materials) to square yards since carpet is often sold by the square yard. To find the square yardage, use the following equation:
Total square footage ÷ 9 = total square yards
You’ll need tack strips to go along the walls, so measure along all walls of the room to find the linear footage you need to buy tack strips. Tack strips are often sold in 4-foot-long strips.
Put on your gloves and eye protection first. Removing doors and baseboards around your room may help make the installation process easier, but this isn’t a necessary step.
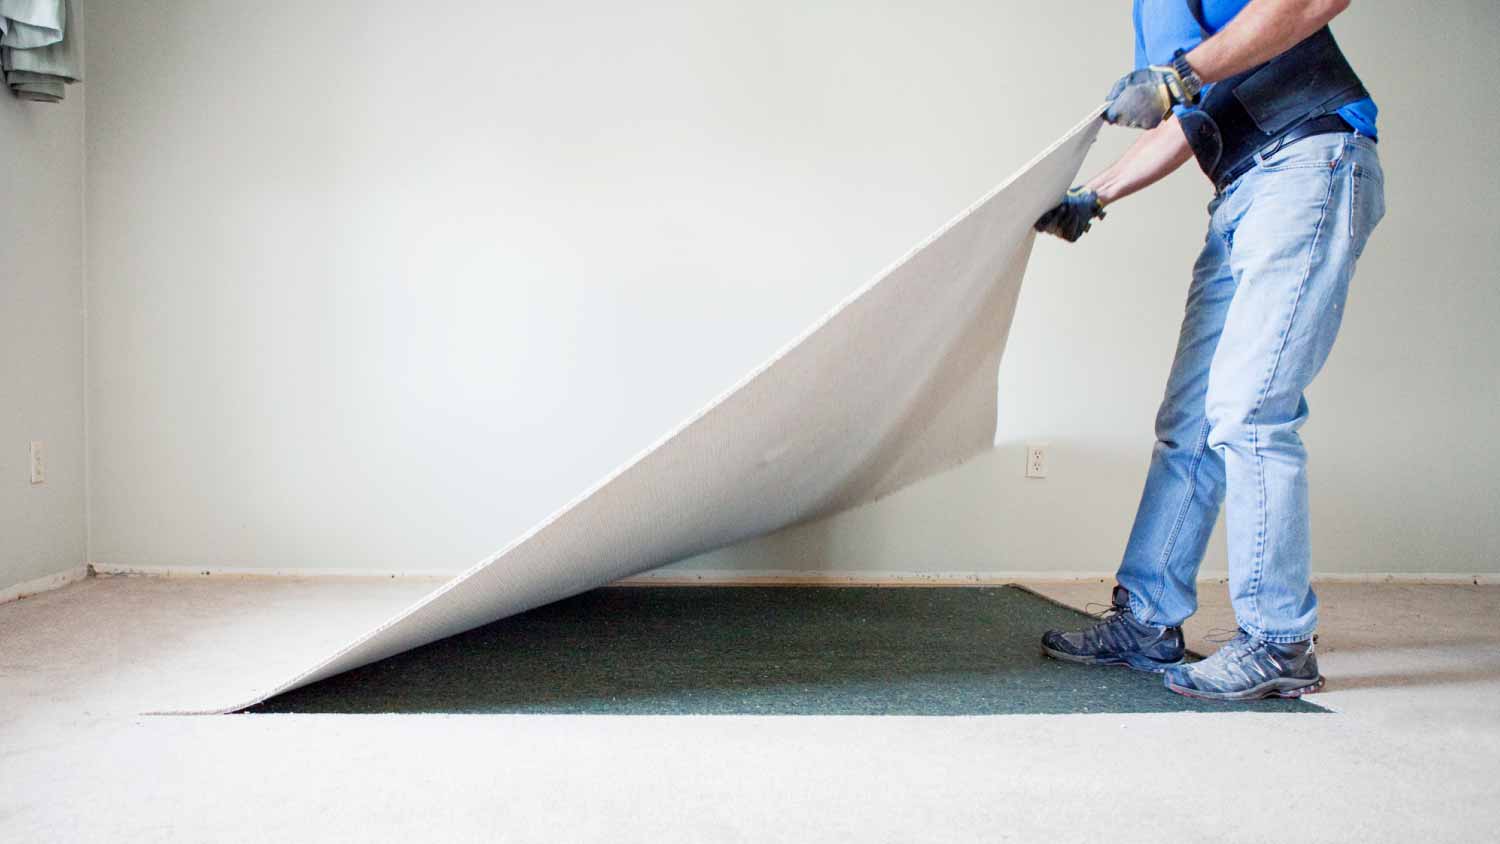
You need to remove any existing flooring in a room before installing new carpet. You shouldn’t install new carpet over existing carpet, laminate, tile, or other types of flooring because it can cause the new carpet to lay unevenly. You may need to pry up some types of flooring, like hardwood or laminate, or you may need to use a sledgehammer to remove old tile floors.

Subfloors are an important part of a room, as they provide support for your new flooring. Worn-out or broken subfloors can lead to squeaky or uneven flooring, so make sure to inspect your subfloors for any damage and repair or replace the subfloors if needed. If the subfloors are in good condition, just vacuum them before moving on to laying the carpet. This may be a good place to hire a pro instead of DIYing if you suspect an issue with your subfloors. You can still install the carpet yourself afterward if you want.
Before adding new flooring of any kind to a room, make sure it has at least 24 hours to adjust to the temperature and humidity. Unwrap the carpet, but keep it rolled, and leave it in the room for a full day before you start the installation process. This will help keep the material from shrinking or expanding after you’ve started installing.
Tack strips help hold carpet in place and allow you to stretch it for the smoothest application. Use a tack strip cutter to cut tack strips to fit along the walls of the room, leaving openings for doors, and around any floor vents. Make sure to leave a small gap of 1/4 to 1/2 inch between the tack strip and the wall.
The tack strip has pointed tacks that are angled, so make sure they are angled toward the wall. Nail the tack strip into the subfloor with one nail toward each end of the strip, or use masonry nails or epoxy adhesive to adhere tack strips to a concrete base. If you use epoxy, make sure to wear a mask in addition to your gloves and eye protection.
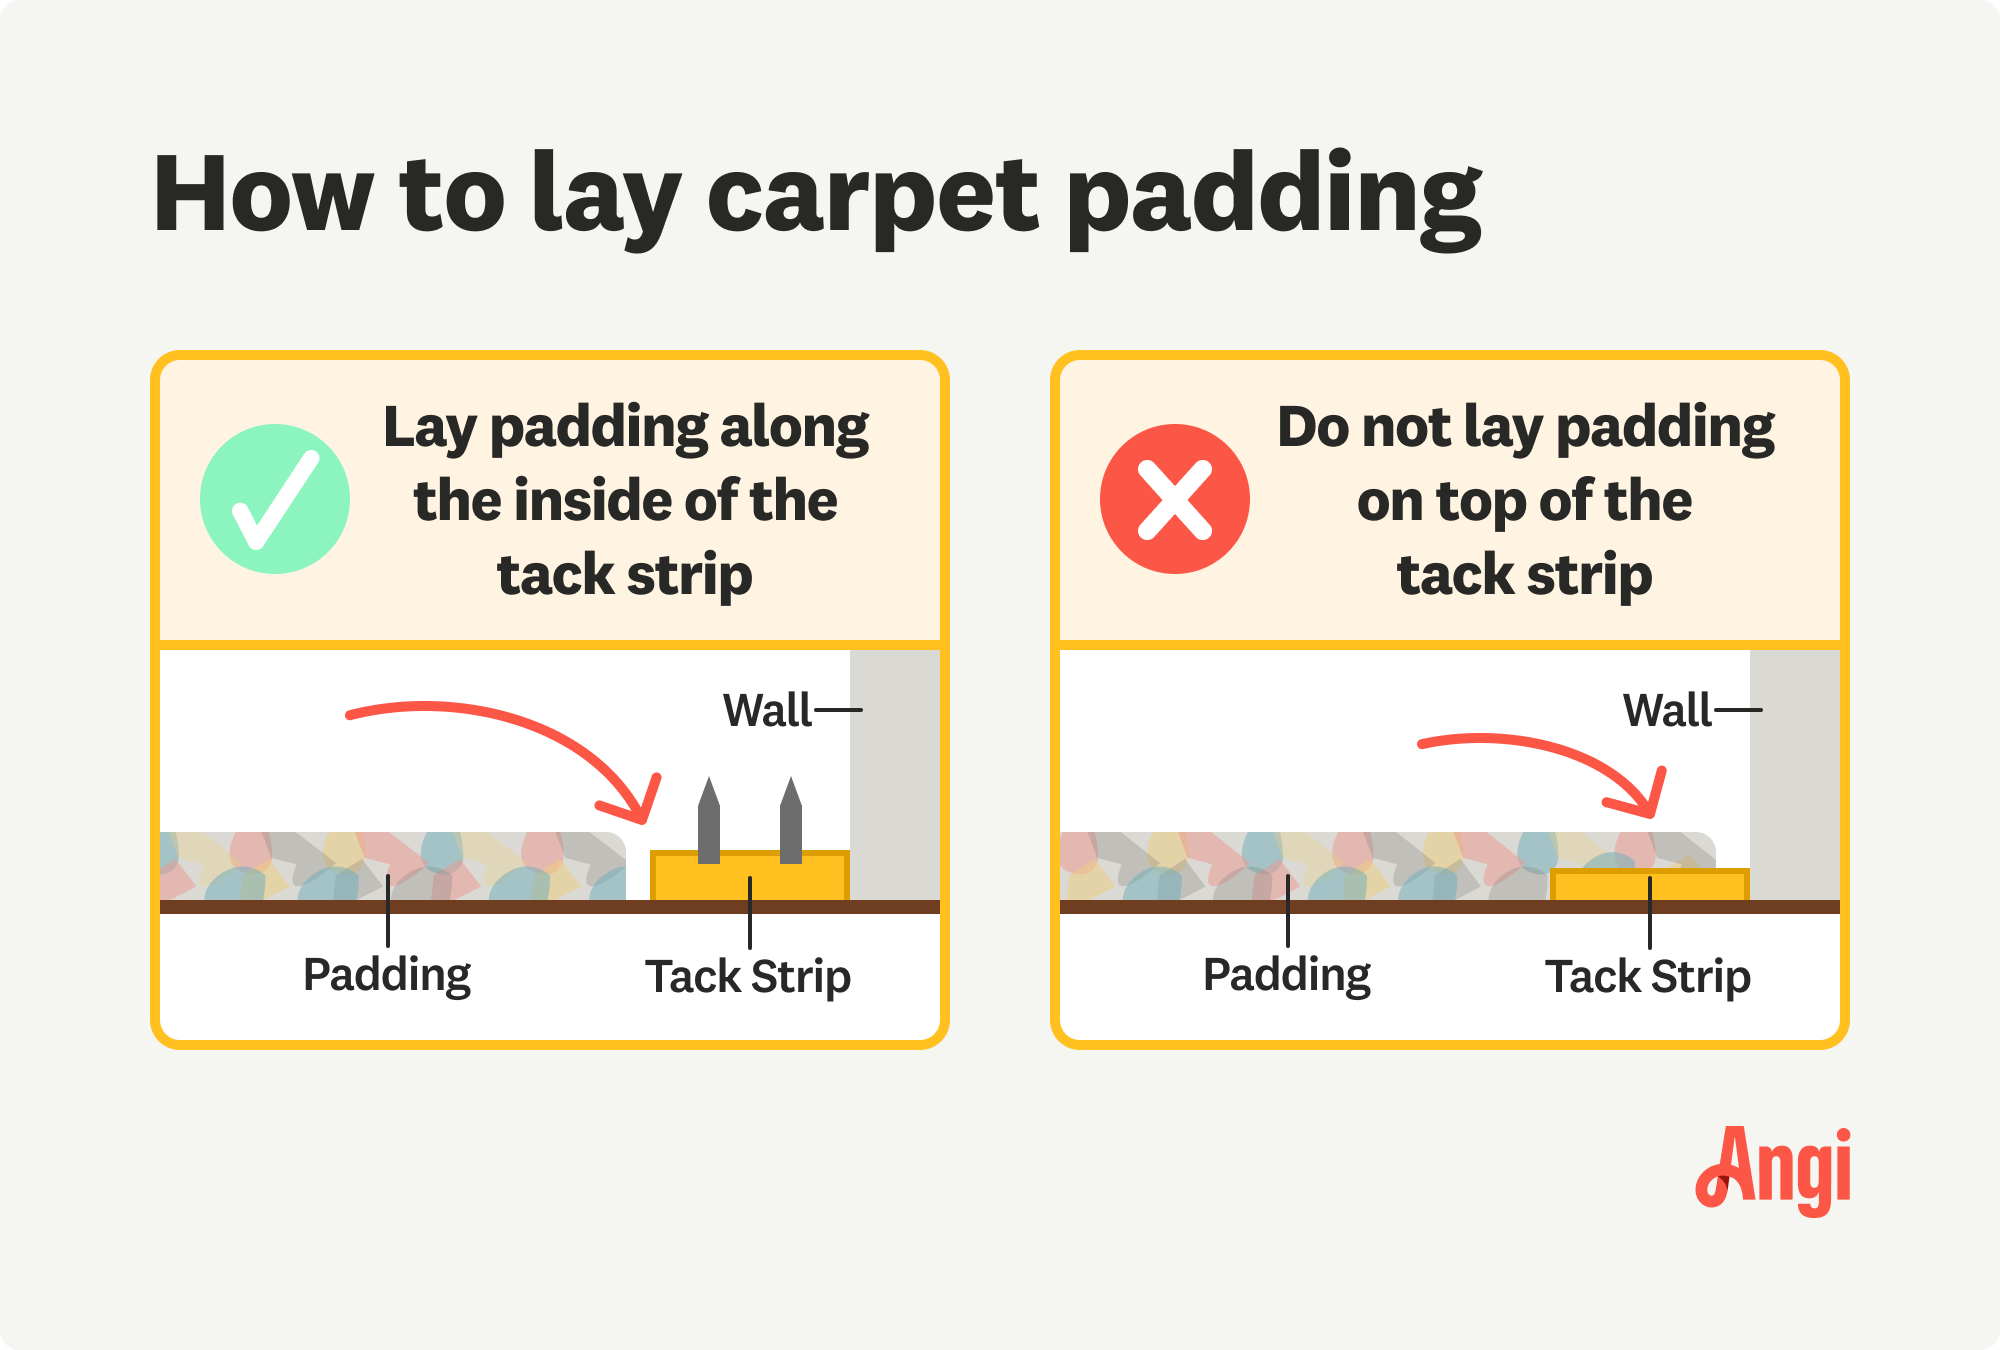
Carpet padding helps give carpeted floors that cushioned feeling, so don’t skip adding this essential layer. Start along one wall and lay the padding down, with the edge just along the inside of the tack strip (meaning don’t cover the tack strip with the carpet padding). You may need multiple rolls of padding, so make sure to cut them to fit snugly against one another and that their seams meet evenly.
Use a staple gun to adhere the padding to the subflooring, or glue the padding down if you’re installing carpet over concrete. Use durable tape, like masking or duct tape, to smooth out the seams where rolls of padding meet.

Although you measured the room before buying the carpet, you should measure the longest wall again to avoid any mistakes. Add 6 inches to the length of the longest wall, and use a carpet or utility knife to cut this measurement in the carpet. You may want to unroll and cut the carpet in another room, then roll up the amount you cut and bring it back to the room to lay it out.
When laying out the carpet, make sure to start in one corner of the room. The carpet should cover the tack strips. You may need multiple rolls of carpet, so align them snugly at the seams as you did with the carpet padding.
Use seaming tape on the backside of the carpet, with the adhesive side facing up to adhere to the back of the carpet. Make sure the seaming tape is aligned to thoroughly attach to both seams of the separate carpet rolls all the way along the seam to avoid any bumps. Repeat for any additional seams, then use a seaming iron on the seaming tape to heat up the adhesive. Press down on the carpet to attach it to the seaming tape, and wait about 30 minutes to let the adhesive dry before you start the next step.
You’ll need a carpet knee kicker to help attach the carpet to the tack strips. Start along one end of a long wall in the room and press into the knee kicker to get the carpet to grip onto the tack strips. Repeat until the carpet is secured along the tack strips of one whole wall.
Now that the carpet is attached along one wall, you can use a carpet stretcher to make sure the carpet won’t wrinkle or pucker in places after installation. Use the stretcher to pull the carpet as tightly as you can toward the opposite wall of the anchor wall where you first attached the carpet. Stretch the carpet multiple times along the length of the opposite wall.
With the carpet stretched, use the carpet knee kicker to attach the carpet to the tack strips along the opposite wall.
Start attaching the carpet to a third wall using the knee kicker, then stretch it to the opposite of this third wall with the carpet stretcher. Finally, attach the carpet to the final tack strips along the last wall.

Now that the carpet is secured around the perimeter of the room, you can trim away any excess carpet and tuck it into the baseboard or bottom of the wall. Use a carpet trimmer to carefully cut away the excess carpet. Then, use a carpet chisel or stair tool, which has a wide, flat surface, to tuck the edges of the carpet into the walls or baseboards.
Transition strips help protect the carpet from fraying and add a finished look to your carpet installation. Place the transition strips carefully to cover the edges of the carpet where they meet other flooring materials, then nail them into place.
You may have opted to remove doors and baseboards or other fixtures around the room to make carpet installation easier. If you did, make sure to replace these elements before you finish up this project.

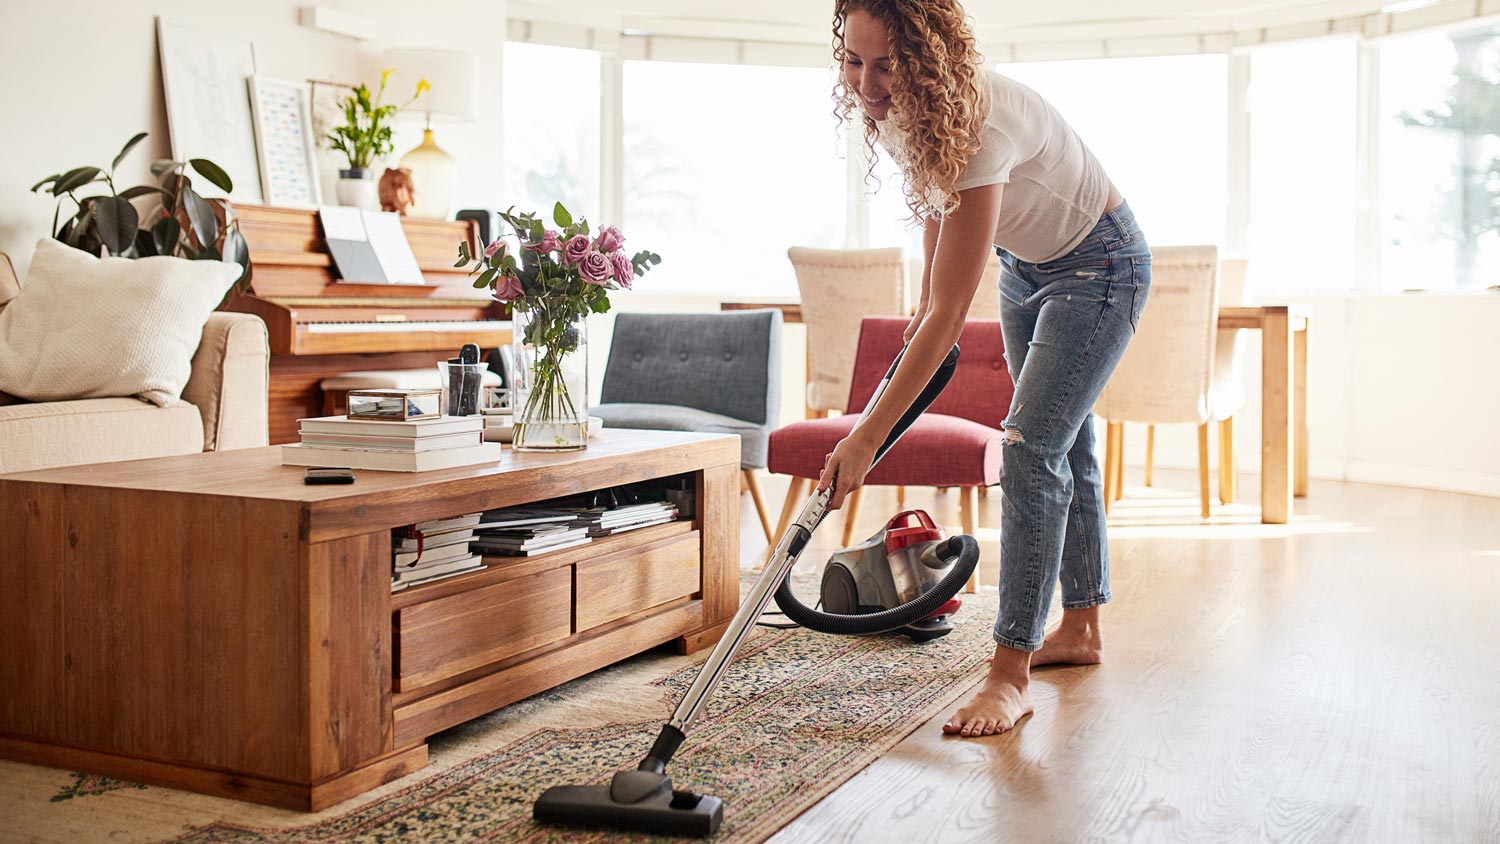
Use a vacuum to thoroughly clean the carpet, then replace your furniture. Now, enjoy the smooth, seamless look and feel of your new carpeting.
Even seasoned DIYers can agree that installing carpet isn’t for the faint of heart. It takes several hours or even days to carefully measure, cut, tack, and stretch carpet to avoid any wrinkles or uneven seams. Even a small mistake could cause the carpet to look or feel bumpy in the days and weeks after installation.
The supplies alone for this job can cost $500 to $1,000 or more for carpet, tack strips, and other essentials. If you don’t already have tools like a knee kicker or a carpet stretcher, you can expect to spend at least another $200 to $650 on the cost of carpet installation.
That’s why it’s the easiest, fastest, and most cost-effective choice to leave this job to the pros rather than trying to DIY. Hire a local carpet installer to help you refresh your favorite rooms with soft, plush, and seamless new carpeting.
Showed up on time and cleaned carpets well, but didn?t move furniture.
Carpet repair done well. Scheduling was easy. Showed up on time.
Joseph did a great job with the staircase and trim. Timely and efficient, clear communication about the work, very fair pricing. For the stairs in particular, done very skillfully in an old house (1893) in a tight spiral, and very creative with how to do the handrail. Did a nice job with...
This company does it right. Firstly, I want to say that Landan was a joy to work with. He was so kind, transparent, and had everything under control. His entire team showed up ready to work and they were all very respectful of the fact that we were in an office space. A little backstory – we...
Very professional, knowledgeable and helpful! Completed the install on time and as expected.
Excellent, Prompt, Courteous Service!!! They were super friendly and quite personable. I felt very comfortable with the gentlemen that did the installation. They installed it exactly where I asked them to and they did an excellent job!! I loved their service so much.
I hired windows depot USA of central to install new windows in house in Oshawa. Ilya was very professional from the start, not only did he offered a great price, he also made sure the installation was on time. I am very satisfied with final outcome. The windows look great and the overall...
We were having 2”x 2” tile installed . There was a small installation error and the new additional replacement tile was from a different lot and the colors didn’t match. Joe assured us that he would rectify everything , which he did without hesitation. We decided to go with the 18” x 36” tile...
 CarifaTile
Great experience all together. Dog friendly, courteous, great results and honest with recommendations. Will certainly be using Cardinal in the future for any carpet repairs
Did an amazing job transforming my yard. Also installed sod in places, would recommend to everyone.
From average costs to expert advice, get all the answers you need to get your job done.
The cost to rip up carpets and install laminate depends on factors like labor prices, materials, and location. Use this guide to get a detailed cost overview.
The average range to remove carpet costs $120 to $720. Contractors base carpet removal costs on square footage, home location, and installation type.

Discover how much carpet replacement costs based on factors like the project size, the carpet material, and the labor required.
Adjusting the height of your vacuum cleaner ensures your carpets get as clean as possible. The process varies by vacuum, but it’s easy no matter what. Learn how to adjust your vacuum’s carpet height settings in 30 seconds or less.
Learn how to fix ripped carpet and understand when to call a pro to repair the damage before it worsens and results in costly replacement.

Brand new or a decade old, there's no need to be scared of cleaning carpets. Learn eight of the best ways to clean carpets like a pro.