
Your dry rot repair cost will depend on factors such as the extent and size of the damage and its location within your home. Here's what you need to know.
Wood plus water doesn't have to equal your worst nightmare

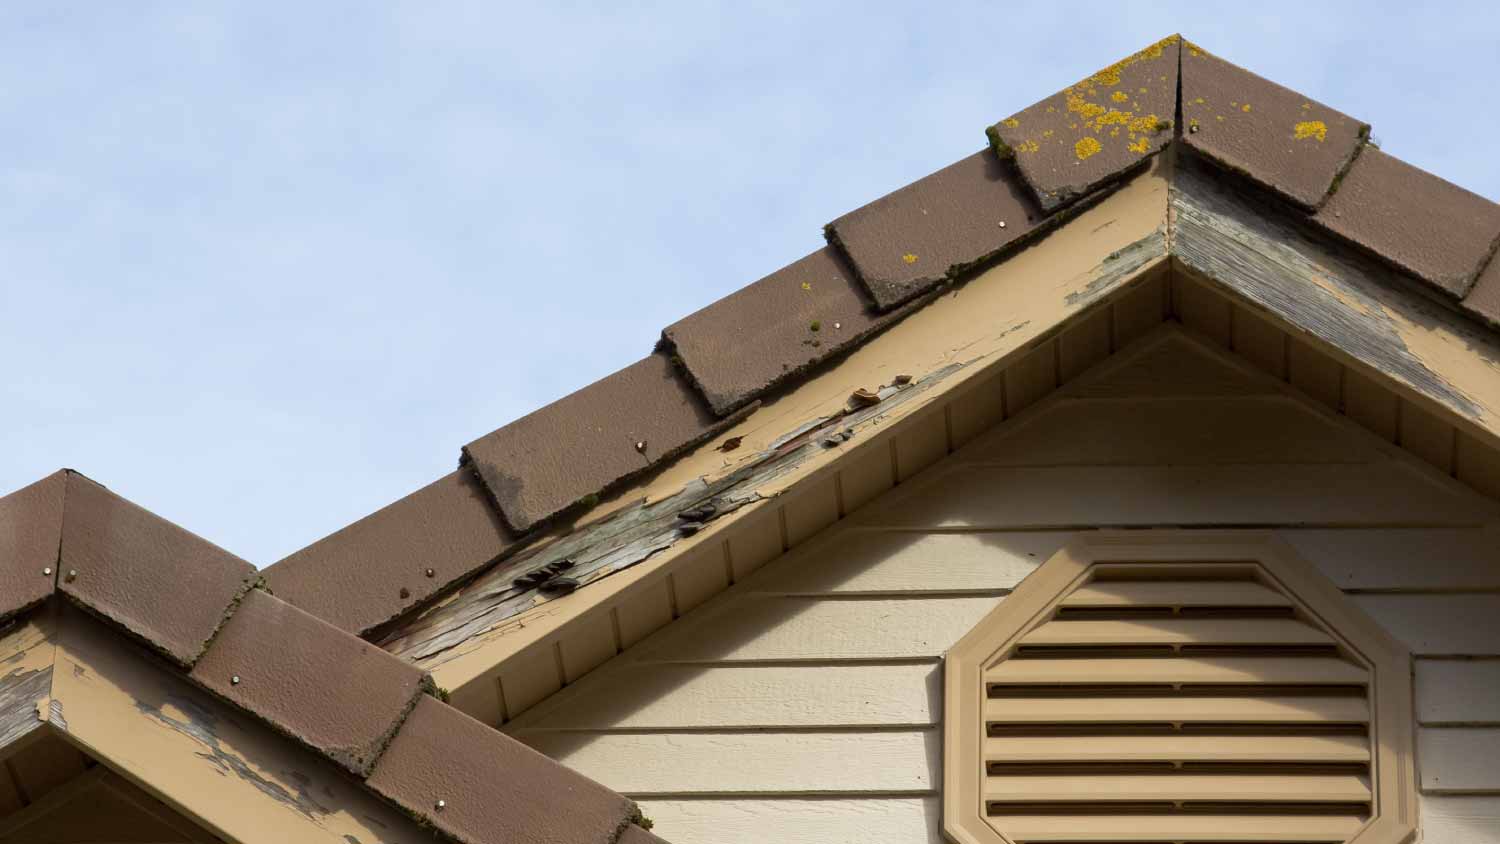
Dry rot may just look unsightly when it first sets in, but if you don’t treat it quickly, it can destroy wood components and even spread to other materials in your home. Knowing how to repair dry rot and how to identify it in the first place can help you protect your property from worsening conditions.

Before you can stop wood rot, you have to know what you're looking for. So, what does dry rot look like? Some common signs of it include:
Peeling paint or blistering
Discolored or darker wood
White or gray mold spores
Orange or brown mushrooms growing on the wood
Dry rot is just one type of wood rot, and you should confirm that you’re not dealing with another type before you implement a solution. Contact a local water damage restoration specialist to help confirm the underlying issue if you’re not sure.
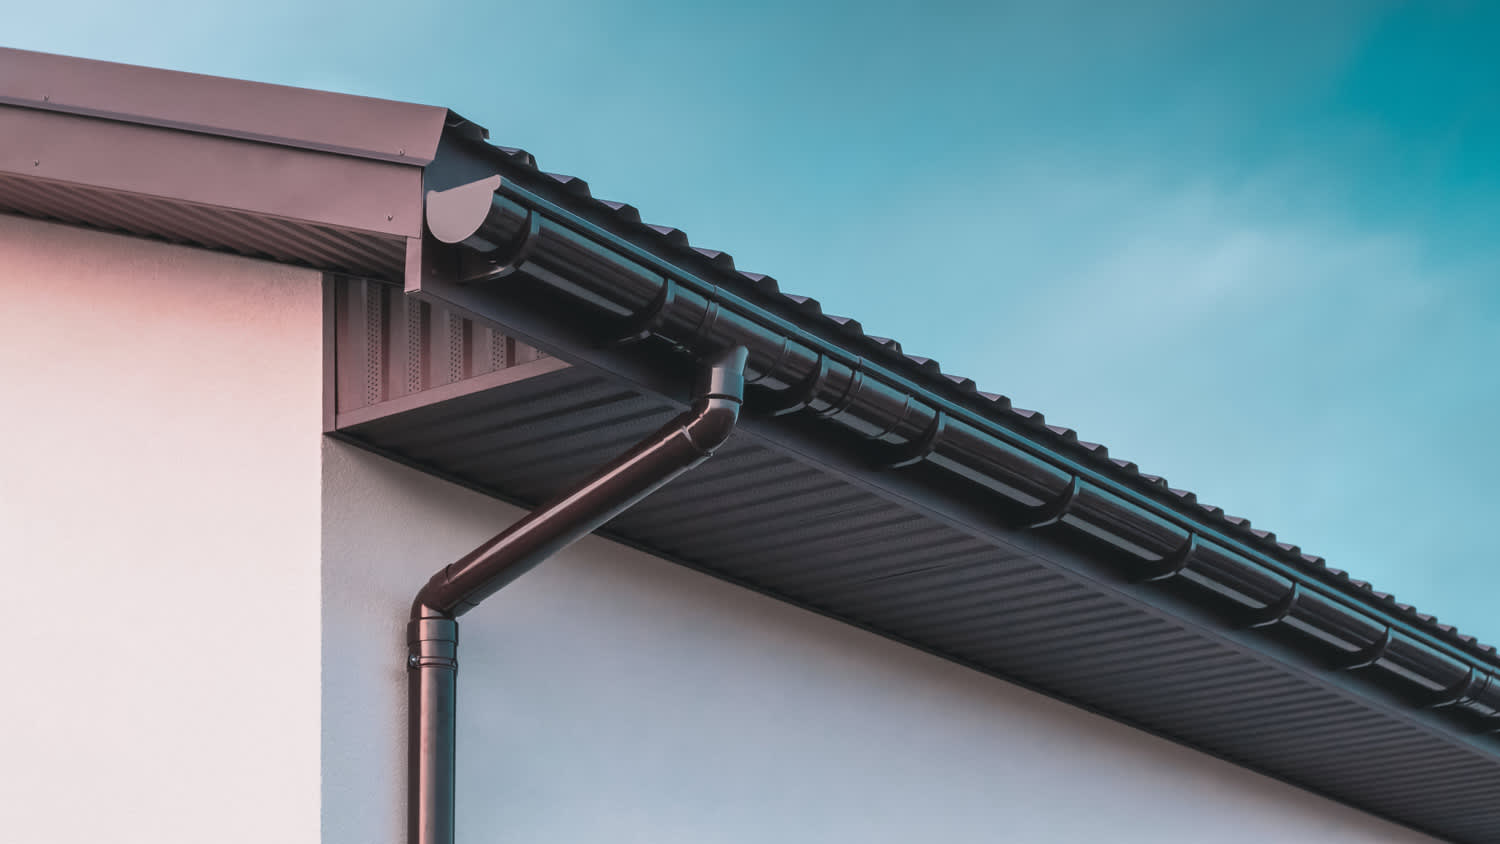
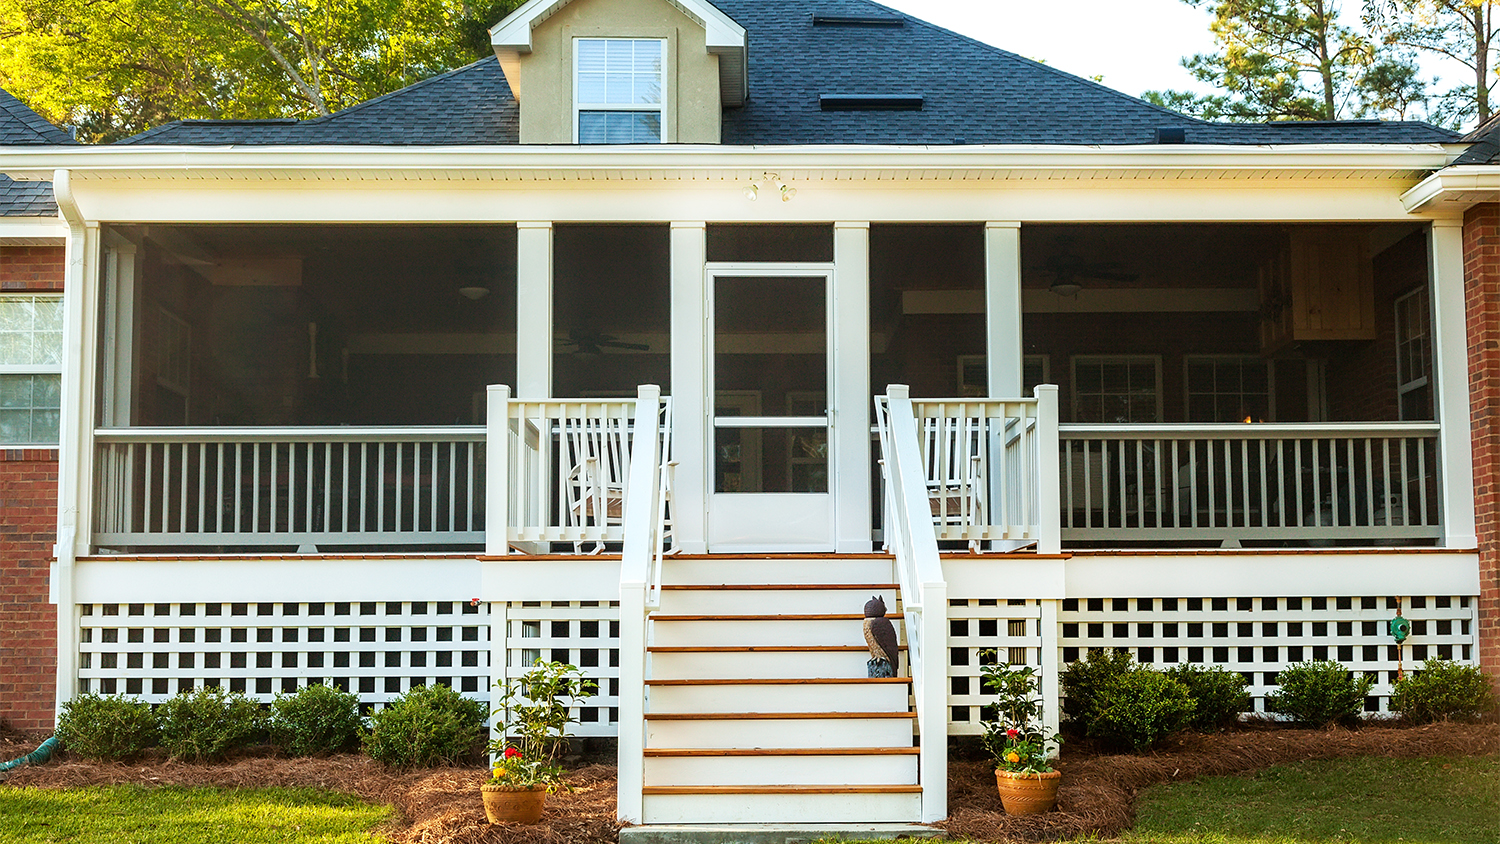
First, find the cause of the rot and fix it before you repair the damaged area. The fungus that causes dry rot will only set into damp wood, so address any leaks or related problems before treatment to prevent wood rot from spreading. Common causes of dry rot include:
A roof leak
Lack of ventilation
Clogged gutters
Shrubbery or greenery that grows too close to your home
Protective paint peeling off of exterior trim
Water pooling on window sills
Inspect exterior areas of your home looking for any signs of excess moisture, leaks, or water damage. If you’re unsure how to treat the problem, call a professional to help ensure you get a permanent solution.
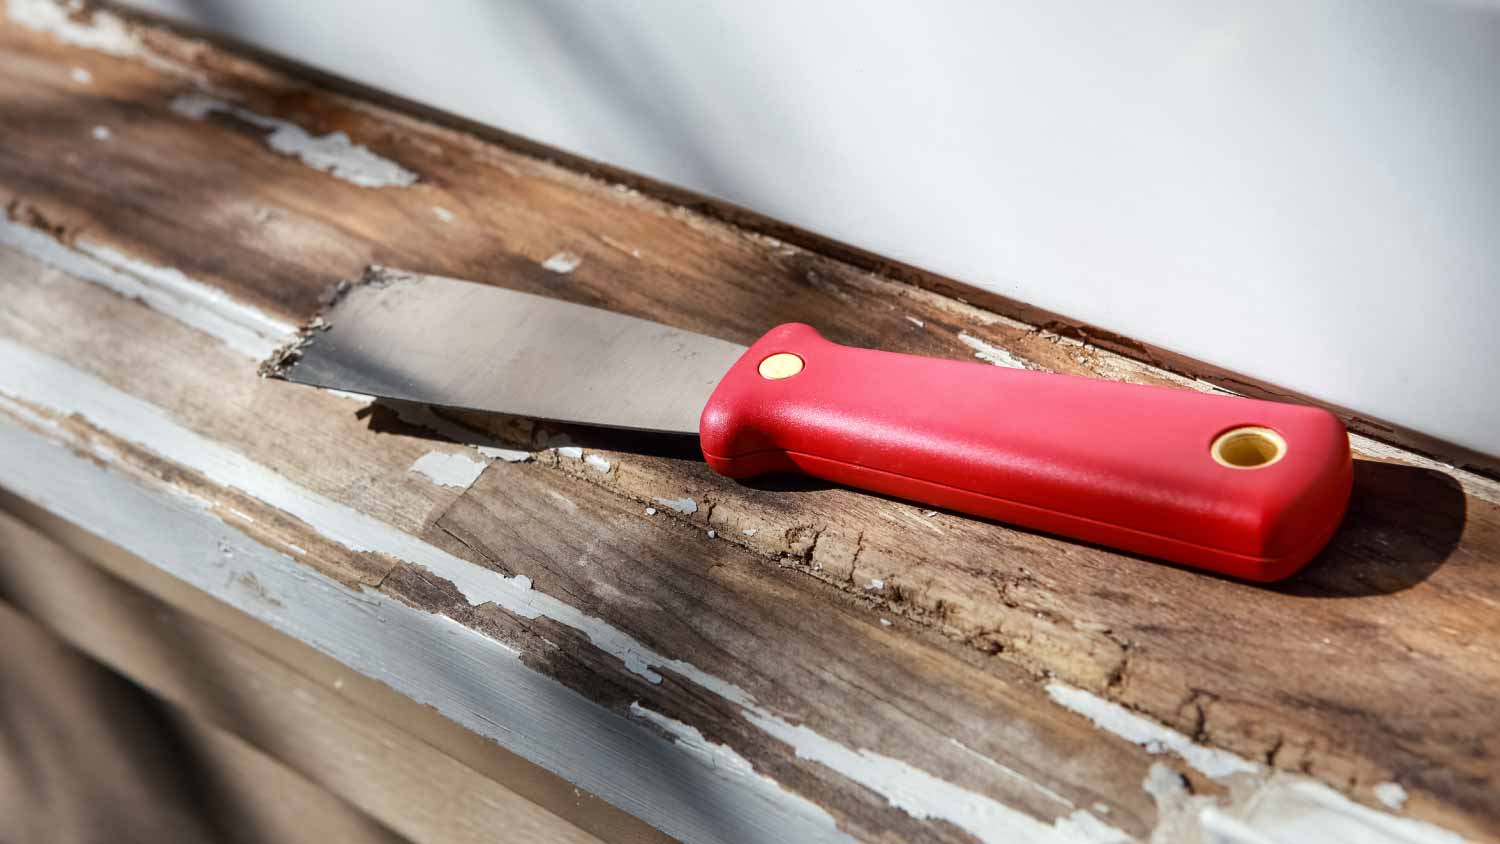
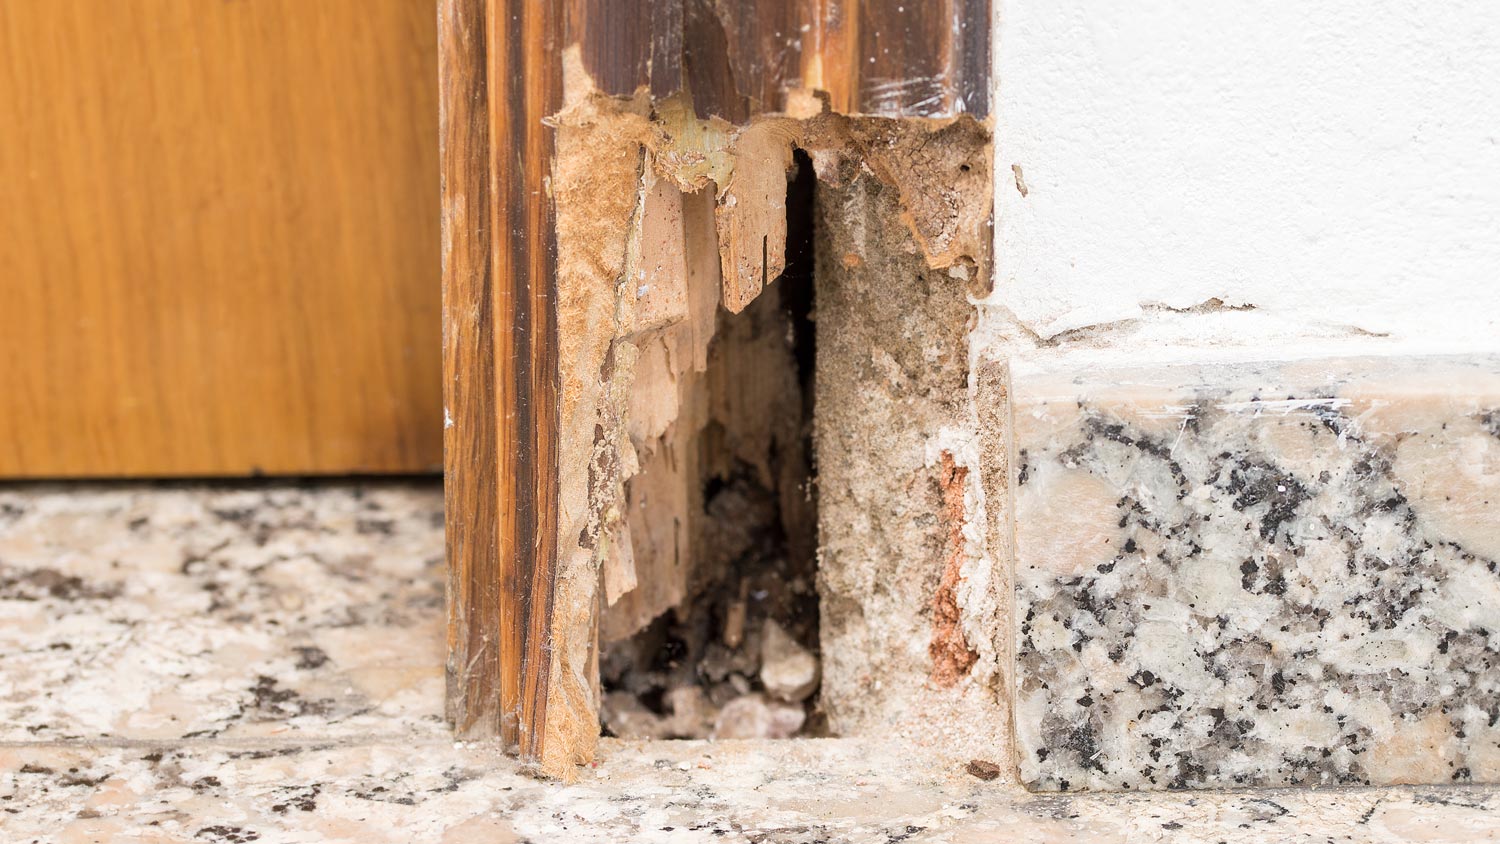
Use a chisel and wire brush to remove any areas of infected wood. Dry rot causes wood to get crumbly, creating cubical cracks in the material, so chisel off large portions of infected wood and brush off the rest.
Remember to wear protective gear, including a mask, goggles, and gloves while working. Keep chiseling and brushing until you've removed all the damaged material and are left with what appears to be unharmed wood.
You may not be able to remove all the damaged wood from the area. In that case, strengthen the wood by applying epoxy wood hardener to it. Use a foam brush to apply the wood hardener, allowing it to seep into the wood’s cracks and holes. Let the wood hardener dry for two to four hours.
Wood hardener contains a high level of volatile organic compounds (VOCs) that are dangerous to inhale and should never contact your skin or eyes. Wear protective gear when applying, including a respirator, safety goggles, long sleeves, and rubber gloves, and always ensure good ventilation in the area.
Use a putty knife to smooth wood filler onto the rotted area to create an even surface. The wood filler should harden within an hour. Once it's hard to the touch, use sandpaper to smooth it down.
Patching with wood putty is only possible if you just have topical damage. If a large portion of the wood is damaged, you’ll need to cut it out and replace it, or splice in new wood. If that’s the case, it’s best to hire a local handyman service, as these repairs require some carpentry experience and specialized tools.
Treating minor dry rot is a relatively straightforward project that most homeowners can tackle themselves, but there are a few key mistakes to avoid.
Failing to treat the underlying moisture issue. Dry rot is caused by a fungus, and although it can continue to spread through dry wood, it only takes root in moist wood. Failing to treat the moisture problem that caused the dry rot in the first place will lead to repeat problems.
Waiting too long before treating the problem. Dry rot spreads relatively quickly, and it can move from moist wood to dry wood and even other building materials if left untreated. Make sure you carry out a complete solution the second you start seeing signs of wood rot.
Not calling in a pro if the damage is extensive. Repairing minor surface damage on rotted wood is DIYable, but anything more extensive requires help from a professional who fixes wood rot. A pro can treat the root cause of the dry rot, replace damaged materials, and help ensure you don’t see ongoing problems.
DIYing repairs on structural components. Feel free to DIY minor dry rot repair on exterior trim, but always call a professional if you see dry rot on structural components, including floor joists, beams, wall framing, and roof rafters. Without help from a pro, even minor dry rot here could lead to structural damage in your home.
Though the terms are used interchangeably, wood rot and dry rot have different meanings. Wood rot is a broad term that describes various types of fungal decay in wood, while dry rot is a specific type of wood rot caused by the fungus Serpula lacrymans. Dry rot can thrive at a low moisture level and spread rapidly across plaster and even masonry to infect new areas of wood.

Minor dry rot repair on decorative pieces of wood is DIYable, but anything more severe requires help from a professional. If you notice extensive sections of dry rot spanning more than a few inches, you should call a water damage restoration company. In that scenario, replacing the damaged wood instead of repairing it is the best option.
You should also always hire a water damage restoration pro if you notice dry rot inside your home, especially on structural components. A water damage pro can restore your home and give you tips and advice for making sure the dry rot doesn't come back, and they can make sure the source of the moisture is taken care of. Dry rot repair costs will be highest if your issue is with structural components, but the cost of water damage restoration is well worth the investment.
Positive experience. As previously stated, the replacement/repair could not be completed (no fault of the plumbing tech) b/c misinformation was rec?d by property management maintenance. Thanks to the plumbing tech for your efforts. Appreciate you!
 The Waterworks
Carpet repair done well. Scheduling was easy. Showed up on time.
As usual with ECO, tech Jordan was outstanding, very professional, very knowledgeable, and very thorough with repairs made to tankless water heaters. Very highly recommend ECO!!!
 Eco Plumbers, Electricians, and HVAC Technicians
I would recommend this company to anyone! He showed up on time, was friendly, completed a very difficult repair on our dryer vent cover, was responsive, and pricing was extremely fair and competitive. I would have him back to do any of our repairs or cleanings without hesitation!
Everything from initial contact to completion was absolutely top notch. We contacted the business during off hours to leave a message, and the owner still reached out to feel out the issue within minutes. We were scheduled and repaired within 48 hours. I cannot say enough about the...
 Supreme brick & chimney
Ace Fireplace Services came to the rescue for my chimney repair. They were quick to pinpoint the issue and worked their magic to fix it. My chimney is now in excellent shape, and I'm a satisfied customer.
 Ace Fireplace Services
On Sunday 2/26 I requested quotes via Angi from 4 refrigerator repair businesses. Northwest Appliance responded to me Monday morning (2/27) and my refrigerator was repaired by noon the same day. Great communication, they did everything they said they would. The technician had the parts on...
When we had the winter freeze, I called Quantum Waterworks Waterline & Drain Cleaning Services and within 1 hour I received an e-mail and he sent someone out the next day and he was on time, he was nice and did the job quickly and cleaned up after himself. We had a leak in our kitchen from...
On time, clean and finished fast. Windows seem sturdy and the finish is good. Caulking was done with no smudges. Would recommend.
Did a great job replacing the ice maker and water regulator on my refrigerator. He was quick and thorough, very friendly and professional. If I needed a heart transplant I'd want him to do it!!!
From average costs to expert advice, get all the answers you need to get your job done.
Your dry rot repair cost will depend on factors such as the extent and size of the damage and its location within your home. Here's what you need to know.
Repairing your home’s soffit and fascia will help prevent water damage and protect your home. Learn how much soffit and fascia repair costs.
What is dry rot and how do you manage it? Dry rot is a fungus that attacks wood. Learn how to get rid of it before it causes structural damage.
Learn how to hire a qualified dry rot repair pro. Find the right contractor, ask the right questions, and protect your home's structural integrity.
What does dry rot look like? Knowing what signs to watch for will help you identify and treat infections before they’re too big to fix.
If you see mushroom-like structures on wood at your home, you likely have wood rot. Learn more about the two primary types of wood rot—dry rot versus wood rot.