

Replacing your chimney increases home value and prevents hazardous structural damage. Learn how much to budget for chimney replacement costs.
A well-working chimney keeps the hearth happy


Hiring a pro to repair a chimney costs an average of $455 and will help protect you from fire hazards and air quality problems.
Jobs that require masonry expertise or working with heights are best left to a pro with the proper gear and training.
A local chimney repair pro is also trained to spot underlying structural issues like cracks and blockages.
Annual chimney inspections are critical to detecting problems early on.
Picture the warmth of a crackling fire on a chilly evening—your chimney makes that moment possible. But that cozy scene could quickly become a disaster if your chimney isn’t functioning correctly. Knowing how to repair a chimney isn’t just about keeping the fire burning, it also protects your home’s value and ensures your family’s safety. In this handy guide, we’ll walk you through some of the most common chimney problems and how to fix them.
An adequately-maintained chimney ensures that smoke and gasses are vented outside your home. This will result in cleaner indoor air and reduces potential fire hazards.
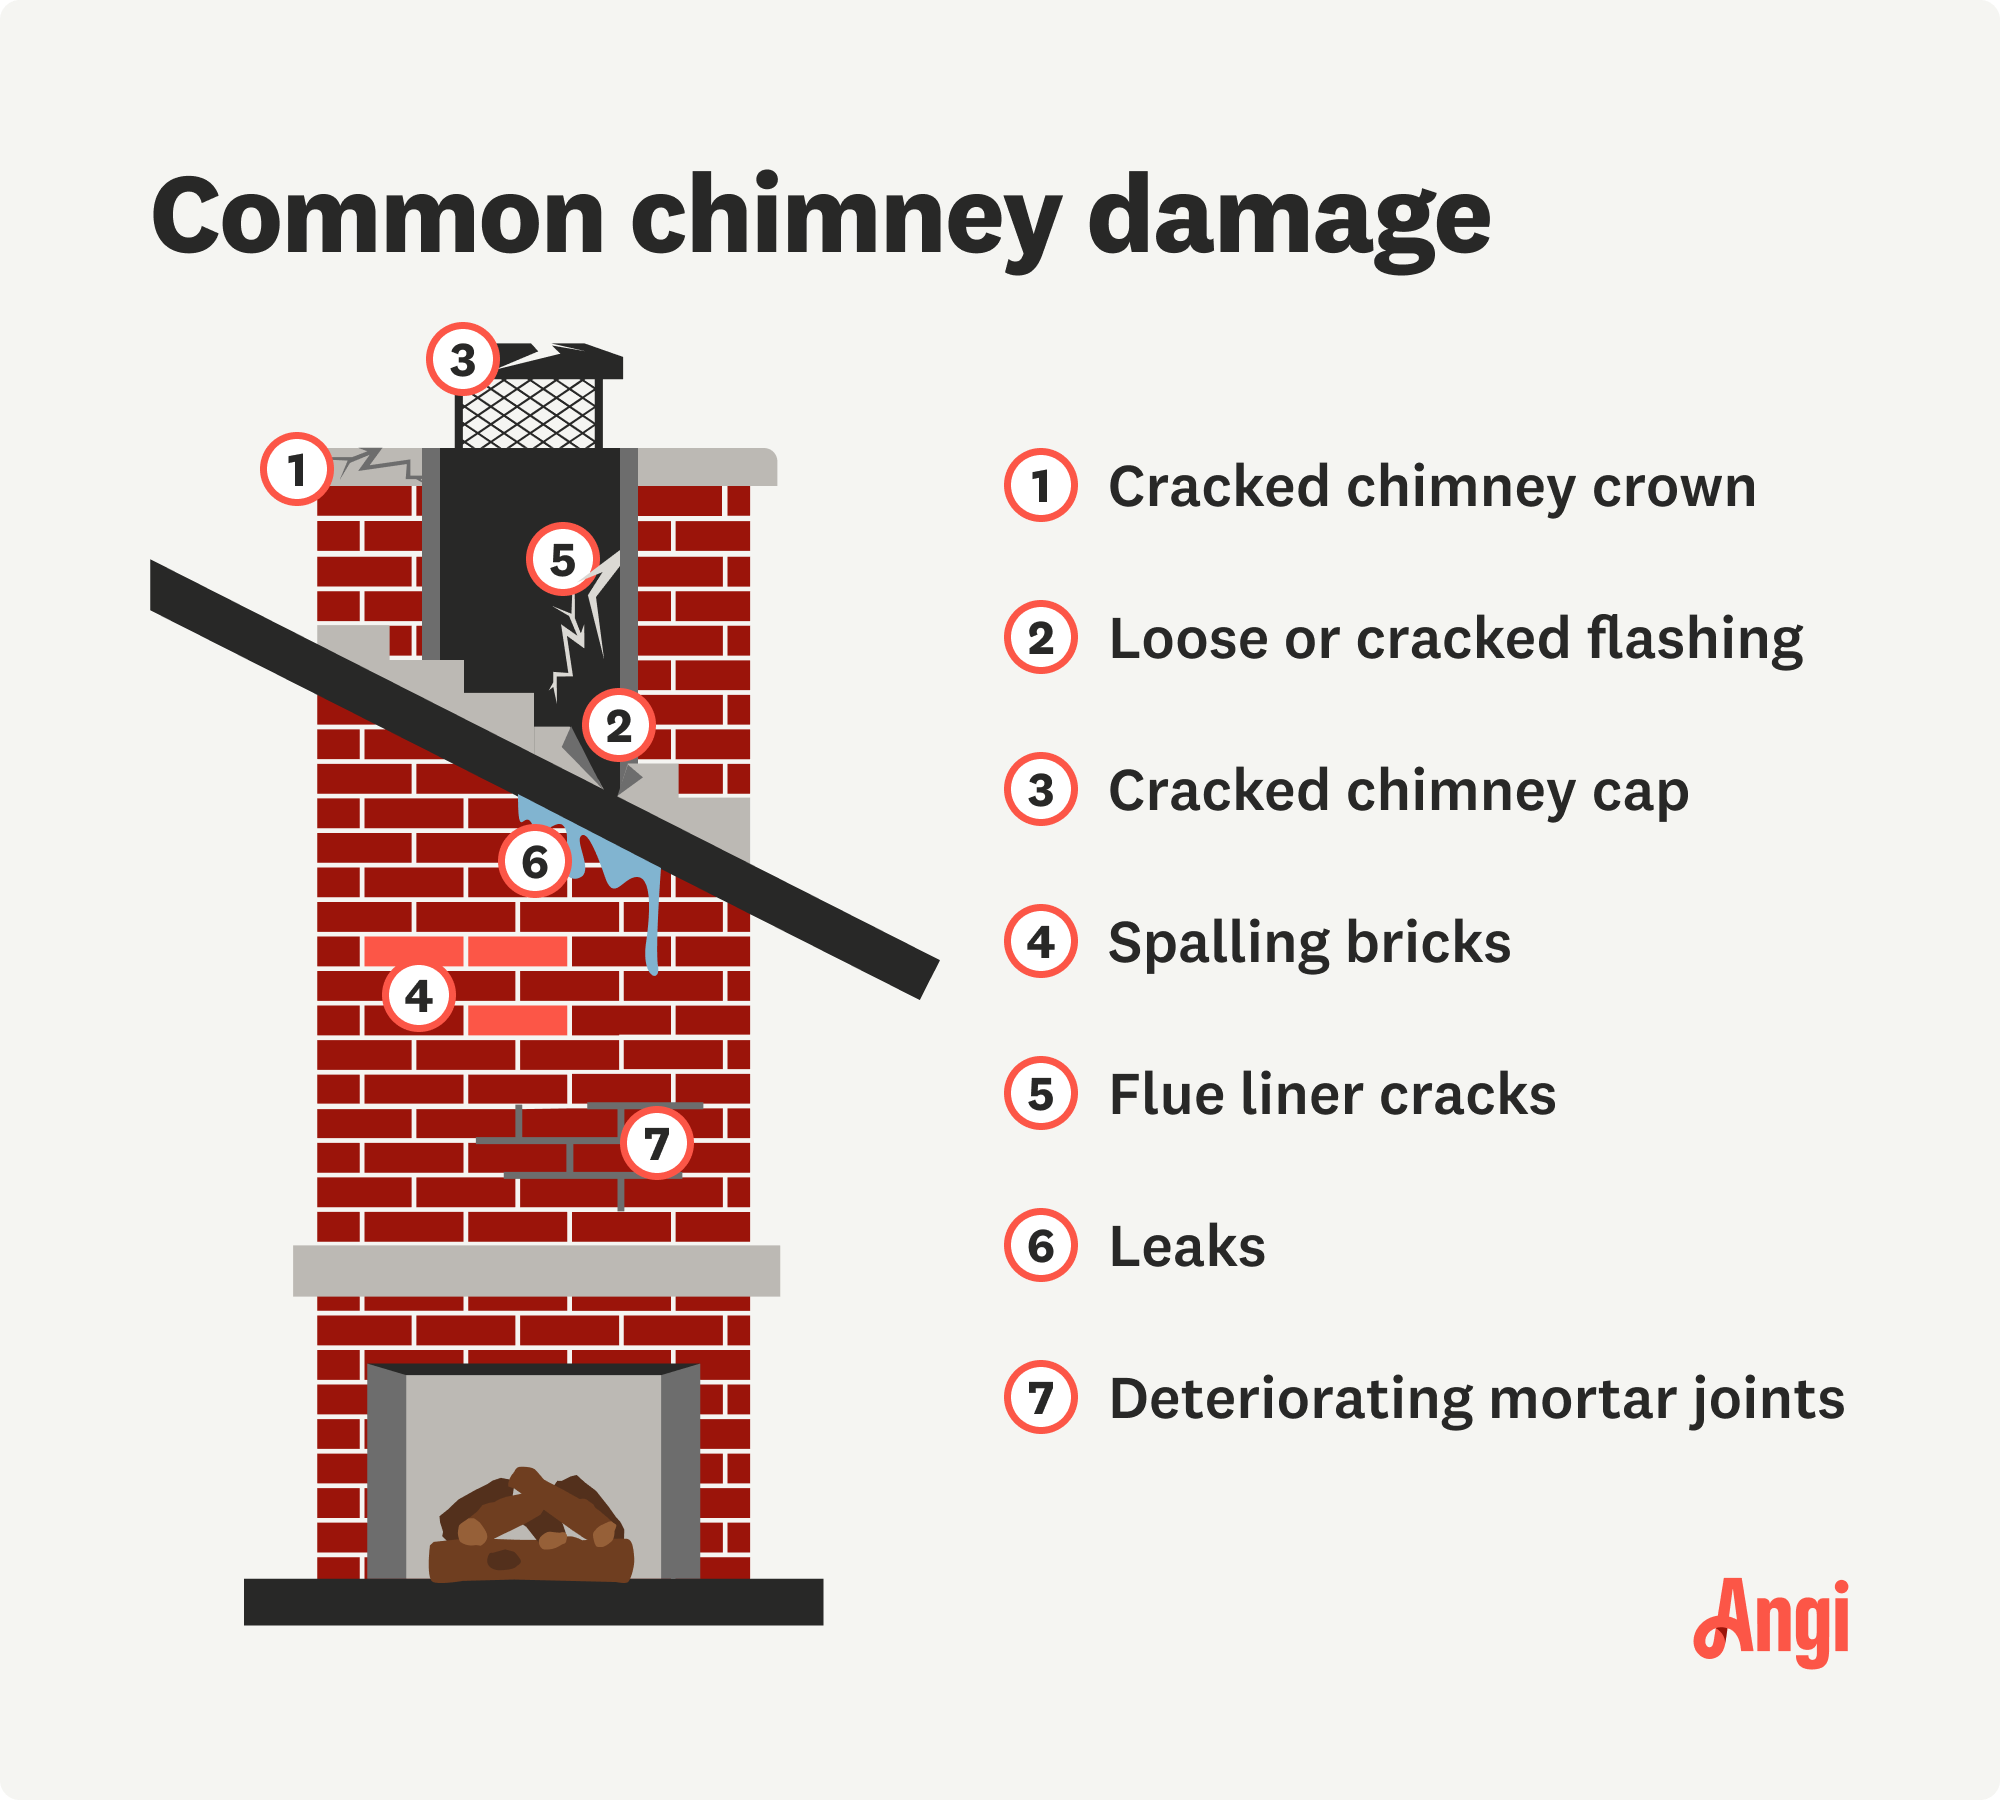
Identifying chimney problems means keeping an eye out for common warning signs. Look for cracks or crumbling in the bricks or mortar, a damaged or missing chimney cap, or signs of moisture damage, like water stains around the fireplace, which could indicate a leaking chimney.
If you experience poor draft performance, where smoke enters your home instead of exiting through the chimney, it’s a clear sign that action is needed. Annual inspections are key to catching these issues early and preventing them from becoming severe or even deadly.
The average cost to repair a chimney is $455, but depending on the issue, you might spend anywhere from $160 to $750. Those amounts typically cover hiring a pro for repointing, , or updating a chimney cap. But if you need to rebuild parts of your chimney, the costs jump between $1,000 and $5,000. And if you need to replace the entire chimney, your tab can run as high as $15,000.
Caring for your chimney might not seem as exciting as tackling projects with more visual impact. However, ignoring these issues can put your home’s safety, structural integrity, and energy efficiency at risk. Here’s a look at five common chimney problems and how to address them.
Moisture from rain and snow, combined with freezing and thawing cycles, can cause bricks to crack or spall—where the outer layer starts to peel or flake off. Over time, these issues allow water to seep in, potentially leading to significant moisture damage or even causing the chimney to collapse. Here’s how to fix it before the damage becomes extensive.
First, grab your hammer and chisel. Then, start carefully chiseling the mortar around the damaged brick while avoiding damaging the surrounding bricks. Once the mortar is gone, gently tap the brick with the hammer to loosen it, and then slide it out of the cavity.
Clean out any remaining debris or old mortar from the opening before preparing it for the new brick. This will ensure a good fit, leaving no gaps to trap water.
Be sure to mix the mortar thoroughly to avoid dry pockets—an even mix will ensure strong adhesion. Also, only mix as much mortar as you can use within a couple of hours, since it begins to harden once water is added. Remember, there are different mortar types for chimneys. Selecting the best one typically depends on your local weather conditions.
Apply a layer of mortar to the clean cavity, place the new brick, and then add mortar around it to secure it. Next, smooth the mortar using a trowel to ensure a tight seal that keeps water out. In most instances, the mortar must cure, so avoid using your chimney for at least 24 hours or per the manufacturer's instructions.
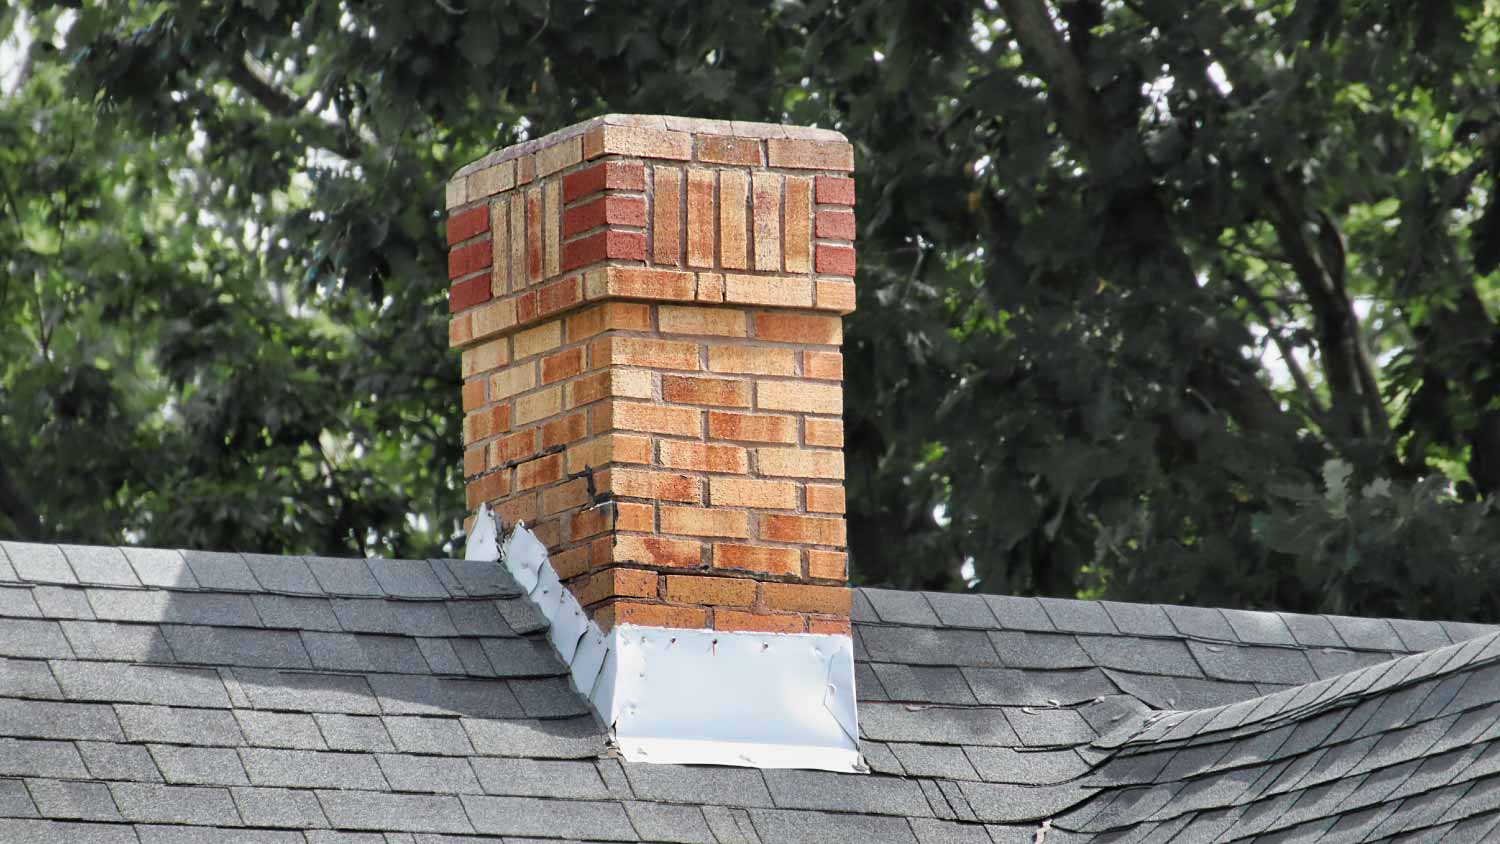
In addition to seeping in and around bricks, water can sneak in through damaged flashing. Here are steps for addressing the problem.
Start by thoroughly cleaning the existing flashing and surrounding roof area to remove dirt, debris, and any loose material.
Apply primer or reinforcement fabric to the flashing’s metal surface to ensure a strong bond with the flashing tape.
Measure and cut the flashing tape to the appropriate length, ensuring it will cover the damaged area with some overlap.
Apply the flashing tape and firmly smooth it to remove air bubbles to enhance a leak-proof bond.
Seal the edges with the sealant to ensure a watertight finish to keep moisture out.
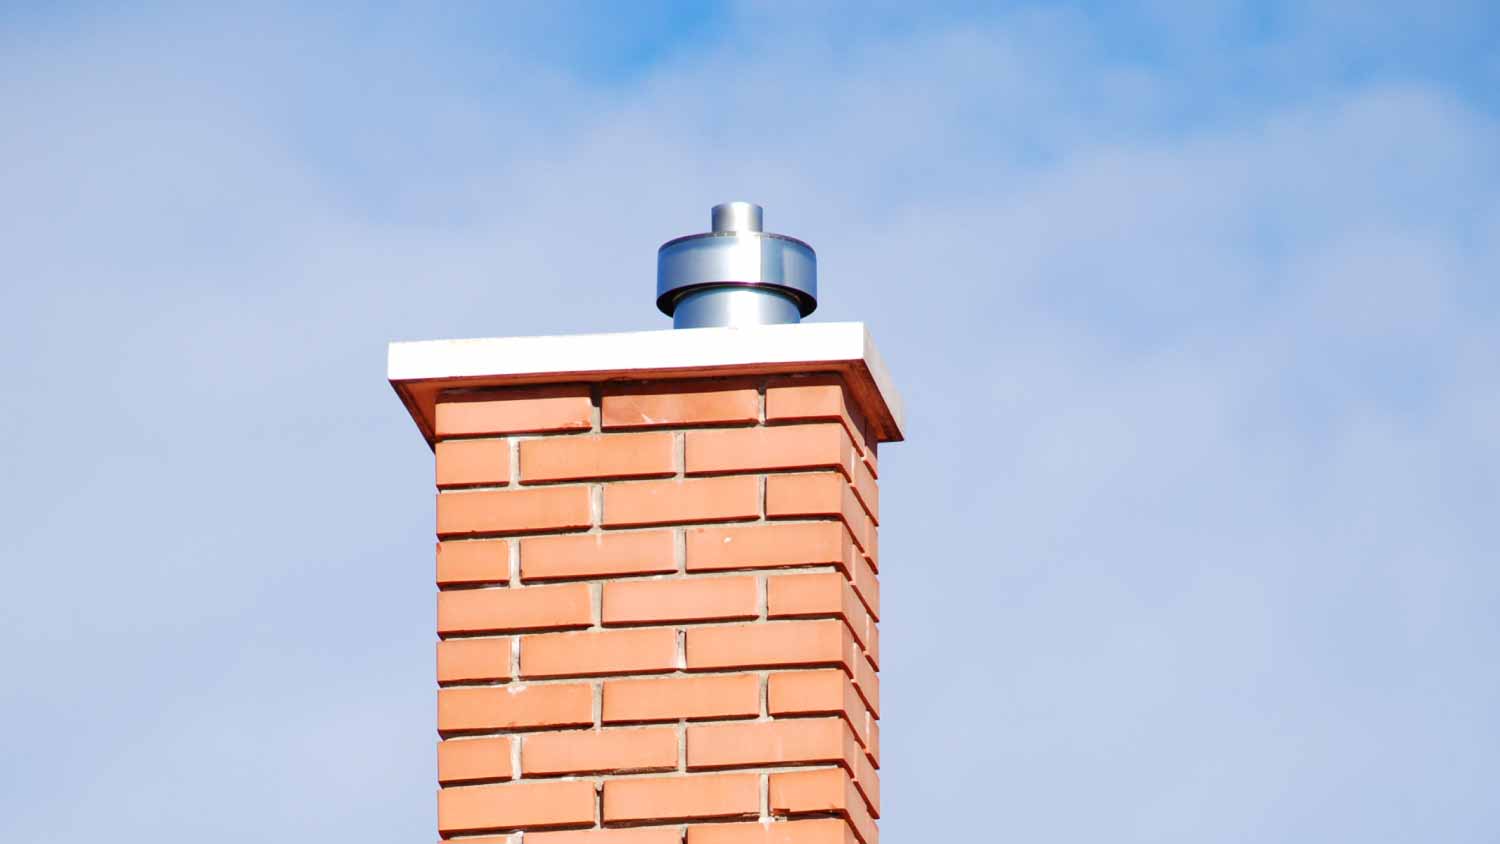
A missing or damaged chimney cap invites debris, critters, and water to enter your chimney, leading to blockages and damage that disrupts proper ventilation. Replacing an old cap is a significant step to keep your chimney functioning efficiently. Some types of chimney caps are adjustable, which makes the job more manageable if you plan to DIY.
Determine the size of your flue by measuring the diameter, width, and length.
Choose a new chimney cap that fits your flue's dimensions.
Position your new chimney cap according to the manufacturer's instructions.
Check the existing drill holes to see if they fit the new cap correctly.
Make new pilot holes if necessary, using a drill and masonry bit that is ⅛-inch smaller than the screws.
Secure the cap using a drill and the appropriate screws.
A chimney crown plays a significant role in preventing water damage. It is usually a slab of stone, concrete, or metal perched atop the chimney. However, because of weather exposure and fluctuations in temperatures, it can crack over time.
Use a wire brush to clean the crown, removing all debris. This ensures that the repair material will adhere properly to the surface. After brushing, dampen the area with water to remove fine dust.
You will need a brushable chimney crown sealant for minor to moderate cracks. To fill the cracks, use a brush to push the sealant deep into them for proper coverage. Afterward, smooth the sealant with a trowel to create a uniform surface that keeps water out. If the cracks are significant, work with a professional.
Drying times for sealants depend on the manufacturer's instructions, but expect at least 24 to 72 hours. During this time, you may need to cover the repair with a tarp to keep the elements out.
Cleaning your flue is a must for removing dangerous blockages that could lead to carbon monoxide poisoning, chimney fires, and smoke inhalation. For most homeowners, the cost of chimney sweeping is worth it because it's a filthy job. Here are the steps to consider for DIY; remember to wear respiratory protection.
Check for blockages with a flashlight—you may spot bird nests, leaves, or soot buildup.
Clean the flue with a chimney brush with extension rods, carefully moving the brush up and down.
Remove the debris that fell in your fireplace after cleaning.
Inspect your flue once more to ensure it's clear.
Savvy homeowners know regular upkeep can prevent costly repairs and dangerous situations—and this, of course, applies to chimneys, too. These tips will help you avoid unnecessary chimney drama.
The National Fire Protection Association recommends that homeowners have their chimneys inspected and cleaned yearly. Both are essential for spotting minor issues that can become big problems later.
While all homes should have one, some don't. Chimney caps are an essential component that helps keep animals, debris, and weather out of your chimney and home.
Burning only dry, well-seasoned wood in your fireplace lessens creosote buildup, reducing the risk of blockages and potential chimney fires.
Seasoned wood, also known as air-dried firewood, is no longer moist. It burns more efficiently and cleanly by producing less smoke and creosote. Remember that it takes at least six months for wood, including its sap, to dry out fully.
Look for signs of moisture or leaks around your chimney and fireplace, such as water stains or rust, and address them quickly to avoid structural damage.
Many confident DIYers can handle minor issues that don't involve masonry expertise. However, being comfortable with heights and using the correct techniques and materials is essential for a job done right.
On the other hand, more significant repairs—such as fixing structural damage, addressing extensive mortar deterioration, animal removal, or dealing with complicated flue blockages, for example—are best left to a local chimney repair professional.
Remember, licensed chimney experts have the expertise, tools, and safety equipment to conduct complex repairs correctly and safely. They are also better at finding structural issues that untrained eyes would miss.
From average costs to expert advice, get all the answers you need to get your job done.
Replacing your chimney increases home value and prevents hazardous structural damage. Learn how much to budget for chimney replacement costs.

If you’re experiencing chimney airflow problems, a new damper may be in order. Use this guide to learn what goes into your chimney damper replacement cost.

Sealing your chimney is one of the most affordable ways to prevent water from penetrating the bricks. This guide breaks down the cost to seal a chimney.

Learn everything you need to know about how to install a chimney damper, then decide whether to do it yourself or hire a local professional.

If you have a new chimney or chimney liner, you may wonder if metal chimney flues need cleaning. The short answer is yes, you need to clean a metal chimney flue.

The process of how to paint a brick chimney comes with a few important caveats, but it’s definitely a worthwhile project to keep your brick strong and in good shape.