How to Remove a Bathtub Drain If You Need to Clean or Replace It
Become a big-time drain brain


There’s nothing more relaxing than a warm bubble bath. But if your bathtub drain is clogged, your at-home spa plans could turn into a DIY project. Luckily, learning how to remove a bathtub drain is easy with a little muscle and some spare time. Follow our guide for the steps to remove the tub drain so you can give it a proper cleaning or repair.

Before You Remove the Bathtub Drain
How to unscrew a bathtub drain starts with familiarizing yourself with which type of drain stopper you have. That way, you can follow the proper steps to remove it, which is the first part of this process. There are four main types of bathtub drains:

Toe-touch drain stoppers allow you to open and close them by tapping with your toe.
Push-pull stoppers have a small knob that allows you to—you guessed it—push or pull to open or close the stopper. These are sometimes called foot plugs.
Lift-and-turn models look similar to push-pull stoppers but require you to turn the stopper clockwise or counterclockwise to open or close it.
Trip-lever stoppers are the most complex of the bunch, requiring you to use a trip lever on the side of the tub (usually below or near the faucet) that connects to the overflow drain, which is one plumbing term you’ll want to know. The lever connects to a rod that runs through the overflow drain and controls a stopper inside of the drain (instead of on the base of the tub).
Steps to Removing a Bathtub Drain Yourself
Follow these simple steps to remove your bathtub drain. We've broken the steps down by drain stopper type and the different tools you might be using for the job.
Remove the Drain Stopper
Once you know which type you have, you can follow the steps to remove your bathtub drain stopper.
Push-Pull Stopper
If the knob isn’t attached to the stopper lid, you should remove it first. Turn the knob counterclockwise to disconnect it from the lid.
If you removed the knob, you should now be able to see the bolt. Use a screwdriver or pliers to unthread the bolt from the drain crossbar.
If the knob connects to the stopper lid as one whole piece, all you need to do is turn the entire lid counterclockwise to disconnect the bolt from the crossbar, then lift the stopper out of the drain.
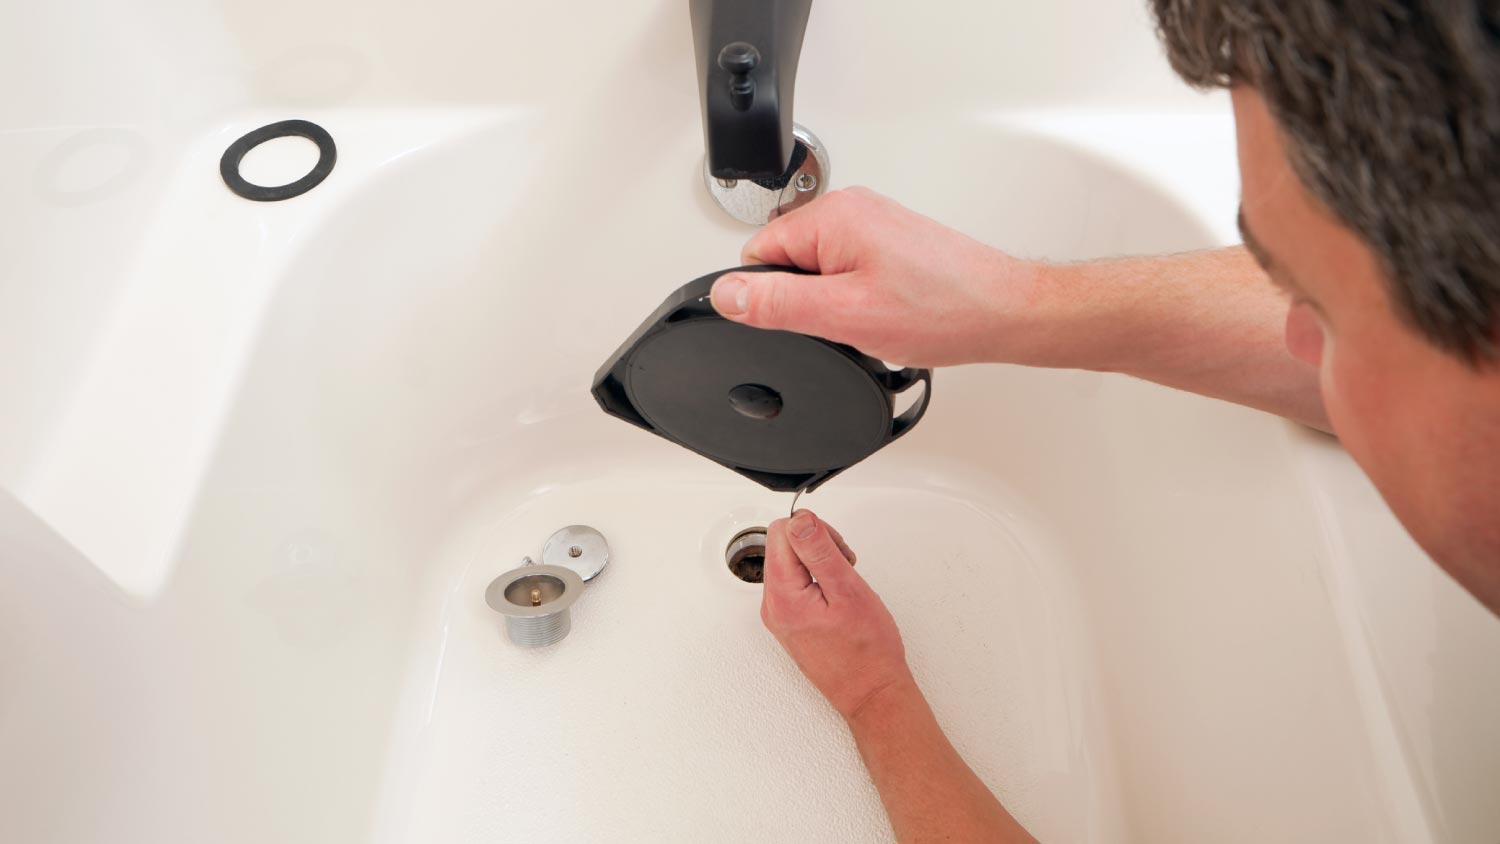
Lift-and-Turn Stopper
Remove the drain stopper knob by turning it counterclockwise until it releases from the bolt in the center of the stopper. If the knob cannot detach from the lid of the stopper, turn the whole lid until it disconnects from the bolt.
Using a screwdriver or pair of pliers, unscrew the bolt. With the bolt removed, the entire drain stopper should lift up easily out of the drain.
Toe-Touch Drain Stopper
Make sure the drain stopper is in the open position. If it’s closed, gently push on it to open it.
Twist the drain stopper counterclockwise while simultaneously pulling upward (gently!) to unfasten it from the screw holding it. Using a screwdriver or pliers, unscrew the fastening screw.
Lift the drain stopper out of the drain.
Trip-Lever Stopper
Flip the lever (located below or near the faucet) to the open position (pointing down).
Using a screwdriver, remove the screws from the overflow grate so you can access the rest of the drain stopper mechanism. Place the screws in a safe place where you can find them later.
Lift the trip-level drain stopper mechanism out of the drainpipe. The trip lever, rods, and plunger should all come out as one piece. If any component seems stuck, spray it with a lubricant for easy removal.
Remove the Drain With a Plug Wrench
Plug wrenches are specifically for drains, and you can use them on a wide variety of models, as they have two ends with wrenches of different sizes to fit various drains.
Insert the wrench into the drain. If you have a screwdriver handy, stick it into one of the wrench's holes; you can then use the screwdriver as a counterweight to twist the wrench and remove the drain.
Turn counterclockwise. If the screwdriver isn’t enough to help, or you don’t have one handy, use a pipe wrench on the neck of the plug wrench to assist you as you turn it.
Once the drain is loose, you should be able to unthread the drain all the way and yank it up by hand.
Remove the Drain With Locking Pliers
Grab a pair of needle-nose locking pliers.
Insert the pliers into the drain, making sure the jaws are on either side of the crossbar, right over the center point of the “X.”
Clamp the pliers, locking them into place on the crossbar. Use a pair of standard pliers to grip the locking pliers; the standard pliers will help you turn the locking pliers to release the drain. Make sure the standard pliers are close to the drain hole so as not to interfere with the locking mechanism.
Moving slowly, turn the pliers counterclockwise to release the drain.
Once the drain has loosened up, set the standard pliers aside and finish unscrewing the drain by hand.
Tips for Replacing or Installing a Bathtub Drain
Whether you want to replace the tub drain you just removed or install a brand new one—perhaps as part of a new bathtub installation—follow these tips to ensure the process goes smoothly.
Get the Proper Parts: If you plan on replacing your existing tub drain with a new one, bring your old drain with you to the store. This way you can compare parts to be sure you get the right size.
Use the Right Tools: To remove the drain basket, you'll need either a set of locking pliers or a tub drain wrench. A drain wrench is form-fitted to grip the crossbar, reducing your risk of accidentally breaking it during bathtub drain removal.
Be Careful With the Old Seal: The old drain basket seal will be made of plumber's putty. Carefully remove the seal with a putty knife and avoid letting it fall down the drain since it will never break down and could clog your pipes. If needed, soften the old seal with a hairdryer for easier removal. Clean the drain opening, basket, and stopper with a non-abrasive cleaner.
Be Patient: Most bathtub drains feature a long, deep thread that can take some time to fully unscrew. Be patient and take your time during removal to avoid damaging your tub or drain. If you encounter any problems, you can always call a plumbing repair pro near you.
DIY vs. Hiring a Pro
Removing a tub drain is a fairly simple process. However, it does require a fair amount of elbow grease to release the drain using the pipe wrench or pliers. If you’d rather leave this job to the pros, consider hiring a local plumber to help you out.
You should also call a plumber if you suspect a leak or major rust, the latter of which would make removing the drain more difficult. The typical cost to replace a bathtub or shower drain is $230 to $1,170.
Frequently Asked Questions
The most likely reason is rust. You can try using lubricant to loosen the metal components, but you’ll most likely need to call in a plumber to professionally sand down the rust without damaging the rest of your bathtub. If the rust is extensive, it might be a sign that you need to replace the plumbing.
If your drain doesn’t have metal crosshairs or crossbars, you should use a tub drain extractor. These tools create a grip on the drain so you can turn it using a 1/2-inch ratchet drive, drain key, or wrench. Your drain may not have crosshairs if it's old and broken.
The plumbing industry has standardized the sizes for bathtub drains. They are 1 1/2 inches wide to fit all standard bathtubs from 14 to 26 inches deep. The standard sizing is to ensure that the drain fits into the P trap, a special part of your piping that prevents sewer water from bubbling up into your home (yuck).


- Gas Plumbers
- Plumbing Repairs
- Sump Pump Installation
- Wood & Pellet Stove Repair
- Shower Repair
- Wood Stove Services
- Emergency Plumbers
- Fire Sprinkler Contractors
- Perc Test Companies
- Toilet Repair & Installation
- Boiler Repair
- Sewer Line Repair
- Faucet Repair
- Main Drain Camera Companies
- Foundation Drain Installation
- French Drains
- Bathtub Replacement
- Subcontractors
- Storm Drain Contractors
- Affordable Plumbing
- Plumbing & Heating Companies
- Bathroom Repair Services
- Sink Installation
- Commercial Plumber
- Barndominium Builders
- Water Line Repair
- Faucet Installation
- Water Line Installation
- Leak Detection
- How to Remove the 6 Types of Bathtub Drain Stoppers
- What Is the Standard Tub Drain Size and How Do I Measure for My Drain?
- 8 Ways to Unclog a Sink or Tub Drain
- Everything You Need to Know About the Different Parts of Your Bathtub Plumbing System
- 5 Easy Ways to Keep Bathroom Clogs at Bay
- How Liquid Drain Cleaner Works: Pros and Cons
- 5 Easy Ways to Remove Hair From Your Drain
- How to Unclog a Shower Drain With Standing Water
- How to Clean a Dishwasher Drain: 7 Effective Methods
- How to Unclog a Washer Drain: 5 Potential Methods
Get our Angi-powered app


