
•
Discover the cost to polish concrete floors, including price ranges, key cost factors, and tips to help you budget for your next flooring project.
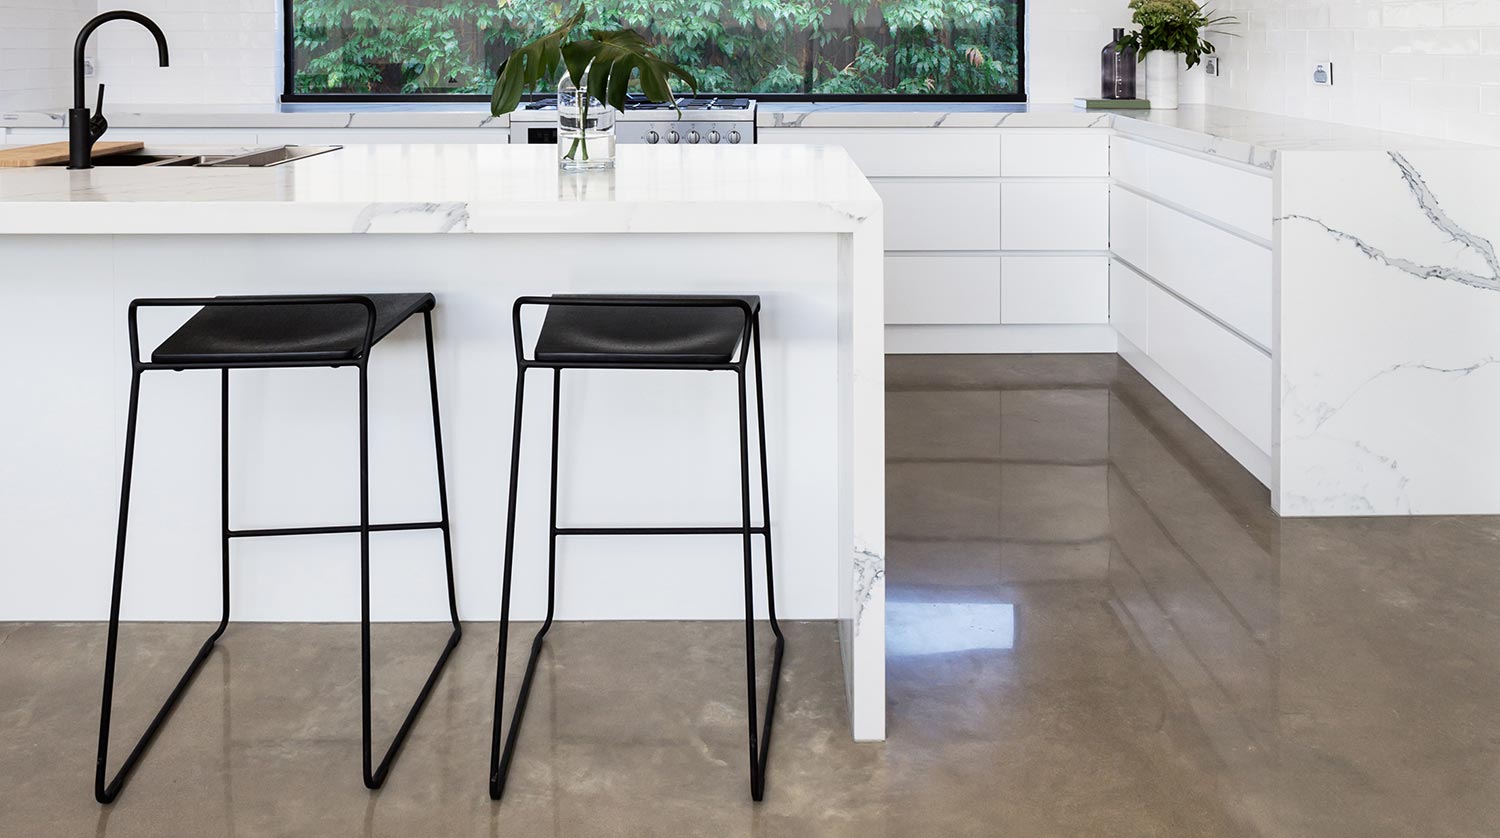
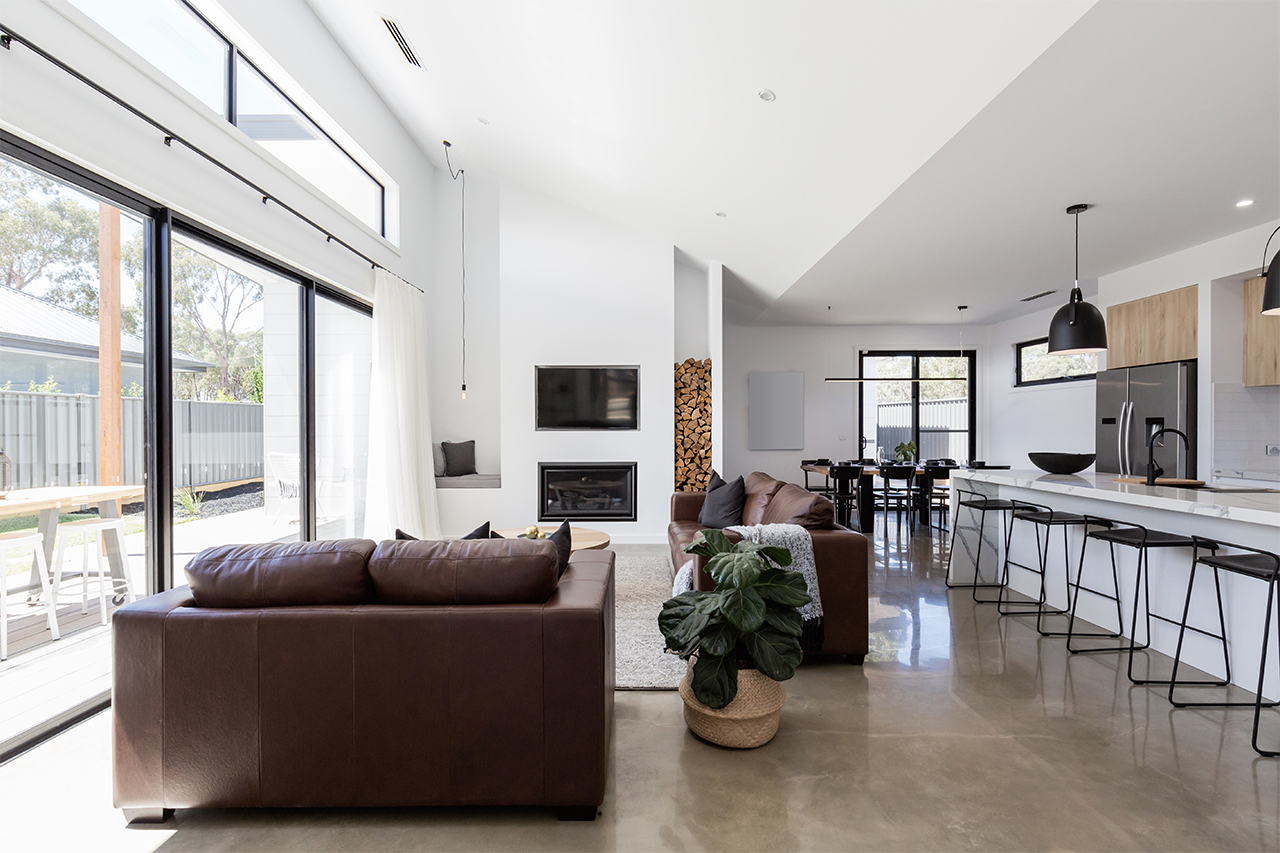
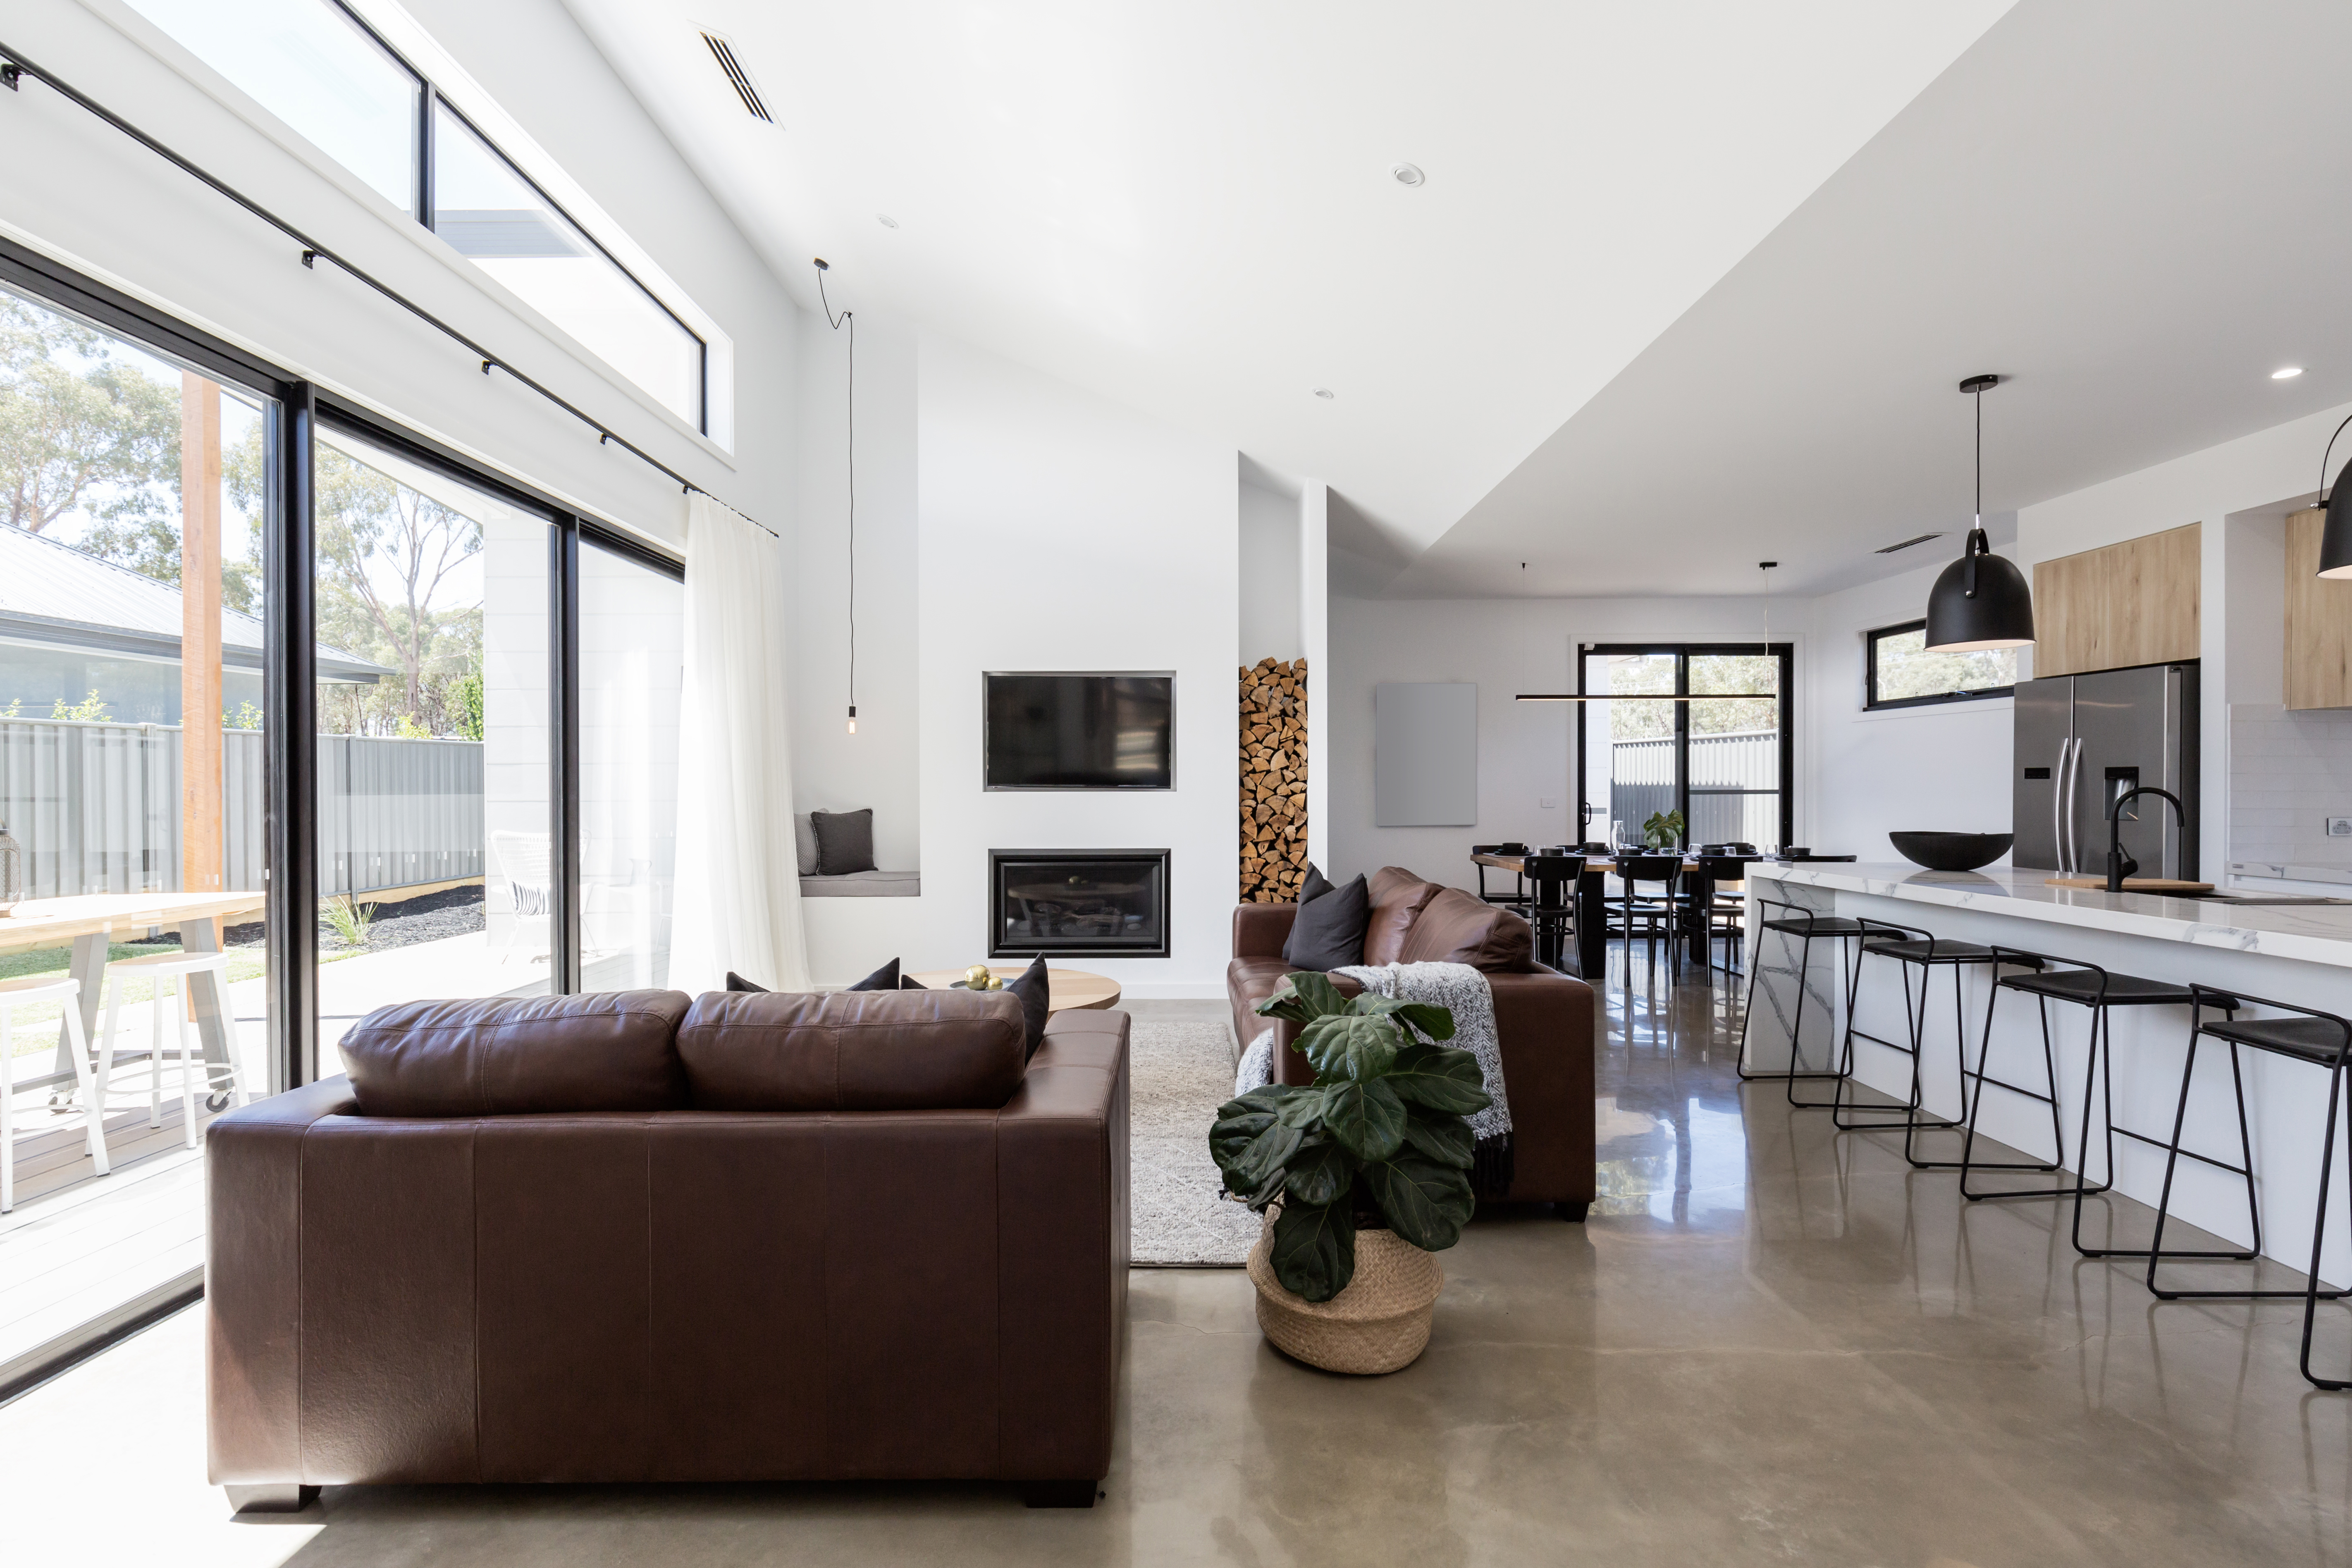
A beautiful, glossy concrete floor takes time, equipment, and a heavy dose of patience

A glossy, polished concrete floor gives professional and private spaces a sleek, modern look that will last for decades. But if you’re wondering how to polish concrete floors yourself, you’ll need to take a deep look at your skills and the access you have to the specialized equipment needed for the size of your project. Achieving the perfect sheen is a complex process, but it might be doable for the (very) experienced DIYer.
A lot of work goes into preparing concrete floors before you touch a machine to the concrete. You’ll have to grind the concrete, gradually using finer and finer grit until you’ve reached the level of gloss and shine you want. You’ll need diamond grinding pads (or discs) in several grits.
Some of the prep work will depend on the type of machine you’re borrowing or renting. For example, if you rent a concrete grinder with a skirt and vacuum (dust collection system), you don’t need to rent a dust collection system or use your own vacuum to collect dust.
Using a concrete grinder takes some know-how and technique. If you’ve never used one before, practice in an inconspicuous area. You can cut too deeply into the floor if you go too slow but not deep enough if you go too fast.
Check the rotation on the head(s) of the grinder. Pads that rotate in the same direction cut more aggressively, so you may need to increase or decrease the rotation speed depending on the direction of the rotation.
You’ll also need to adjust the speed of the grinder according to the pad’s grit. Coarser grits require lower speeds to prevent the teeth from skipping over the concrete’s surface, whereas finer grits can run at higher speeds.
When using the concrete grinder or edge grinder, wear appropriate protective gear, including safety goggles, dust masks, ear protection, and gloves.
Lastly, consider that your final polished concrete floor cost will depend on several factors, such as the size and shape of the concrete, the concrete’s thickness, and the final look you’re trying to achieve.
Use a Mohs pick and scratch test kit, and following the manufacturer's directions, test the concrete to see where the concrete falls on the Mohs hardness scale. The concrete’s hardness determines the grit you need.
You’ll have the best success by buying all the grinding pads from the same manufacturer. Each manufacturer has its own system for rating the pads and the corresponding concrete hardness they work best on.

Cleaning concrete is easier than polishing but no less crucial to the final result. Sweep or vacuum any dust, debris, or dirt from the concrete’s surface. Apply a concrete cleaner to remove adhesives or other chemical substances that could interfere with polishing. If the concrete has an existing coating, you’ll need to grind it off using the concrete grinder.
Using a trowel, sponges, float paddles, and epoxy, grout, or another semi-rigid filler, seal any cracks or holes. If left untreated, they can change the consistency of the final finish.
Using the concrete grinder, attach the coarsest grit (lowest number) diamond grinding pad, and methodically grind the entire floor. You may need an edging grinder for square edges to complete the floor. If it's a smaller project, use a hand grinder instead of a walk-behind concrete grinder.

Change the grinding pads to those with a finer grit. For example, if you started with a 30- to 40-grit pad, go to an 80-grit on this pass. Do another pass over the entire floor with the finer grit pads. After your second pass, get ready for a third. This time, use a finer grit yet again. For example, if you used a 40- and then an 80-grit pad (as described above), you can move on to a 150- to 200-grit grinding pad.
A densifier is a chemical hardener that contains silicate materials that react with the concrete to harden the floor, creating a protective top layer. It also reduces dust and improves the concrete’s strength. The product may be called a “densifer and hardener” or simply a densifier or hardener, but they all do the same thing.
Spray on the densifier while another person uses a microfiber mop to evenly spread it. The densifier may reach a point where it gels or pools, at which point, you can either spread it with the mop again to break the surface tension or add a small amount of water to that area to help the densifier penetrate the concrete.
Allow the densifier to dry according to the manufacturer’s instructions. Densifiers generally take about 24 hours to dry, but environmental conditions may shorten or lengthen drying time.
By now, you know the drill. Using the concrete grinder, polish the floor with a 400-grit diamond grinding pad.
This step will depend on the final look you want, and some people may choose to skip applying another layer of densifier altogether. You can:
Apply a final light densifier layer.
Apply a coloring agent, stain, or dye before applying a light densifier layer.
Some pros apply a light densifier layer to help lock in the color, while others don’t.
Change the pads to an 800-grit, with the option of gradually using pads up to around 3,000-grit until you’ve reached the desired level of polish. You may not need to use the finer grinding pads, depending on the desired look and hardness of the concrete.
Do another pass over the entire floor with the concrete grinder with the finest grit pads you’re going to use. This step is where you’ll create the glossy finish. You may need to repeat steps 10 and 11, using increasingly finer grit grinding pads.

There are many options when looking at how to seal concrete, from polyurethane to acrylic and epoxy sealers. Choose a sealer or stain guard based on where and how the floor will function. Use a sprayer and microfiber mop or roller to apply the sealer.
Polishing concrete floors is a long and complicated process that requires costly equipment. Everything about concrete, from its hardness to the climate and whether it’s a new or old floor, affects the polishing process. (You’ll need to factor in concrete slab costs if you’re dealing with a new pour, too.) Unless you have experience polishing concrete floors, you’ll get the best results by contacting a local concrete pro. They can determine the right pad grits, densifier, and sealer to achieve your desired look.
Archie did a good job cleaning up the driveway before he laid down the sealer. It looks good. He was gracious and even helped me bring up my groceries. His rate was comparable to another company who came out to give me a quote and he talked to me personally rather than just text me a quote...
Wonderful. I am going to have them remove and replace my driveway in the spring.
 All Star Paving and Sealing
Working with Peter and his crew was a breeze. They were exceptionally polite and did a neat job to repair and seal our driveway. I will definitely talk to them first for additional work.
 Central Paving
The preformed a really good job the staff is incredible never been so happy with my home, A brand new driveway is like a face lift!!
We recently had our office sidewalk repaired and CT Concrete did an "Outstanding" job. They were quick, friendly and the job is "flawless". I would highly recommend CT Concrete for any of your concrete/sidewalk needs.
Called Mark on a Thursday morning. Not really knowing if he could help me or not. I was having driveway, flooding issues due to a clogged channel drain and I was trying to figure out what direction to take. Heavy rains had come on Monday and again on Thursday leading to flooding in my garage...
It went really well! The concrete looks, they even did some patch work on my buildings parking lot. That was such a plus! <br />
 AmeriCoat Asphalt & Concrete
Jand J has provided services for clients of mine for 15 years or maybe longer. They are always honest with their recommendations, providing good advice to my clients and competitive pricing. All three of the structural engineers whom I have dealt with in recent years have Jand J on their...
We first had Mark fix the back patio and liked his work so much we had him make a brick patio on the side of the house. When we decided to change our concrete walkway to brick, we wanted Mark to do the job because his prices were fair and he did such good work on t he other two projects.
 Mark Monnette Masonry
Mr. Lewis was extraordinarily responsive. At the time we realized that the concrete could not be repaired, we had intended to put our house on the market. We were anxious to get the work complete so that we wouldn't delay marketing the house. Mr. Lewis promptly returned our calls, provided...
From average costs to expert advice, get all the answers you need to get your job done.
Discover the cost to polish concrete floors, including price ranges, key cost factors, and tips to help you budget for your next flooring project.
Polished concrete floor costs depend on the size of the area you’re targeting and the style of concrete floor. Our guide breaks down all the cost factors.

Staining concrete floors can add a little something to a drab slab. Learn more about how much stained concrete floors cost and what factors impact it.
With so many types of polished concrete floors to choose from, you should first learn about the classes of grinding, levels of polishing, and color options.
Faced with the shiny dilemma of polished concrete floors vs epoxy, you’ll need the details of cost, aesthetics, and durability to weigh and measure the winner.
Dull marble floors got you down? This simple guide on how to polish marble floors can revive your floors to a flawless shine.