

The cost of plastering walls and ceilings depends on the room size and ceiling height. Our tips can help you estimate an accurate cost.
While not as easy as fixing drywall, patching plaster is still totally DIY-able


Interior walls see a lot of action throughout the years, and their wear and tear will eventually show even if you’re as careful as possible. Fortunately, patching up holes is among the easiest home repair projects for beginner DIYers. Though the process of fixing plaster is slightly different from repairing drywall, using the right tips and techniques will make it just as smooth and simple.
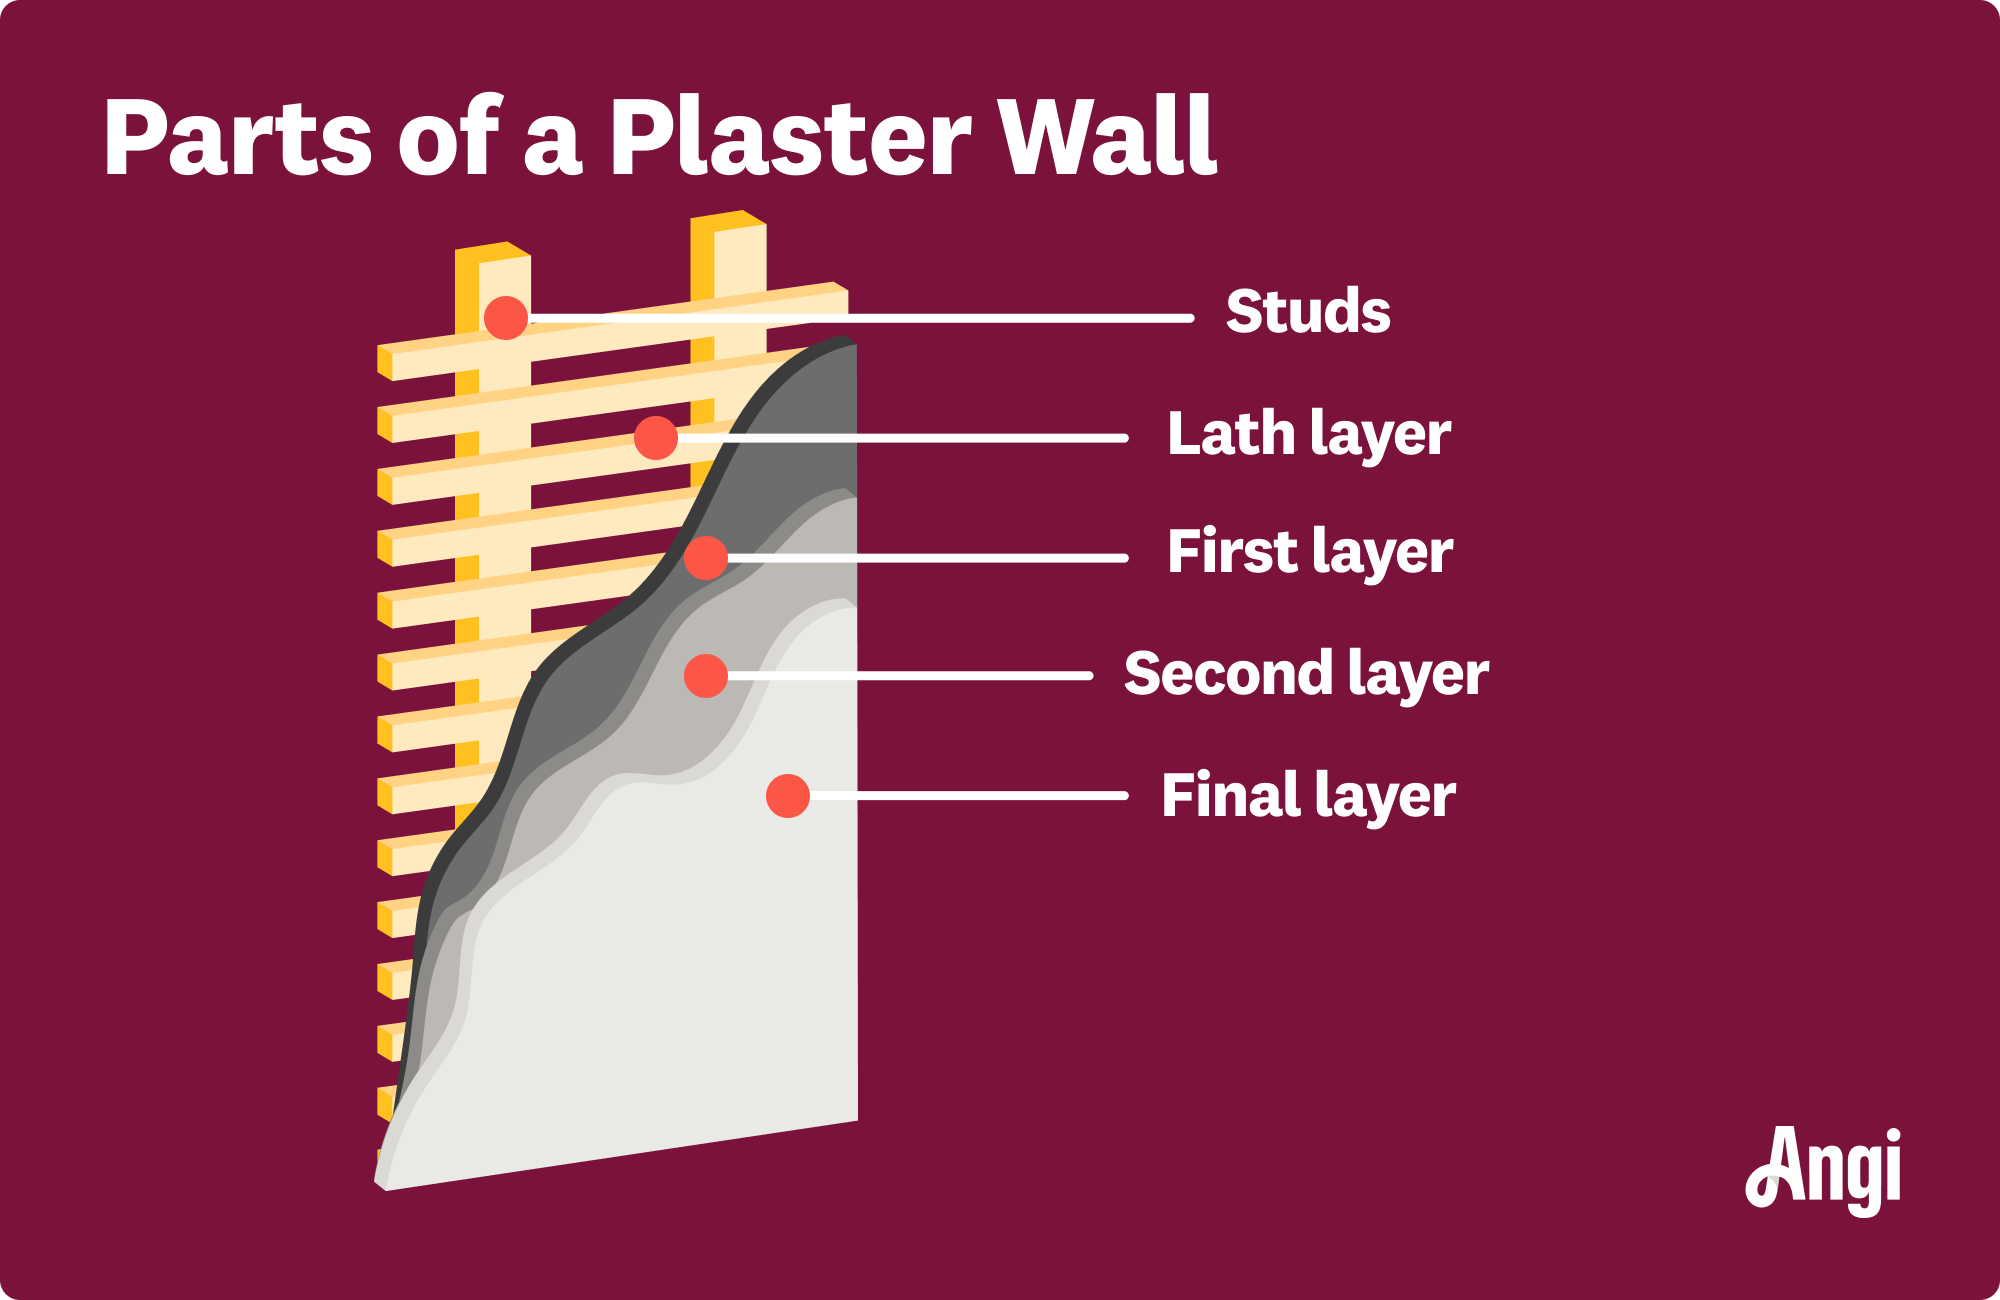
"Working with plaster walls is a very different experience than working with sheetrock," says Bob Tschudi, Expert Review Board Member and general contractor in Raleigh, NC. "Plaster walls are heavy with wood lath behind the plaster, and often have structural anomalies, such as horizontal studs everywhere."
This guide will walk you through every step of patching interior plaster walls, from what you’ll need to how to use it.
Before beginning a repair project like this, take steps to protect your home (and yourself). Lay down a drop cloth in your work area, secure it with painter’s tape, and wear goggles and a mask at the appropriate times. Also, be prepared to wait for possibly lengthy plaster drying periods.
Plaster walls can be decades or even centuries old. Because of this, any work you do you may only be able to do once. If, for example, you damage the underlying plaster, it can be nearly impossible to match it with a repair. Treat plaster repair with much more care than you might for drywall or Sheetrock. The saying “measure twice, cut once” is something to remember when working with plaster.
Gently remove large pieces of plaster with either a box cutter or hammer. If you absolutely need to, chisel until you have a smooth and even working surface. Any shards that remain will create inconsistencies in your wall if left behind and will make it difficult to blend the repaired section into the undamaged sections. Plaster is known to break off in unique ways, but you’ll want a surface that’s as uniform as possible before you begin repairs.

Vacuum up as much dust and debris as possible from your wall and workstation, and then use a microfiber cloth to remove anything that still remains. Finally, use an all-purpose cleaner and rag to clean the area surrounding the hole.
Lath is the wooden frame that will be underneath the plaster and is easier to replace than repair. Plaster and wood are both materials that can last a long time but lath can be damaged from conventional force—like holes put through the wall—but can also be caused by water damage, fire, and humidity.
Replacing and repairing lath is a significant job that often requires the removal of the plaster on top of it. Assuming support beams are in good condition, removing lath isn’t too complicated (it’s basically a demolition job). Remove the lath with a crowbar or hammer until there is none left.
At this point, you would replace the lath with a wood of your choosing. Lath boards are widely available at home improvement stores, and they aren’t too expensive. Nail or screw the lath into the support beams, leaving enough space to plaster on top. A good gauge is using your little finger as a spacer (around one-third of an inch).
If you discover the lath is metal, simply rip it out and replace it with the same material. It’s rare that metal lath becomes damaged, but it isn’t too expensive and will save you from having to remove plaster on top of the old metal lath.

You shouldn’t replace or repair plaster without reinforcing existing plaster, just as you wouldn’t build a house without a foundation. Drill holes in the existing plaster every 3 inches around the damaged area. You don’t have to be exact, but you do need to make sure there is enough space to create a secure bond.
Once the holes are drilled, fill them first with plaster conditioner and once that is dry, fill the holes with plaster adhesive. This ensures that the first coat of plaster you add will adhere properly. The last thing you want is plaster falling off your wall.

The scratch coat (sand, water, and cement) is the first coat you’ll apply to your lath. It may initially seem like you’re applying a lot of layers, but each one has a specific purpose. Scratch coats are applied so that the brown coat adheres properly to the lath while also securing the lath in place.
A scratch gets its name from the “scratching” you do to the mixture once it’s applied. By running a handheld tool—that looks like a rake—through the mixture once it’s spread on the wall, a series of lines are created. If you have a ridged trowel, you can use the toothed side of it in the same way. The following coat that is applied will stick to those lines while on the other side, the scratch coat bonds to the lath. It’s vitally important to spray your path lightly with water so that the plaster properly adheres to it.
Once the scratch coat is applied and has had adequate time to dry, it’s time to apply a brown coat. This second coat is usually the same mixture as the scratch coat and is applied so that the finishing coat has a uniform and flat surface to adhere to.
You don’t necessarily have to be precise when you apply a brown coat. In fact, some people prefer a rougher plaster texture. If you are trying to finish the job with a smooth wall, you can save time by spreading your brown coat as flat as possible.
A brown coat is thicker than a scratch coat. A good thickness for a brown coat is 3/8 of an inch.
The finishing coat is the last coat you apply when you’re repairing or replacing plaster. This last coat is made of joint compound and is spread very thinly over the brown coat. Using a trowel, spread the compound as evenly as possible. Let it dry, and repeat the process twice for a total of three finishing coats. This may seem redundant, but it’s necessary to achieve a sturdy wall with the right aesthetic.
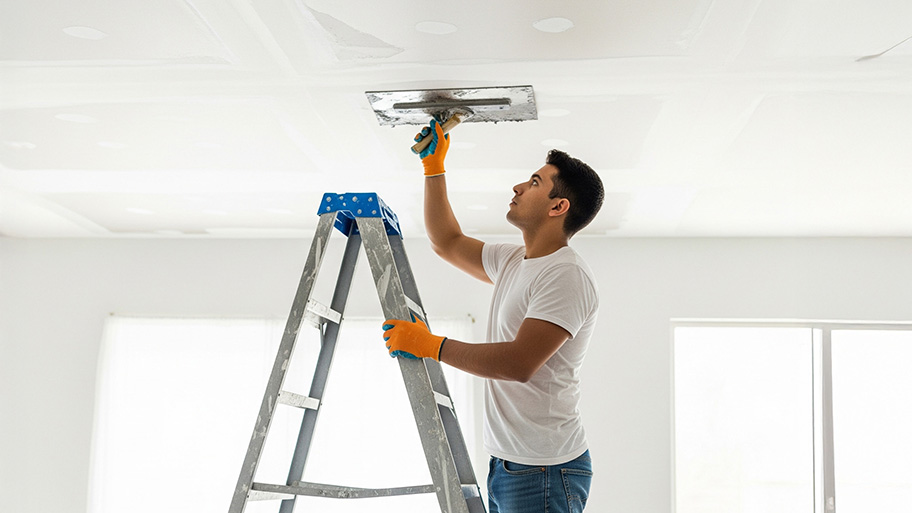
Once your spackle or joint compound is dry, which can take 24 to 48 hours depending on the humidity levels in your home, sand it with a hand sander until it’s smooth. Repeat the previous step, if necessary. Be sure to take safety precautions, like wearing goggles and a face mask, to keep yourself safe from the dust as you sand.
"The most important step in repairing plaster or gypsum walls is sanding," Tschudi says, "because all that matters is the final look and a seamless patch will make the repair just disappear."

When the wall patch has fully dried, you’re free to do the fun part: paint! Since you should never paint over damaged plaster, this is a good opportunity to try out a new paint color or try that stylish accent wall you’ve been dreaming about.
Assuming that there is no critical structural damage to the lath and plaster wall that would require making a call to a plaster pro, handy DIYers can do the job. Follow these tips for a smooth repair:
Reattach the plaster: If the plaster has separated from the lath, drill some holes and inject a plaster adhesive to rejoin it.
Fix any cracks or holes first: For plaster cracks, clean out any dirt or debris first. Apply a bonding agent and refill it with plaster or joint compound. Let it all dry, then smooth it with sandpaper. For holes, reattach or replace the lath, if necessary. Then, apply a bonding agent followed by a layer of plaster, allowing for dry time between each layer of plaster.
Sand the surface: Once the plaster has dried, sand it completely smooth so it all blends in.
Choose the right primer: Be sure to use a plaster-friendly primer before painting to finish up the job.
This is an affordable project for anyone to DIY because the necessary materials don’t cost a lot, and you’ll almost always be able to reuse them. In general, you’ll pay a one-time cost of approximately $50 to $100 for all the materials involved if you don’t own them already, and you’ll have it all on hand for any future wall damages. On the other hand, the cost to hire a local drywall repair pro to patch plaster wall holes can range anywhere from $50 to $300.
Drywall and plaster work require extensive practice and talent. You can try a DIY repair if a patch is small enough or where you won’t mind looking at a less-than-professional job when it’s done. If an entire wall needs repair, trust the pros to do the work so you're happy with the results.
From average costs to expert advice, get all the answers you need to get your job done.
The cost of plastering walls and ceilings depends on the room size and ceiling height. Our tips can help you estimate an accurate cost.

The eye-catching character of a coffered ceiling can really set your room design apart. This guide breaks down coffered ceiling costs to help you budget.
A ceiling repair averages about $1,000, but multiple factors affect this number. Learn more about creating an accurate ceiling repair cost estimate with our tips.
While some ceiling noises are normal, others can indicate a much larger issue. This article translates snaps, crackles, and pops into potential causes and solutions.
Want to hang up a new piece of art or mount a TV on your plaster walls? First, you’ll need to learn how to find a stud in a plaster wall. Here are four methods.

Whether you want to boost the aesthetics of a room or add more privacy, use this guide to learn how to hang ceiling-mounted curtains securely.