How to Paint Interior Doors for the Perfect Finish
You’re a couple of brush strokes away from a stunning interior


- Paint brushes
- Paint tray
- Drop cloths
- Scrub sponge
- Rags
- Paint
- Painter’s tape
- Degreaser
- Sandpaper
- Wood filler (optional)
It’s easy to overlook the importance of having a clean, stylish door—after all, we frequently enter and exit rooms without even thinking about that old door. But if your home is ready for a quick and easy touch-up, sometimes just adding a new coat of paint to a dingy, old door is all that’s needed. So before you bring in the pros, try your hand at DIY and learn how to paint interior doors yourself.
Prepping to Paint Interior Doors
Before you start painting, there are a few things you’ll want to do to prepare your interior doors for a successful paint job that will last for years to come.
Choosing Between Rollers vs. Brushes
It’s a good idea to have both foam rollers and brushes on hand when painting interior doors. If your door is flat, you may be able to get away with simply rolling your roller across the door and using an angled brush to get into the finer details around the edges of the door.
If you’re painting a panel door, you’ll get the smoothest finish by painting the panels, fine details, and sides using a brush and then going over them with a roller.
Picking the Right Paint and Primer
With countless paint types, brands, colors, and more, choosing the best paint and primer for your door can mean the difference between unsightly streaks and a solid, smooth finish.
The most common types of paint include latex, oil, and acrylic paint. Your exterior door may have an oil-based paint, but you’ll want to use latex-based paint for interior doors, as they give off fewer fumes than oil-based paint, dry faster, and have less streaking than acrylic paint. Opt for a semi-gloss finish to hide future nicks, dents, and imperfections.
While some paints are self-priming, others need a separate primer to ensure the paint adheres. This is especially true if you’re switching from oil-based paint to water-based paint.
Calculating How Much Paint You Need
Most standard interior doors can get by with one quart of paint, but you’ll want to double-check your door’s dimensions to ensure you have the right amount of paint. A quart of paint covers around 100 square feet, and most doors are around 20 square feet per side for a total of 40 square feet.
To calculate how much paint you need, follow these steps:
Measure the square footage.
Multiply the square footage by two.
Round up your measurements.
Repeat these steps if you’re painting more than one door.
Add together the square footage of all doors.
Increase that number by 5% to account for the sides and a margin of error.
Keeping Safe With Old Paint
If your home was built before 1978 and you haven’t changed doors or touched up the paint, there’s a chance that your door contains lead-based paint. Use a lead testing kit or have a local lead testing service confirm if there’s lead in your old paint.
If you discover lead in your paint, you’ll need to wear personal protective equipment (PPE) like latex gloves, safety glasses, long-sleeved clothes, close-toed shoes, and an N95 mask when sanding and removing old paint. However, the safest option is to have a lead removal specialist near you handle the job.

Remove the Hardware
 Photo: Jose Luis Pelaez Inc / DigitalVision / Getty Images
To prepare your door, you’ll want to know what to remove—and what not to remove. Remove the doorknob, locks, plates, and any other installations or hardware you have on your door before you paint, but avoid removing your door from the hinges if you want a quick and easy project. To keep track of it all, you can label each part and place them in a zip-lock bag.
Though it may seem like a good idea to take the door off the hinges to get into every nook and cranny and avoid making a mess, doing so could make your door too thick to fit back on the hinges. It could also increase the time it takes for you to complete your project because you have to wait for each side of the door to dry. Still, you may prefer the convenience of having a flat, horizontal surface.
Lay Down Drop Cloths
No one likes getting paint on hardwood or carpet, so prevent that from happening by placing a drop cloth underneath the door. This will prevent any rogue droplets of paint from making a mess.
Clean the Door
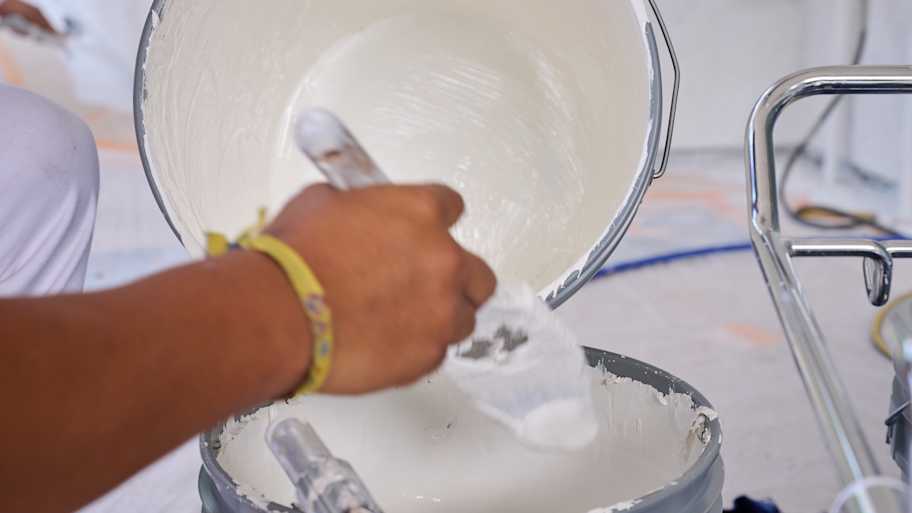
 Photo: Olena Ruban / Moment / Getty Images
To ensure your paint adheres to your door, clean it with a degreasing agent like trisodium phosphate (TSP) or a DIY cleaning solution of equal parts water and vinegar and a tablespoon of dish soap to quickly dissolve any grease. Use a scrub sponge to clean the surface, then wipe it dry.
Fill in Imperfections
With a squeaky-clean door at hand, now it’s time to give your door a little TLC and fill in any holes or other blemishes using a wood filler. Be sure your filler is sandable to prepare for the next step.
Sand Your Door
 Photo: boschettophotography / iStock / Getty Images Plus / Getty Images
Once your filler dries, you can sand your door to prepare the surface for paint. 180-grit to 220-grit sandpaper are good grit numbers for gently smoothing out any wrinkles. If your door is in poor shape, you should use a lower grit, like 100, and work your way up to 220. Gently sand your door using a sanding sponge or sandpaper, then wipe clean with a rag to remove debris.
Apply Painter’s Tape
Once you’ve sanded and wiped away excess dust, you can apply high-quality painter’s tape to the areas you want to keep free from paint. To do this, place tape across your door’s hinges and frame, using a utility knife to precisely cut the tape so that it only covers the hinges and frame. Apply firm pressure to ensure that the tape fully adheres to the surface.
Apply a Primer
If your door is in poor condition, has a bright color you wish to replace, or has a different type of paint to what you’re about to use, you’ll probably want to apply an interior primer to the door. You can apply either one or two coats of primer, but be sure to wait for it to dry fully before moving on to the next step.
Paint the Door
 Photo: eyecrave productions / E+ / Getty Images
With your paintbrush or roller in hand, apply paint to your door, working with the grain. If your door is flat, all you need to do is dip the roller into the tray and roll it across the surface. If you’re painting a panel door, start with the outer sections with a roller, paint the recessed sections with a brush, and then go back in with the roller over the flat panels.
Cover the Fine Details
Finish up by using a brush to get the hard-to-reach sections. You’ll want to coat the entire surface of the door to prevent moisture from entering, so don’t skip the top, bottom, or sides. Apply the paint in thin coats to avoid dripping or streaking.
Sand Your Door
Once fully dry, go over your freshly painted door with 220-grit sandpaper or a sanding sponge, applying very little pressure. Use a rag to wipe away any dust.
Give It a Second Coat (Optional)
 Photo: LOUISE BEAUMONT / E+ / Getty Images
Though optional, adding a second coat of paint will ensure that your door looks elegant and no previous colors end up seeping through. Repeat the steps you took to paint your door to give it a second coat of paint.
Remove the Tape
After you’ve waited for the paint to dry, carefully remove the painter’s tape so as not to accidentally peel off any new paint as you go. Throw the tape in the trash.
Reinstall the Hardware
Retrace the steps you took to remove the hardware from your door, including the doorknob, plates, locks, and more, using a screwdriver wherever necessary.
DIY vs. Hiring a Pro
Painting an interior door is a relatively simple project that doesn’t require professional skills. You'll save money with DIY door painting, as it costs $20 to $50 per hour for labor when you hire a professional painter—plus the cost of the paint. Some painters may have a minimum fee for their services, so if you hire a pro to paint a door, you may want to add any other paint-related projects to the bill.
If you DIY your door painting, you can expect to pay between $15 and $60 per gallon of paint, plus any tools you may need.
However, if your home is older and contains lead paint, you should hire a professional interior painter near you to handle the job.
Frequently Asked Questions
Though you can remove your interior door and paint it on a flat surface, doing so can be more time-consuming and labor-intensive. The easiest way to paint an interior door is by simply leaving it on its hinges and then painting both sides of the door all at once. That way, you can avoid having to reinstall the door, you don’t have to find a project site to paint it, and you get a faster dry time.
One of the most popular paint types for interior doors is a latex-based semi-gloss paint. Latex is a water-based, low-VOC paint, and the semi-gloss adds just enough sheen to your door to make cleaning your door easy. It also helps hide scuffs. You can also use water-based acrylic paint, but brush marks may be more visible with this paint.
In most cases, you can simply paint over old paint on doors. If your door contains latex paint, and you’re painting with latex paint, this is the easiest way to paint over an interior door. However, if your door has oil-based paint and you’re switching to water-based paint, you’ll need to sand it and apply a primer to ensure that the paint adheres to the door’s surface.


Get our Angi-powered app


