

The cost to paint the interior of a house in Kansas City, MO depends on size, layout, type of surface, and more. Learn what factors can influence your total in this guide.
Don’t roll over on painting your ceiling


If you’ve recently looked up at your ceiling (aka your fifth wall) and noticed some grime, it’s probably time to break out the paint roller. Learning how to paint your ceiling adds brightness, makes your room appear larger, and adds personality to the space. So, set aside a weekend, equip yourself with patience and arm strength, and you’ll be able to paint your ceiling like a pro in no time.
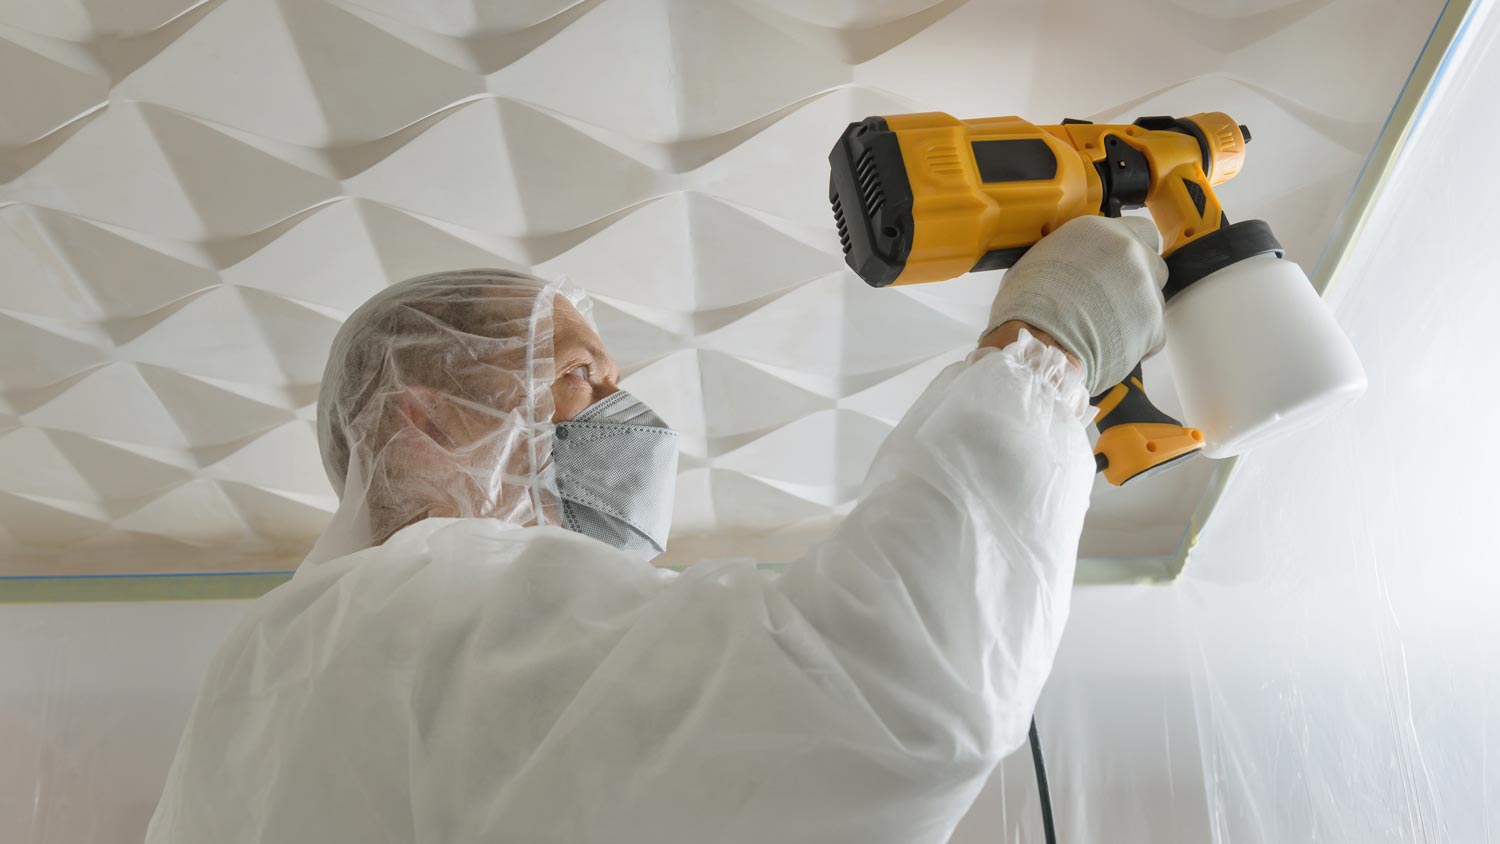
Before you start your ceiling painting project, know what type of ceiling you have. Having a smooth, clean ceiling is ideal. But if you have a textured (splatter-coated/knock-down) or popcorn ceiling, you may want to hire a professional painter near you to spray paint your ceiling with special equipment.
Or, you might want to remove your popcorn or textured ceiling before painting. You can expect to pay between $900 to $3,000 to get a smooth surface.
Next, gather your tools. Measure your ceiling and purchase the right amount of paint for the job. Choose interior latex primer and paint specifically formulated for ceilings.
Pro tip: If your ceiling requires more than one gallon of paint, mix them together for consistency.

Ideally, you’ll want to move all furniture out of the room to have an open and airy space to work. If you can’t take everything out, cover all remaining furniture with drop cloths or protective coverings.
Next, turn off the power and remove all lighting fixtures. Cover all ceiling fan and lighting fixture bases with painter’s tape.
Finally, if your ceiling isn’t smooth, run a sanding pole across it with 100-grit sandpaper. Follow this up by cleaning your ceiling with a damp cloth, so it’s dust-free, prepped, and ready to go.

We recommend purchasing cloth drop cloths to cover the entire floor. You’ll want to place each drop cloth at least 12 inches over each other to ensure there are no open cracks for the paint to fall through.

If you’re planning to paint the walls after the ceiling, you can skip this step. Otherwise, you’ll want to create a clean, straight line with your tape and place it right up to the ceiling on the walls or crown molding.
Now is an excellent time to also fill in any small holes with spackle and a putty knife—and any cracks with a caulking gun.

Don’t skip the primer! Ceiling primer helps to cover stains and provides a nice smooth surface for ceiling paint. Here’s how to prime your ceiling:
Grab your safety goggles, hat, and apron to protect yourself from splatter.
Pour your primer into the paint tray and dip in your roller.
Apply one coat of primer to your ceiling.
Check the instructions on the primer to find the ideal drying time before adding your first coat of paint.

“Cutting” is a painting technique where you use a brush to paint along the edges and any other space that would be hard to cover with a roller. While tedious, you'll need to take on this step for clean results.
Using a paintbrush, paint 2 to 3 inches around ceiling edges in nice even strokes, tapping excess paint back into the pail. If you covered your ceiling fan or lighting base in painter’s tape, now is the time to cut around those edges too.

While the corners are still wet, take your paint roller, lower it into the paint tray, and coat the 3/8-inch (for flat ceilings) or 1/2-inch (for textured ceilings) nap roller cover evenly with paint.
Paint the ceiling in small sections (typically 5-by-5 square feet) in a zig-zag pattern, keeping the area wet as you go. Start in one corner (facing away from windows) and paint across the ceiling to the nearest corner, meeting your brush strokes. Go over each section to smooth out and even the paint.
Pro Tip: For larger ceilings that take longer to paint, you’ll want to feather out the paint at the edges to keep them wet.

Wait for your first coat of ceiling paint to dry. If your ceiling has dark stains, uneven coverage, or just doesn’t have a flawless look, go ahead and apply a second coat of paint.
Pro Tip: Textured ceilings typically require at least two coats of paint, if not more, to fill in all the uneven grooves.
Before you breathe a sigh of relief, you’ll want to clean your painting tools immediately. Getting dry paint off your tools is tough, making it harder to use them for future painting projects.
Rinse your rollers and paintbrushes in warm soapy water. Use a paintbrush comb to clean your brushes thoroughly.
Squeeze and wring out your roller until the water runs clear.
Fully dry all metal tools to prevent rusting.
Add any remaining paint from the tray back into the can.
Wash the tray with soapy water and save your paint can for touch-ups.
Allow brushes to completely dry and store them in waxed paper wrapped with a rubber band to retain their shape.
Remove painter’s tape and drop cloths.
Reattach any ceiling fixtures.
Move furniture back into your room.
DIY-savvy homeowners can tackle a ceiling painting project in a weekend. However, hiring a top-rated interior painter in your area is always a great choice if you’re looking for a professional paint job without the hassle of prep and labor. You can expect to pay $1.00 to $2.50 per square foot for a pro, with an average price of $150 to $350 for a 12-foot-by-12-foot room ceiling.
When painting your entire room, make sure to start with the ceiling. Otherwise, you’ll end up with drips and splatters down your walls.
Choose a ceiling color to fit the room’s aesthetic: white for an open feel, dark for a cozier look, or neutrals for a hint of dramatic intent.
While waiting for your ceiling paint to dry, cover your roller head in saran wrap or a tight-fitting bag to keep it fresh.
Consider hiring a pro for this project if you have a vaulted ceiling that requires a ladder to reach.
From average costs to expert advice, get all the answers you need to get your job done.
The cost to paint the interior of a house in Kansas City, MO depends on size, layout, type of surface, and more. Learn what factors can influence your total in this guide.
The cost to paint the interior of a house in Phoenix, AZ depends on size, layout, type of surface, and more. Learn what factors can influence your total in this guide.
The cost to paint the interior of a house in Raleigh, NC depends on size, layout, type of surface, and more. Learn what factors can influence your total in this guide.

Need to remove old, chipping, or flaking paint before refreshing? Learn about paint removal costs in this guide to see how much you should budget.

A faux wall finish done correctly can transform an entire room. Discover the pros and cons of 15 of the most popular faux painting techniques with Angi.
Not sure who to hire for electrostatic painting? Learn which pros to call, how the process works, and how to choose the right service.