

Whether it’s on your floor, walls, or shower, ceramic tile can add style to your space. So, how much does ceramic tile installation cost? Let’s break it down.
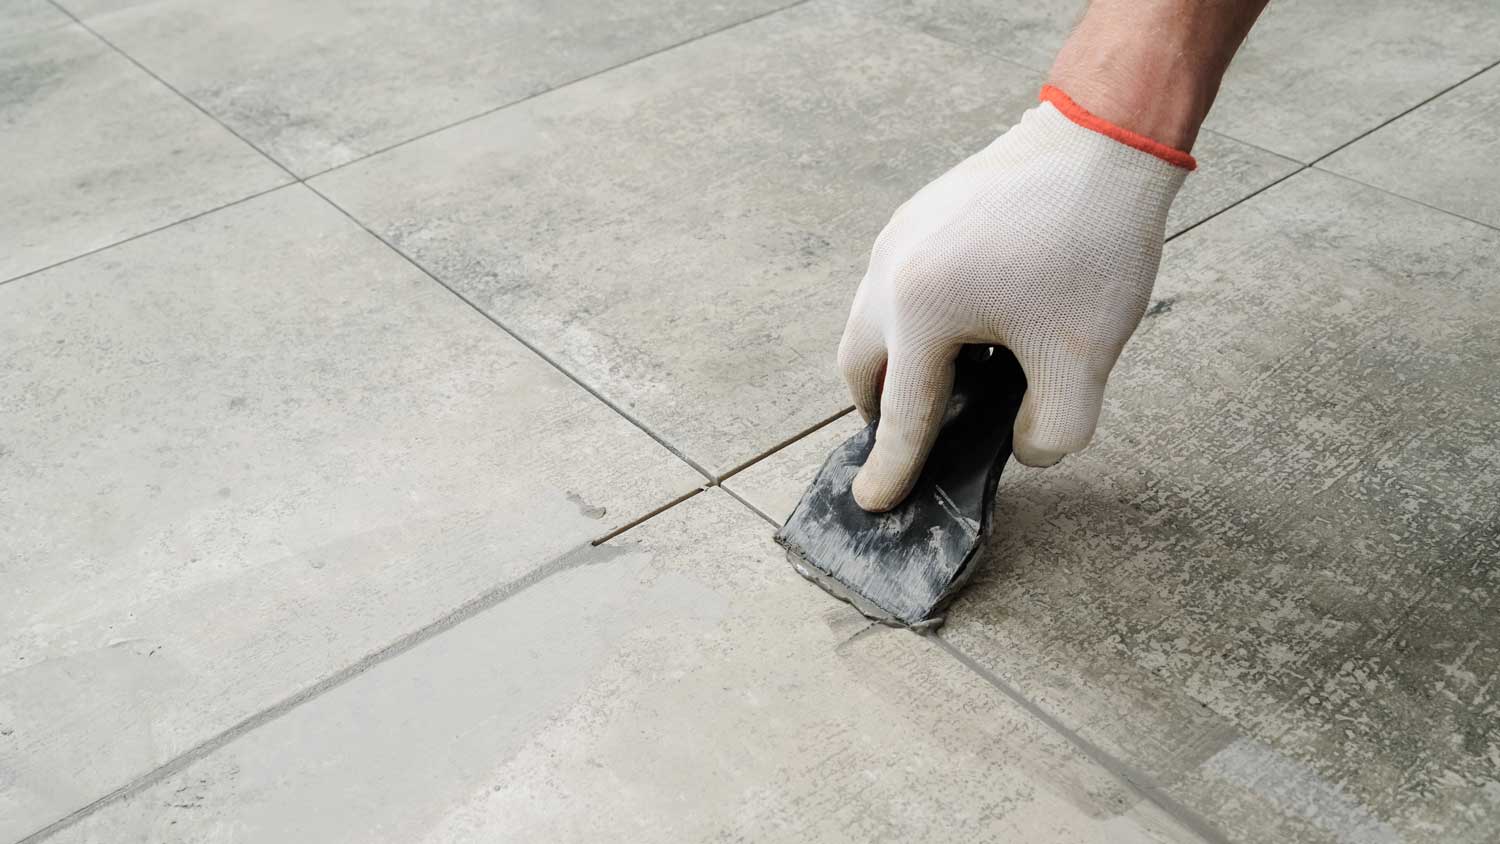
Whip up a perfect batch of grout in less than 30 minutes


If you don’t know how to mix grout, don’t panic. With the right grout mix and tiling tools, a beginner can have grout ready to go within 30 minutes. Taking on this DIY project can save money on tile installation costs and lets you customize the final look with different grout types and colors.
There are three main types of grout: sanded, unsanded, and epoxy. Sanded and unsanded grout are cementitious, which means they cure to a near cement-like hardness. We’re only addressing sanded and unsanded grout in this how-to guide, because epoxy behaves differently and requires a slightly different mixing process.
To choose the right grout, start by determining the width of the joints between tiles that your layout will require.
Unsanded grout contains:
Cement
Filler particles
Pigment
Unsanded grout more readily adheres in small, narrow spaces, so use it when filling joints smaller than ⅛ inch. It’s also the best option if you’re grouting between delicate materials that can get damaged by sand, like marble. Unsanded grout offers a smoother, sleeker appearance, though the lack of sand reduces the binding power.
Sanded grout contains:
Cement
Filler particles
Pigment
Sand
Sanded grout works better in joints wider than 1/8 inch. The sand helps the mixture to bond better with less overall shrinkage, reducing the chances of cracks.
Additives give the grout additional properties above the typical binding. They include:
Mix-in sealants
Latex additives
Color additives
Mix-in sealants are liquids that replace water in the grout mixture and eliminate the need for a secondary sealant after applying the grout. Some mix-in sealants can also improve the consistency of the grout’s color. Mix-in sealants help prevent moisture penetration, thus protecting against stains, mold, and mildew.
You don’t need to use a secondary sealant if you choose to use a mix-in. Some sealants also claim to make the grout harder and more durable, though these claims aren’t substantiated. Not all mix-in sealants work well with every type or brand of grout, so be sure the two are compatible before proceeding.
Latex additives give the grout flexibility and stronger adhesion. They’re a common additive in kitchens and bathrooms because they stand up to temperature changes and improve durability. Latex additives are also known to cure harder, which further protects against moisture penetration.
Finally, there are color additives. Both sanded and unsanded grouts are available in different colors. However, if the color choices aren’t working for your project, you can use a color additive to customize the grout color. Color additives come in powder form, and the more powder you add, the darker the grout color will be. However, keep in mind that the grout will dry slightly darker than the wet mixture.
Follow the steps below to learn how to mix grout. You’ll be a pro at it in no time.
Grout requires the correct ratio of water to powder. However, to account for humidity and give yourself some room for adjustment, add slightly less water than recommended in the manufacturer’s instructions to a two-gallon bucket. If you’re using a mix-in sealant, wear protective gloves and pour the sealant into the bucket instead of water.
In general, it’s easier to add the grouting powder to the water than the other way around. You can add more water later on if the mixture needs it. Avoid using hard water or well water for mixing grout. Both can contain minerals that change the composition of the mixture, which can cause a white powder to form on the grout after it dries. A safe bet is to use distilled water.

Add a quarter to a half of the grouting powder to the water. You’re reserving the rest of the powder to add in later as you adjust the mix to get the correct consistency.
If you’re using a latex or color additive, add it to the bucket before mixing. They’re mixed in at the same time as the grouting powder.
Tilt the bucket to a 45-degree angle to put the contents at a better mixing angle. Use a grout-mixing knife or trowel to blend the water, grouting powder, and any additives. Keep blending using the grout-mixing knife until all of the powder is mixed and all lumps are gone. If too many air bubbles form in the grout, it can cause discoloration and weaken the final product; manual stirring prevents this.

Adjust the grout consistency based on where you’ll use it. If you’re tiling the floor, the grout should have a consistency similar to smooth peanut butter. For use on walls, you want a grout that’s a little thicker, like soft bread dough. It should hold its shape if you hold it in your hand (with protective gloves on).
Add grouting powder if the mix is too thin or slack. A thin grout may shrink and crack as it dries. If the grout has clumps and looks dry, add a little water.
To better control the amount of water added, dampen a sponge or cloth and squeeze small amounts of water into the grout. Continue to add small amounts of water or grouting powder until you reach the correct consistency. Mix thoroughly with the grout-mixing knife, whether you’re adding powder or water.
The grout needs to rest (also known as slake) for five to 10 minutes so that the chemicals in the grout can activate and bond. As the grout slakes, the water continues to penetrate the powder and strengthens the final product. The grout thickens as it slakes, but that’s okay. Don’t add any more water at this point.
Use your grout-mixing knife to mix the grout one more time. You’re making sure there aren’t any clumps and that you’ve got the right consistency.
Even if you have minimal DIY experience, you can handle mixing grout. However, if you’ve never mixed grout before, it will take you longer than a pro to get the correct consistency. And there’s always the risk that you’ll apply the grout while it’s too thin or thick. If you’re ready to try your hand at mixing grout, expect to spend under $50 for the grout mixing supplies and tools.
A nearby tile contractor, meanwhile, will cost between $30 to $120 per hour. However, they bring experience, which could save time and result in a more attractive and longer-lasting finished product.
From average costs to expert advice, get all the answers you need to get your job done.
Whether it’s on your floor, walls, or shower, ceramic tile can add style to your space. So, how much does ceramic tile installation cost? Let’s break it down.

You're planning a bathroom remodel, but how much will it cost to retile your bathroom? Read this guide to find out.
Discover the average cost of grout repair, key price factors, and tips to save. Get expert advice to plan your grout repair project with confidence.
Discover the average cost to reglaze tile, what impacts pricing, and how to save. Get expert tips to plan your tile reglazing project with confidence.

Can you tile over tile? Yes—if you prep right. Learn how to prep, choose adhesive, and avoid common mistakes for a successful tile-over-tile project.
Are you wondering how much sealant you need for a project? This calculator will help you determine your construction sealant needs.