How to Measure for a Storm Door to Get the Perfect Fit
All you’ll need is a measuring tape, a pen, and some paper


Whether you want an attractive door to bring in more natural light and views of the neighborhood or your home needs more protection from the elements, a storm door can help improve the curb appeal and functionality of your front door. But for this type of door to truly work as intended, you must know how to properly measure a storm door for a secure fit. Luckily, taking measurements is easy, but it requires more effort than you might think.
What Is a Storm Door?
A storm door is a secondary exterior door that sits outside the front door and offers an extra layer of protection against the elements. Storm doors feature a sturdy frame and a glass panel, although some may offer screens, as well.
A storm door improves insulation around the front door and allows you to open up the solid front door to let in light, views, or even fresh air through the storm door. This protective barrier can also shield your primary front door from the elements, an essential feature if you have a sentimental or pricey front door that you want to keep in excellent condition.
How Much Does a Storm Door Cost?
A storm door costs about $185 to $650, and labor adds another $75 to $400. To save money, you may opt for a storm door kit, which includes all the materials and instructions you need to install a new storm door.
How to Measure for a New Storm Door


Most storm doors measure 32 or 36 inches wide and 75 or 81 inches tall, and you’ll need a 1-inch-wide by 1-inch-deep area inside the frame to fit a storm door.
When you measure for a DIY project, you probably already know to always measure twice. With your new storm doors, though, you’ll actually want to measure three times if you want the door to fit properly. You’ll need to triple-check each dimension, including width and height.
Measure the Width
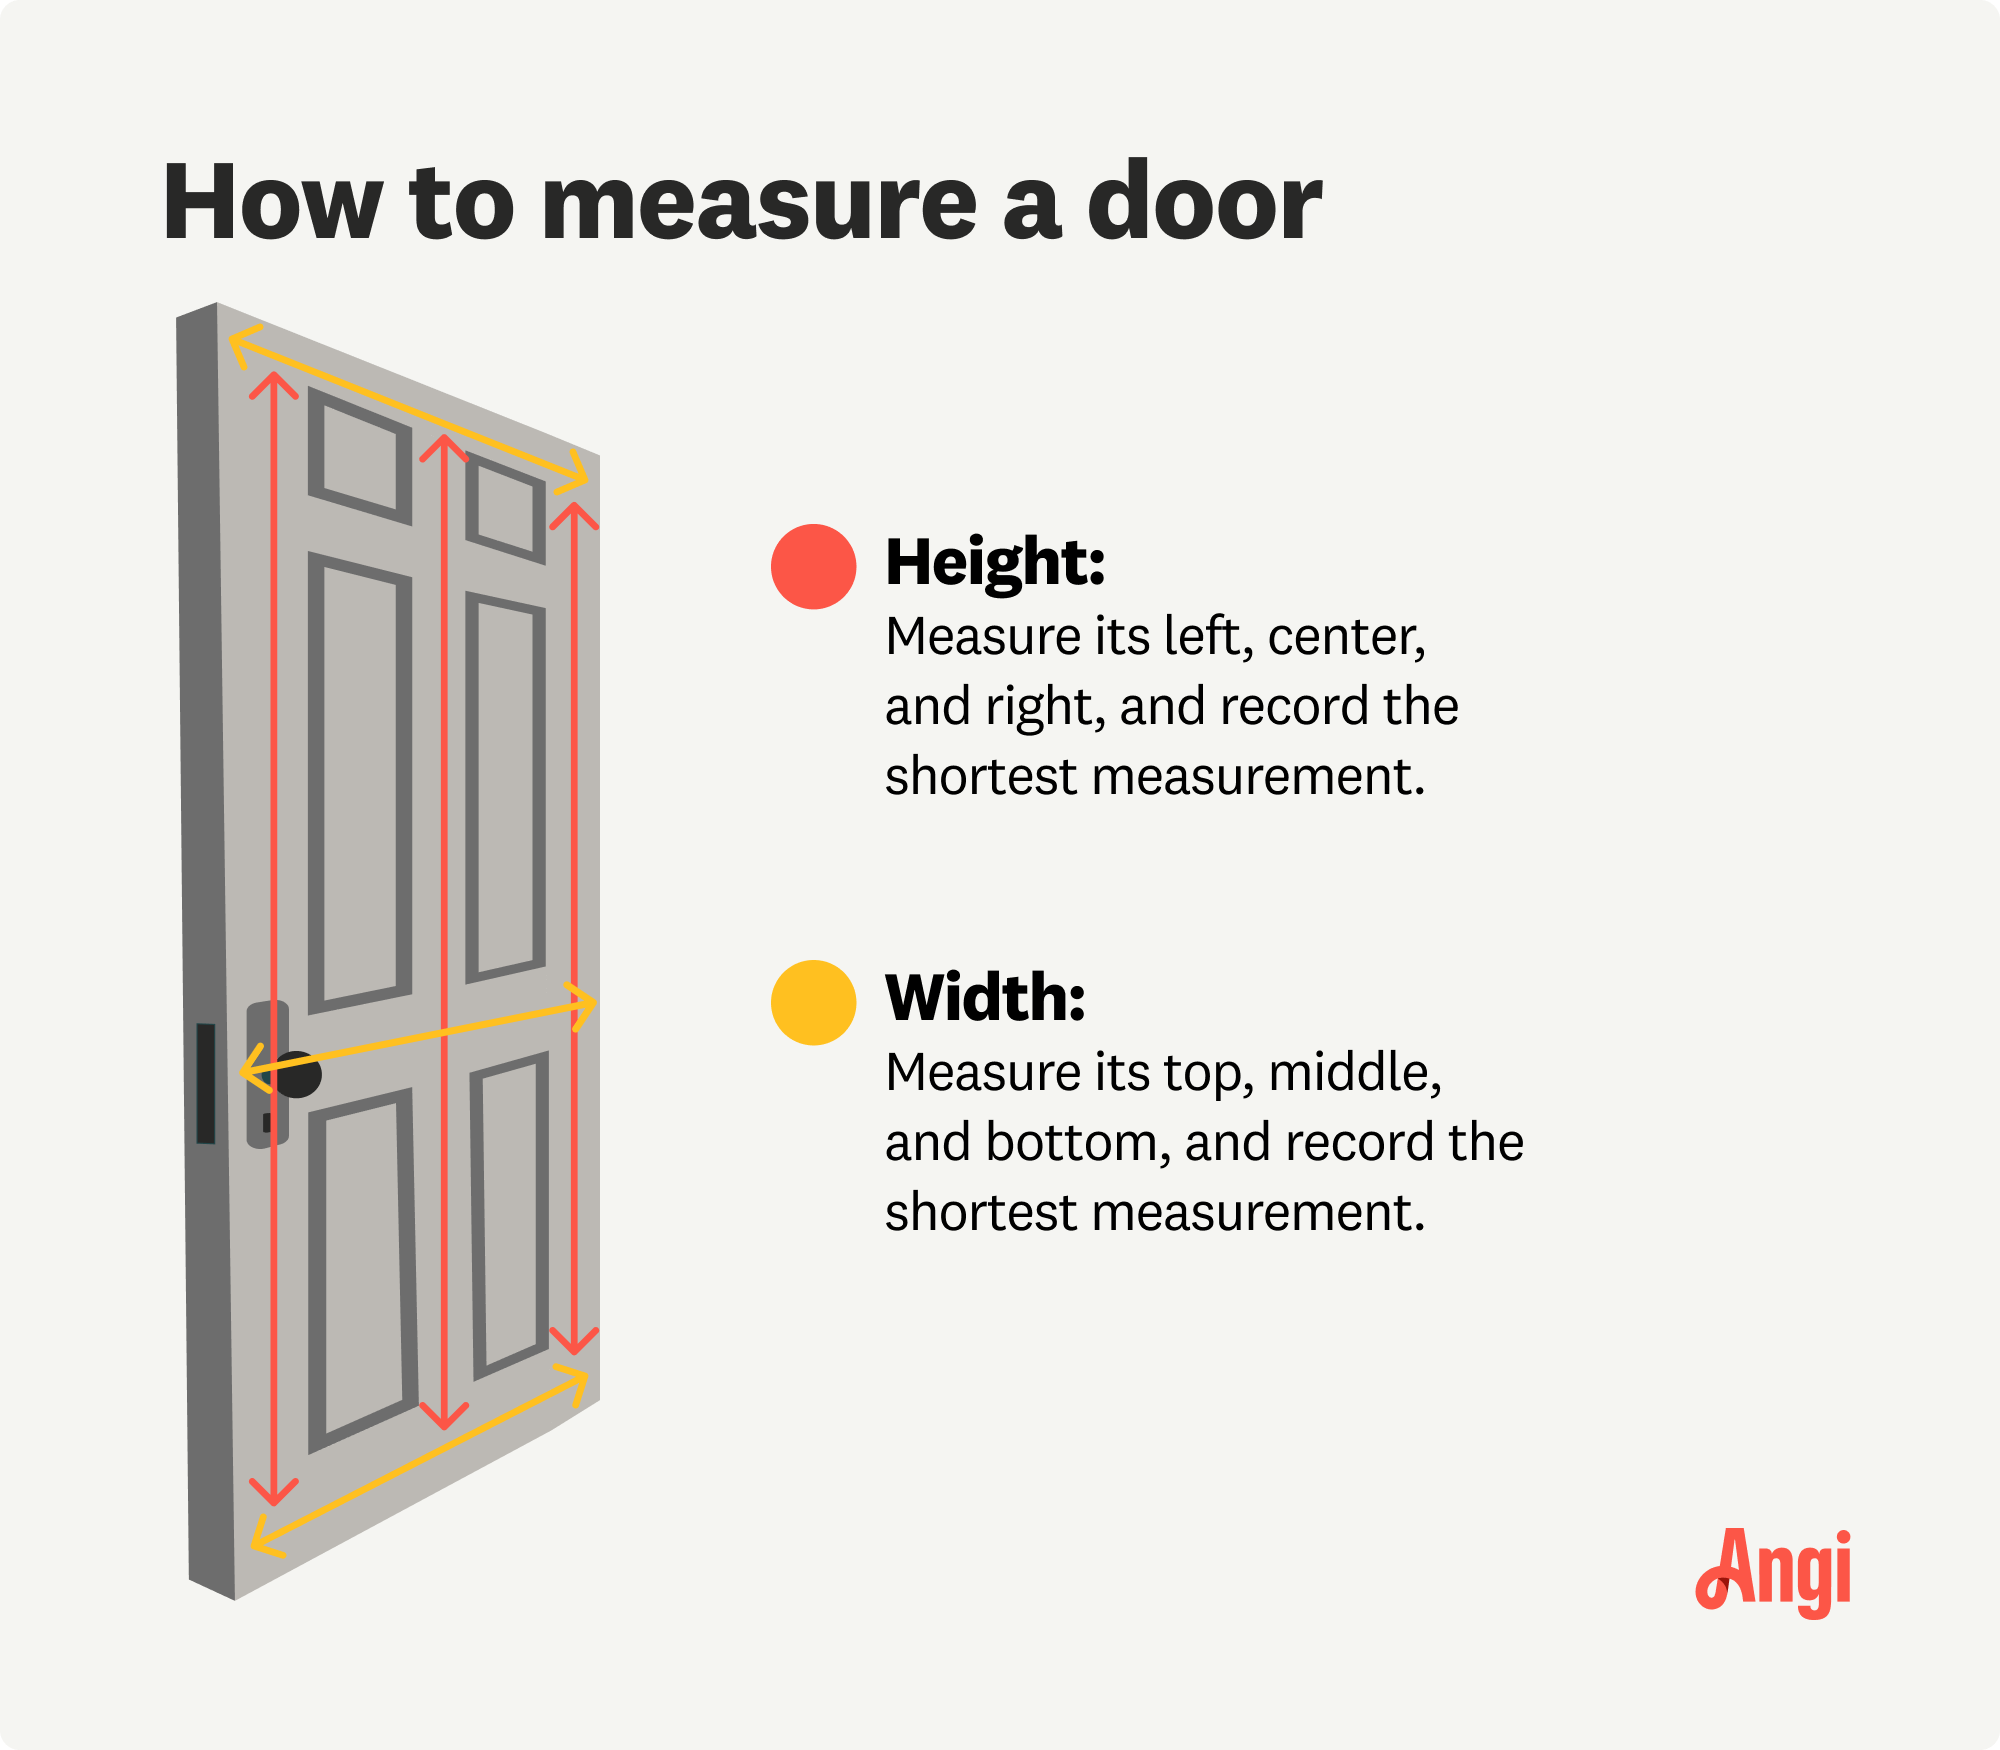
Using a tape measure, measure the width of your standard front door. You’ll measure the width in three places: the top of the door, the middle of the door, and toward the bottom of the door. Note these measurements with pen and paper, and circle or highlight the smallest width measurement. You’ll use this to determine the size of the storm door you need, and you may need to use shims to fit the door properly into an opening that’s too wide or tall in some spots.
Measure the Height
Grab the measuring tape and measure the height of the front door from top to bottom, down the center of the door. Then, measure the height again on the left side of the door and measure the height toward the right side of the door. Jot down all three measurements, noting the smallest measurement to refer to when purchasing a new storm door.
How to Measure for Storm Door Replacement
Similarly to measuring for a new storm door, you’ll want to measure the width and height three times before buying a replacement door. However, you’ll be measuring the existing storm door for a replacement rather than the front door.
Measure the Width
Take the measuring tape and measure the width of the existing storm door at the top, middle, and bottom of the door. Write down these measurements, and note the smallest width measurement.
Measure the Height
Measure the height on the left, middle, and right sides of the existing storm door. Write down all these measurements on paper, highlighting the shortest height measurement. You’ll use that number to choose your replacement storm door.
Taking Care of Storm Doors

Once you install a new storm door or a replacement, you’ll want to get the most life out of it as possible. A storm door will last about 20 to 30 years, and you can extend the life span of your storm door with some regular maintenance tasks throughout the year.
Wash the Door
Although the storm door is designed to protect the front door from debris, you shouldn’t let dirt build up on this outer door, either. Be sure to clean it carefully with soap, water, and a soft cleaning cloth about every three to six months. Skip more abrasive or harsh cleaners, like ammonia, bleach, or even glass cleaner, and use a mild soap instead.
Apply a Protectant
After you wash the door, dry it with a clean cloth and apply a protectant, which can help prevent corrosion. Follow the instructions on the protectant product or non-powdering wax to finish the application.
Inspect the Door Parts
Cracks, warping, dents, and other damage can prevent your storm door from doing its job. You may want to inspect the door parts, like the frame, glass or screen panels, hardware, and weather stripping, for damage after each cleaning session or at least a couple of times per year (especially after bad weather). Test the door by opening and shutting it. It might be time to replace the storm door if it's difficult to open or fully close.
Repair or Replace Hardware
The hardware needs to be in good condition for your storm door to provide proper insulation and protection. If the locks are broken, the hinges are sticky, or the handle feels loose, make sure to tighten the screws, make any necessary repairs, or replace broken hardware as needed.
DIY vs. Hiring a Pro
Measuring a storm door is easy for the average person, even without a ton of DIY experience. You’ll only need a measuring tape and pen and paper to jot down the measurements. In total, this will cost you less than $25, or it could be free if you already have these items at home.
If you plan to hire a local storm door company to install your new door, you may want to have the pros measure to make sure your storm door will fit perfectly. Hiring a pro for storm door installation costs about $75 to $400 for labor. In older homes, having a pro measure for a storm door can be especially important since it can be difficult to get an accurate read when the door frame may have warped or shifted over time in certain places.
Different types of doors, such as exterior, interior, fire-rated, and egress doors, have distinct code requirements. A professional door installer has the extensive knowledge to ensure your project is up to code.
Frequently Asked Questions
You can determine what size storm door you need by measuring for the storm door. Take the width at the top, middle, and bottom of either your front door or an existing storm door, then measure the height on the left, center, and right of the door. Buy a storm door that matches your measurements' smallest width and shortest height.
A storm door should be the same size as the front door. Both doors will fit into the same opening on the exterior of the home, so you can expect the storm door to be the same size as the front door. Most doors will be about 32 or 36 inches wide and 75 or 81 inches tall, although you can customize your door sizes.
Depending on your design preferences, the storm door can match either the front door or the trim. If you want the storm door to blend into the frame, you can choose a storm door that matches your home’s trim. If you want to draw attention to the front door, choose a storm door that matches your front door.


- How to Fix a Gap Between a Storm Door and Frame to Seal Your Home
- Do I Need a Storm Door? What to Consider
- Exploring the Different Parts of a Storm Door and Their Functions
- 4 Types of Storm Doors and How to Choose the Best One
- 5 Ways To Make Your Front Door Energy Efficient
- How to Fix a Door That Sticks: 5 Different Methods
- How to Insulate a Door
- Storm Door vs. Screen Door: How to Choose the Right One for Your Home
- Why Water is Leaking Through Your Sliding Glass Door and How to Stop It
- 9 Tips to Make Installing a Pocket Door in Your Home Easy


