The cost to install porcelain tile depends on materials, size, and whether you DIY or hire a pro. This guide will help you choose the perfect porcelain tile for your home and budget.
Ace your backsplash from tape to tile


Knowing how to measure for a backsplash can help save you on cost and wasted materials. You’ll need to get measurements in square feet and add a bit extra in case of project adjustments. No more guessing games—this article guides you through four simple steps to accurately measure your kitchen or bathroom for backsplash tile.


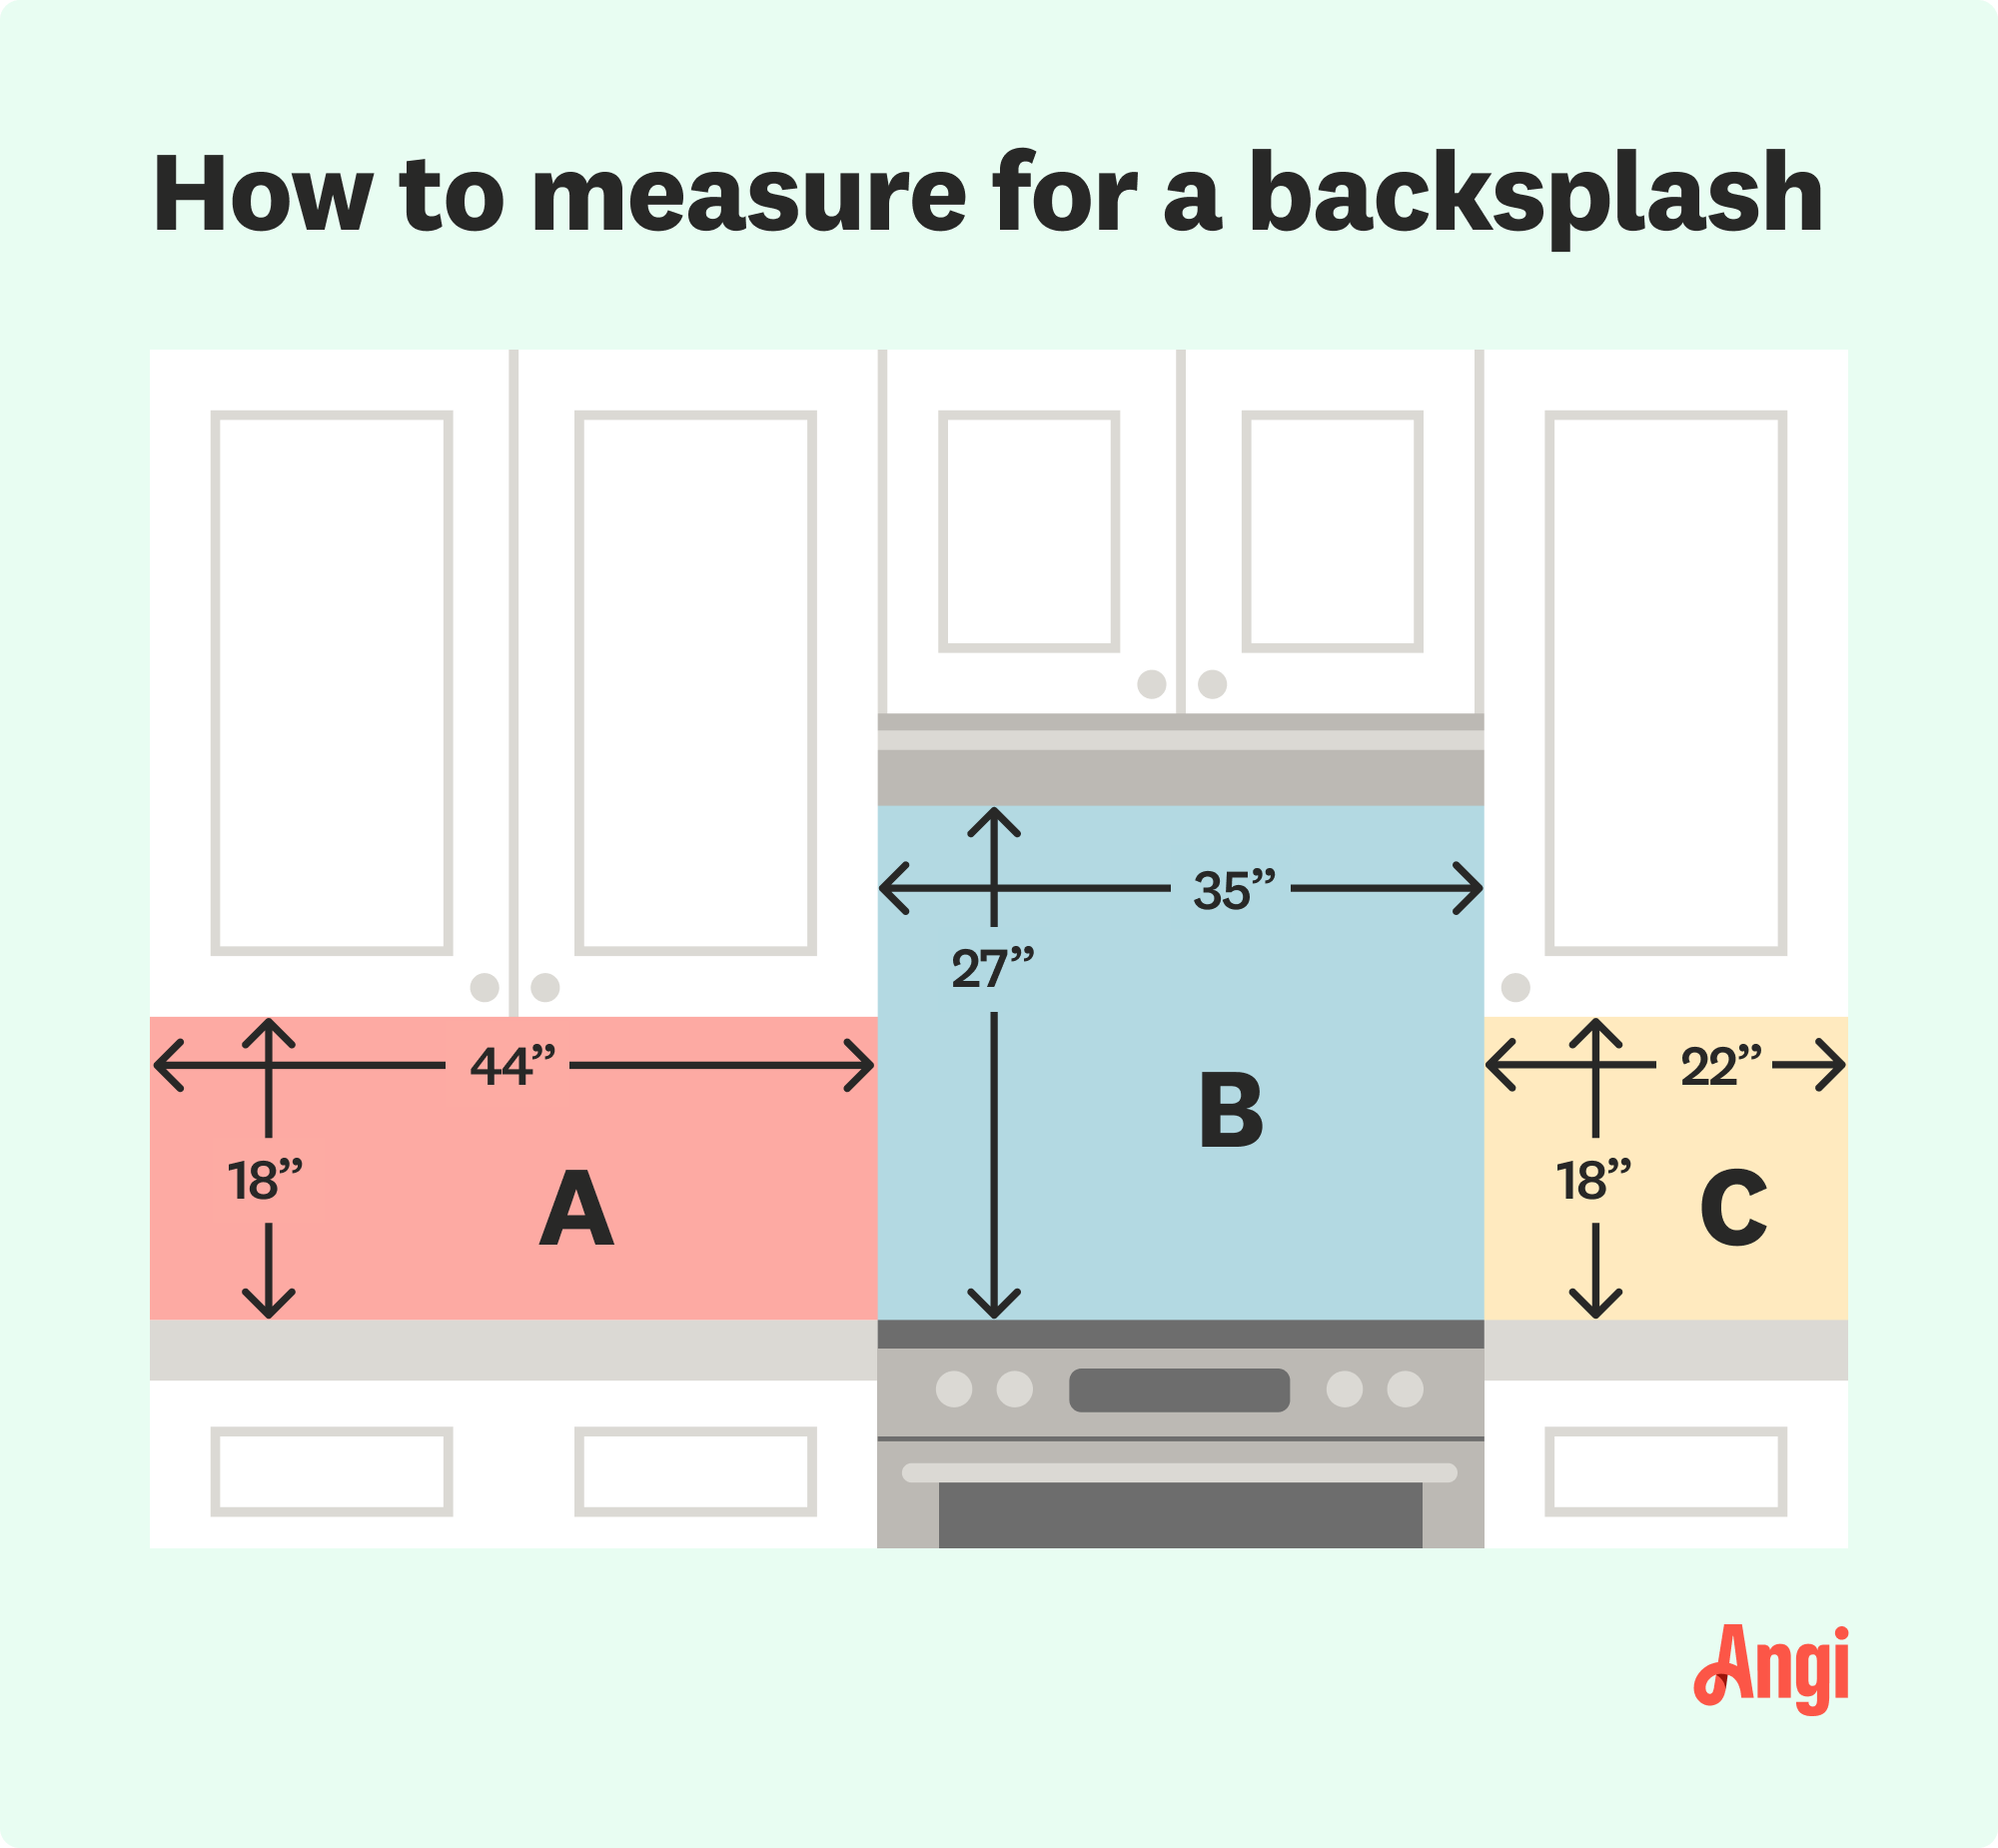
Start by measuring the length of the area where the backsplash will be placed using measuring tape. Then, measure the height of the backsplash area, starting from the countertop.
If the backsplash area is uneven or does not have perfect right angles, you can break down the area into smaller, rectangular sections and measure each section separately. For example, your kitchen might have cabinets of different heights, so you can divide the area into rectangles that fit under each cabinet.
Write down these measurements and note any irregularities in the wall, such as bumps or recesses, which may impact the final measurements.
You’ll want to measure the areas of outlets, switches, or other obstacles. These measurements can be subtracted from the total area, as you’ll likely keep them in place during backsplash installation.
Most likely, your measurements are in inches. First, multiply the length by the height to get the total square inches. If you took measurements for multiple sections, add the square inches for each section together. Also, remember to subtract the area of outlets and obstacles measured.
Tile is sold by square foot, so convert the square inches measurements to square feet by dividing the total by 144.
For example, suppose you’ve measured a backsplash area with a height of 18 inches and a length of 36 inches. Here are the formulas you’d use:
18” x 36” = 648 square inches
648”/144 = 4.5 square feet of backsplash tile need
Adding a margin of extra tile material is smart to accommodate waste, cutting, and adjustments during installation. It’s also useful to have extra tile that matches the existing tile for repairs down the road. It’s common practice to add 10% overage for basic tile shapes. For more complex tiles, such as mosaic tile, it’s best to add 15% to 20% extra.
Accurate measurements are the cornerstone of ensuring you order sufficient material without having excess. It’s the Goldilocks principle: too much tile, and you end up overspending and wasting material—too little tile, and you won’t have enough to cover the entire backsplash area.
Inaccurate measurements can disrupt the planned tile layout and pattern, causing patterns to mismatch or tiles to be cut in a way that breaks from the intended design. Plus, if you need to order more tile after you’ve begun the backsplash, this extends the timeline of your project as you wait for new tile to ship—in some cases, that might even be a few weeks added to your timeline.
Once you’ve ordered the tile, consider hiring a tile installer near you to install the backsplash cleanly and ensure that your design goals are fulfilled.
From average costs to expert advice, get all the answers you need to get your job done.

The cost to install porcelain tile depends on materials, size, and whether you DIY or hire a pro. This guide will help you choose the perfect porcelain tile for your home and budget.

Discover the cost to regrout shower, including average prices, key cost factors, and tips to help you budget for a fresh, watertight shower.

Whether it’s on your floor, walls, or shower, ceramic tile can add style to your space. So, how much does ceramic tile installation cost? Let’s break it down.

Loose grout can cause loose tiles, mold, and slipping hazards. This guide breaks down common causes of loose grout in your kitchen or bathroom, and how to fix it.

Regrouting your shower takes some time because it involves multiple days’ worth of work. Use this guide to help you decide who to hire to regrout your shower.

Calculating how much thinset you need involves multiple steps. Use this guide to determine exactly how much of the bonding material you’ll need.