
Need a little extra room for clothes storage in your home? Learn about the average cost to build a closet, some cost factors to consider, and more.
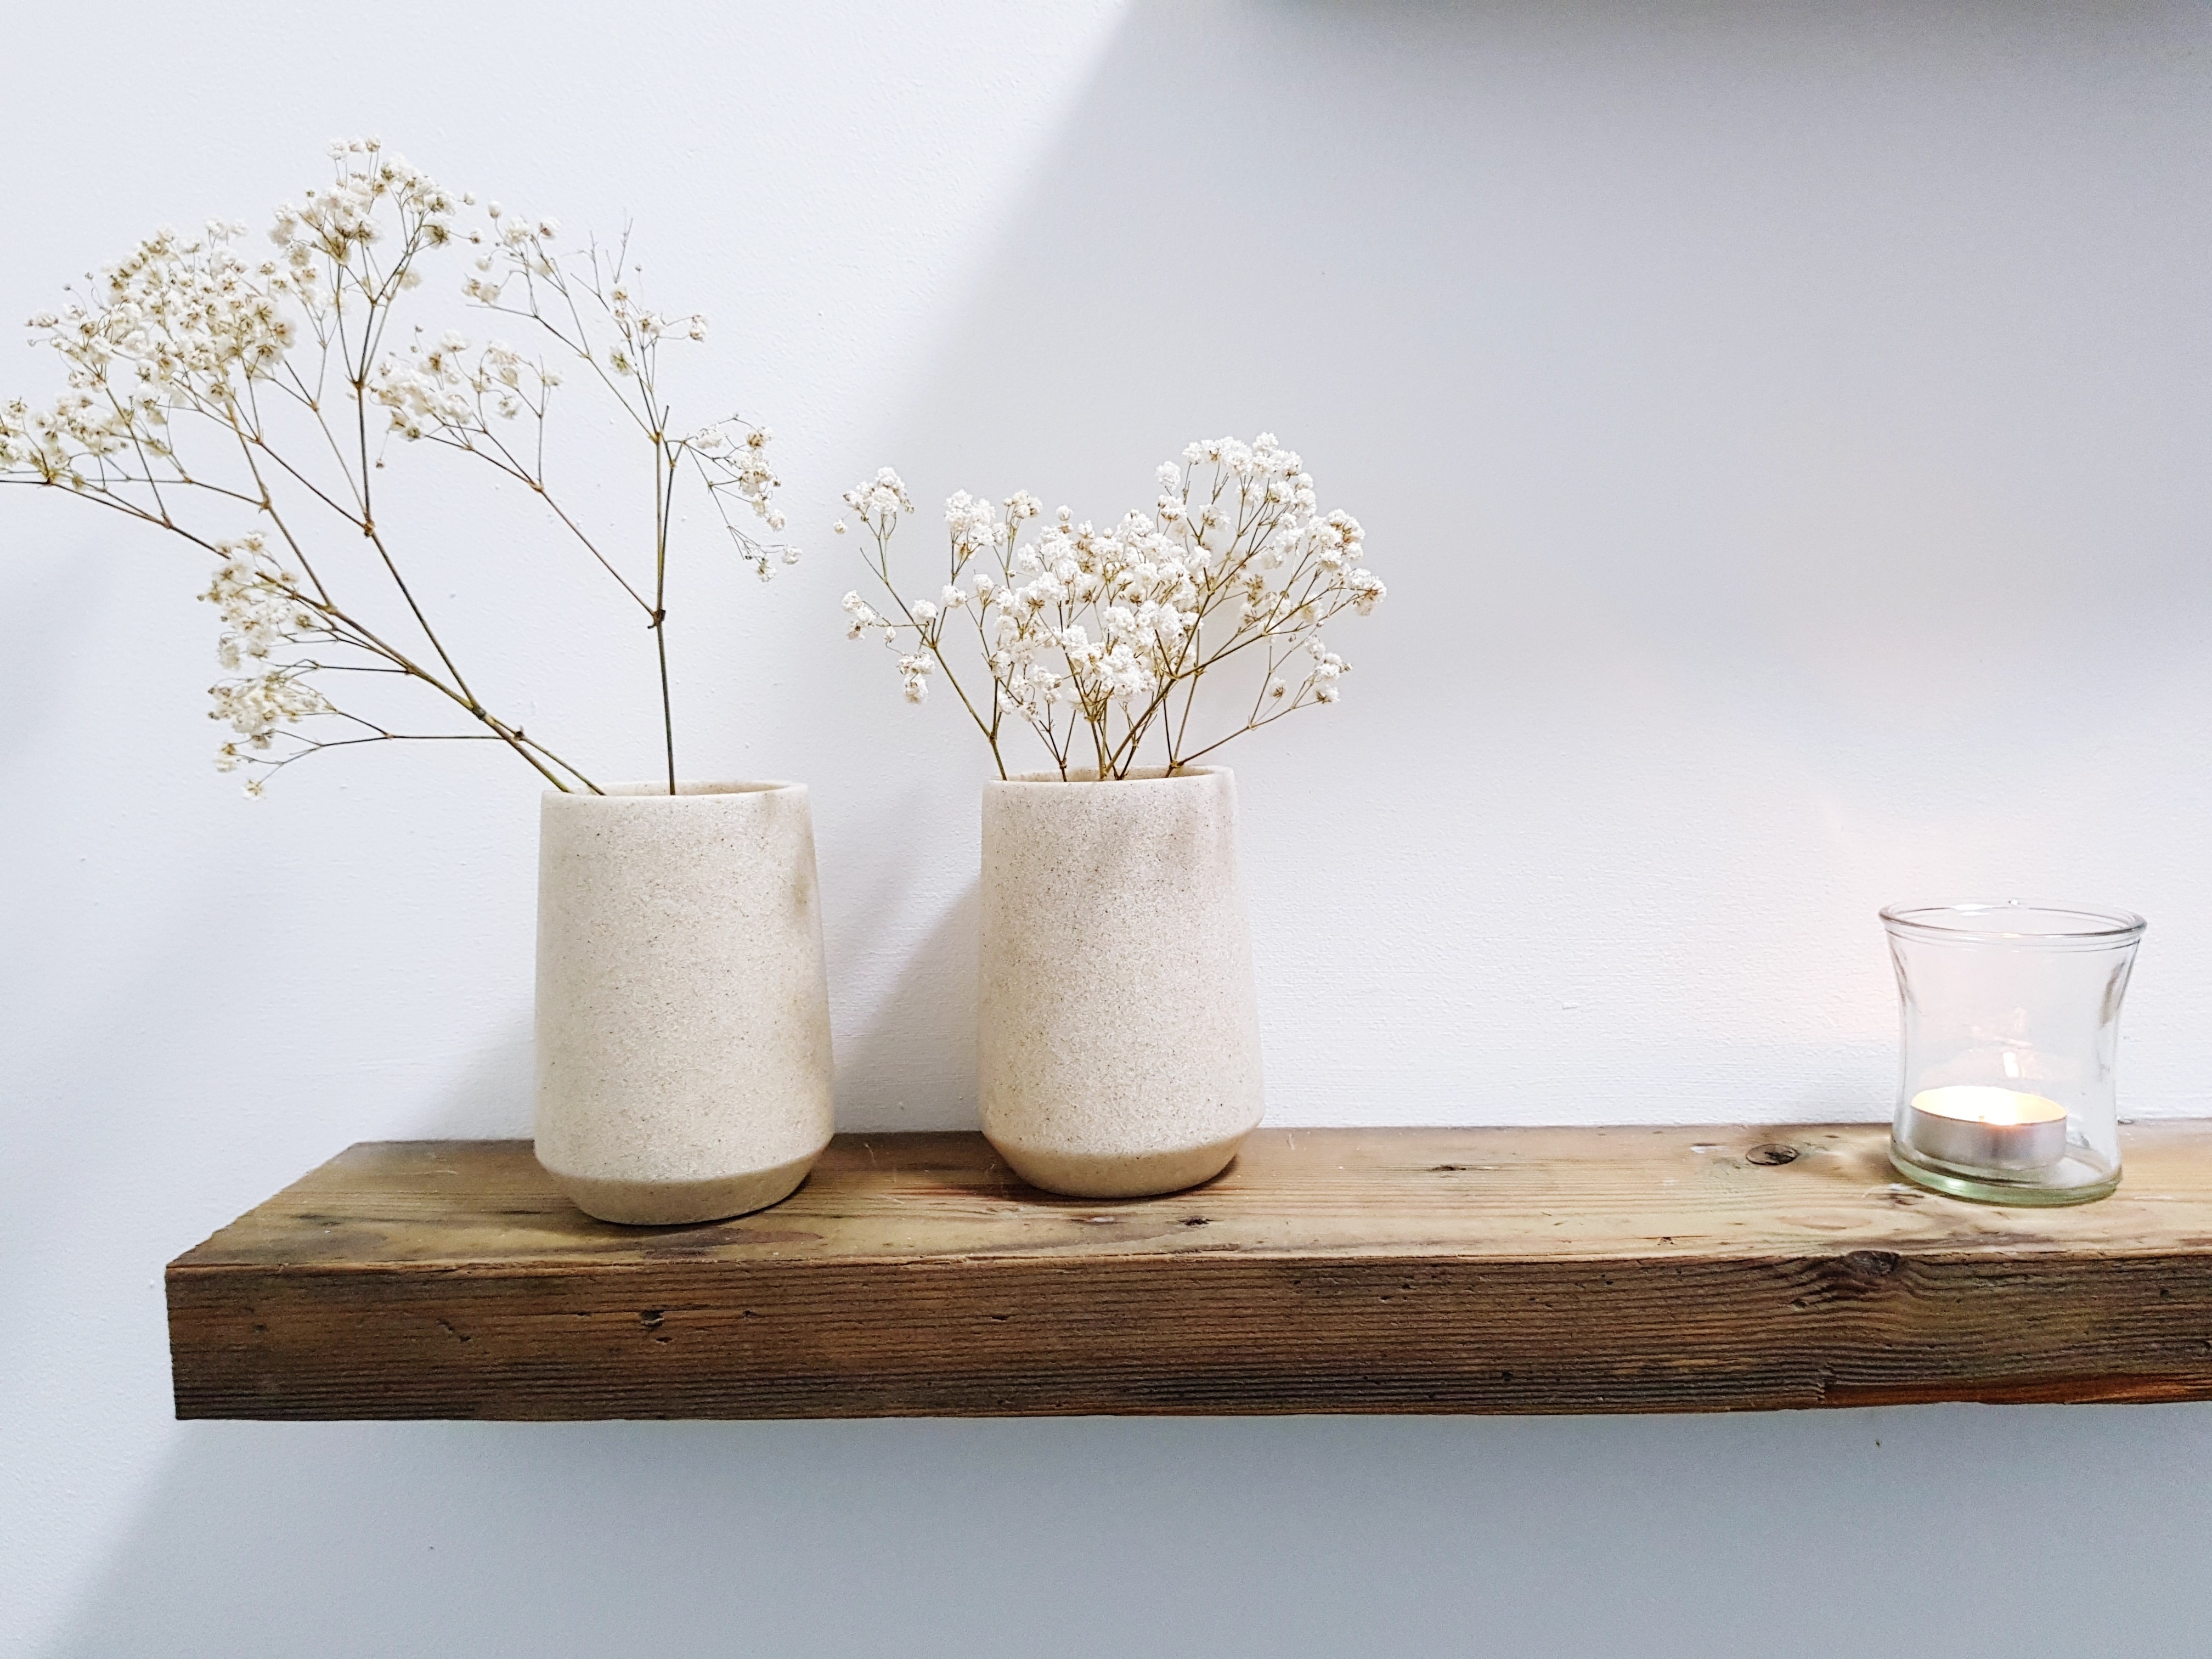
Custom floating shelves make the perfect beginner DIY project


Many homeowners prefer the look of a floating shelf because there’s no visible hardware needed to hang it. This leaves room for more decor without making the space look cluttered.
There’re many ways to go about hanging a floating shelf. Some people prefer to install a pre-made unit while others like to take the DIY route (it’s easier than you might think).
The benefit to building your own floating shelf is that you can customize every aspect of it—from the type of wood to the size of the shelf and even the color of the stain.
Learn how to make floating shelves from scratch in eight steps with this simple step-by-step guide.

First things first—determine the length of your floating shelf by measuring the area on the wall where the shelf will go.
It’ll help to search for wall studs during this step. Drilling your floating shelf into wall studs is the safest and most secure way to mount it to the wall.
If there are no wall studs in your preferred location, you will have to install wall anchors first before drilling the cleat to the wall. To learn more about anchors, refer to our drywall anchor guide.

You’ll need a jigsaw, circular saw, or miter saw for this step. If you don't have access to a saw at home, you can get all of the pieces you need cut to size at your local hardware store.
Cut the top and bottom shelf surfaces. Cut the length of the top and bottom shelf pieces using a 1x8 board.
Cut the sides. Using a 1x2 board, cut one piece to the same length as the top and bottom shelf pieces. This will be used to connect the two pieces lengthwise. You only need to connect one side of the shelf—the other side will remain open to slide over the cleat.
Next, cut two more pieces of the same 1x2 board matching the width of the top and bottom planks. These pieces will be used to hold the two planks together at the ends, completing the three-sided hollow box.

Now it’s time to put all the pieces together to build the shelf.
Stand the 1x8 board on its side and line up a 1x2 block on each end. Drill pilot holes—two per side—through the surface board and into the side blocks.
Then, use a liquid wood adhesive to attach the two end pieces to the 1x8 board. Lastly, secure the pieces together by drilling 1-¼ inch wood screws into the pilot holes.
Your shelf will start to take shape in this step. Start by laying the U-shaped bracket you just built flat on the table. Place the 1x8 surface board evenly on top so the edges of both units are perfectly in line with each other (there should be no overlap).
Drill pilot holes. If everything lines up correctly, drill pilot holes around the edge—two per side. If you’d like, you can drill three on the longer edge for more stabilization.
Secure it together. Remove the shelf surface board and apply wood glue around the U-shaped bracket. Put the shelf plank back on top to attach both pieces together. Once dry, secure 1-¼” screws into the pilot holes.
Repeat on the other side. Flip the board over and repeat on the other side. Once finished, you should have a finished hollow shelf with one side open.

Sand the shelf box using a power sander and 220 grit sandpaper. Doing this will help blend all the edges together while removing excess glue residue from where you attached pieces.
At this point, you can stain or paint the shelf if you’d like.
The cleat is the part of the floating shelf that mounts to the wall. It includes a base (the plank that is mounted to the wall) and three legs projecting outward. The legs are inserted into the hollow shelf box, which is what gives the shelf a “floating” effect.
Measure and cut the base. To build the cleat, start by measuring the distance between one inside edge of the self opening to the other. This will determine the base length of the cleat. Cut down a 2x2 plank to this length.
Measure and cut the cleat legs. Next, cut three 2x2 planks to be used as the legs of the cleat. These legs will be going inside the shelf to hold it into place on the wall.
To make sure it will snugly fit inside the shelf, calculate the length of the legs by measuring the inside depth of the shelf and subtract the thickness of the base of the cleat.
Drill, glue, and attach. Set the pieces of the cleat in place and prepare to drill pilot holes. To do this, lay the long piece flat and space the legs out evenly — one flush at each end and one directly in the middle.
Attach the legs to the longer board with wood glue. Once dry, drill a pilot hole through the plank and into each leg. Secure the pieces tightly together with 2” screws.
Now it’s time to install the cleat to the wall. At this point, you should already have determined where your shelf will go and whether or not you will be utilizing wall studs or wall anchors.
Drill one side of the cleat to the wall where you have either marked a stud or drilled a drywall anchor. You can then set a leveling too on top of the cleats and slide the other side of the shelf up and down until it is perfectly level. Drill to attach the other side of the cleat.

Slide the shelf box you made over the cleat legs. Consider drilling a screw through the bottom of the shelf into the middle bracket for extra hold.
From average costs to expert advice, get all the answers you need to get your job done.
Need a little extra room for clothes storage in your home? Learn about the average cost to build a closet, some cost factors to consider, and more.
Discover the average cost of tin ceiling installation, including labor, materials, and key factors that impact your budget. Learn how to save and plan your project today.

Discover the average feng shui consultant cost, what impacts pricing, and how to save on your consultation.
Wondering who to hire to install acoustic ceiling tiles? Learn which pro to call, how installation works, and what to expect. Get confident before you book.

Create a stunning and functional home or remodel with an interior designer. Follow these common interior design questions to prepare for working with a pro.
Discover the cost to install a built-in wardrobe. Learn about average prices, installation factors, and ways to save on your custom storage project.