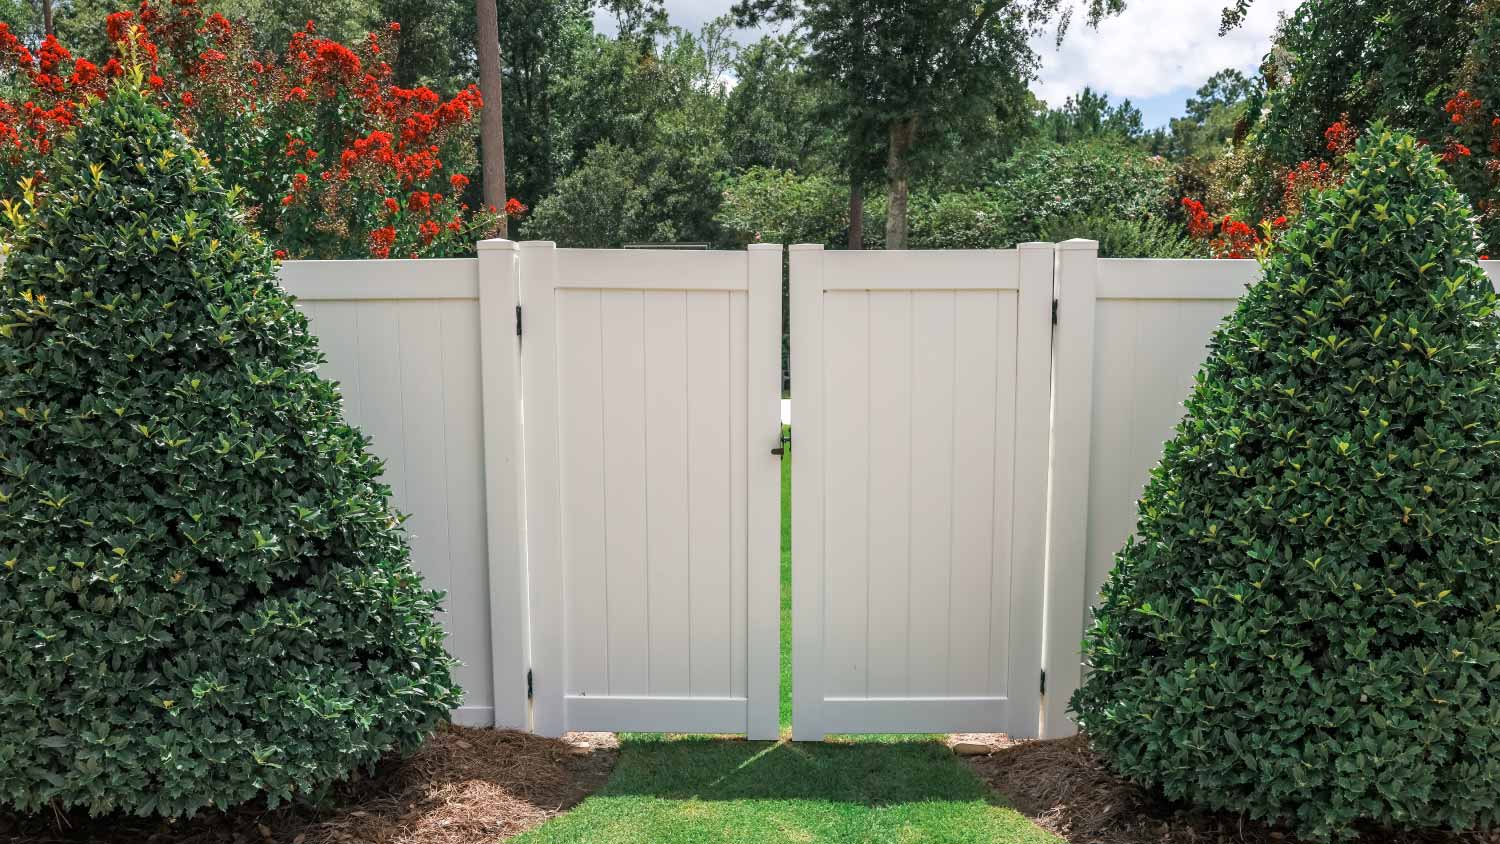
How to Install a Security Gate to Keep Your Property Safe
An extra layer of protection to your home


- Power drill
- Spirit level
- Nut driver bit
- Star driver bit
- Hammer
- Security gate kit
- Self-tapping screws
- Star drive screws
- Lag shields
Feeling safe in your home is a must, and every additional layer of security helps bolster that feeling. One such layer is a secure gate on your property. Knowing how to install a security gate can save you money and make you more familiar with the barriers protecting your home. This guide walks you through the steps for to measuring the space and installing a security gate.
Measuring to Buy a Security Gate
When purchasing any type of security gate, you'll need two measurements: The width and height of the opening in your fence or wall. Measure the width of both the top edge and bottom edge of the opening and use the smaller of the two width measurements if there is any discrepancy. Many prefabricated gate kits include mounting posts, which are accounted for in the width of the kit.
Arches or other decorative elements will be included in the total height of the gate. However, the height of the side edge of your gate should match the height of of the side edge of your opening, not the center. Additionally, account for at least two inches of space underneath where the gate will swing to allow for rocks, dirt, or sloping ground.

Mount the Hinge Post
Start by mounting the post that your gate will hinge on. Have a partner hold your first mounting post an inch or two off the ground against the side of the opening in which you're installing the gate. Use the spirit level to ensure the post is vertically level.
If the sides of the opening are made of wood, you'll use a quarter-inch drill bit. If they're made of brick or other masonry, use a half-inch masonry bit.
Mark the location of the top, middle, and bottom holes in the post with your drill. Remove the post, then finish drilling each pilot hole and hammer a lag shield into each. Put the post back in place and drill star drive screws into each hole to hold the post securely in place.
Attach the Hinges
Line up the top hinge so it's straight and plumb with the post. Attach it to the mounting post using self-tapping screws. If your post doesn't come with pre-drilled holes, no pre-drilling is needed. Repeat this process with the remaining hinges.
Attach the Gate
Have a partner hold the gate so that the top of the post lines up with the top corner of the gate. Place a support block under the gate, if needed, to help keep it steady. With the top hinge straight and plumb with the gate, screw the gate into each hinge using self-tapping screws.
Mount the Latch Post
Follow the same process you used to mount the hinge post for the latch post. Have your partner hold the latch post and match its height to the gate. Ensure the post is plumb before drilling pilot holes, hammering in lag shields, and securing the post with star bolts. Once the latch post is secure, swing the gate to ensure everything lines up as intended before proceeding.
Attach the Latch
The latch should always go on the side of the post where the gate swings out. Attach the latch mechanism to the top of the latch mounting post using self-tapping screws. Mount it as close to the inside edge of the opening as possible. This provides more room for a padlock.
Put the latch finger into the latch to line it up with the gate. Then, mount the latch finger to the gate itself using self-tapping screws. Ensure that the gate swings shut and latches properly with enough room to insert a padlock.
DIY vs. Hiring a Pro
The cost to install a security gate depends on the tools and supplies you have on hand. Gate kits vary in cost depending on the material and features you choose, but be prepared to spend at least $300 for everything you need.
This guide assumes that you're installing a security gate in an existing fence or wall opening. If you're installing the gate as part of a new fence, on the other hand, be prepared for a larger investment of both time and money. Fence and gate posts need to be buried deep in the ground and rooted with concrete post hole filler, which will need to be done before installing the gate.
Whether you’re taking on a full fence installation or simply want to ensure that your gate is installed properly for maximum security, you may wish to hire a local gate installation specialist. The average cost to have a security gate installed professionally ranges from $880 to $3,810.
Frequently Asked Questions
To make your gate safe, purchase a gate made from strong material such as wrought iron, stainless steel, or other metals. Ensure that the gate has strong joints and bars that are welded on rather than inserted loosely. If you’re concerned about people climbing over your gate, you can deter them by installing fence spikes along the top as an extra precaution.
A sliding gate is better than a swinging gate if you don’t have a lot of clearance for a gate to open. However, it’s important to keep in mind that a sliding gate will require more maintenance to keep it operating properly. Swinging gates also cost less, meaning you may be able to purchase a more secure model with stronger joints, a thicker frame, and a sturdier base material for the same price.


Get our Angi-powered app


