How to Fix a Window Crank in 9 Steps and Get Back to Enjoying the Breeze
Don’t let a broken crank make you cranky


There’s nothing better than opening your windows on a sunny day and letting the breeze in. A little fresh air in your home can make all the difference. But what happens when your casement window crank breaks and you can’t get those stubborn windows open? Before you do any damage—or call a contractor about a whole new window—take a stab at a quick and easy DIY window crank replacement. Learning how to fix window cranks is easier than you might think!
What Is a Window Crank?
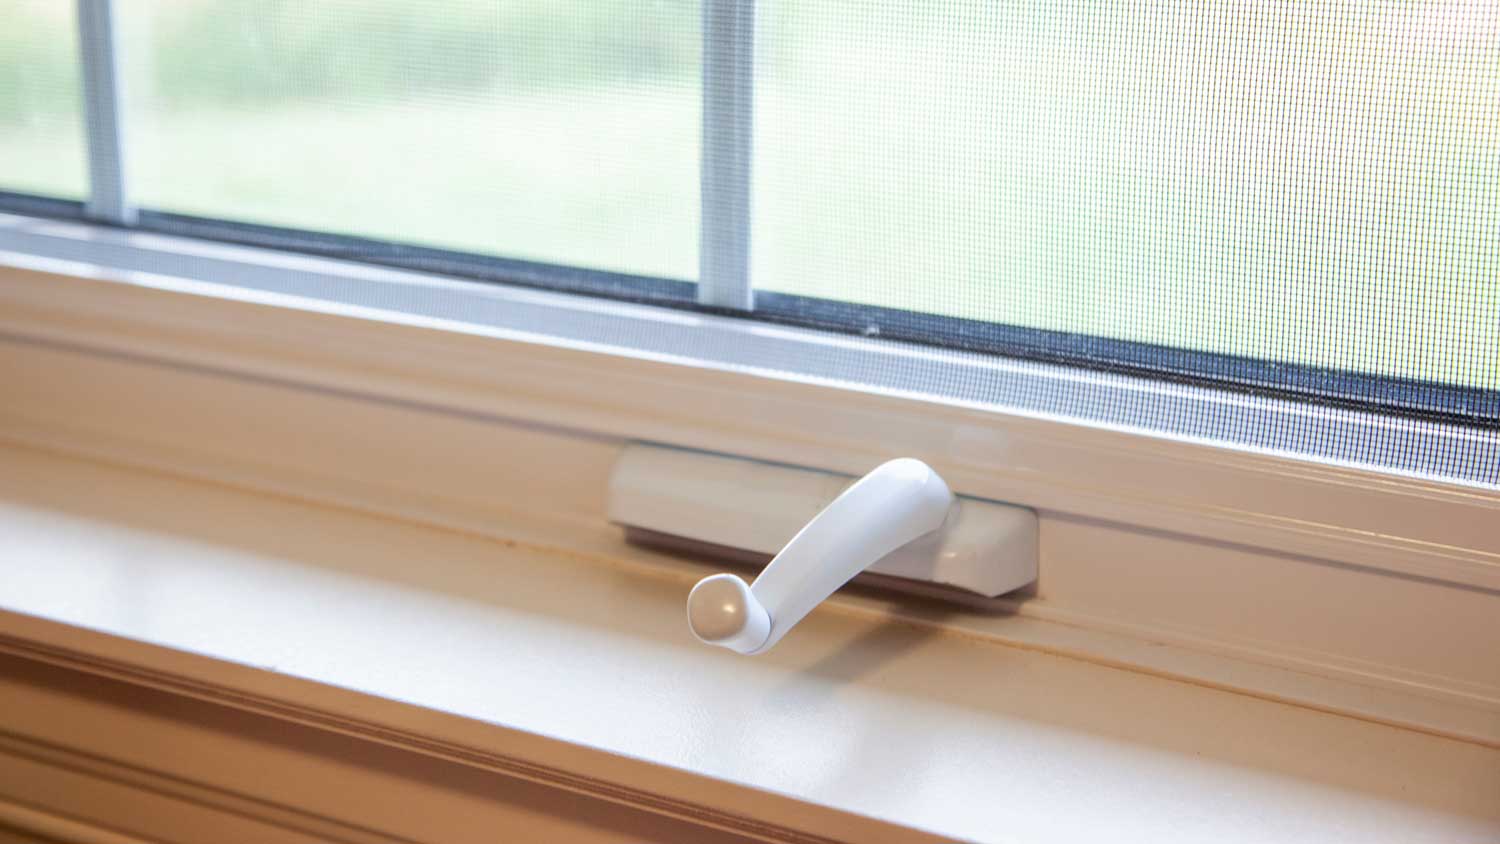
A window crank is a piece of hardware that allows you to open and shut a casement window. Casement windows are a type of window with hinges on the side. You use a crank to open the window outward, either to the left or right. Generally, you find casement windows in areas that would benefit from extra ventilation, like a bathroom, or places where it would be difficult to open a traditional window, like above the kitchen sink.
Window cranks sit on the bottom sill of the window. Usually, the crank handle has a plastic covering over it. When you turn the crank, the crank arm extends or retracts, opening or shutting the window. With a properly functioning crank, opening and closing your window should be pretty effortless. However, if your window crank doesn’t open or close your window when you turn it, it may be stripped. If that’s the case, it’s time to learn how to fix a crank window.

How to Prep for Fixing a Window Crank
If you’re wondering how to fix a stripped window crank, it isn’t difficult—but it’s crucial to have the right parts. Ideally, you can find an exact replacement for the window crank you already have. You can find a replacement crank in a couple of ways:
If you know what brand of crank you have, you can take measurements of the arm and crank base and find the part with a quick online search.
If you can’t find a matching crank yourself, many hardware stores or suppliers can help you find a match if you show them a photo of your current crank.
Of course, if you can’t find the exact matching crank, that may be okay. Just make sure your new crank has the same dimensions as the old one and is compatible with your current window.
How to Fix a Window Crank
Fixing a window crank requires two basic steps: removing the old window crank and installing the new one. Once you’ve found a replacement crank, a lot of the work is behind you. But before you get started, you’ll need a few more materials:
Replacement window crank
Screwdrivers (whichever styles and sizes are needed to remove your crank and window sill screws)
Pry bar
Pliers
Hammer
Wooden block
Remove the Old Crank
Open your window. If needed, you can use pliers in place of your window crank handle and lightly push the window open with your hand.
If your crank has a plastic cover hiding the screws, remove it.
Unhook the crank arms from the window. There may be a notch on the window’s guide track (where the crank arm slides back and forth) where you can easily detach the arm from the track.
If the window sill covers any of the screws on the window crank, you need to remove it. Use a pry bar and a flathead screwdriver to carefully remove the piece covering the crank.
Use a screwdriver to loosen the screws in the old crank and remove it completely from the window.
Attach the New Crank
Line up the new crank and screw it in using the old screw holes.
Attach the crank arms to the window and test the new crank.
Replace the window sill by gently tapping it into place with the hammer and wooden block.
Replace the plastic crank cover.
Voila! Now you’ve got a new, working crank at a fraction of the cost to replace a window.
Tips for Maintaining Window Cranks
As you’ve seen, it’s not a big deal to replace window cranks on your casement windows. But it’d be even better if you could prevent them from breaking in the first place.
Use these tips to maintain your casement windows and prevent broken window cranks:
Don’t force your windows open: If the crank is difficult to turn, stop turning it and find out what’s keeping it from working properly.
Keep things clean: Dirt and debris can get into the window crank operator and hinges, making it tough to open the window. Clean these areas at least once a year. Use a rag to clean out hinges, and wash metal hardware in soapy water.
Lubricate the crank operator and hinges: After cleaning and drying your window crank and hinges, apply a silicone-based lubricant to reduce friction and wear, making the crank easier to operate.
Keep an eye on your trim: Warped trim can interfere with your casement window’s ability to open and close properly, so make sure it’s in good repair.
If cleaning and lubrication don’t improve your window crank’s function, it may be time to replace the crank. Grinding sounds also indicate a broken crank that needs replacing.
Frequently Asked Questions
Generally, yes. As long as the other parts of your window are in good shape, you can replace just the window crank without replacing the entire casement window. Just remember it’s important to find the right replacement crank that fits your window. However, if you still have problems opening or closing your casement window after replacing, cleaning, and lubricating the window crank, you may need to inspect other parts of your window to see what else needs attention.
There are a few reasons your crank windows might not close. First, determine if your window crank is working properly and opening and closing the window when you turn it. If it’s not, the crank may need replacing, cleaning, or lubricating. Another reason your windows aren’t closing could be dirt and debris in the window hinges or sash. Finally, make sure your window lock operator is set in the unlocked position and isn’t blocking the window from fully closing. If you’re still having trouble closing your window, it may be worth consulting a local window contractor.


Get our Angi-powered app


