
You may wonder, how much does a leaky roof cost to fix? Learn why waiting to fix even a small leak can considerably increase the final cost.
That drip, drip, drip is no match for a weekend warrior


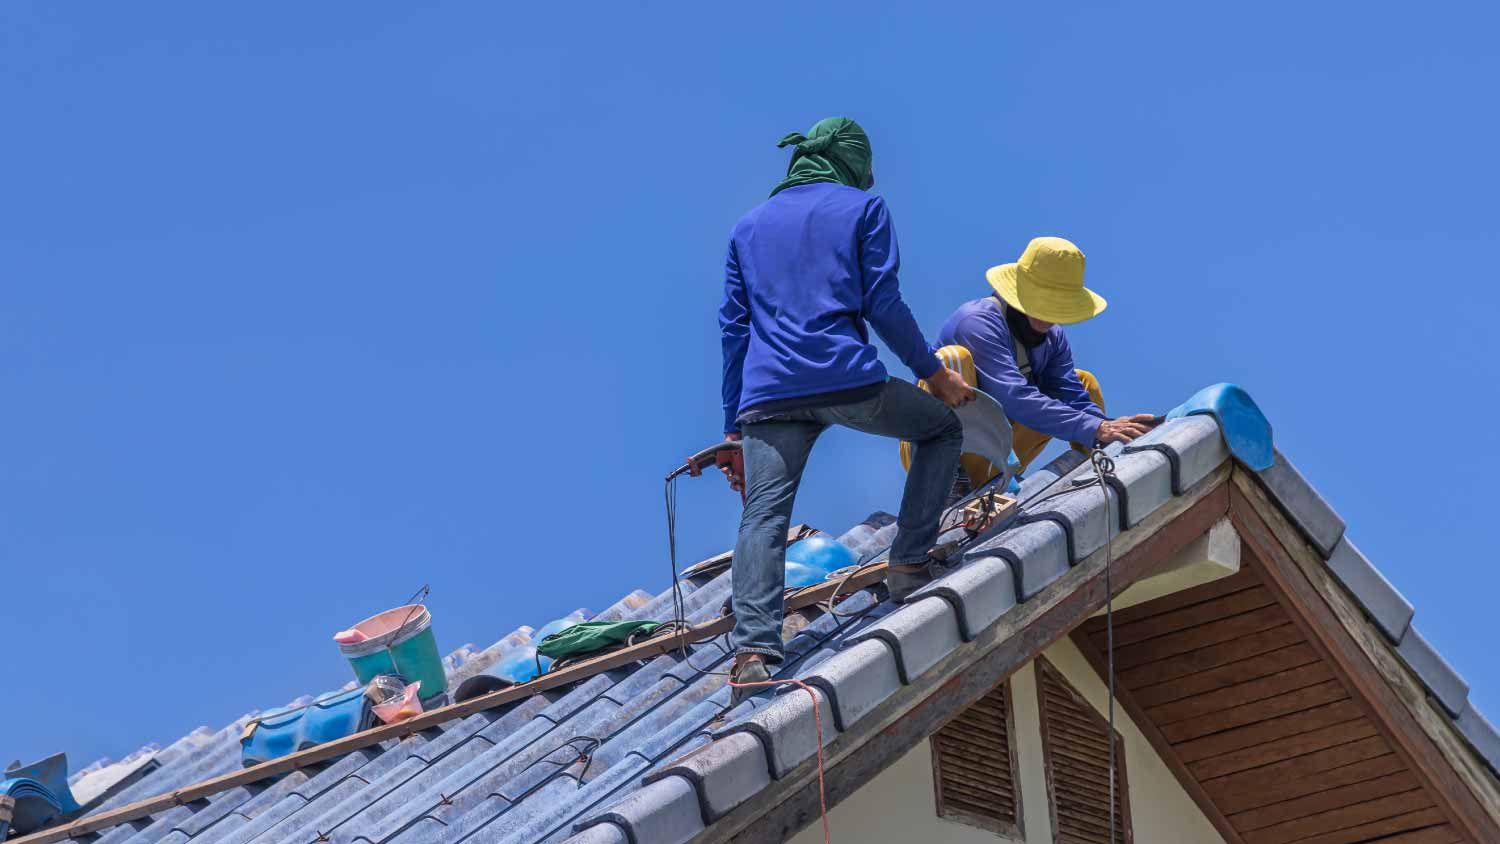
Roof leaks often form near vents, chimneys, or pipes, where damaged flashing or cracked vent boots let water slip underneath your shingles.
Professional roof leak repairs cost $360 to $1,550 on average, so addressing small leaks quickly helps you avoid higher costs from structural damage.
You can fix many small leaks yourself by replacing damaged vent boots, covering old mounting holes with flashing, or resealing step flashing around walls.
Hiring a local roof repair professional provides reliable help with flashing repairs and vent boot replacements, keeping your home protected from water damage.
Your roof is one of your home’s most important lines of defense against the elements. A roof leak can become a big problem if not dealt with quickly. In some cases, small leaks can be fixed relatively simply using only a few tools and supplies from your local home center. Use this helpful guide on how to fix a leaking roof to identify and fix common leaks on your own.
A leaking roof is a problem you should address immediately. Even if the problem seems minor or you’re planning on replacing the roof in the next year or so, letting a small leak go can cause big problems that extend beyond your roof. Water penetration can cause your home’s framing and sheathing to rot, destroy your insulation or ceilings, and lead to mold.
The cost to repair a roof that is leaking can range from about $10 to $120 if you do it yourself. The final DIY repair price depends on the extent of the damage and the type of roof material you have. If you choose to hire a local roof repair company for the job, expect to pay anywhere from $360 to $1,550 on average.
Roofing repairs can be dangerous. Avoid falls by wearing soft-soled boots and working on a clean, dry roof. Check the immediate forecast in your area and plan to work on your leaky roof during the driest, warmest stretch of days. DIY roofing work should mainly be done in late spring, summer, or early fall to minimize your roof deck’s potential exposure to moisture.
You should always have an assistant nearby to hold your ladder and keep an eye out in case anything goes wrong. Qualified roofing pros always come equipped with a fall restraint system to slow or stop them from falling off of roofs, which can be expensive and require specific training to use properly.
Finding the source of a roof leak often takes more time than fixing it. Luckily, there are some easy tips you can use to make the task easier. Follow the tips below, but be patient and expect the process to take an hour or more.

Look for evidence in your attic. If your home has an attic or crawlspace, use a flashlight to search for water stains that you can trace up to the roof or rafters.
Move from low to high. Start from the bottom of a stain and trace the leak upwards. You may see black or white coloration, mold, or mildew at the location of the leak.
Soak the roof. With a helper watching in your attic, climb on the roof and use a hose to heavily soak very specific sections for several minutes each until your helper sees water.
Check for damage around projections or penetrations. Leaks often form near openings in the roof such as vents, dormers, attic fans, pipes, and chimneys.
Scan larger areas. Signs of a leak may form several feet from the actual leak itself. Look above stains or to the left and right to pinpoint the source.
Because leaks can form in so many different areas of your roof, there is no one method to fix a leaking roof. Once you’ve identified the source of your leak, use the approach below that best suits your situation. Most of these approaches are simple and won’t take much time.

Many roofs have vertical pipes called vent stacks that connect to plumbing fixtures in your home and release pressure from your plumbing system. These vents often have a base, or boot, made of plastic, metal, or flexible rubber. Cracks, tears, rot, or broken seams in a vent boot can all cause roof leaks. Also, many boots have exposed nails on them that should be covered with sealant to prevent oxidation of the fasteners. If a nail starts to rust out, it can result in a leak that is relatively easy to fix—if the nail is secure into the sheathing, simply place sealant on the head of the fastener to stop the leak.
Sealant breaks down under UV light and needs to be checked and possibly reapplied every three to five years as a general roof maintenance item.
If you notice vent boot problems, grab a helper and follow these steps:
Purchase a new vent boot to replace the existing one.
From your rooftop, use a pry bar to pull out the nails holding the shingles to the boot.
Pry back the shingles without removing them. Have your helper hold them, if needed.
Remove the nails that hold the vent to the roof deck and remove the vent.
Apply a thick bead of roofing cement or sealant to the bottom of the vent’s flashing.
Have your helper gently roll back the shingles so you can slide the new boot in place. Make sure that the shingles go back in the same way they were—the top of the boot and the sides should be under the shingles so that water cannot get under the boot as it flows down the roof.
Attach the new boot at all corners and every 4 inches with washer-head roofing screws.
Cover the new nails with cement or sealant.
Nail down the shingles you pulled back.
If your existing boot is in good condition but you notice that some of the fasteners are missing, you can simply replace them with your washer-head screws.
Your roof may have tiny holes left behind from old vents, satellite dish or antenna mounting brackets, or some other previous attachment. To patch these holes and prevent water from getting through, take the following steps:
Pull out any misplaced roofing repair nails.
Slip a piece of roof flashing underneath the shingle where the hole is located.
Secure the flashing with a bead of caulk or roof cement on the top and bottom edge.

You’ll find short sections of overlapping L-shaped flashing around your chimney or on walls that intersect with your shingle roof. These pieces of flashing are meant to direct water over the shingles directly downhill from them, but when they rust or come loose they can let water underneath the shingles instead. To replace a rusted piece of flashing, take these steps:
Carefully loosen the shingles near the flashing with your pry bar.
Remove the old flashing and push a new piece in its place.
Secure the new flashing with roofing cement.
Nail the flashing and shingles back into place.
If you have a rock or brick wall, the flashing needs to go into the wall (this is called “counter flashing”) and have sealant placed at the seam as a secondary line of defense. With wood or cement board siding, the flashing needs to go behind the siding.
Cracks between siding or between corner boards and windows can both be entry points for water. If you have dormer walls with cracks from old or missing caulk, fix them with the following steps:
Use a putty knife to dig out cracked or dry caulking that isn’t providing a proper seal.
Apply a new layer of high-quality caulk to the affected areas, including at corner flashing.
Check the siding directly above your step flashing for cracks or rotted areas.
Replace missing or damaged siding with a piece that overlaps the flashing by 2 inches.
A roof's plywood decking, or sheathing, may develop water damage, mold, or mildew on its underside. If your shingle roof is leaking due to roof deck damage, follow these steps to remove the shingles and patch the problem area with a piece of replacement plywood or OSB.
Start two rows of shingles above the damage. From the bottom of the shingles, pry nails loose and pull the shingles away to expose the roofing paper or underlayment below.
Work downwards through rows to remove all shingles from the damaged area.
Slice off the roofing paper or underlayment with a utility knife.
With the damage exposed, snap chalk lines down the center of the rafters to the left and right, above, and below.
Set your circular saw's blade depth to the thickness of the roofing deck plus 1/16th-inch.
Kneel outside the marked section and saw along the chalk lines to cut out the damage.
Pry nails from the section you just cut and remove the damaged plywood.
Use the damaged section as a template to mark the dimensions of your plywood patch.
Set the patch in place and nail it onto the rafters with 8d common nails.
From the bottom up, nail down new roofing paper or underlayment using roofing nails, overlapping each row by 4 inches.
Lay your first row of new shingles left to right along the bottom, leafing new shingles into existing ones as needed.
Nail down the new shingles along the top of the row.
Continue laying and nailing down new rows until you reach the top row. Slide the new shingles under the top row.
If you have a flat roof, DIY repairs can be as simple as removing and replacing the surface membrane. Follow these steps to get the job done:
Measure your roof's dimensions and purchase an ethylene propylene diene monomer (EPDM) membrane to fit. Your supplier can cut it to size for you in-store.
If needed, remove your gutters and fascia to access the roofing underneath.
Remove the plies of the roof by driving a spade into the surface and under the plies. Take care not to stand on sagging spots.
Remove the framework around the roof's perimeter by hand after jostling it loose.
If any perimeter pieces remain stuck to the surface, scrape them off with a scraper.
Remove the remaining plies of felt from around the roof perimeter.
If your roof has timber fillets, slowly pry and pop them off with your spade or pry bar.
Make sure your roof surface is clean and dry and the outdoor temperature is above 50 degrees Fahrenheit before you lay the EPDM.
With your EPDM folded, lay it in the center of your roof so its top and bottom edges are parallel with the top and bottom edges of your roof.
Drag the right corners of the EPDM to align them with the right edge of the roof.
Drag the remaining corners of the EPDM to align them with the left edge of the roof. Let the new membrane rest for 30 minutes.
Draw the left edge of the membrane back and fold it to the right edge so there are two equal layers on the right half of your roof.
Use an adhesive roller to apply an opaque layer of water-based adhesive on the now-exposed half of the roof. You should not be able to see the roof under the adhesive.
Gently roll the membrane back in place on the left side of the roof while the adhesive is still wet. Roll until you reach the edge.
Press the membrane in place with a broom, working out from the center crease to remove air pockets. Wait 30 minutes for it to dry.
Repeat steps 12 through 15 with the other half of your roof.
If you removed your gutters, fascia, or fillets, put them back in place.

Roof leaks are not only hard to detect, but they’re often too severe to prevent by the time you notice signs of damage. Proper roof care is key to preventing that damage in the first place. Use the following tips to take care of your roof and keep damage at bay.
Have your roof inspected regularly. Roof leaks are rarely obvious. Have a professional roof inspection once a year to catch problems that you might miss on your own.
Clear your attic ventilation. Blockages in attic ventilation can lead to moisture and heat buildup that can soak your insulation and lead to rot in your roof’s structure. Oftentimes, soffit vents are blocked with insulation by the installers, which prevents proper air flow.
Watch for damage in drip edges. Your roof’s drip edge keeps water off the roof. Gaps can lead to damage and create entry points for insects and other pests.
Maintain your gutters. Clogged gutters can cause water to pool on your roof. Whether you clean them out yourself or hire a pro, make sure to keep your gutters clear.
Trim your trees. Plants that grow too close to your roof can create damp, shaded areas and pose a hazard during heavy storms. Keep branches trimmed back from your home. Generally, all branches should be at least three feet away from the roof.
Check fasteners: Check that any exposed fasteners are covered with sealant to prevent oxidation of the fasteners.
The life span of a roof depends on the roofing material and the maintenance it has received. So while repairing a leaking roof should be done as soon as possible, deciding whether or not you should replace your roof may require more consideration.
Signs you should opt for roof replacement rather than repair include:
Sagging areas
Large areas of missing or cracked roof shingles or tiles
Multiple leaks in different places
Extensive storm damage
Also take into account whether your roof is close to the end of its estimated life span, which will depend on the roofing material:
Asphalt roof: 12–20 years
Metal roof: 40–70
Slate: 50 years
Composite: 50 years
Though roofing repair can be dangerous to do yourself, it is possible and can save you a significant amount of money if you have the experience. Repairing a leaky roof as a DIY project can cost you anywhere from about $10 to repair a simple cracked vent booting or reseal a joint, all the way up to $120 or more to mitigate ice buildup.
For most homeowners, however, it’s best to hire a roofing pro to diagnose and repair any damage to your roof. This is especially true if the leak involves flashing. A roof’s many components need to be properly aligned to effectively protect your home, and the work involves climbing on your roof which can pose a risk to your safety. Professional leak repairs cost an average of $360 to $1,550 depending on the type of damage.
Many roofing contractors have a minimum charge; it's good to find out what it is before you hire them. Also, ask if they offer a warranty for their repair work. If they are unsuccessful finding a leak on their first attempt, it's good to know how they'd handle that situation.
Stephanie Mickelson contributed to this piece.
Mitchell and the crew were top tier i am so happy with my new roof
D1 Roofing delivers outstanding service from beginning to end, backed by a strong warranty and expert teams. I highly recommend them for their excellence in meeting and surpassing expectations with unmatched communication. Choosing D1 Roofing was flawless decision
This place took $25,000 for a flat roof job with a five-year warranty and never returned to fix the leaks that were caused by their work. These people are not professionals and should not be doing this type of work. They incorrectly changed the pitch of the roof, and caused more damage than...
The technician was very professional and friendly. He answered all my questions and was very thorough. He left the fireplace area very clean . He inspected from the roof and advised me as to other work that might need to be done. There was no pressure there. I was very satisfied with the...
 Supreme brick & chimney
I am really impressed with their timeliness and turnaround. Mitchell came out, and we decided to move forward with their pricing. Our roof was on within a week, and we could not be happier with their team! Amazing company, great prices and honest, dependable craftsmanship. I highly recommend...
Manuel Calvillo is the best option in the area for roofing and you won't be disappointed.
They damaged multiple items on my property, including a marble slab used as a table top, tried to hide it, and refused to pay or replace. Arrived day one without a ladder to access roof & delayed a day. Left a mess in back yard; didn't wear face masks; no show by owner to property to see damages
I've hired Gary/Cherokee Roofing for two different homes, work quality, responsiveness, and completion have been great both times. And the prices quoted were very competitive. I would definitely hire again.
Lyle did a great job removing asbestos shingles from our front porch roof. They worked together with our roofer to make sure that the new roof was able to be installed on the same day that Lyle removed the asbestos shingles.
 Lyle Environmental
Bradley Builders did a good job replacing the roof on our front porch. They color-matched the existing shingles on the rest of the house and installed a metal ridge roll since we live in a historical neighborhood. They did the job while we were out of town. When we got back, everything was...
 Bradley Builders, Inc.
From average costs to expert advice, get all the answers you need to get your job done.
You may wonder, how much does a leaky roof cost to fix? Learn why waiting to fix even a small leak can considerably increase the final cost.
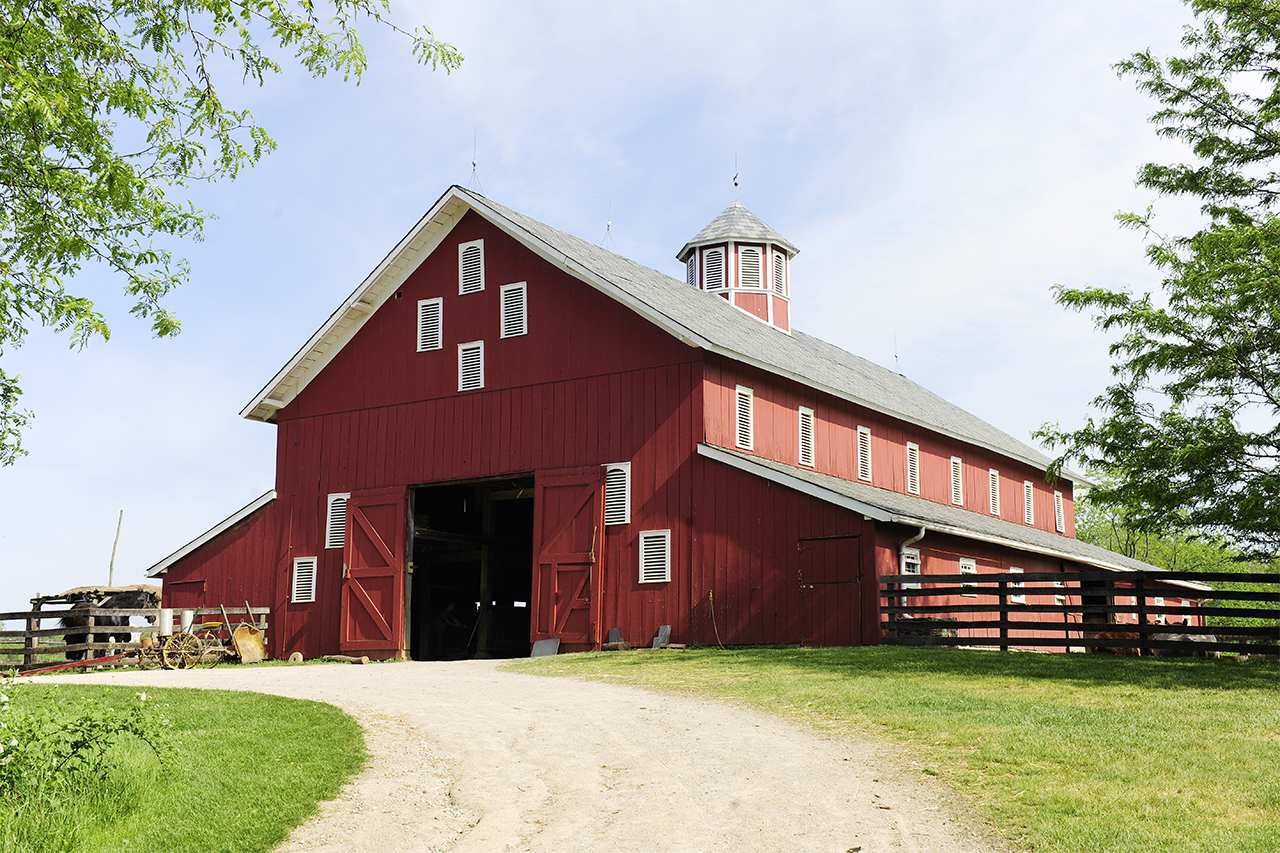
Get expert insights on barn roof repair cost, including average prices, cost factors, and ways to save. Learn what impacts your barn roof repair cost and how to budget.

If you notice your roof leaking, it is important to act fast. A new leaking roof could cause tremendous damage to your home if left unrepaired.
Water coming through the roof is an absolute no-no and needs to be remedied immediately. Finding a roof leak can be tricky, but our tips can help.
It can be challenging to find and fix a leaking flat roof, but it is not impossible. We’ve got you covered with 10 steps for hunting down the source and initiating flat roof repair.
Knowing how to fix a leaking roof from the inside can come in handy if you find a roof leak but are unable to do an exterior repair right away. Here is what to do.