How much does rewire house cost in Columbus? Learn the major factors that impact the price and how it can help increase your home's value.
Remember to turn off the power, or you will get a shocking surprise


If you're wondering how to fix an electrical outlet, you may be surprised to learn that it is a manageable task for some DIY enthusiasts. However, you must remember that working with electricity carries inherent risks, so consult a professional electrician if you ever feel unsure or uncomfortable handling the task. Here's how to earn another notch in your DIY toolbelt with this guide on outlet replacement.
Whether you have a dead outlet or one showing signs of wear, replacing it is essential to prevent potential electrical hazards and ensure uninterrupted access to power. Remember, it bears repeating: hiring a local electrician is best if a project like this is beyond your comfort zone. It's always better to be safe than sorry.

Replacing an electrical outlet begins with turning off the power to the outlet. Go to your circuit breaker box—often found in the basement or utility closet—and switch off the circuit that controls the outlet you'll be working on. Then, use a voltage tester to confirm that no power flows to the outlet.
This step exposes the outlet and the screws that secure it to the electrical box. Remove the screws holding the outlet cover in place. If you plan to reuse the cover and screws, use your masking tape to secure the screws to the cover and put them aside. This will spare you the trouble of searching for those teeny screws later.
Using a Phillips head screwdriver, remove the screws that secure the outlet to the electrical box at the top and bottom of the unit. Gently pull the outlet away from the wall. Avoid tugging too hard to prevent damage to the connected wires.

Before you disconnect any wires, note how they are connected. This will make it easier when you're installing the new outlet. For your convenience, take a photo with your phone.
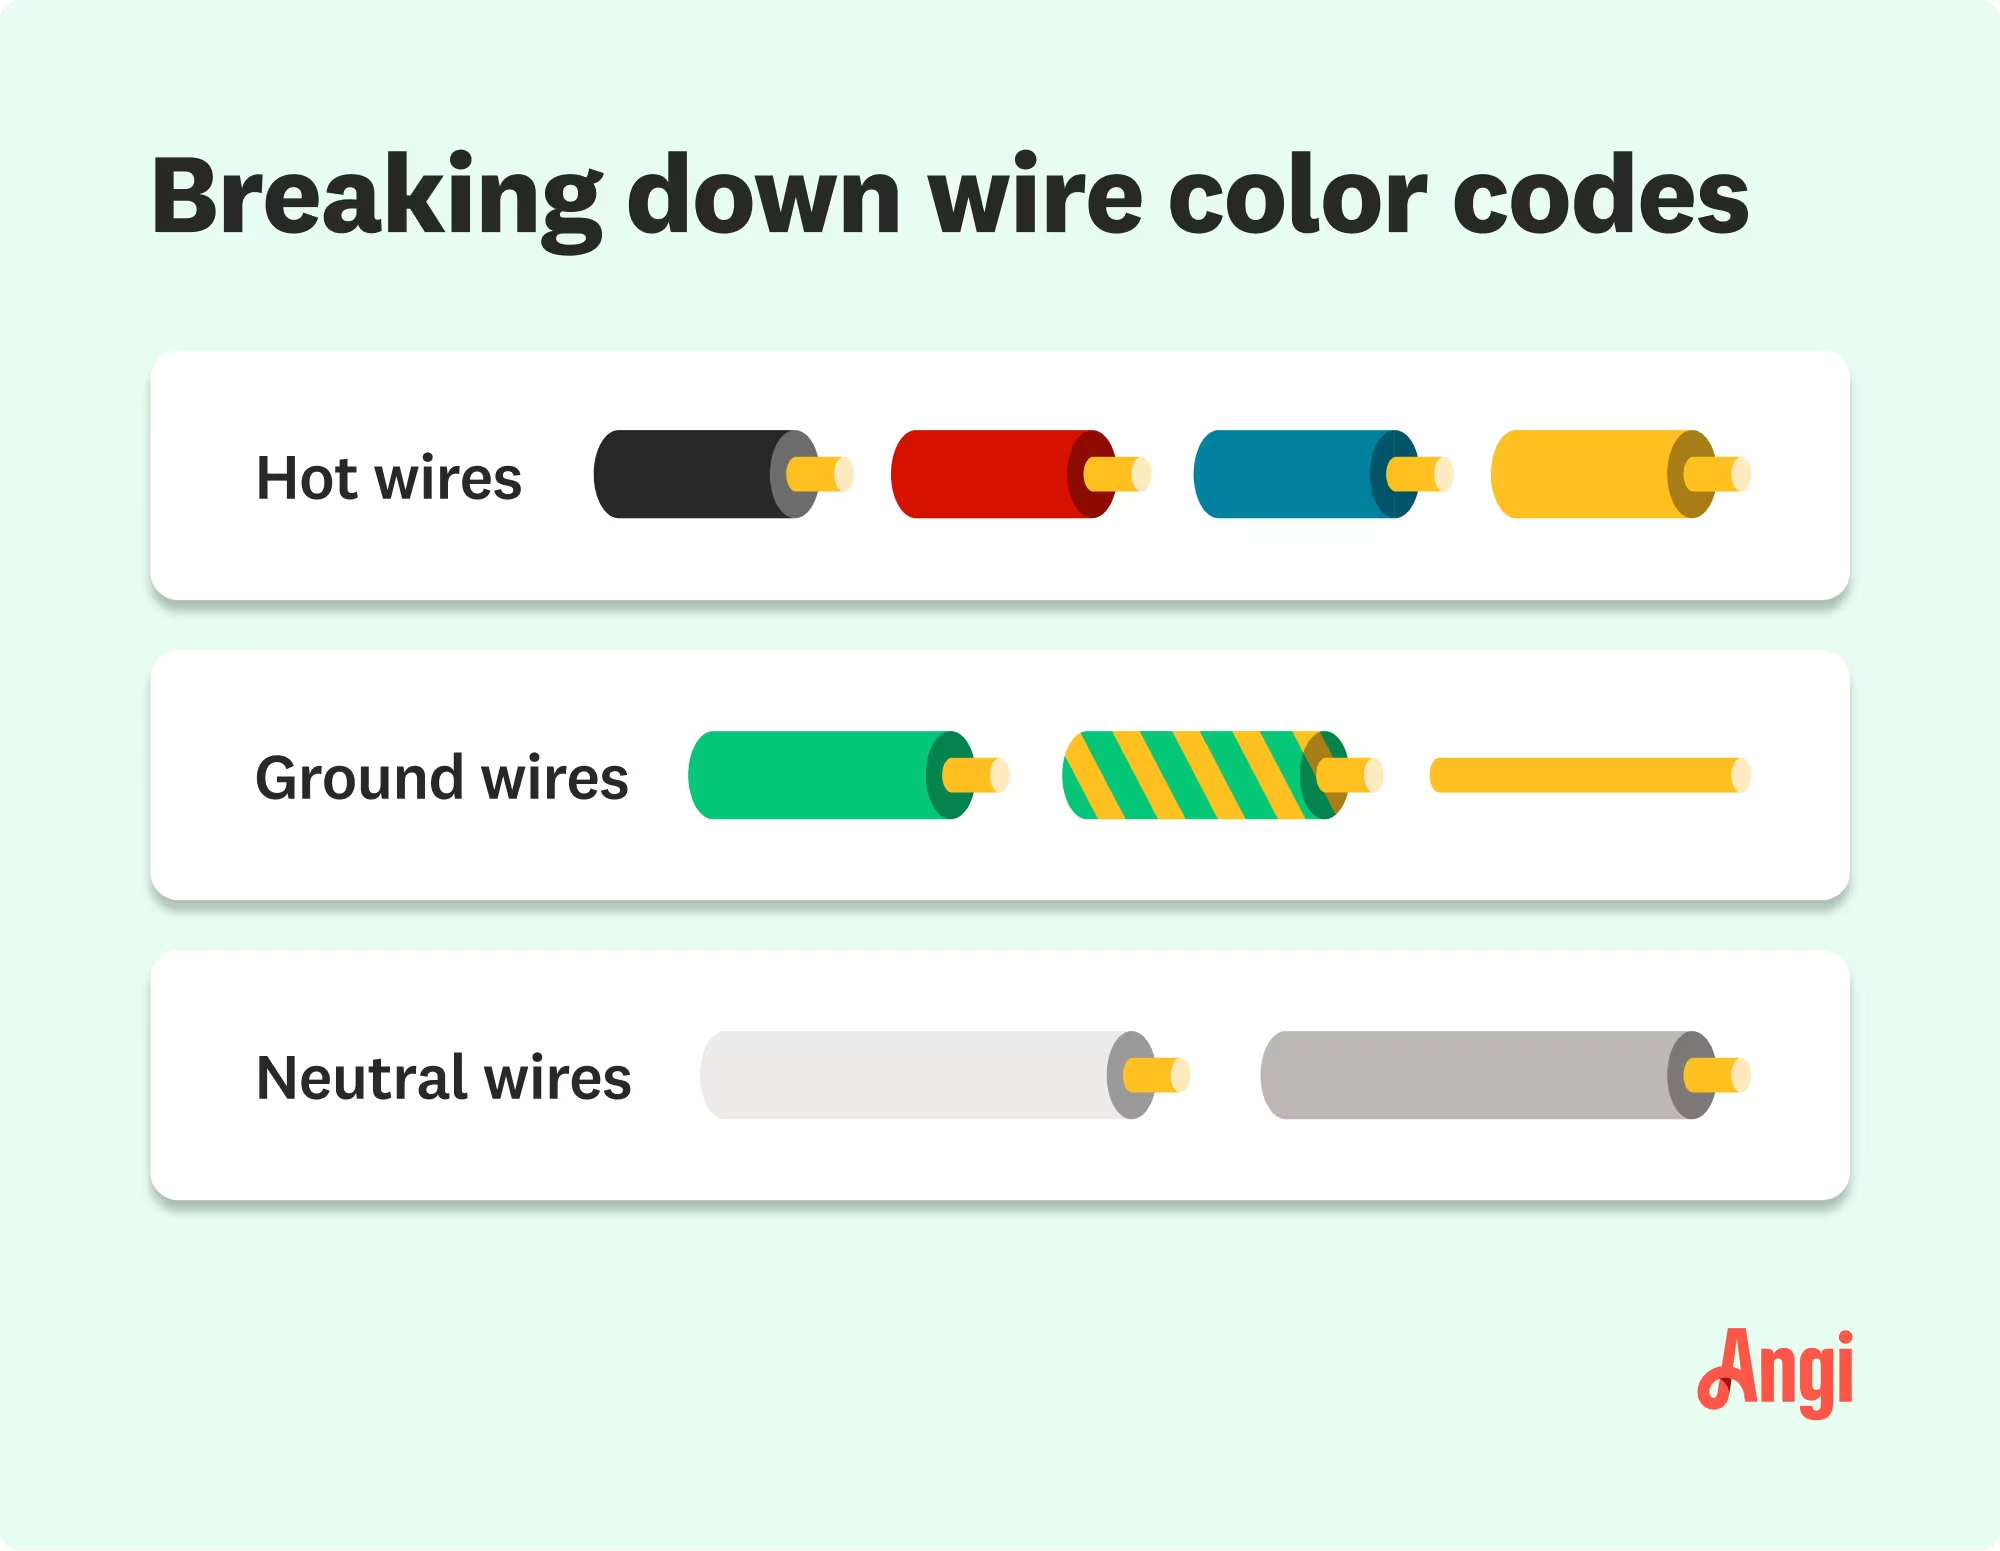
Remember, outlet wires come in different colors, each serving a specific function. Keep this infographic handy when working with electrical wires.
Before you remove the wires, it's crucial to double-check for voltage with your tester, even if the power is off and you've tested before. This is a safety measure to prevent any potential shocks. When you’re sure there’s no power, gently remove the wires from the outlet.
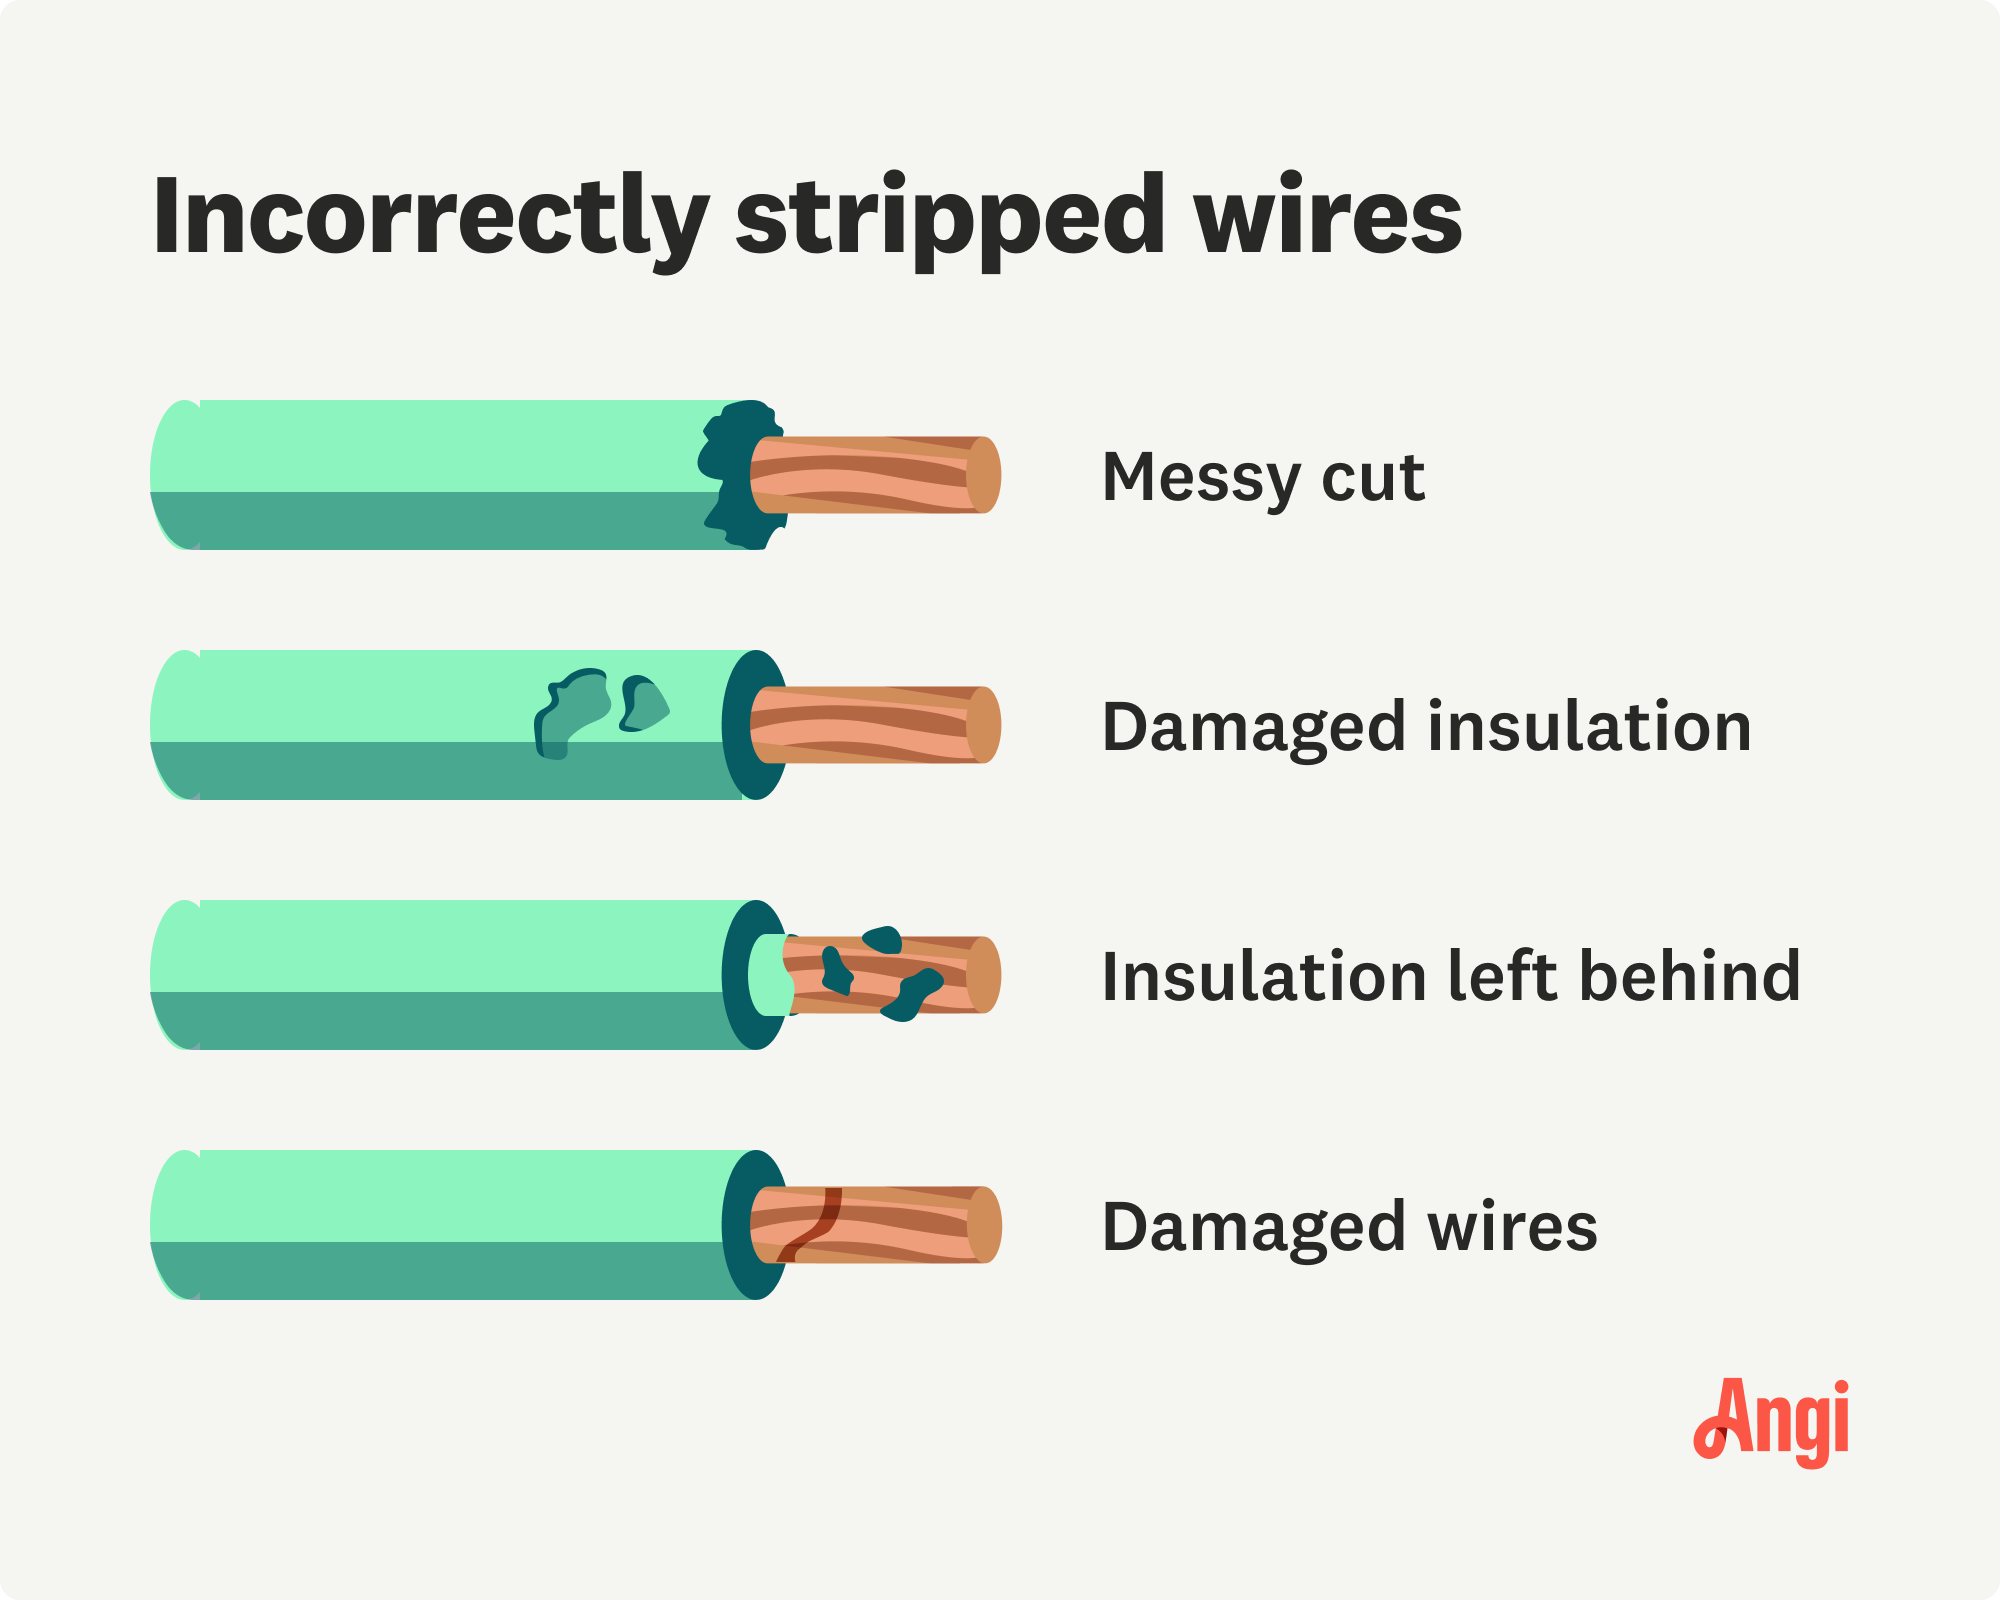
Look for any wear or damage to the wires, such as fraying, nicks, or discoloration. Remember, damaged wires can lead to poor connections or even electrical hazards. For coated wires, you want to ensure the color coating that acts as insulation is intact and not striped too far back. Typically, you need about 3/4 inch of exposed wire.

If the wire ends are damaged or there is not enough exposed wire to make a good connection, you’ll need to strip them using wire strippers. The tool has different holes to accommodate various outlet wire gauges, including 12- to 14-gauge household wiring.
Position the wire in the appropriate hole on the wire stripper, aligning the point where you want to cut.
Squeeze the handles on the strippers to cut through the insulation, then gently pull the tool toward the end of the wire.
Strip about 3/4 inch of insulation.
The insulation should slide off, leaving clean, exposed copper wire.
Inspect the ends to ensure no nicks or damage to the copper wire. Damaged wires should be trimmed back and stripped again.
Use your needle-nose pliers to straighten the ends of the wires, making it easier to connect them securely to the new outlet. If necessary, form small hooks at the ends of the wires to wrap around the screw terminals. Clean any oxidation on the exposed wire ends with fine-grit sandpaper or a wire brush to ensure a good electrical connection.
To safely replace an electrical outlet, you need to match the amperage of the new outlet with the old one. Check the old outlet for markings indicating its amperage, usually stamped on the body. Also, check the circuit breaker for the outlet's circuit, as the switch's amperage rating should be on the switch. Many new appliances need a 240v outlet rather than 220v.
Next, connect the wires to the new outlet, using your earlier photo for reference. The black or red hot wire goes to the brass screw, the white or gray neutral wire to the silver screw, and the green or bare copper ground wire to the green screw. Tightly secure the wires under the screws.
Afterward, insert the outlet by carefully pushing the wires back into the electrical box and secure the new outlet with screws. Then attach the outlet cover screwing it into place.
Installing a new outlet in an existing spot depends on your comfort level and experience with electrical work. It is a great way to save on the outlet labor costs associated with a pro install, which ranges between $125 and $200.
However, whether replacing an indoor or outdoor outlet, hiring a professional electrician guarantees a job done right. Mistakes in electrical work lead to severe hazards, including electrical fires and injury. A professional will ensure the project is up to code and safe, offering reassurance and potentially saving you from costly repairs in the future.
From average costs to expert advice, get all the answers you need to get your job done.

How much does rewire house cost in Columbus? Learn the major factors that impact the price and how it can help increase your home's value.

Keep pool-side dreams from getting short-circuited by being aware of pool electrical installation costs and how they can affect your overall budget.

How much does adding an electrical outlet cost in Columbus? Get details on average pricing, permit needs, and what affects the total cost.

Learn how to wire an outlet switch combo receptacle in various ways to adapt an existing wired location for several applications.

Wire nuts are used to connect two or more electrical wires. Our guide explains what the different wire nut sizes and colors mean, and when to use each.

Grounded circuits are happy (and safe) circuits, but what if you live in an older home with pre-grounded receptacles? Here are ways to ground without a wire.