
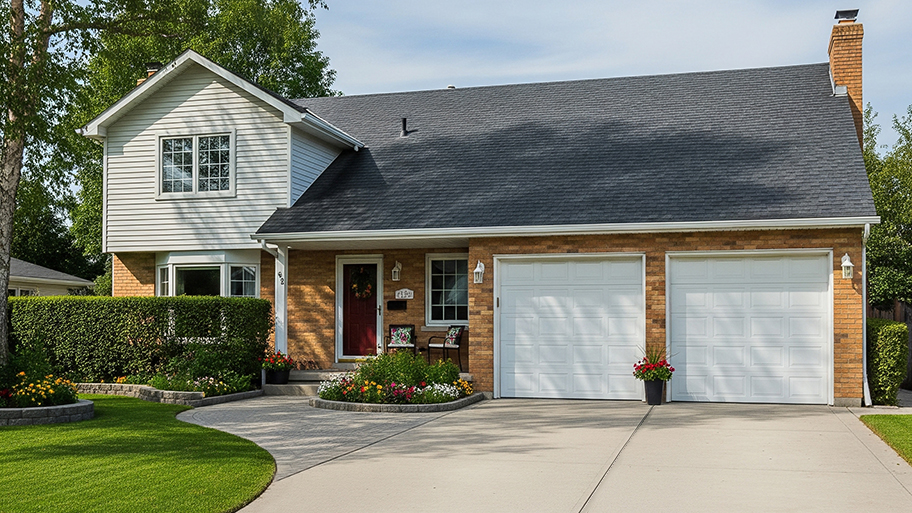
Concrete driveways stand up to a lot of pressure over the years. How much do concrete driveway repairs cost when it's time to give it a little TLC?
Learn the best way to finish concrete like a pro


Concrete is a go-to building material for patios, walkways, driveways, and more, but homeowners are often intimidated by the process of pouring and finishing concrete. But with the right tools and techniques, you can DIY your new outdoor feature with professional-looking results. Use this guide to learn how to finish concrete and get the smooth, even concrete finish you’d expect from the pros.
Finishing concrete requires some specialized tools that you may not have on hand. The screed (used for initial leveling) and darby (to flatten the concrete) can be easily made from scrap wood, but you’ll need to rent or buy a hand float, bull float, edger, and groover unless you already have them on hand.
Get ready to pour the concrete by setting the forms to your desired shape and size and mixing the concrete. Before pouring the concrete, you should perform a concrete slump test to ensure your mix is the right consistency for the project. If your concrete mix has too much or too little water, it can affect the finished product and may lead to problems with your concrete in the future.
Let all the bleed water evaporate before finishing your concrete. This can take anywhere from 20 minutes to four hours.

Start by pouring the concrete into the forms. Use a flat shovel to drag the wet concrete into the voids and fill the entire form. The concrete should be filled so it is slightly above the height of the forms.
After filling the forms with wet concrete, use the screed board to level the mix. The board should be at least 12 inches longer than the width of the slab and forms.
Starting at one edge of the slab, place the screed on top of the forms. With the leading edge slightly lifted, saw the screed board back and forth while pushing it across the slab. This will push the concrete mix into any voids or valleys while also removing excess concrete from the surface. Continue from one edge to the other and clean up the excess concrete.

Once the concrete is level, it’s time to immediately float it to a smoother (but not yet smooth) finish. This can be done with a darby or hand float for smaller projects or a bull float for larger slabs.
Place the float on the concrete surface. Lifting the leading edge slightly, sweep the float or darby in large arcs across the surface of the concrete. This should push the larger aggregate lower into the concrete and allow some of the finer aggregate and sand to move to the surface. Complete two passes across the slab.
As aggregate is pushed below and settles, it will push bleed water to the surface of the concrete. This is normal and a good sign that the concrete is settling properly, but the bleed water has to evaporate before moving on. How long evaporation will take depends on the weather, but don’t move on to the next step until the bleed water is gone and the sheen on the surface of the slab dulls.

Once the bleed water evaporates, use the edger to create smooth, round edges around the outside of the slab. Place the edger between the form and the concrete, lifting the front edge slightly and pushing it in long passes, using the form as a guide.
While edging, a small ridge should form at the inner edge of the slab, and this ensures that the edge is level with the rest of the slab. If the edger is sinking into the concrete slab more than 1/8 of an inch, wait for the concrete to harden a bit more before continuing.
New concrete cracking is natural, and expansion joints give the concrete controlled places to crack without detracting from the look of the slab. The distance between expansion joints should be no more than two to three times in feet the total thickness of the slab in inches. So, for a 4-inch-thick slab, expansion joints should be 8 to 12 feet apart. For a 6-inch-thick slab, joints should be 12 to 18 feet apart.
Place a straight board across the forms (the screed board works if it is cleaned). Place the groover into the surface of the concrete, working it back and forth until it’s fully in contact with the concrete. Using the edge of the board as a guide and holding the front of the groover slightly up, push the groover across the concrete to create an expansion joint. Repeat as necessary.

Use a magnesium float to smooth the surface completely as a final step. This float will bring the “cream” of the concrete to the top and create a smooth, dimple-free surface that will shed water. Following the same procedure as before, smooth the surface with wide arcs, holding the lead edge of the float up slightly. Once the surface is smooth, stop. Overdoing it can bring too much of the softer material in the concrete to the surface, leading to flaking or dusting in the future.
For another type of concrete finish, many folks “broom” the finished surface to add texture for non-slip walking and to hide imperfections. Do so by lightly touching the bristles of a broom into the concrete and gently dragging them across the surface to make small ridges. Use straight, even passes, and don’t push down into the concrete. The pressure of the broom should be enough for this particular concrete floor finish.
The concrete has to cure after finishing. Curing is different from drying, as concrete actually cures from the chemical reaction between the water and the aggregate, while drying indicates that water has evaporated. This curing process can take up to 30 days, but it should be ready for foot traffic within two days and vehicle parking in about two weeks.
It’s important not to let the concrete cure too quickly, however. Hot days will cause the surface of the concrete to dry much faster than the lower portion, and this creates a tension between the two levels that essentially breaks the bond and creates a weak slab. To avoid this, wet the surface of the concrete with a garden hose a few times each day for the first week. Once it cures, seal the concrete to prevent stains and other damage to the surface and minimize concrete cleaning.
While it’s possible to learn how to finish concrete, it is a big project that takes a lot of experience to truly nail. In some circumstances, it may be better to hire a local concrete finishing professional who can pour and finish the concrete surface exactly the way you want it. For larger jobs, hiring a concrete contractor means they’ll be able to handle the delivery, pouring, finishing, and sealing of the concrete, allowing you to reap the benefits of a new concrete slab without the work. Hiring a pro to resurface your concrete costs about $3 to $5 a square foot for basic concrete, with decorative finishes and major repairs adding to the price.
Tom Scalisi contributed to this piece.
From average costs to expert advice, get all the answers you need to get your job done.
Concrete driveways stand up to a lot of pressure over the years. How much do concrete driveway repairs cost when it's time to give it a little TLC?

Between the endless customizations and decades of strength, the cost of a concrete driveway may be worth the investment. Let's break down your bottom line.

Whether you’re planning on putting in a concrete driveway, patio, or staircase, use this concrete delivery cost guide to get an accurate estimate.

Concrete may be strong, but it's surprisingly sensitive to extreme temperatures. Here's what to know about pouring concrete in cold weather.
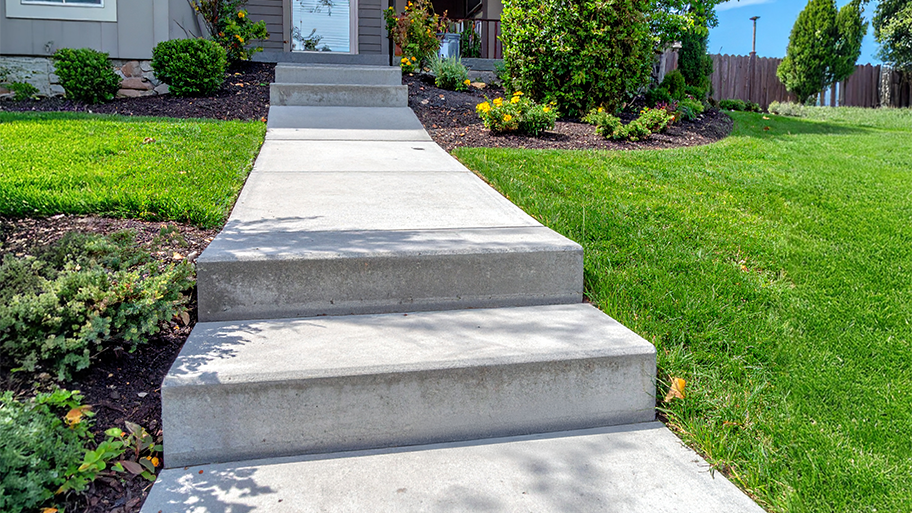
Pouring concrete steps can add to your home’s curb appeal or lead out to your patio. Learn how to build concrete steps that will last.

Before you start pouring, should you use sand or gravel under a concrete slab? Let's explore how the foundation below your concrete works.